Storing dehydrated apples long term successfully hinges on eliminating moisture and protecting against oxygen, light, and pests. The absolute key is ensuring apples are completely dry before storage, then using airtight, food-grade containers in a cool, dark, and stable environment. By following proper conditioning, using oxygen absorbers, and avoiding common pitfalls like plastic bags, you can enjoy your homemade dried apples for 1-2 years while preserving flavor and nutrition.
Key Takeaways
- Understanding How To Store Dehydrated Apples Long Term: Provides essential knowledge
📑 Table of Contents
- Introduction: Preserving the Crispness of Autumn
- Understanding the Enemy: What Makes Dehydrated Apples Spoil?
- The Non-Negotiable First Step: Proper Dehydration & Conditioning
- Choosing Your Armor: The Best Containers for Long-Term Storage
- The Perfect Storage Environment: Location, Location, Location
- Advanced Techniques & Common Pitfalls to Avoid
- Shelf Life, Rehydration, and Enjoyment
- Conclusion: The Reward of Patience and Precision
Introduction: Preserving the Crispness of Autumn
There’s something deeply satisfying about taking a basket of crisp, juicy apples from the orchard or farmers market and transforming them into a shelf-stable, chewy-sweet snack that can last for months. Dehydrating apples concentrates their flavor into a delightful, fiber-packed treat. But the magic doesn’t end when the dehydrator shuts off. The real secret to enjoying that harvest all year long lies in the how to store dehydrated apples long term. It’s the bridge between a successful drying session and a pantry full of ready-to-eat goodness.
Many people put tremendous effort into perfecting their dehydrating technique—slicing uniformly, pre-treating to prevent browning, timing the dry just right—only to lose their precious cargo to spoilage, sogginess, or insect infestation weeks later. This happens almost exclusively due to improper storage. The goal of this comprehensive guide is to eliminate that frustration. We will move beyond basic “put them in a jar” advice and dive deep into the science of preservation, the tools of the trade, and the step-by-step protocols that guarantee your dehydrated apples remain as delicious and safe as the day you packed them away. Whether you’re a beginner with a few slices or a seasoned preserver with buckets of fruit, these principles are universal.
Understanding the Enemy: What Makes Dehydrated Apples Spoil?
To win the storage game, you must know what you’re fighting. Dehydrated apples spoil for three primary reasons, and understanding them is the first step toward flawless preservation.
Visual guide about How to Store Dehydrated Apples Long Term
Image source: emergencyprepguy.com
1. Moisture: The Silent Destroyer
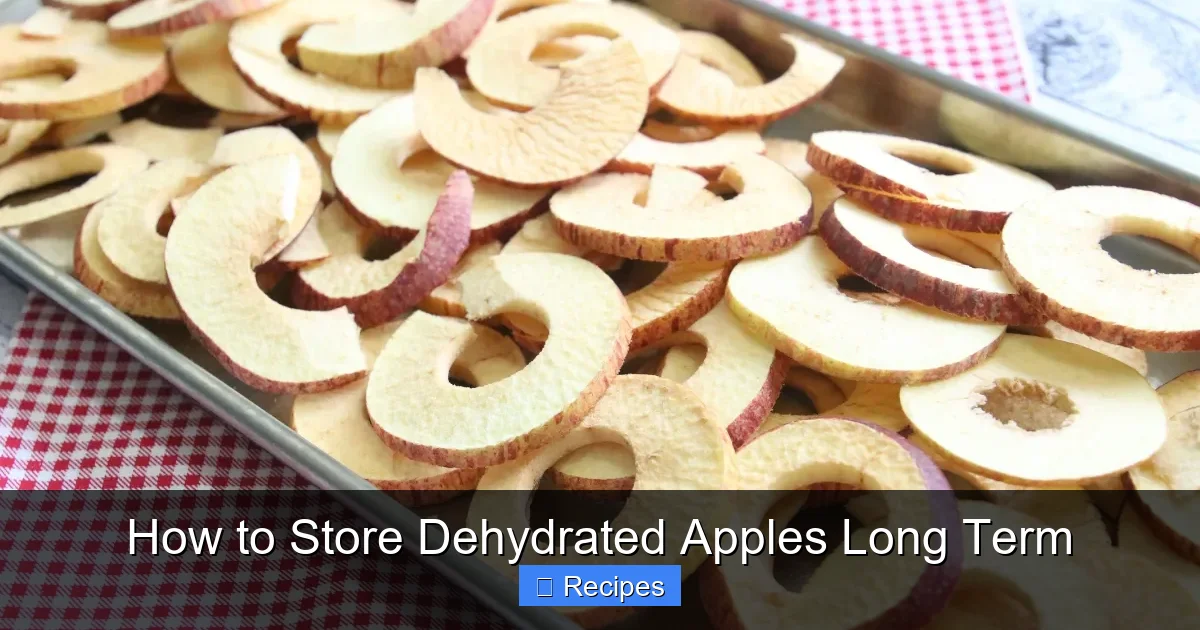
Dehydration works by removing enough water (H₂O) from the apple so that microorganisms like mold, yeast, and bacteria cannot grow. The critical threshold for most fruits is a moisture content of less than 20%, with 15% or lower being ideal for truly long-term storage. If any residual moisture remains—especially if it’s trapped in a clump of slices or in the center of a thick piece—it will migrate, causing some pieces to become soft and sticky, creating the perfect breeding ground for mold. This is why the “conditioning” step, which we’ll detail later, is absolutely critical.
2. Oxygen: The Flavor and Freshness Thief
Oxygen doesn’t just support microbial life; it actively degrades your food. Through a process called oxidation, oxygen reacts with fats and flavor compounds in the apple, leading to rancidity (off-flavors) and a loss of vibrant taste and color. Even in the absence of fat, oxygen causes slow, cumulative damage. Minimizing oxygen contact is paramount for preserving both safety and quality over months and years.
3. Environmental Factors: Light, Heat, and Pests
Light, especially direct sunlight, can fade color and degrade nutrients through photo-oxidation. Heat accelerates all chemical reactions, including oxidation and the slow breakdown of the apple’s structure, leading to a less crisp texture over time. Finally, pantry pests like weevils or moth larvae can infiltrate improperly sealed containers. A robust storage system must be a barrier against all four of these elements: moisture, oxygen, light, and pests.
The Non-Negotiable First Step: Proper Dehydration & Conditioning
You cannot store what you haven’t properly made. The storage process begins during and immediately after dehydration. Rushing this stage dooms your storage efforts from the start.
Visual guide about How to Store Dehydrated Apples Long Term
Image source: storables.com
Testing for True Dryness
The standard test for dehydrated fruit is the “bend but don’t break” test for leathery fruits like apricots. For apples, you should aim for a brittle texture. Take a piece from the center of a thick slice. It should snap cleanly, not bend. If it flexes at all, it needs more time. When in doubt, dry it more. Modern dehydrators with temperature controls are excellent, but oven drying requires extra vigilance due to less consistent airflow.
The Critical Conditioning Period
This is the step most novices skip and the primary reason for “sweating” and mold in jars. After your apples are dry, do not immediately seal them. Instead:
- Cool Completely: Let the dried apples cool to room temperature on the dehydrator trays. Warm apples will release steam into a sealed container.
- Transfer to an Open Container: Place the cooled slices in a large, clean, non-airtight container—a glass baking dish, a food-grade plastic tote, or even a clean, dry pillowcase works.
- Wait and Stir: Leave the container open (or loosely covered with a cloth) in a warm, dry, and clean area for 7 to 10 days. Stir or shake the apples once or twice a day. This allows any remaining microscopic moisture pockets to equilibrate and evaporate. You may notice the apples feel slightly damp on the first day; this is normal and will dissipate.
- Final Test: After a week, perform the bend/snap test again on a piece from the middle of a cluster. It should be consistently brittle throughout.
Only after successful conditioning are your apples truly ready for long-term storage. This simple process can add years to your shelf life.
Choosing Your Armor: The Best Containers for Long-Term Storage
With perfectly conditioned apples in hand, your container choice becomes your primary defense. The wrong container is a leak in your armor. Let’s rank your options from most to least effective for multi-year storage.
Visual guide about How to Store Dehydrated Apples Long Term
Image source: emergencyprepguy.com
Tier 1: The Gold Standard
Mylar Bags with Oxygen Absorbers: This is the professional, prepper, and gold-standard method for 1+ year storage. Mylar is a metallized polyester film that is completely impermeable to light and oxygen. You fill the bag, add an appropriately sized oxygen absorber (300cc for a gallon bag is common), press out as much air as possible, and seal with a heat sealer or even a hot iron. The absorber creates a vacuum, sucking out residual oxygen. Store these sealed bags in a rigid container (like a food-grade bucket) to protect against puncture and rodents. This method is unparalleled for maximum shelf life.
Glass Jars (Mason, Kilner): Excellent for shorter-term storage (6-12 months) if kept in ideal conditions. Use wide-mouth jars for easy filling and access. Ensure the lids and seals are new and undamaged. For extra security, you can place an oxygen absorber in the jar before sealing. The downside is their fragility and weight, and they are not 100% opaque unless stored in a dark cupboard.
Tier 2: Good with Caveats
Food-Grade Plastic Buckets (Gamma Seal Lids): 5-gallon food-grade buckets with airtight gamma seal lids are fantastic for bulk storage. They are sturdy, stackable, and protect from light and pests. The key is ensuring the bucket is food-grade and previously unused for non-food items. You can place Mylar bags inside the buckets for a double barrier, or fill the bucket directly with conditioned apples and add oxygen absorbers before sealing the lid.
High-Quality Vacuum Sealer Bags: If you have a vacuum sealer, this is a very effective method. The vacuum removes most air. Use the “pulse” or “gentle” setting to avoid crushing your delicate apple slices. For best results, pre-freeze the slices for an hour before vacuum sealing to kill any potential insect eggs (though this is rarely an issue with home-dried goods). Store the sealed bags in a dark, cool place. Note that standard plastic vacuum bags are not 100% impermeable to oxygen over very long periods (years), but for 6-18 months, they are excellent.
Tier 3: Acceptable for Short-Term Only
Standard Zip-Top Freezer Bags: These can be used for storage up to 3-6 months only if you are extremely diligent. Squeeze out all air, seal tightly, and label. Store in the refrigerator or a very cool, dark pantry. They are not oxygen or moisture-proof long-term and can easily develop pinholes. Never use simple sandwich bags.
What to AVOID: Cardboard boxes, paper bags, regular plastic containers without gaskets, and any container that is not food-grade or previously held chemicals. These offer zero protection against moisture, oxygen, or pests.
The Perfect Storage Environment: Location, Location, Location
Even the best container will fail in a bad location. Think of your storage container as a thermos—it maintains the conditions it’s placed in. Your goal is a space that is Cool, Dark, Dry, and Stable.
Temperature: The 50-70°F Sweet Spot
Every 10°F increase in temperature roughly doubles the rate of chemical reactions, including oxidation. Aim for a consistent temperature between 50°F and 70°F (10°C – 21°C). The cooler, the better for longevity. Basements, cellars, or interior closets are often ideal. Avoid garages, attics, and near ovens or water heaters where temperatures swing dramatically from day to night and season to season.
Light: Total Darkness is Best
Store containers in complete darkness. Light, especially UV light, degrades nutrients and color. If using glass jars, store them in an opaque box or a cupboard that is never opened in direct light. Opaque containers like Mylar bags, buckets, or colored plastic bins naturally block light.
Humidity: Keep it Dry
The surrounding air should be dry. Do not store in a damp basement or a humid pantry. If you live in a humid climate, your sealed containers are your best friend, as they create a microclimate inside. Ensure the storage area has good air circulation.
Pest Prevention
Airtight containers are your first defense. For added peace of mind, especially with bucket storage, place a few bay leaves on top of the apples before sealing. Bay leaves are a natural insect repellent and are safe to use. You can also freeze your sealed containers for 48 hours before placing them in long-term storage to kill any potential insect eggs (though this is more critical for grains).
Advanced Techniques & Common Pitfalls to Avoid
Now let’s fine-tune your strategy and avoid the mistakes that ruin batches.
To Use Oxygen Absorbers or Not?
For storage beyond 3-4 months, yes, use them. They are cheap insurance. For a standard 1-quart (1L) glass jar, use a 100cc absorber. For a 1-gallon Mylar bag, use a 300cc absorber. Always use fresh, unused absorbers from a reputable supplier. They are not reusable. Place one absorber on top of the apples before sealing. Do not open the absorber package until you are ready to use it, as they activate immediately upon exposure to air.
The Pitfall of “Sweating”
This is the classic failure. You open a jar of beautifully dried apples weeks later to find them wet, sticky, and clumped together. Cause? The apples were not conditioned properly, or they were sealed while still warm. The residual moisture condensed on the cooler walls of the jar. The fix is the conditioning step—it’s that important. If this happens, you must immediately re-dehydrate the apples at a low temperature (125-135°F / 52-57°C) until crisp again.
Flavor Transfer
Dried apples are porous and can absorb odors. Never store them near strong-smelling items like spices, onions, garlic, or cleaning supplies. Your storage area should be dedicated or at least free of potent aromas.
How Long Will They Last?
With perfect dehydration, conditioning, and storage in Mylar with absorbers in a cool, dark basement: 12-24 months. In vacuum-sealed bags in a cool pantry: 6-12 months. In glass jars in a kitchen cupboard: 3-6 months. These are quality guidelines. They will remain safe indefinitely if kept dry and mold-free, but flavor and texture will slowly degrade over time. Always use your senses.
Shelf Life, Rehydration, and Enjoyment
Knowing how long your apples will last and how to use them completes the cycle.
Checking for Spoilage
Before using a container from long-term storage, inspect it. Look for any signs of moisture inside, bulging (sign of gas from fermentation), or visible mold (fuzzy spots, usually white, green, or black). Smell the apples through the container if possible; they should have a sweet, apple-cider-like aroma. Any sour, yeasty, or “off” smell means discard. Upon opening, check a few pieces. They should be brittle. If they are soft, leathery, or sticky, they have absorbed moisture and should be used immediately or re-dehydrated.
Rehydrating for Cooking
To rehydrate for pies, crisps, or sauces, cover the apples with boiling water or apple juice and let soak for 30-60 minutes. Drain and use. For a quicker method, simmer them in a saucepan with a small amount of liquid until tender. For eating as a snack, no rehydration is needed—their chewy texture is part of the appeal!
Creative Uses Beyond Snacking
Long-term stored dehydrated apples are incredibly versatile. Grind them into homemade apple powder for flavoring oatmeal or smoothies. Chop and add to trail mix, granola, or homemade cereal. Simmer with cinnamon and a splash of water for a quick apple sauce. Use them in stuffing, pork chops, or baked goods like muffins and breads. Their concentrated flavor can elevate many dishes.
Conclusion: The Reward of Patience and Precision
Storing dehydrated apples long term isn’t complicated magic; it’s applied science and careful habit. It starts with getting the fruit truly, completely dry. It is cemented by the often-overlooked conditioning period that equalizes moisture. It is secured by choosing the right barrier—a Mylar bag with an oxygen absorber, a sealed glass jar, or a food-grade bucket—and placing it in the cool, dark, and stable sanctuary of your pantry or cellar. By respecting these principles, you transform a seasonal abundance into a year-round treasure. You build a resilient, nutritious food stash that requires no electricity, generates no waste, and delivers a taste of autumn’s harvest whenever you desire. The next time you fill a container with those golden, fragrant slices, you’ll do so with confidence, knowing that with these steps, your delicious investment is protected. Now, go forth and preserve that apple-y goodness!
Frequently Asked Questions
What is the absolute maximum shelf life for properly stored dehydrated apples?
With meticulous preparation (complete dryness, conditioning) and storage in Mylar bags with oxygen absorbers in a consistently cool (50-60°F), dark, and dry basement, dehydrated apples can safely last 18-24 months while maintaining excellent flavor and texture. Beyond two years, quality will gradually decline, though they may remain safe if kept perfectly dry.
Can I store dehydrated apples in the refrigerator or freezer for longer life?
The refrigerator is not recommended due to its humidity, which can cause condensation when you open containers. The freezer is an excellent option for extending life to 2-3 years or more. Ensure apples are completely conditioned and stored in truly airtight freezer bags or vacuum-sealed bags to prevent freezer burn. Freezer storage is ideal for very long-term preservation if you have the space.
How can I tell if my stored dehydrated apples have gone bad or gotten moldy?
Always inspect before eating. Signs of spoilage include: visible mold (fuzzy spots, usually white, green, or black), a sour, yeasty, or “off” odor, a sticky, soft, or leathery texture (instead of brittle), or any visible moisture inside the container. If the apples have clumped together into a solid mass, this is a sign of moisture absorption and potential spoilage. When in any doubt, throw them out.
Is vacuum sealing alone enough for long-term storage, or do I still need oxygen absorbers?
Vacuum sealing is a very good method and significantly extends shelf life by removing most air. For storage of 6-12 months in a cool, dark place, it is often sufficient. However, for maximum longevity (1+ years), combining vacuum sealing with an oxygen absorber provides the ultimate barrier, as absorbers chemically scavenge any residual oxygen that a vacuum seal might leave behind.
Can I rehydrate apples that were stored long-term, and will they taste like fresh?
Yes, you can easily rehydrate them by soaking in hot water or apple juice. However, they will not taste or have the texture of a fresh apple. Rehydrated dried apples have a concentrated, cooked-apple flavor and a softer, chewier texture—similar to a baked apple. They are perfect for pies, sauces, and oatmeal, but not for eating like a crisp, raw apple.
My apples got soft in storage. Can I fix them?
Yes, this is usually due to moisture absorption. You can often rescue them by re-dehydrating. Spread the soft slices on dehydrator trays (or a baking sheet in a very low oven, 150°F/65°C) and dry them until they are brittle again. Once re-dried and re-conditioned, you can repackage them in a new, truly airtight container with a fresh oxygen absorber. This is a common and fixable storage error.