Storing sprouts properly is the key to enjoying their crunch and nutrition without spoilage. The core principle is managing moisture: dry them thoroughly after washing and store them in an airtight container in the refrigerator. Different sprouts like alfalfa, mung beans, and broccoli have slightly different needs, but all require cool temperatures and minimal exposure to air and ethylene gas from other produce. By following a few simple steps, you can extend the life of your sprouts from days to over a week, ensuring they stay crisp and safe to eat.
Key Takeaways
- Moisture is the Enemy: The single most important rule is to dry sprouts completely after rinsing. Any excess water inside a storage container will accelerate spoilage and sliminess.
- Airtight is Essential: Use containers with good seals, like specialized produce keepers or glass jars with lids, to limit air exposure which causes wilting and decay.
- Refrigeration is Non-Negotiable: Always store sprouts in the refrigerator. The ideal temperature is between 34°F and 40°F (1°C to 4°C), typically in the main body, not the door.
- Know Your Sprout: Bean sprouts (mung, lentil) are hardier and last longer than leafy sprouts (alfalfa, clover). Adjust your expectations and check them more frequently for delicate varieties.
- Avoid Ethylene Producers: Keep sprouts away from fruits like apples, bananas, and tomatoes that release ethylene gas, which will cause them to yellow and deteriorate faster.
- Don’t Pre-Wash for Storage: Wash sprouts only right before you plan to eat them. Washing before storage introduces the moisture that leads to rapid spoilage.
- Check Daily: A quick daily check for excess moisture, wilting, or off smells allows you to salvage good parts or use them immediately, preventing one bad sprout from ruining the batch.
📑 Table of Contents
- How to Store Sprouts: The Ultimate Guide to Freshness and Safety
- The Universal Golden Rules of Sprout Storage
- Storing Common Sprout Varieties: Specific Needs
- Common Storage Mistakes (And How to Avoid Them)
- What to Do With Sprouts That Are Past Their Prime (But Not Bad)
- Extending Shelf Life: Advanced Techniques
- Conclusion: Fresh Sprouts at Your Fingertips
How to Store Sprouts: The Ultimate Guide to Freshness and Safety
You’ve meticulously rinsed and drained your homegrown or store-bought sprouts. They’re crisp, vibrant, and packed with nutrients. Now, the critical question: how do you keep them that way? Improper storage is the silent killer of sprouts, turning a promising batch into a slimy, smelly disappointment in just a day or two. But it doesn’t have to be this way. Mastering the art of sprout storage is simpler than you think, and the payoff is immense. You’ll reduce food waste, save money, and always have these nutritional powerhouses on hand for salads, sandwiches, and stir-fries. This guide will walk you through everything, from the universal golden rules to the specific needs of different sprout varieties, ensuring your sprouts stay fresh, safe, and delicious for as long as possible.
The fundamental challenge with storing sprouts is their very nature. They are young, tender plants, alive and continuing to respire. This means they produce moisture and are highly susceptible to the environment around them. Their delicate structure, high water content, and neutral pH make them a potential breeding ground for bacteria if not handled correctly. Therefore, our storage strategy must focus on three pillars: temperature, moisture control, and air exposure. Get these three factors right, and you’ve won 90% of the battle. Let’s dive in.
The Universal Golden Rules of Sprout Storage
Before we get into specific sprout types, there are foundational principles that apply to every single variety of sprout, from tiny mustard greens to hearty mung beans. These are non-negotiable. Skip these, and you’re setting yourself up for failure.
Visual guide about How to Store Sprouts
Image source: sprouts.com
Rule #1: The Drying Ritual is Sacred
This cannot be overstated. Water is the primary catalyst for decay in sprouts. After you rinse your sprouts—which you should always do before eating—you must remove every last drop of surface water before they go into their storage container. Think of it like this: you wouldn’t put a wet towel in a sealed plastic bag and expect it to stay fresh, would you? The same principle applies, just on a smaller scale. Use a clean salad spinner for the most efficient drying. Spin them in batches if you have a lot. If you don’t have a spinner, lay them out on a clean kitchen towel or paper towels and gently pat them dry, or let them sit in a colander for 15-20 minutes to allow excess water to drip away. The goal is for the sprouts to feel completely dry to the touch, with no clumping from residual moisture.
Rule #2: Choose the Right Vessel
An airtight container is your best friend. The goal is to create a stable, humid-but-not-wet microenvironment that slows respiration without trapping liquid. Plastic produce saver containers with vented lids are excellent. Glass jars with tight-sealing lids work perfectly. Even a clean, dry plastic food storage bag with the air gently pressed out can suffice for a day or two. Avoid leaving sprouts in their original perforated plastic clamshell containers from the store for long-term storage; these are designed for airflow during transport, not for maintaining optimal humidity at home. If you do use a bag, consider placing a dry paper towel inside to absorb any errant moisture that might accumulate.
Rule #3: The Cold is Crucial
Sprouts must be refrigerated. Period. The cold temperature (ideally 34°F to 40°F / 1°C to 4°C) dramatically slows down their metabolic processes, extending their shelf life. Where you place them in the fridge matters. Avoid the refrigerator door. The temperature fluctuates every time the door opens. Instead, place your container in the main body of the refrigerator, often on a lower shelf where it’s consistently coldest. Also, keep them away from the back wall if your fridge has a frost-free cycle, as that area can occasionally get too cold and cause freezing damage, turning sprouts mushy.
Storing Common Sprout Varieties: Specific Needs
While the golden rules are universal, different sprouts have varying inherent shelf lives and quirks. Understanding these helps you set realistic expectations and tailor your storage slightly.
Visual guide about How to Store Sprouts
Image source: thewonderfulworldofsprouts.com
Leafy Sprouts: Alfalfa, Clover, Radish, and Mustard
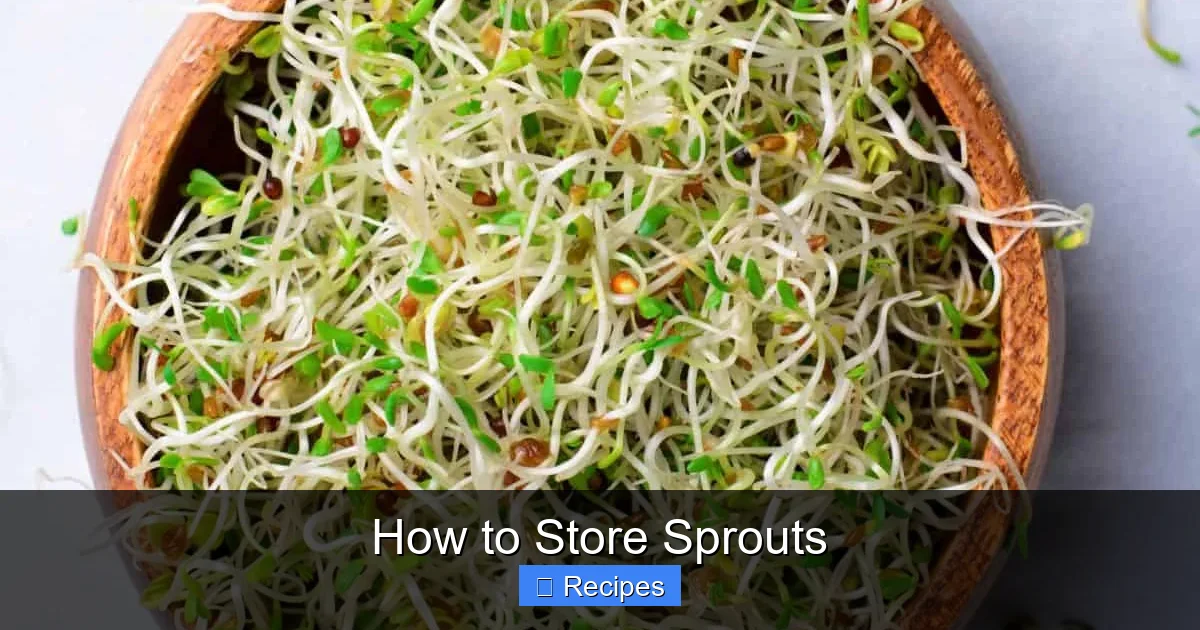
These are the most delicate and have the shortest lifespan, typically 3-5 days when stored perfectly. Their fine, lacy leaves are prone to wilting and yellowing. They are also the most sensitive to ethylene gas. When storing these, be extra vigilant about drying. Because they are so light and airy, a salad spinner is almost essential. Store them in a container with a bit of headspace to prevent crushing. Use these within a couple of days for peak crispness in salads and sandwiches. If you see the very tips starting to yellow, you can still use the green parts—just pluck off the discolored bits.
Bean Sprouts: Mung Bean and Soybean
These are the workhorses of the sprout world. With their thick, crunchy shoots and beans, they are much hardier. When stored correctly, mung bean sprouts can last 7-10 days or even longer. Their sturdy structure means they tolerate a bit more moisture and handling. You can store them in a larger container, and they don’t crush as easily. They are commonly used in cooked dishes like stir-fries and soups, and they hold up well to brief cooking even after a week in the fridge. However, they are still susceptible to sliminess if wet, so drying is still key. Look for sprouts that are white or pale green with firm, moist (not wet) stems.
Broccoli and Other Cruciferous Sprouts
Broccoli sprouts are known for their incredible nutritional profile, particularly their sulforaphane content. They have a tiny, bud-like structure similar to alfalfa but with a slightly more robust stem. Their storage life is similar to leafy sprouts, about 4-6 days. They can develop a slight odor as they age, which is normal but a sign to use them soon. Their small size makes them easy to dry in a spinner lined with a paper towel. Store them in a small, airtight jar. Because of their health-food-star status, you might pay more for them, so proper storage is key to getting your money’s worth.
Blended Sprout Mixes
Many stores sell exciting mixes like “spicy sprout blend” (often containing radish, mustard, and broccoli) or “mung bean and lentil mix.” Here, you need to follow the needs of the most delicate component. If a mix contains alfalfa or clover, treat it with the same care as a leafy sprout. Use it within 3-4 days. The hardier bean sprouts in the mix will fare fine, but the leafy ones will dictate the overall freshness timeline.
Common Storage Mistakes (And How to Avoid Them)
Even with the best intentions, it’s easy to slip up. Here are the most frequent pitfalls that ruin sprouts and exactly how to sidestep them.
Visual guide about How to Store Sprouts
Image source: thewonderfulworldofsprouts.com
Mistake: Washing and Storing Wet
This is the #1 mistake. The instinct is to rinse sprouts, drain them, and pop the container in the fridge. But a few droplets of water trapped in the bottom create a humid pocket that turns sprouts slimy within hours. The Fix: Make drying a mandatory step. Use a salad spinner until the sprouts are completely dry. If you wash them in a colander, let them sit in it for 20 minutes to drain, then spread them on a towel for a final pat-dry before containerizing.
Mistake: Storing with Ethylene-Producing Fruits
Fruits like apples, bananas, avocados, tomatoes, and melons release ethylene gas as they ripen. This gas is a natural plant hormone that causes senescence (aging) in other produce. Sprouts are extremely sensitive and will yellow, wilt, and develop off-flavors much faster when stored nearby. The Fix: Keep sprouts in a separate drawer or on a different shelf from ripening fruit. If your fridge has a dedicated crisper drawer, that’s a great spot, as long as it’s not shared with apples.
Mistake: Using the Wrong Container
A loosely covered bowl or the original store clamshell leaves sprouts exposed to air and fridge odors. They will dry out or absorb smells. The Fix: Transfer to a dedicated, clean, airtight container. If using a jar, ensure the lid screws on tightly. For bags, use a zip-top bag and press out the air before sealing. A container that’s too large can also be an issue, as there’s more air space for the sprouts to lose moisture into. Choose a container that fits the quantity snugly.
Mistake: Ignoring the “Use By” Date and Not Checking
Sprouts are living things and their freshness declines daily. Forgetting them in the back of the fridge is a recipe for waste. The Fix: Practice the “first in, first out” method. When you bring new sprouts home, put the older container in front. Make it a habit to give your sprouts a quick visual and smell check every day or two. If you see a few slimy or discolored sprouts, remove them immediately—they can spoil their neighbors. This simple habit can add days to the usable life of your batch.
What to Do With Sprouts That Are Past Their Prime (But Not Bad)
Even with perfect storage, sprouts will eventually begin to wilt or lose their peak crispness. Before you compost them, consider these options to give them a delicious second life.
For Slightly Wilted Leafy Sprouts: They may not be ideal for a crisp salad, but they are perfect for blending into smoothies, where texture doesn’t matter. They also work wonderfully in soups or stews, added in the last minute of cooking. You can sauté them lightly with garlic as a soft, green side dish. Their nutritional value remains largely intact.
For Bean Sprouts Losing Crunch: They are classic candidates for stir-fries. Cook them quickly over high heat for 1-2 minutes, and they’ll regain a pleasant, tender-crisp texture. They’re also great in hot and sour soup, spring rolls (where they are cooked slightly by the warm wrapper), or mixed into a warm grain bowl.
The Smell Test is Final: If sprouts smell sour, fermented, or generally “off,” or if they are uniformly slimy and dark, discard them immediately. There is no saving them, and consuming them could pose a health risk. When in doubt, throw it out.
Extending Shelf Life: Advanced Techniques
For the sprout enthusiast or someone who buys in bulk, these methods can buy you extra time.
The Paper Towel Method
This is a game-changer for extending life by 2-3 days. After drying your sprouts, place a dry paper towel on the bottom of your airtight container. Add the sprouts, then place another dry paper towel on top. The towels will absorb any residual humidity that builds up inside the container, keeping the sprouts drier. Check the towels every day or two and replace them if they feel damp. This method is especially effective for leafy sprouts.
Specialized Produce Keepers
Containers like the “FreshWorks” or “Oxo Good Grips” produce savers are engineered to maintain optimal humidity. They have a vented lid and a tray that elevates the produce, allowing air circulation and keeping it out of any liquid that might collect. They work exceptionally well for sprouts and are worth the investment if you eat them regularly.
Can You Freeze Sprouts?
Yes, but with a major caveat: texture will change completely. Freezing ruptures the cell walls in sprouts. They will be limp, soft, and unsuitable for fresh salads or garnishes. However, frozen sprouts are perfectly acceptable for cooked applications like soups, casseroles, stir-fries, and smoothies. To freeze: blanch them briefly (30 seconds in boiling water, then ice bath), dry them thoroughly, spread on a baking sheet to freeze solid (this prevents clumping), then transfer to a freezer bag. They will keep for 3-4 months.
Conclusion: Fresh Sprouts at Your Fingertips
Storing sprouts successfully boils down to respect for their delicate biology. By treating them as the living, breathing food they are—giving them the cool, dry, and protected environment they crave—you unlock their full potential. You’ll enjoy that satisfying crunch in your sandwich, the vibrant green boost in your salad, and the peace of mind knowing you’re minimizing waste. Remember the mantra: Dry Thoroughly, Seal Airtight, Refrigerate Immediately, and Check Daily. Armed with this knowledge and an understanding of your specific sprout’s personality, you can confidently keep these nutritious gems fresh and ready to enhance your meals all week long. Now, go enjoy those crisp, home-stored sprouts!
Frequently Asked Questions
How long do sprouts last in the fridge?
With proper storage, mung bean sprouts can last 7-10 days, while more delicate leafy sprouts like alfalfa and clover last 3-5 days. Always rely on smell and appearance as the final guide.
Can I store sprouts in water to keep them fresh?
No, storing sprouts submerged in water will cause them to rot and become slimy very quickly. The key is to keep them dry. Some restaurants store bean sprouts in cold water for a few hours before service for extra crunch, but this is for immediate use, not for multi-day storage at home.
How can I tell if sprouts have gone bad?
Trust your senses. Bad sprouts will have a sour, fermented, or unpleasant odor. They will be uniformly slimy, dark yellow/brown, and may have visible mold. If they just smell a bit “off” or have a few slimy tips, discard the bad parts. If the whole batch smells wrong, throw it all out.
Should I wash sprouts before storing them?
No, do not wash sprouts before long-term storage. Only rinse them right before you plan to eat or cook them. Washing introduces moisture, which is the primary cause of spoilage. Always store your sprouts completely dry.
Can I store sprouts with other vegetables in the same container?
It’s best not to mix sprouts with other moist vegetables like lettuce or cucumbers in the same sealed container, as those veggies can release moisture. Keep sprouts in their own dedicated container. However, storing them in the same crisper drawer with other veggies is fine as long as they are in separate containers.
Are sprouts safe for everyone to eat, especially if stored at home?
While sprouts are nutritious, their growing conditions (warm, humid) are also ideal for bacteria like Salmonella and E. coli. Commercially, some sprouts are treated to reduce risk. At home, the risk is very low if you start with clean seeds, rinse sprouts well during growth, and store them properly in the fridge. However, pregnant women, young children, the elderly, and anyone with a compromised immune system may want to cook sprouts thoroughly (e.g., in a stir-fry or soup) to eliminate any potential risk, as cooking kills bacteria.
Pingback: How Long to Roast Brussel Sprouts 400 - kitchenandhouseware.com
Pingback: Roasted Brussel Sprouts Recipe - kitchenandhouseware.com