Wrapping your Rice Krispie treats professionally is the secret weapon for bake sale success. It protects your treats from contamination and sogginess, makes them visually appealing to customers, and often meets health code requirements. This guide covers everything from choosing the right materials—like parchment paper, cellophane, or plastic wrap—to mastering simple folding techniques and adding custom tags or ribbons. You’ll learn how to prep your treats perfectly, wrap them efficiently, and transport them without damage, ensuring your delicious creations look as good as they taste and sell out fast.
So, you’ve mastered the perfect, gooey, slightly-crispy Rice Krispie treat recipe. You’ve got your vanilla extract just right, your marshmallows melted to a silky dream, and you’ve pressed the mixture into the pan with the patience of a saint. The treats are cooling on the rack, smelling like a childhood memory. Then it hits you: the bake sale is Saturday, and these glorious squares are currently naked. The thought of wrapping dozens—maybe hundreds—of them can feel like a mountain of monotony. But here’s the secret: wrapping isn’t a chore; it’s your final, crucial step to bake sale victory. A beautifully wrapped treat signals quality, care, and deliciousness before a single bite is taken. It protects your hard work from dust, fingers, and humidity, and it makes your table look professional, organized, and irresistible. This isn’t just about slapping on some plastic; it’s about presentation, preservation, and peace of mind. Let’s dive into the complete guide on how to wrap Rice Krispie treats for bake sale success, transforming your treats from homemade to “Sold Out!”
Key Takeaways
- Preparation is everything: Ensure treats are completely cooled and cut evenly before wrapping to prevent condensation and ensure uniform presentation.
- Material matters: Choose between food-safe parchment paper (breathable, classic), cellophane (clear, shiny), or plastic wrap (tight seal) based on your climate, budget, and desired look.
- Hygiene is non-negotiable: Always wrap treats on a clean surface with clean hands or wear gloves to meet health standards and reassure customers.
- Seal it tight: Whether using a fold, twist tie, or sticker, a secure seal prevents air exposure, keeping treats fresh and preventing staleness during the sale.
- Presentation sells: Add a simple custom tag with the treat’s name and price, or a decorative ribbon to elevate your package from basic to boutique.
- Transport with care: Pack wrapped treats in rigid, shallow containers with parchment layers between to avoid smudging and shifting en route to the sale.
- Practice makes perfect: Do a test run with a few treats to find your fastest, most efficient wrapping method before committing to the full batch.
📑 Table of Contents
- Why Wrapping Isn’t Optional: The Triple Benefit
- Essential Materials: Choosing Your Wrapping Arsenal
- Step-by-Step: The Wrapping Process from Pan to Package
- Pro Techniques and Creative Customization
- Common Pitfalls and How to Avoid Them
- Storage and Transport: Getting Your Treats to the Sale in Style
- Conclusion: Wrap With Confidence, Sell With Pride
Why Wrapping Isn’t Optional: The Triple Benefit
Before we talk about the “how,” let’s establish the “why.” Some bakers might think, “They’re just Rice Krispie treats; people will eat them right off the tray!” But at a bustling bake sale, that mindset can cost you sales and reputation. Wrapping delivers three critical benefits.
1. Hygiene and Health Code Compliance
This is the most important, non-negotiable reason. In many areas, especially for school or organized events, any food that isn’t pre-packaged in a way that prevents direct hand contact is a health code violation. A customer shouldn’t have to use a napkin to pick up a treat from a tray. Wrapping each piece individually creates a barrier. It shows you care about your customers’ safety and protects you from liability. Using food-safe materials and wrapping on a clean surface with clean hands (or gloves) is essential. It’s a simple step that builds immense trust.
2. Preservation of Texture and Freshness
Rice Krispie treats have a unique, delicate texture. The crispy cereal can become soft and soggy if exposed to ambient humidity for too long. The marshmallow binder can dry out and become tough if left uncovered. Proper wrapping creates a micro-environment for each treat. It locks in just enough moisture to keep them soft and chewy, while shielding them from external air that causes staleness. This means your treats will be just as perfect at 3 PM as they were at 10 AM when you set up your table.
3. The Power of Visual Appeal and Perceived Value
Humans eat with their eyes first. A tray of naked, slightly crumbly squares is a missed opportunity. A neatly arranged array of uniformly wrapped treats, perhaps with a small branded tag, looks deliberate, professional, and high-quality. It suggests the baker took extra time and care. This perceived value can justify a slightly higher price point and makes customers more likely to purchase. Wrapping also makes portion control obvious and helps with pricing consistency. It turns your batch from a “homemade snack” into a “crafted confection.”
Essential Materials: Choosing Your Wrapping Arsenal
You don’t need a fancy wrapping machine. You need the right supplies, and the best choice depends on your climate, budget, and aesthetic. Let’s break down the core materials.
Visual guide about How to Wrap Rice Krispie Treats for Bake Sale
Image source: thekitchenix.com
The Wrap: Parchment, Plastic, or Cellophane?
Parchment Paper (or Baking Paper): The classic, rustic, and highly breathable choice. It’s food-safe, non-stick, and has a natural, homemade look. It’s excellent for preventing sogginess because it allows a tiny amount of air exchange, which can be good in humid climates. It’s also compostable, appealing to eco-conscious buyers. The downside is it can be less secure—a loose fold might come undone—and it doesn’t provide a completely airtight seal. It’s perfect for a charming, farmer’s market vibe.
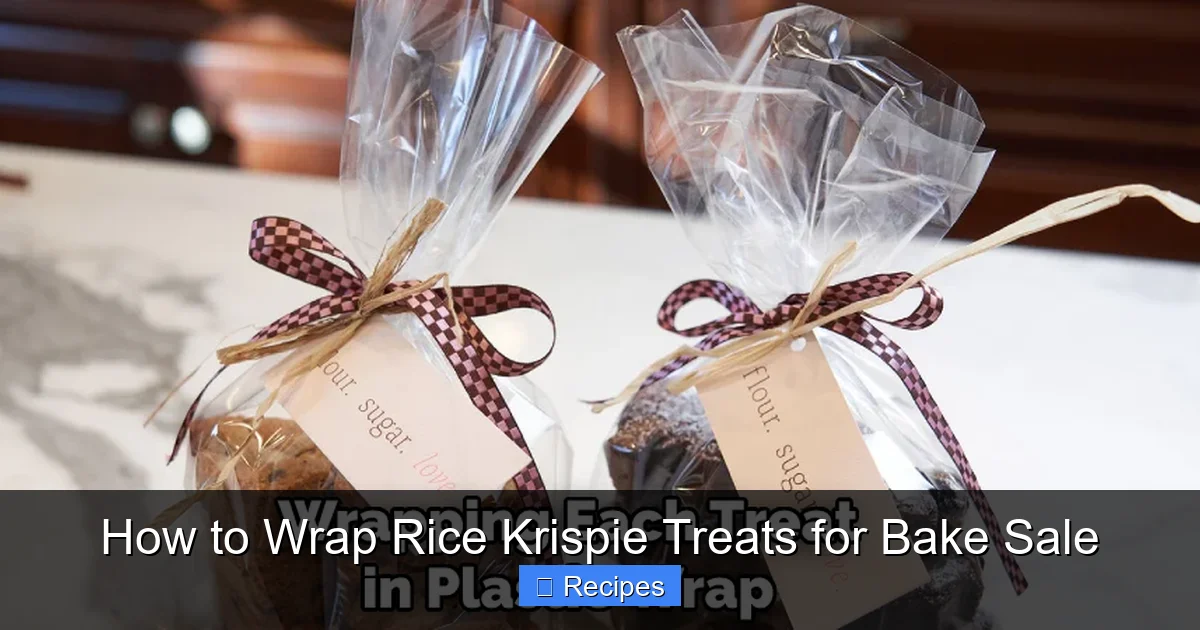
Cellophane (or Clear Poly Bags): The professional, shiny, and secure option. These pre-cut bags come in various sizes (2”x2”, 3”x3” are common for squares). You simply place the treat inside and seal the top with a twist tie, sticker, or heat sealer. They provide an airtight barrier, excellent for long sales or humid days. They showcase the treat perfectly and look very clean. They are more expensive per unit than a roll of parchment but save immense time. Look for “food-safe” and “cellulose” (plant-based) for a more eco-friendly option than plastic.
Plastic Wrap (Cling Film): The tightest seal and the most budget-friendly bulk option. A single roll can wrap hundreds of treats. It creates a super-tight wrap that molds to the treat’s shape, offering maximum protection against air and moisture. However, it can be tricky to handle—it sticks to everything, including itself—and can look less polished if not done neatly. It also creates more plastic waste. It’s best for very large batches where cost is the primary concern and you’re willing to practice to get a neat finish.
The Seal: Securing Your Wrap
How you finish the wrap is key to it staying put.
- Stickers: Custom printed stickers with your sale name or “Rice Krispie Treats” are fantastic. They seal the bag or the end of a parchment fold and double as branding. You can order them online or use plain white labels and write on them.
- Twist Ties: Inexpensive and effective for cellophane bags. You can get plain ones or colored ones to match a theme.
- Ribbon or String: For a special touch, tie a small piece of baker’s twine or colorful ribbon around the neck of a cellophane bag or around a parchment packet. It adds a handmade, gift-like feel.
- Heat Sealer: If you’re wrapping *hundreds* of treats, a small impulse sealer for cellophane bags is a game-changer. It creates a professional, tamper-evident seal in seconds. Consider it an investment for frequent large-scale sales.
Extras: Tags, Labels, and Tools
Price Tags: Small cardstock tags attached with a twist tie or staple. Write the treat name and price clearly.
Parchment Paper Scissors: If using a roll, have a dedicated pair of scissors for cutting cleanly.
Cutting Mat & Ruler: For perfectly square, uniform treats. Use a sharp knife or bench scraper, wiping the blade between cuts for clean edges.
Gloves: Disposable food service gloves are a must for hygiene and make handling sticky treats easier.
Flat Work Surface: A large, clean table or countertop. A silicone baking mat underneath your parchment roll can provide grip.
Step-by-Step: The Wrapping Process from Pan to Package
Now for the mechanics. Follow this process for maximum efficiency and a professional result.
Visual guide about How to Wrap Rice Krispie Treats for Bake Sale
Image source: thekitchenix.com
Step 1: The Foundation – Perfect Prep and Cutting
You cannot wrap a messy treat. This step is 50% of the battle.
- Cool Completely: This is paramount. After pressing the mixture into your pan, let it cool at room temperature until it is completely, utterly cold to the touch. If it’s even slightly warm, condensation will form inside your wrapper, making the treat soggy. This can take 1-2 hours. Do not refrigerate to speed it up, as this can make the treats too hard and crumbly.
- Lift Out and Place on a Cutting Surface: Once cold, use the parchment paper overhang (if you lined the pan) to lift the entire slab out onto a large cutting board or your work surface.
- Cut Precisely: Using a sharp knife or a bench scraper, cut into squares. For uniformity, measure and mark your first row with a ruler. Wipe the blade clean after every 4-5 cuts to prevent sticking and smearing. Aim for 2” or 2.5” squares for a perfect single-serving size that fits standard small cellophane bags.
Step 2: The Clean Workspace and Hands
Lay out your clean work surface. Put on your disposable gloves. Have all your materials within easy reach: the wrapping material (roll or stack of bags), your sealing method (stickers, ties), and your container for finished treats.
Step 3: The Wrap – Three Foolproof Techniques
Technique A: The Parchment Packet (for parchment paper rolls)
- Cut a piece of parchment paper roughly 6”x6”.
- Place a Rice Krispie treat square in the center.
- Bring two opposite sides of the paper together over the top of the treat.
- Fold them over neatly, like you’re making a little envelope.
- Then, fold the ends inward, tucking them tightly under the packet. It should feel secure.
- Secure with a sticker over the final fold or a small piece of tape.
Technique B: The Cellophane Bag (for pre-cut bags)
- Open a bag and place one or two treats inside (check bag size).
- Gently press out excess air.
- Fold the top of the bag over once or twice.
- Secure immediately with a twist tie, staple (if allowed by health code), or a sticker that covers the folded top.
Technique C: The Plastic Wrap Swaddle
- Cut a generous square of plastic wrap (about 8”x8”).
- Place the treat in the center.
- Pull two opposite sides up and over the treat, twisting them together tightly above the treat.
- Then, fold the remaining two sides under the treat, tucking them in to create a neat, sealed packet. The twist at the top keeps it all together.
Step 4: The Seal and Label
Immediately after wrapping, apply your seal. A sticker over a parchment fold or on a cellophane bag top is ideal. If you’re using price tags, attach them now. Consistency is key—place all labels in the same spot (e.g., bottom right corner) for a uniform look on your display table.
Step 5: Organized Storage for Transport
Do not just pile wrapped treats into a bag. As they move, they will rub against each other, potentially smudging decorations (if you added any) or causing the wrappers to come loose. Instead, place wrapped treats in a single layer in a rigid, shallow container like a baking sheet, a lasagna pan, or a sturdy cardboard box. If you need multiple layers, place a sheet of parchment paper between each layer. This keeps everything pristine until you arrive at the sale.
Pro Techniques and Creative Customization
You’ve got the basics down. Now let’s elevate your game from competent to captivating.
Visual guide about How to Wrap Rice Krispie Treats for Bake Sale
Image source: thekitchenix.com
Double-Wrapping for Maximum Protection
For very long sales (all-day events), sales in humid climates, or if you’re using a particularly sticky recipe, consider double-wrapping. Place the treat in a small parchment packet first, then slip that packet into a cellophane bag. The parchment wicks away any potential internal moisture, and the cellophane provides the external airtight barrier. It’s the Cadillac of Rice Krispie treat packaging.
Themed and Seasonal Wrapping
Match your wrap to the occasion! Use red and green cellophane bags and twine for Christmas, pastel ribbons for Easter, or orange and black paper for Halloween. You can even use small themed stickers as seals. This small detail makes your treats feel special and holiday-specific, often allowing for a premium price.
Adding a Personal Touch: Custom Tags
Don’t just write “Rice Krispie Treats” on a sticker. Create a small brand. Use a label maker, or print small tags from your computer on cardstock. Include your “Bakery” name (e.g., “Grandma’s Kitchen”), the treat name (“Original Krispie Squares”), and the price. For a child’s school sale, have them help draw a simple picture on the tags. This personal connection is powerful.
Elevating with Edible Decor (Before Wrapping!)
Why wrap a plain square when you can wrap a masterpiece? Before wrapping, you can:
- Dip one corner in melted chocolate and let it set.
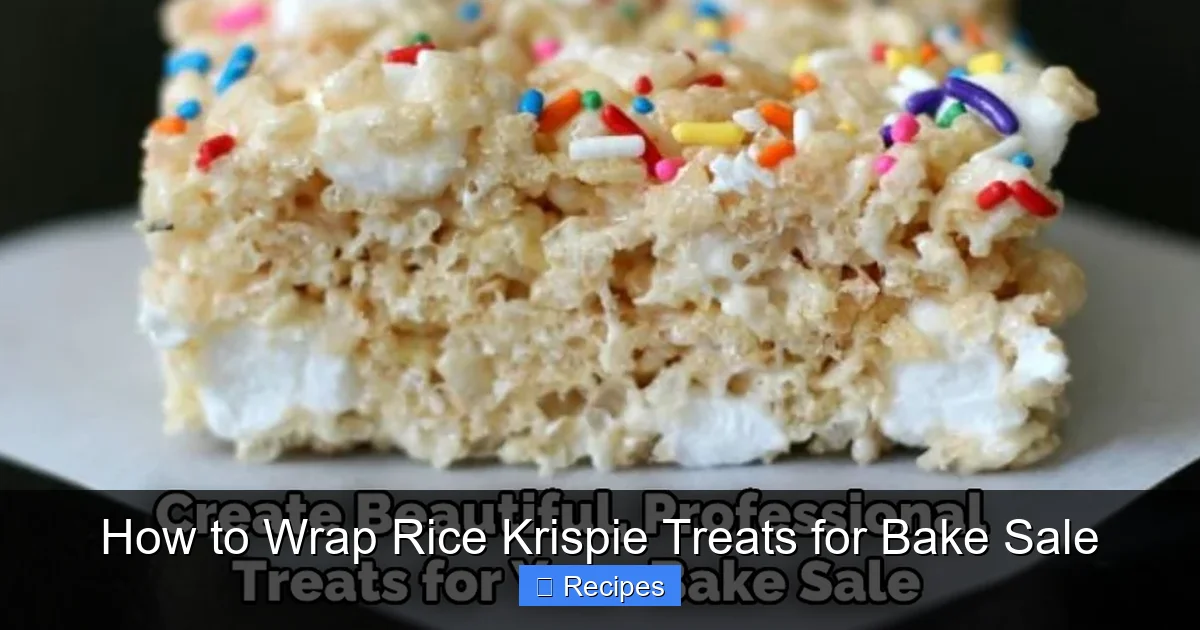
- Press a few sprinkles or mini chocolate chips into the top while the treat is still slightly soft.
- Drizzle with colored icing.
- Add a tiny fondant decoration.
Critical: If you add wet decorations (chocolate, icing), you must let them set completely (several hours) before wrapping, or they will stick to the wrapper and ruin everything. Parchment paper is excellent for placing decorated treats on while they set.
Common Pitfalls and How to Avoid Them
Even with the best intentions, things can go wrong. Here’s how to sidestep the most common wrapping woes.
The Soggy Treat Syndrome
Cause: Wrapping a treat that isn’t 100% cool. The residual heat creates steam inside the wrapper, which condenses into water droplets, making the treat soggy.
Fix: Patience. Let treats cool on a wire rack for at least 1.5-2 hours. If you’re in a rush, you can speed cooling by cutting the slab into large rectangles first, increasing surface area, but never wrap warm.
The Wrapper That Won’t Stay Shut
Cause: Using a material that’s too large or not securing the seal properly. A big parchment packet will unfold. A cellophane bag with no secure closure will pop open.
Fix: Size your wrapper appropriately. For parchment, a 6”x6” square is usually perfect for a 2” square treat. For cellophane, use a bag that’s just slightly larger than the treat. Always use a dedicated seal—a sticker, tie, or tape. Don’t rely on a simple fold alone.
The Sticky Situation
Cause: The treat is too fresh and moist, or you’re handling it with bare, slightly damp hands. The marshmallow binder is sticky by nature.
Fix: Ensure treats are *completely* cool and set. Wear gloves. If a treat is particularly sticky, you can dust it very lightly with powdered sugar or a tiny bit of cornstarch before wrapping, but be cautious—too much will affect taste and texture. Often, just letting it sit for an extra 30 minutes solves the problem.
The Transport Disaster
Cause: Tossing wrapped treats into a flimsy bag or box where they jostle and crush.
Fix: Use rigid, shallow containers. A deep box allows treats to slide and pile on top of each other. A shallow baking sheet or tray keeps everything in one layer. Always use parchment paper sheets between layers if you must stack.
Storage and Transport: Getting Your Treats to the Sale in Style
Your treats are wrapped perfectly. Now, they must survive the journey to the bake sale table.
Pre-Sale Storage: The 24-Hour Rule
Once wrapped, your treats are in their happy, protected state. Store them in a cool, dry place away from direct sunlight. An airtight container or a large, lidded bin is ideal. Do not refrigerate them. The refrigerator introduces moisture and can make the cereal lose its crispness. At room temperature, properly wrapped treats will stay fresh for 3-5 days. If you need to make them further in advance, you can freeze them. Wrap them extremely well (double-wrap in parchment then plastic), place in a freezer bag, and freeze for up to 1 month. Thaw completely, still wrapped, on the counter before the sale.
Transport Logistics: The “Bake Sale Box”
Create a dedicated “bake sale transport kit.”
- Container: A sturdy, shallow cardboard box (like a copy paper box) or a plastic storage bin with a locking lid. Line the bottom with a clean kitchen towel or parchment paper for cushioning.
- Layer Like a Pro: Place a single layer of wrapped treats in the container. Cover them with a sheet of parchment paper. Add the next layer. This prevents wrappers from rubbing off on each other and stops treats from shifting.
- Keep Them Flat: Do not stack containers on top of each other if they are not rigid. Carry them carefully and place them flat in your car, not on a seat where they might slide.
- Bring Extras: Pack a few extra unwrapped treats in a separate container, just in case a wrapper tears or you have a last-minute display idea. Also, bring spare wrapping materials, stickers, and a Sharpie for last-minute price changes.
Sale Day Display: The Final Presentation
At your table, do not just dump the container’s contents onto the table. This looks messy and makes treats vulnerable. Instead:
- Use a clean, flat tablecloth or a large, rigid tray as your base.
- Arrange treats in neat rows or a pattern, alternating directions if using different types.
- If you have a mix, use small folded cards to label each type (e.g., “Original,” “Peanut Butter,” “Sprinkled”).
- Keep a stack of wrapped treats in your transport box behind the table to replenish the display as items sell.
- Have your price list clearly visible. If you’re using tags, ensure prices are easy to read.
Conclusion: Wrap With Confidence, Sell With Pride
Wrapping your Rice Krispie treats for a bake sale is the final, transformative act of your baking journey. It’s where care meets commerce. By investing a little time in choosing the right materials—whether it’s the breathable charm of parchment or the crystal-clear protection of cellophane—and mastering a simple, secure folding technique, you do so much more than just cover a treat. You safeguard its texture, you comply with health standards, and you present your creation as something special. You tell the customer, “I made this with love, and I want it to be perfect for you.” That message resonates. So, embrace the wrapping process. Put on some music, set up your station, and methodically turn your cooling pan of golden squares into a dazzling, uniform array of packaged delights. When you see a customer’s eyes light up at your beautifully arranged table, you’ll know that every careful fold, every tied ribbon, and every handwritten tag was worth it. Now go forth, wrap with confidence, and watch your treats—and your profits—rise.
Frequently Asked Questions
How do I prevent my Rice Krispie treats from getting soggy after wrapping?
Ensure treats are 100% completely cool before wrapping. Any residual heat will create steam and condensation inside the wrapper. Wrap them on a dry day, and use breathable materials like parchment paper if your climate is very humid, as it allows minimal air exchange.
What’s the most cost-effective wrapping material for a large bake sale?
A roll of food-safe parchment paper is the most budget-friendly for large batches. While it requires a bit more time to fold each packet, the cost per treat is extremely low. For a balance of cost and time, bulk boxes of small cellophane bags with twist ties are a great investment.
Can I make and wrap Rice Krispie treats ahead of time?
Yes, you can make them 1-2 days ahead. Cool completely, cut, and wrap them. Store the wrapped treats in an airtight container at room temperature in a cool, dry place. For best texture, aim to sell them within 3 days. You can also freeze them for longer storage.
Do I need to label each individual treat?
Not necessarily. Health codes typically require the food to be packaged, not necessarily individually labeled. However, you should have a clear, large sign at your table listing the item name (“Rice Krispie Treats”) and the price per piece. Individual tags are a nice touch for branding and professionalism but are optional.
What’s the best way to wrap if I added chocolate drizzle or sprinkles on top?
Let all decorations set completely—this is crucial. Place decorated treats on a parchment-lined baking sheet and let them sit for several hours until the chocolate or icing is rock hard. Then wrap them carefully. Parchment paper is excellent for this as it won’t stick to the chocolate.
How can I cut my Rice Krispie treats into perfectly even squares?
After the slab is completely cool, use a sharp knife or a bench scraper. First, use a ruler and a toothpick or the tip of your knife to lightly score lines where you will cut. Then, using a clean, dry blade, cut along the scored lines, wiping the blade with a damp cloth between every few cuts to remove sticky residue for clean edges.