Unlock bakery-quality results at home by mastering your oven’s proof setting. This gentle, low-heat function creates the ideal warm, draft-free environment for yeast dough to rise slowly and evenly. It eliminates guesswork, prevents over-proofing, and ensures consistent texture and flavor development for everything from cinnamon rolls to sourdough loaves. Simply place your covered dough inside, set the temperature (usually 80-110°F/27-43°C), and let the oven do the work.
Have you ever stared at a lump of dough, willing it to rise faster? Or worse, walked away to find it has over-proofed and collapsed on the counter? For many home bakers, the most nerve-wracking part of making bread, pizza, or sweet rolls isn’t the mixing or shaping—it’s the waiting. That patient, hopeful period where the dough sits, seemingly doing nothing, is where magic (or disaster) happens. This is the proofing stage, and if your oven has a dedicated proof setting, you hold a secret weapon for consistent, bakery-style results. But what exactly does this mysterious button do, and how do you use it correctly? Let’s dive in and demystify this incredible feature.
The proof setting on your oven is a specialized, low-temperature function designed to create a perfectly controlled, warm, and draft-free microenvironment. Its sole purpose is to mimic the ideal conditions a professional bakery’s proofing cabinet provides: a steady, gentle warmth that accelerates yeast activity without shocking it, and a humid atmosphere that keeps the dough’s surface supple. By using it, you remove the biggest variables in home proofing—fluctuating room temperature, drafts from windows or vents, and dry air. This means no more guessing if your counter is “too cool” or if the afternoon sun will make your dough race ahead. You get predictable, reliable rising every single time. Whether you’re crafting a crusty artisan loaf, fluffy dinner rolls, or a chewy pizza base, learning to use the proof setting will elevate your homemade baked goods from good to extraordinary.
Key Takeaways
- Proofing is a specific rising stage: The proof setting on your oven is designed solely for the final rise of shaped yeast dough after kneading, not for initial fermentation or baking.
- Temperature is critical: The ideal proofing temperature range is typically between 80°F and 110°F (27°C and 43°C). Too hot kills yeast; too cold slows it down.
- Moisture is key: Always cover your dough (with a lid, damp towel, or plastic wrap) to prevent a dry skin from forming, which inhibits oven spring.
- Visual cues trump time: Recipe times are guidelines. Learn to recognize properly proofed dough: it should look puffy, feel airy, and slowly spring back when gently pressed.
- Not all “proof” settings are equal: Consult your oven’s manual. Some models have a dedicated “Proof” button; others require using the “Warm” setting at a specific low temperature.
- It’s a tool, not a crutch: While incredibly helpful, understanding the signs of good dough is essential. The setting aids the process but doesn’t replace baker’s intuition.
📑 Table of Contents
- What Exactly Is Proofing? The Science of the Rise
- How the Proof Setting on Your Oven Actually Works
- Step-by-Step: How to Use Your Oven’s Proof Setting
- Practical Examples: Proofing Times for Common Doughs
- Troubleshooting: Common Problems and Solutions
- What If My Oven Doesn’t Have a Proof Setting?
- Conclusion: Embrace the Proof
What Exactly Is Proofing? The Science of the Rise
Before we talk about the button on your oven, we need to understand the process it facilitates. Proofing, also called the final rise or bulk fermentation (for the first rise), is the stage after kneading and shaping where yeast consumes sugars in the dough and produces carbon dioxide gas. These gas bubbles get trapped in the gluten network you developed during kneading, causing the dough to expand and become lighter and more aerated.
The Yeast’s Happy Place: Temperature and Time
Yeast is a living organism. Like us, it has a comfort zone. For most common baker’s yeast (active dry or instant), the optimal temperature for active fermentation is between 75°F and 85°F (24°C and 29°C). At this range, it works efficiently, producing the best flavor compounds. If the temperature drops below 70°F (21°C), the yeast becomes sluggish, and proofing can take many hours. If it climbs above 115°F (46°C), the yeast begins to die, and gas production stops. The proof setting on your oven is calibrated to stay safely within this “Goldilocks zone,” usually between 80°F and 110°F (27°C and 43°C), providing that consistent warmth.
The Importance of Moisture
While temperature is crucial, humidity is its partner in crime. A dry surface forms a tough “skin” on the dough. This skin restricts expansion and can cause uneven rising or cracks during baking. In a proofing oven, the enclosed space helps retain moisture, especially if the dough is properly covered. Some advanced ovens even have a “proof with steam” option, but for most, the simple act of covering the dough pan or bowl is sufficient.
Two Stages of Proofing
It’s helpful to distinguish between two proofing stages:
- Bulk Fermentation (First Rise): This is the initial rise after mixing and kneading, where the dough sits in a large, relaxed mass. While you *can* use the oven’s proof setting for this, many bakers prefer a cooler, longer bulk ferment (in the fridge overnight) for more flavor development. The oven proof setting is most valuable for the final rise.
- Final Proof (Second Rise): This is the rise that happens after the dough has been shaped into loaves, rolls, or pizza bases and is placed in its final baking vessel or on a peel. This is the stage where the oven proof setting truly shines, as it prepares the dough for its moment in the hot oven. Getting this rise just right is critical for good “oven spring”—the dramatic final expansion when the dough hits the heat.
How the Proof Setting on Your Oven Actually Works
Now, let’s look under the hood. The proof setting isn’t just a low “warm” cycle. It’s a carefully engineered program.
Visual guide about How to Use the Proof Setting on My Oven
Image source: settingaid.com
Typical Temperature Range
Most oven proof settings operate between 80°F and 110°F (27°C and 43°C). This is significantly lower than the lowest bake setting (usually 170°F/77°C or higher). This low heat is sufficient to encourage yeast activity without beginning to cook the exterior of the dough. Some models allow you to adjust this within a narrow range; others have a fixed temperature. Your oven’s manual is the ultimate authority here.
How It’s Generated: Element Cycling vs. True Low Heat
Ovens achieve the proofing temperature in one of two ways:
- Bottom Element Only (Most Common): The oven uses only the lower heating element, often cycling it on and off to maintain the low temperature. Heat rises, so this creates a gentle, even warmth from below, much like a natural warm spot.
- Dedicated Low-Wattage Element: Some newer or higher-end models have a specific, low-wattage heating element designed purely for proofing, which provides even more stable and gentle heat.
It’s important to note that the proof setting typically does not engage the fan in a convection oven, as moving air can dry out the dough’s surface. Always check your manual to confirm if convection is disabled during proofing.
Finding the Setting on Your Control Panel
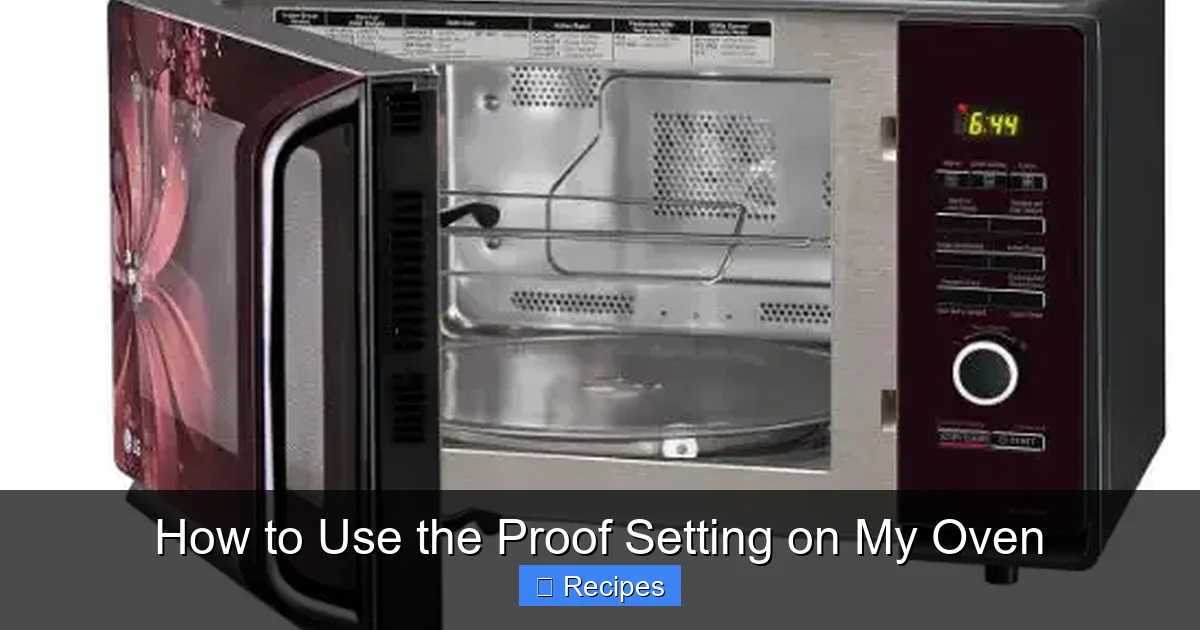
The button might be labeled clearly as “PROOF,” “PROOFING,” or “DOUGH RISE.” On some models, it’s a dedicated button. On others, you may need to select a special “Proof” mode within the oven’s cycle menu (sometimes found under “Specialty” or “Auto” settings). If you can’t find it, your oven might not have a true proof setting but may have a “Warm” or “Keep Warm” setting that operates in a similar low-temperature range (100°F-150°F/38°C-66°C). Be cautious: The “Warm” setting is often too hot for proofing and can easily kill yeast. 150°F is perilously close to the yeast death zone. If using “Warm,” you must use an independent oven thermometer to verify the actual temperature inside.
Step-by-Step: How to Use Your Oven’s Proof Setting
Alright, theory aside. Let’s get practical. Here is your foolproof, step-by-step guide to using the proof setting.

Visual guide about How to Use the Proof Setting on My Oven
Image source: kitchenseer.com
Step 1: Prepare Your Dough and Vessel
Follow your recipe through mixing, kneading, and shaping. For the final proof, you’ll place the shaped dough into its final baking vessel (a loaf pan, for example) or onto a baking sheet or pizza peel if baking free-form. Critical: The dough must be covered to trap moisture. Use:
- The lid that came with your proofing basket or loaf pan.
- A piece of plastic wrap lightly greased with oil or cooking spray.
- A damp kitchen towel, with another dry towel on top to insulate.
- A large, inverted bowl or baking dish.
Do not cover tightly with a lid that doesn’t allow for any expansion if your dough is close to the top of the pan.
Step 2: Preheat the Proofing Environment (Yes, Really!)
This is the most common mistake people make. You do not put cold dough into a cold oven and then turn the proof setting on. Just like with baking, you need to preheat the proofing chamber. Turn the oven on and select the PROOF setting. Allow it to heat for 10-15 minutes. This ensures the entire cavity, including the walls and racks, reaches a stable, uniform temperature before introducing the dough. A cold oven will take too long to come up to temp, leading to an inconsistent rise.
Step 3: Position the Dough Correctly
Place the covered dough on the center rack of the preheated proofing oven. This is usually the best spot for most even heat distribution. Avoid placing it too close to the back wall where the heating element is (usually the bottom rear), as this can create a hot spot. If your oven has multiple racks, the middle rack is your safe bet.
Step 4: Set a Timer and Observe
While the recipe will give a time estimate (e.g., “proof for 60-90 minutes”), treat it as a starting point. Set a timer for the minimum time. When it goes off, check your dough. The proofing setting creates ideal conditions, so the dough will likely rise faster than on the counter. Do not simply wait for the timer to go off; use your eyes and fingers.
Step 5: Check for Doneness – The Poke Test
This is the baker’s most trusted tool. Lightly flour your fingertip and gently press about 1/2 inch into the side of the dough.
- If the indentation springs back quickly and completely: The dough needs more time. The gluten is still tight and full of energy.
- If the indentation springs back slowly, leaving a small dent: Perfect! The dough is proofed and ready for the oven. This is the sweet spot.
- If the indentation does not spring back at all, or the dough deflates: You have over-proofed. The gluten structure has weakened. You can sometimes rescue it by carefully reshaping and giving it a short, second proof, but the final loaf may be flatter and denser.
For free-form loaves like boules, you can also gently turn the dough over onto your hand to check the bottom. It should look pillowy and full of bubbles, and feel airy and light.
Step 6: Bake Immediately
Once proofed, remove the dough from the proofing oven immediately. If your recipe calls for scoring (slashing) the top, do this quickly. Then, get it into your preheated *baking* oven (a completely different, high temperature) as fast as possible. The gas bubbles are primed to expand dramatically with the initial burst of oven heat (oven spring). Any delay on the counter will cause precious gas to escape, limiting that spring.
Practical Examples: Proofing Times for Common Doughs
Times vary wildly based on dough composition, hydration, and temperature. Here are realistic expectations when using a 100°F (38°C) proof setting. Always rely on the poke test first.
Visual guide about How to Use the Proof Setting on My Oven
Image source: thekitchenix.com
Rich, Sweet Doughs (Cinnamon Rolls, Brioche)
These doughs contain eggs, butter, and sugar, which can slow yeast activity slightly. They also tend to be softer and more delicate.
- Typical Proof Time in Oven: 45-75 minutes.
- Visual Cues: The dough should look very puffy and soft. For rolls in a pan, they should be gently touching or almost touching each other. For a brioche loaf, it should rise about 1.5 times its original size and be very jiggly.
Standard Lean Doughs (Sandwich Bread, Dinner Rolls)
These are flour, water, salt, and yeast doughs. They are more forgiving and can proof more vigorously.
- Typical Proof Time in Oven: 30-60 minutes.
- Visual Cues: The loaf in a pan should crown about 1 inch above the rim of the pan. Rolls should be nicely rounded and touching. The dough will feel light for its size.
High-Hydration, Artisan Doughs (Sourdough, Ciabatta)
These wet, slack doughs are tricky. They lack structure and can spread more than they rise. The proofing oven is perfect for them as it provides stable warmth without drafts that can cause uneven rising.
- Typical Proof Time in Oven: 40-60 minutes for final proof after shaping. (Note: Many sourdough recipes call for a long, cold bulk fermentation in the fridge, followed by a 1-2 hour warm final proof.)
- Visual Cues: The dough should look fuller and slightly more rounded. It may not double in size due to the high hydration. The “poke test” is absolutely essential here. The dough should feel like a water balloon—tense but yielding.
Pizza Dough
Pizza dough benefits greatly from a warm proof to become extensible and airy.
- Typical Proof Time in Oven: 45-90 minutes for balls, depending on size and hydration.
- Visual Cues: The dough balls should be very puffy and soft to the touch. When you gently press the side, it should leave a slow, deep indentation. They should be easy to stretch without tearing.
Troubleshooting: Common Problems and Solutions
Even with the proof setting, things can go awry. Here’s how to diagnose and fix the most common issues.
“My dough is rising too fast / slow.”
First, verify your oven’s actual temperature with an independent oven thermometer. The built-in setting can be inaccurate. If it’s truly rising too fast (finishing in half the time), your oven may be running hot. Reduce the proofing time or, if possible, lower the setting. If it’s too slow, your oven may be running cool, or your yeast may be old. Ensure your yeast is fresh and active (proof it in warm water with a pinch of sugar first if unsure).
“My dough is developing a dry skin.”
This means your covering is insufficient. Switch from a towel to a tight layer of plastic wrap or a proper lid. You can also place a small pan of boiling water on the bottom rack of the cold oven before adding the dough and closing the door, to inject steam. (Remove the pan before baking).
“My dough over-proofed and collapsed.”
This means it sat too long at too warm a temperature. The gluten network fatigued and couldn’t hold the gas. For the future, check earlier and use the poke test religiously. To rescue a slightly over-proofed dough: gently reshape it into a loaf or balls, give it a quick, gentle knead to redevelop some gluten, and let it proof again for about half the original time. It will likely produce a denser, more rustic loaf.
“The oven proof setting seems to cook the bottom of my dough.”
This indicates a hot spot from the bottom element. Do not place the dough directly on the oven floor or on a dark metal pan. Use a light-colored or insulated baking sheet, or place a second empty baking sheet on the rack below your dough to act as a heat diffuser. Also, ensure you are using the proof setting and not a low bake or warm setting.
What If My Oven Doesn’t Have a Proof Setting?
Don’t worry! You can create an excellent DIY proofing box with your oven’s off state.
The Oven Light Method (Most Reliable)
Turn the oven light on (the small bulb inside) and close the door. The incandescent bulb (not LED) generates a small amount of heat that can raise the oven temperature to a perfect proofing range (80-90°F/27-32°C). This is often more stable than the “Warm” setting. Place a bowl of steaming hot water on the bottom rack to add humidity. Monitor with an oven thermometer.
The Microwave Method
Heat a cup of water in the microwave on high for 2 minutes. Turn the microwave off, place the cup of hot water in the back corner, and quickly add your covered dough to the center. Close the door. The microwave’s insulated box traps the heat and steam from the water, creating a perfect mini-proofing cabinet. Reheat the water every 45-60 minutes as needed.
The Cooler / Insulated Box Method
Place your covered dough in a cardboard box. Put a heating pad set to low underneath the box, or place a hot water bottle or heating pad inside the box (wrapped in a towel so it doesn’t touch the dough). Insulate the box with towels. This is great for overnight bulk fermentation in a cool house.
Conclusion: Embrace the Proof
The proof setting on your oven is more than just a button; it’s a gateway to consistent, professional-quality baking. It takes the biggest environmental variable out of the equation, allowing you to focus on the craft of mixing, kneading, and shaping. By understanding that it’s a tool for gentle, moist warmth, and by pairing it with the timeless baker’s skill of observation—the gentle poke, the watchful eye—you eliminate guesswork and frustration. You’ll open your oven to find dough that has risen perfectly, holding its promise of a light, airy crumb and a beautifully expanded crust. So next time a recipe calls for proofing, don’t just set it on the counter and hope for the best. Preheat that proofing oven, cover your dough, and step away with confidence. Your best loaf yet is quietly, perfectly rising.
Frequently Asked Questions
Can I use the proof setting for the first rise (bulk fermentation)?
Yes, you can. It will speed up the first rise significantly. However, many bakers prefer a slower, cooler first rise (often in the refrigerator) because it develops more complex flavors. The oven proof setting is best reserved for the final, shaped rise where you want controlled, predictable expansion.
What if my oven’s proof setting runs too hot and kills the yeast?
Always use an independent oven thermometer to verify the actual temperature inside the oven cavity. If it consistently reads above 115°F (46°C), do not use the proof setting. Instead, use the oven light method or the warm setting at the lowest possible temperature, monitored closely with your thermometer.
Do I need to preheat the oven for proofing?
Absolutely, yes. Preheating for 10-15 minutes ensures the entire oven space reaches a stable, uniform temperature. Putting cold dough into a cold oven means the dough will sit in a cool environment for too long before the oven warms up, leading to an inconsistent and potentially longer proof.
Can I proof dough directly on the oven rack?
You can, but only if the dough is in a covered baking dish or pan. Never place uncovered dough directly on the rack, as the heat from below can cook the bottom. For free-form loaves, use a piece of parchment paper on a baking sheet, cover the entire sheet with a large inverted bowl or a large plastic bag.
My oven doesn’t have a proof button. Is the “Warm” setting safe to use?
Proceed with extreme caution. The “Warm” or “Keep Warm” setting is designed for holding cooked food at serving temperature, typically between 140°F and 200°F (60°C and 93°C). This is far too hot for live yeast and will likely kill it or cause over-proofing. Only use it if you have an oven thermometer confirming it stays below 110°F (43°C). The oven light method is a safer, more reliable alternative.
How long can I leave dough in the proofing oven?
Once the dough is fully proofed, you should bake it immediately. If you are not ready to bake, remove the dough from the warm oven and place it in the refrigerator to slow down any further activity. Leaving a fully proofed dough in the warm oven will lead to over-proofing and collapse within 30-60 minutes.
Pingback: Yeast Proof Time - kitchenandhouseware.com