Yellowed granite is often caused by surface stains, improper cleaners, or a damaged sealant, not the stone itself. You can safely restore its brightness using pH-neutral cleaners, gentle poultices, or specialized granite polishing powders. Never use vinegar, bleach, or abrasive scrubbers, as they will permanently damage the seal and etch the surface. For severe or widespread discoloration, consulting a professional stone restoration specialist is the safest and most effective solution.
Oh, that dreaded yellow tinge. You spent a small fortune on beautiful granite countertops, lovingly chosen to be the gleaming heart of your kitchen. But over the years, a stubborn, uneven yellow hue has crept in, making the surface look dull, aged, and just plain dirty. Before you despair and start browsing for expensive replacements, take a deep breath. That yellowing is almost certainly not the granite itself giving up—it’s almost always a surface-level problem you can fix. Welcome to your complete, no-nonsense guide on how to whiten a granite countertop that has yellowed. We’ll walk through exactly why this happens, the safe and effective methods to bring back that original sparkle, and the critical mistakes to avoid that could turn a fixable problem into a costly disaster.
Think of your granite countertop like a beautiful, sealed piece of art. The stone is incredibly durable, but its shine and color are protected by a thin, invisible shield—the sealant. When that shield gets compromised or coated with residues, the stone underneath can look discolored. Our goal is to clean and restore that shield, not attack the stone. We’ll use a methodical approach: gentle cleaning first, targeted stain removal if needed, and finally, protection for the future. Let’s get started on bringing your countertops back to life.
Key Takeaways
- Identify the Cause: Yellowing is usually from surface stains (oil, wine), residue from harsh cleaners, or a worn sealant, not the granite degrading.
- Use Proper Cleaners: Always use a pH-neutral, non-abrasive cleaner specifically designed for natural stone. Avoid all acids (vinegar, lemon) and alkalis (bleach, ammonia).
- Deep Cleaning with Poultice: For set-in stains, a DIY poultice using baking soda and hydrogen peroxide can draw out discoloration without harming the stone.
- Avoid DIY Hacks: Steer clear of popular internet tricks involving vinegar, baking soda pastes (without peroxide), or scrubbing pads, as they cause irreversible damage.
- Resealing is Crucial: After deep cleaning, reseal the granite with a high-quality penetrating sealer to protect against future stains and yellowing.
- Know When to Call a Pro: If yellowing is uniform and deep, or if you’re unsure, a professional can safely grind, hone, and polish the surface for a like-new finish.
📑 Table of Contents
- Understanding the Enemy: Why Does Granite Turn Yellow?
- The Golden Rules: What You MUST NEVER Do
- The Safe & Effective Whitening Arsenal: Your Step-by-Step Toolkit
- The Restoration Protocol: A Phased Approach
- The Non-Negotiable Final Step: Resealing Your Granite
- Prevention: Keeping the Yellow at Bay Forever
- When to Call the Professionals: The Line You Should Not Cross
- Conclusion: Your Granite’s Second Act
Understanding the Enemy: Why Does Granite Turn Yellow?
You can’t effectively solve a problem without understanding its root cause. Yellowing in granite isn’t a mysterious disease; it’s usually one of a few very specific (and fixable) issues. Pinpointing which one is affecting your countertops is the first and most important step. Using the wrong treatment for the wrong cause can make things worse.
The Usual Suspect #1: Stubborn Surface Stains and Buildup
This is the most common culprit. Granite is porous, especially if its seal has worn down over time. Everyday kitchen villains like cooking oils, grease splatters, wine, coffee, tea, and even certain foods can seep into these microscopic pores and stain the stone from within. These organic stains often manifest as yellow or brownish patches. Additionally, a layer of accumulated grease, soap scum, and general grime can create a dull, yellow-ish film over the entire surface, making the whole countertop look discolored even if the stone itself is fine.
The Usual Suspect #2: The Wrong Cleaners Have Left Their Mark
This is a self-inflicted wound many homeowners make. Because granite is stone, people mistakenly treat it like a bathroom tile or a concrete floor. They reach for vinegar (an acid) to cut grease or bleach (a strong alkali) to disinfect. Both are absolute enemies of granite sealant and can even etch the calcium in some granites. Over time, these harsh chemicals degrade the protective sealant layer. Once that seal is compromised, the stone is left vulnerable. More insidiously, some all-purpose cleaners leave behind a dulling, waxy residue that builds up and creates a yellowed, lackluster appearance. You’re not seeing the granite; you’re seeing the ghost of bad cleaning products past.
The Usual Suspect #3: A Worn-Out or Improper Sealant
Granite sealant isn’t a permanent, impenetrable barrier. It’s a penetrative coating that slowly wears off due to heat, acidic foods, and regular cleaning. When it fails, the stone’s natural pigments—which can include beige, yellow, or gold tones—can become more pronounced or the stone can absorb stains more readily, leading to uniform yellowing. Sometimes, an inferior or wax-based sealant applied years ago can itself yellow with age, casting that tint over your beautiful stone.
The Usual Suspect #4: Iron Oxide or Mineral Stains
Less common but possible, especially if your granite has a lot of rust-colored veining, is the presence of iron-bearing minerals within the stone. Exposure to water or oxygen can cause these minerals to oxidize, creating rust-like yellow or brown stains that look like they’re coming from deep within the slab. This is a chemical reaction within the stone itself and is trickier to treat.
So, how do you diagnose? Start with the water test. Sprinkle a few drops of water on your countertop in an inconspicuous area. If the water darkens the stone after a minute or two, your seal is likely compromised or gone. That means stains have penetrated and you’ll need a deeper cleaning approach. If the water beads up nicely, your seal is probably intact, and you’re likely dealing with a surface film from grease or improper cleaners—a much easier fix.
The Golden Rules: What You MUST NEVER Do
Before we get to the solutions, a critical safety briefing. There are countless “life hack” videos and blog posts touting kitchen staples as granite saviors. Following this advice will almost certainly destroy your countertops. Memorize these prohibitions.
Visual guide about How to Whiten Granite Countertop That Has Yellowed
Image source: thekitchenix.com
Forbidden Hack #1: Vinegar and Baking Soda (The Volcanic Disaster)
The classic science experiment volcano is a granite’s worst nightmare. Vinegar is an acid that etches and dulls the sealant and can even etch the stone’s surface if it’s calcareous (contains calcium). Baking soda is alkaline and mildly abrasive. When you mix them, you create a fizzy, gritty paste that feels like it’s “working,” but you’re simultaneously attacking your seal with acid and sanding your stone with a mild abrasive. The result? A permanently dull, scratched, and more porous surface that will stain even more easily in the future. Never combine these on granite.
Forbidden Hack #2: Straight Bleach or Ammonia
These are powerful disinfectants, but they are too harsh for natural stone. They will strip away any remaining sealant rapidly, leaving the granite naked and vulnerable. They can also cause chemical reactions that lead to discoloration or etching. The fumes are dangerous in an enclosed kitchen, and the long-term damage is irreversible.
Forbidden Hack #3: Abrasive Scrubbers and powders
Steel wool, SOS pads, Comet, Ajax, or even heavy-duty scrub sponges (like the green side of a dual-sided sponge) will scratch the polished surface of your granite. These scratches are not removable without professional honing and will create a matte, dull finish that traps dirt. Once scratched, the damage is permanent.
Forbidden Hack #4: All-Purpose Cleaners and Window Sprays
Products like 409, Windex, or generic kitchen cleaners often contain acids, alkalis, or waxes. The acids and alkalis degrade the seal. The waxes leave a buildup that attracts dirt and creates that yellow film. Even “stone-safe” labels on some all-purpose cleaners can be misleading. Always use a dedicated stone cleaner.
The mantra is: Gentle, pH-neutral, and non-abrasive. Your granite is a luxury surface; treat it with the corresponding care.
The Safe & Effective Whitening Arsenal: Your Step-by-Step Toolkit
Now for the good stuff. Here’s exactly what you need to safely whiten your yellowed granite. Gather these supplies before you begin. This is a systematic process—start gentle and escalate only if necessary.

Visual guide about How to Whiten Granite Countertop That Has Yellowed
Image source: thekitchenix.com
- High-Quality pH-Neutral Granite Cleaner: This is your daily driver. Brands like Stone Care International, Granite Gold, or Weiman Granite Cleaner are reliable. They clean without degrading sealant.
- Isopropyl Alcohol (Rubbing Alcohol, 70%): A fantastic, inexpensive disinfectant and degreaser that is safe for sealed stone. Dilute 1 part alcohol to 1 part distilled water.
- Hydrogen Peroxide (3% Solution): The safe bleaching agent for organic stains. It’s an oxidizer, not a chlorine bleach, making it safe for stone when used correctly.
- Baking Soda (Pure, not baking powder): A mild, gentle abrasive and absorbent. When mixed with peroxide, it forms an effective poultice.
- Plastic Wrap and Painter’s Tape: For securing poultices.
- Soft Microfiber Cloths: Several clean ones. No terry cloth, which can be abrasive.
- Non-Scratch Nylon Scrub Pad: Like the blue or yellow non-scratch pads, for stubborn film only, used with minimal pressure.
- Plastic or Wooden Spatula: For applying and removing poultices.
- High-Quality Penetrating Granite Sealer: For the final step. Look for brands like Miracle Sealants, Aqua Mix, or the same brand as your cleaner. Avoid topical/wax sealers.
- Rubber Gloves and Eye Protection: For safety, especially when using peroxide.
The Restoration Protocol: A Phased Approach
Do not jump to the strongest method. Start with Phase 1. If the yellowing persists, move to Phase 2. This methodical approach minimizes risk and effort.
Visual guide about How to Whiten Granite Countertop That Has Yellowed
Image source: thekitchenix.com
Phase 1: The Deep Surface Clean (For Dull Film & Light Stains)
This targets the most common issue: a greasy, waxy film from improper cleaners or cooking residue. You’re essentially giving your countertops a detox.
- Clear the Deck: Remove everything from the countertops. Wipe down with a dry microfiber cloth to remove loose debris.
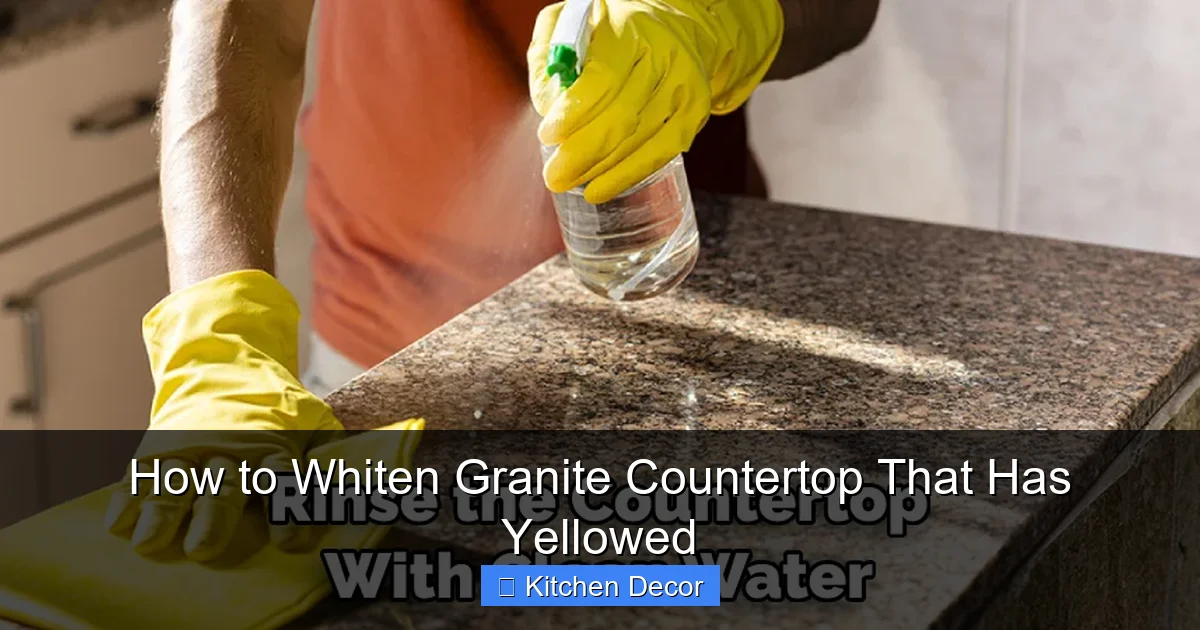
- First Pass: Spray your pH-neutral granite cleaner liberally over a 2×2 foot section. Let it sit for 3-5 minutes to penetrate and break down grease. Do not let it dry.
- Agitate Gently: Using a clean microfiber cloth, wipe in circular motions. You should feel the grease lifting. For tougher film, use the non-scratch nylon pad with very light pressure, always moving with the grain of the stone if visible.
- Rinse Thoroughly: This is crucial. Dampen a *clean* microfiber cloth with plain distilled water (minerals in tap water can cause spotting) and wipe the area repeatedly to remove all cleaner residue. Follow with a dry microfiber cloth to buff.
- Assess: Move to the next section. Once the entire countertop is done, step back and look at it in good light (daylight is best). Has the yellow film reduced? Is the stone brighter? If yes, repeat this process once more. Often, a second deep clean with a fresh batch of cleaner does the trick. If significant yellowing remains, proceed to Phase 2.
Phase 2: The Targeted Stain Poultice (For Set-In Organic Stains)
This is your go-to for localized yellow or brown spots from oil, wine, coffee, etc. The poultice is a paste that “draws” the stain out of the stone through capillary action and chemical reaction.
- Identify & Isolate: Mark the stained area with a piece of painter’s tape.
- Mix the Poultice: In a small bowl, mix baking soda and 3% hydrogen peroxide until you achieve a thick, peanut butter-like consistency. The peroxide activates the baking soda’s drawing power. Work in small batches, as it can dry out.
- Apply: Using a plastic spatula, spread a generous layer of the poultice over the stained area, covering it completely. Press it down gently.
- Cover & Seal: Place a piece of plastic wrap over the poultice. Use painter’s tape to seal the edges of the plastic to the countertop. This traps moisture and prevents the poultice from drying too quickly.
- Wait: Let it sit for 24-48 hours. You’ll see it dry and harden. Do not let it sit longer than 48 hours.
- Remove & Rinse: Carefully peel off the plastic. Use the plastic spatula to scrape off the hardened poultice. Wipe the area with a damp microfiber cloth, then rinse thoroughly with a water-dampened cloth. Buff dry.
- Repeat if Necessary: Some deep stains require 2-3 applications. Wait a day between applications to see results. If after 2-3 tries the stain is lighter but not gone, it may be a mineral stain or very deep, requiring a pro.
Phase 3: The Granite Polishing Powder (For Overall Dullness)
If the entire surface looks uniformly yellowed and dull, even after deep cleaning, the sealant may be degraded or the stone’s surface may have micro-scratches. A fine granite polishing powder can restore a micro-sheen. Use this sparingly and as a last resort before sealing.
- Clean First: Ensure the countertop is impeccably clean and dry from Phase 1.
- Apply Powder: Sprinkle a small amount of professional-grade granite polishing powder (like Stone Tech Revitalizer or similar) onto a 2×2 foot section.
- Buff with Machine: For best results, use a variable-speed orbital buffer with a white polishing pad. Work the powder into the surface at a low speed (around 1500 RPM) for 1-2 minutes per section. You’ll see a slurry form that then dries to a haze.
- Remove Haze: Wipe away the dried haze with a clean, dry microfiber cloth. Buff to a shine. Move systematically across the countertop.
- Clean Again: After polishing, clean the entire surface again with your pH-neutral cleaner to remove all powder residue before sealing.
Note: Hand-buffing with a cloth is possible but requires immense effort and rarely achieves the same even result as a machine. For a one-time job, consider renting a buffer from a home center.
The Non-Negotiable Final Step: Resealing Your Granite
You’ve done the hard work. Now you must protect your investment. Resealing is what makes all your cleaning efforts last. A proper seal fills the pores, making the stone hydrophobic (water-repellant) and resistant to stains.
How to Properly Reseal Granite
- Prep is Everything: The countertop must be perfectly clean and completely dry. Any residue or moisture will trap contaminants under the seal. Let it air dry for several hours after your final clean.
- Choose the Right Sealer: Use a penetrating/impenetrating sealer (silane/siloxane based). These go into the stone, not on top. Avoid topical sealers or “enhancers” that can yellow over time and need frequent reapplication.
- Apply: Following the manufacturer’s instructions precisely, spray or brush the sealer onto a small, manageable section (e.g., 3×3 feet). Ensure full, even coverage without puddling.
- Let it Soak: Allow the sealer to penetrate for the time specified (usually 5-15 minutes). You should see it get absorbed. Do not let it dry on the surface.
- Wipe Off Excess: Using a clean, dry microfiber cloth, buff the area thoroughly to remove all excess sealer from the surface. This prevents hazing.
- Cure: Let the sealed area cure undisturbed for at least 24 hours (72 is better) before placing items on it or getting it wet. Do not use the countertop during this time.
- Test Your Seal: After curing, perform the water test again. The water should bead up strongly for 30+ minutes. This is your seal working.
How often should you reseal? It depends on use, but generally every 1-3 years. The water test is your best guide. When water stops beading and starts to darken the stone, it’s time.
Prevention: Keeping the Yellow at Bay Forever
An ounce of prevention is worth a pound of poultice. Integrate these habits into your kitchen routine to keep your granite bright for decades.
Daily & Weekly Habits
- Wipe spills immediately. Especially oils, wines, and acidic juices.
- Use cutting boards and trivets always. Never cut directly on granite (it can damage your knives, not the stone) and always use hot pads under pans.
- Clean daily with your pH-neutral stone cleaner. This removes film before it builds up.
- Dry the surface. After cleaning or wiping a spill, dry with a microfiber cloth. This prevents water spots and mineral deposits.
What to Avoid (Reiterating for Emphasis)
- No vinegar, lemon juice, or citrus cleaners.
- No bleach, ammonia, or window cleaners.
- No abrasive pads or powders.
- No “all-purpose” cleaners unless explicitly labeled safe for natural stone.
- No sitting dishes with wet bottoms. Use coasters.
Reseal on a Schedule
Don’t wait for stains to appear. Mark your calendar. Test the seal annually with the water drop test. Reseal proactively based on that test, not after damage is done.
When to Call the Professionals: The Line You Should Not Cross
DIY is great, but there are times when it’s time to phone a friend—a professional stone restoration technician. Here’s when:
- Uniform, Deep Yellowing: If the entire countertop is evenly yellow and the water test shows the seal is long gone, the discoloration may be deep within the stone. Professionals can use diamond abrasives to grind and hone a microscopic layer off the surface, removing the stained layer entirely, then polish and seal it. This is not a DIY job.
- Etching: If you’ve used vinegar or another acid and see a dull, light spot that feels slightly rough to the touch, that’s etching. This is physical damage to the stone’s finish. Only professional honing and polishing can remove it.
- You’re Unsure of the Cause: If you can’t identify if it’s a stain, film, or mineral deposit, a pro can diagnose correctly.
- Large, Old Stains: Stains that have been there for years may be beyond the reach of a poultice.
- The Countertop is Seamless or Has Complex Edges: Professionals have the tools and experience to work on intricate profiles without causing damage.
A professional restoration can often make a 15-year-old countertop look virtually new again for a fraction of the cost of replacement. Get multiple quotes from reputable, insured companies that specialize in natural stone.
Conclusion: Your Granite’s Second Act
Seeing your once-bright granite countertop turn yellow is disheartening, but it’s rarely a death sentence for the stone. It’s a cry for help from its compromised sealant and a buildup of everyday grime. By arming yourself with the right knowledge—understanding the cause, avoiding destructive DIY hacks, and following the phased cleaning and sealing protocol—you can systematically undo that damage. Start with the gentle deep clean, escalate to a targeted poultice for stubborn spots, and finish with a professional-grade reseal. Remember, the key to a permanently bright countertop is not just the occasional rescue mission, but the consistent, gentle care that prevents the yellowing from ever gaining a foothold. Your granite has decades of beauty left in it. With this guide, you know exactly how to unlock it.
Frequently Asked Questions
Can I use vinegar to clean and whiten my yellowed granite?
No, absolutely not. Vinegar is an acid that will etch the granite’s surface, dull its finish, and degrade the sealant, making it more susceptible to future staining and yellowing. Always use a pH-neutral cleaner designed for natural stone.
Is baking soda safe to use on my granite countertop?
Baking soda is safe for granite only when used correctly in a poultice with hydrogen peroxide. Never use a dry baking soda paste or combine it with vinegar, as the gritty texture and alkaline nature can scratch the surface if used improperly for scrubbing.
How often should I reseal my granite countertop to prevent yellowing?
There is no set timeline. Perform the water test: place a few drops of water on the countertop. If it beads for 30+ minutes, the seal is good. If it darkens the stone within a few minutes, it’s time to reseal. Typically, this is every 1-3 years depending on use.
Can I use a steam cleaner on my yellowed granite?
No. The extreme heat and moisture from a steam cleaner can force water into the stone, potentially causing mineral deposits (which look like white spots) and can also degrade the sealant over time, exacerbating the problem.
What’s the difference between a stone sealer and a stone enhancer?
A penetrating sealer goes into the pores of the stone to protect against stains without changing its appearance. An enhancer (often topical or wax-based) sits on the surface, darkens the stone’s color, and can yellow over time, which is often the cause of yellowing. For whitening, you need a sealer, not an enhancer.
If my whole countertop is uniformly yellow, is it ruined?
Almost certainly not. Uniform yellowing usually indicates a worn sealant and/or a surface film. A thorough deep clean followed by a professional-grade reseal can often restore the original color. If the yellow persists after this, it may require professional grinding and polishing, which removes a microscopic layer of stone to reveal fresh, unyellowed surface underneath.