Venting a kitchen sink under a window presents a unique challenge due to the window’s structural framing and potential code conflicts. It requires careful planning to route the vent pipe horizontally above the window or use alternative methods like an air admittance valve. Proper venting is non-negotiable for preventing sink gurgling, slow drainage, and trap siphoning, ensuring your kitchen plumbing functions smoothly and meets code.
Key Takeaways
- Venting is Essential: A proper vent prevents negative pressure, allowing water to drain freely and keeping sewer gases from entering your home.
- Windows Create a Major Obstacle: The window header, framing, and glass block the traditional vertical vent path, forcing creative horizontal routing.
- Code Compliance is Mandatory: All venting must adhere to the International Plumbing Code (IPC) or Uniform Plumbing Code (UPC), specifying pipe size, slope, and connection points.
- Horizontal Runs Are the Primary Solution: Running the vent pipe horizontally from the trap, up and over the window header, and then vertically is the most common compliant method.
- Air Admittance Valves (AAVs) Are an Alternative: In some jurisdictions, an AAV installed locally under the sink can solve the problem, but local codes must permit their use.
- Precision Cutting and Support are Critical: Any hole through the window header must be structurally sound, and all horizontal vent pipes must be supported and sloped correctly.
- Know When to Call a Pro: If you’re unsure about structural elements, local codes, or complex routing, consulting a licensed plumber is a wise investment.
📑 Table of Contents
- Why Venting Your Kitchen Sink is Non-Negotiable
- Understanding the Rules: Plumbing Codes and Venting Principles
- The Primary Solution: The Horizontal “Over-the-Top” Vent Run
- Alternative Solution: The Air Admittance Valve (AAV)
- Common Pitfalls and How to Avoid Them
- When to Absolutely Call a Licensed Plumber
- Conclusion: A Vent Well-Vented is a Home Well-Lived
Why Venting Your Kitchen Sink is Non-Negotiable
Let’s start with the absolute basics. That gurgling sound you sometimes hear when your kitchen sink drains? The slow, gurgling, glug-glug drainage? That’s often a cry for help from your plumbing system, specifically from a lack of proper venting. Every plumbing fixture in your home—sinks, toilets, showers—needs a vent. Think of it as the plumbing system’s breathing apparatus.
The vent pipe serves two critical jobs. First, it lets air into the drain lines. When water flows down the drain, it pushes air ahead of it. Without a vent, that air has to bubble back up through the water in the trap (that U-shaped pipe under your sink), causing the familiar gurgle. Second, and more importantly, the vent provides a safe escape route for sewer gases. These gases, which include methane and hydrogen sulfide (the rotten egg smell), are not just unpleasant; they can be hazardous. The water in your trap acts as a seal, blocking these gases. A proper vent ensures this seal isn’t sucked dry by negative pressure, a phenomenon called “siphoning.”
The Window Problem: A Structural Roadblock
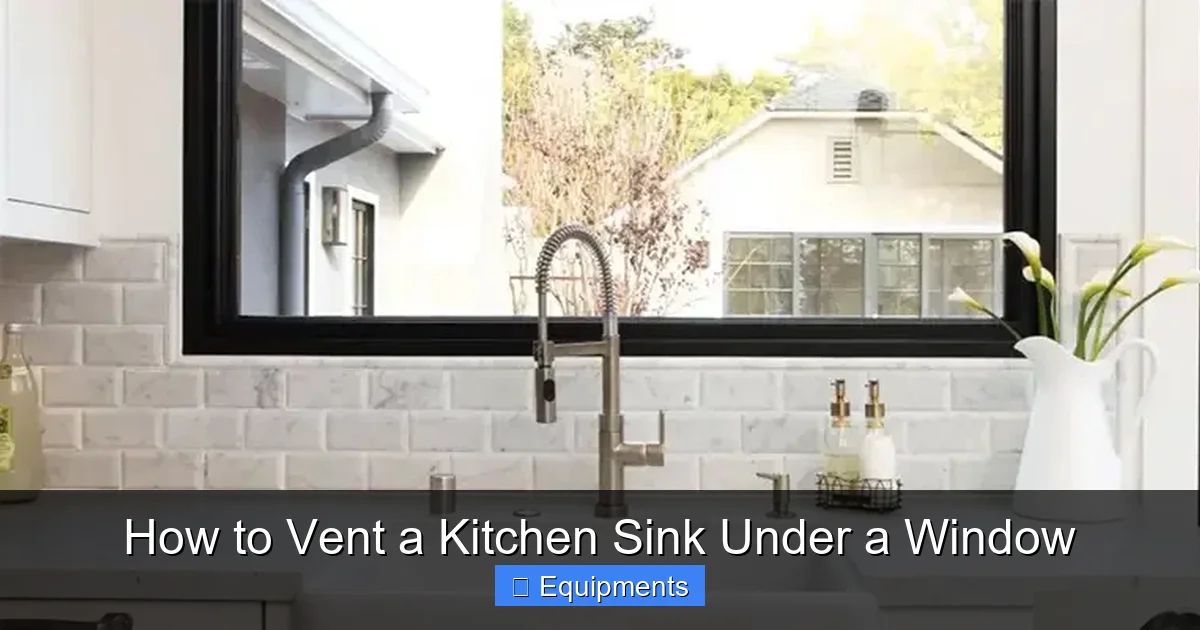
In a perfect world, the vent for your kitchen sink would be a simple, short vertical pipe that goes straight up through the roof or connects to a main stack. But in many homes, especially those with kitchens designed around a nice window over the counter, that perfect vertical path is blocked by the window itself. You have a window header (the horizontal beam above the window), king studs, and the window frame all standing in the way. You can’t just drill a hole through a load-bearing header. So, what’s a DIYer or homeowner to do? This is where the challenge—and the creativity—of how to vent a kitchen sink under a window truly begins.
Understanding the Rules: Plumbing Codes and Venting Principles
Before we talk solutions, we must talk rules. You can’t just run a pipe any old way. Plumbing codes exist for health, safety, and to ensure systems work reliably for decades. The two main codes in the U.S. are the International Plumbing Code (IPC) and the Uniform Plumbing Code (UPC). While they have differences, their core venting principles are similar.
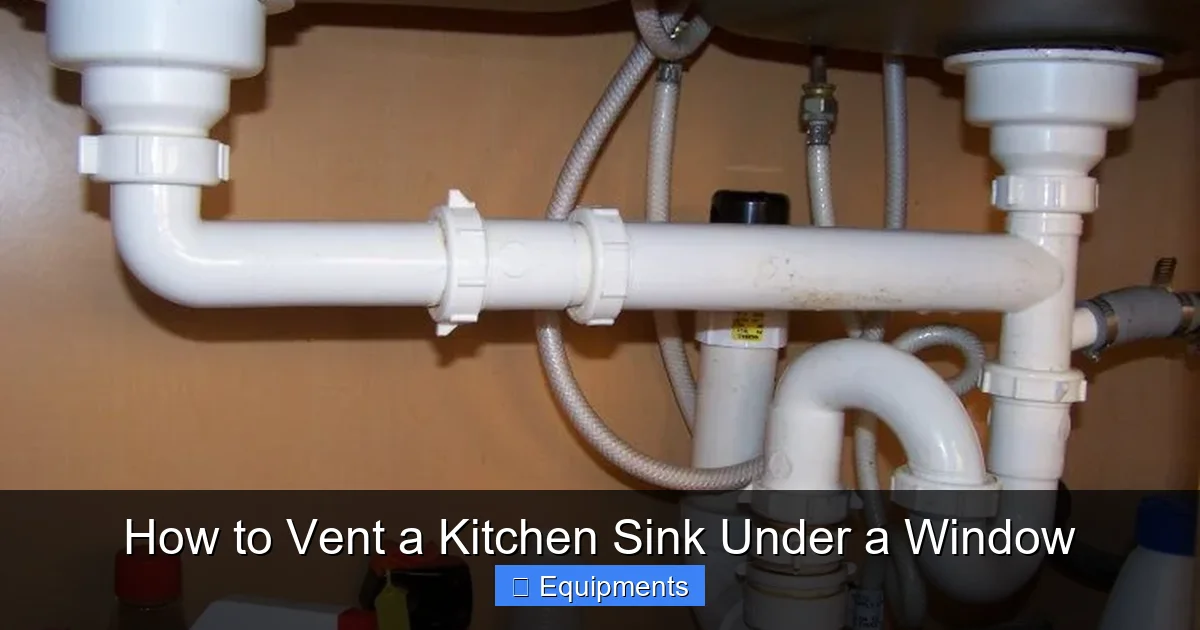
Visual guide about How to Vent a Kitchen Sink Under a Window
Image source: askmehelpdesk.com
Key Code Requirements You Must Know
First, pipe size matters. For a standard kitchen sink, the minimum drain pipe is 1 ½ inches, and the minimum vent pipe is 1 ¼ inches (often 1 ½ inches is used for simplicity and to match the drain). Second, the vent must connect to the drain line within a certain distance from the trap, known as the “trap seal.” This distance is based on the pipe’s diameter. For a 1 ½-inch drain, the vent must connect within 5 feet of the trap under the IPC. This is to ensure the vent is effective at protecting the trap seal. Third, and crucial for our window problem, horizontal vent runs are allowed but have strict rules. They must be supported securely, and they must have a continuous slope back toward the drain (toward the fixture) of at least 1/4 inch per foot. This “fall” ensures any condensate or minor debris flows back down to the drain and doesn’t pool in the vent pipe.
The Primary Solution: The Horizontal “Over-the-Top” Vent Run
This is the classic, most common, and often most code-compliant method for solving the window venting dilemma. The goal is to run the vent horizontally from the sink’s drain line, go up and over the window header, and then turn it vertically to meet the main vent stack or go through the roof. It sounds simple, but it requires precision.
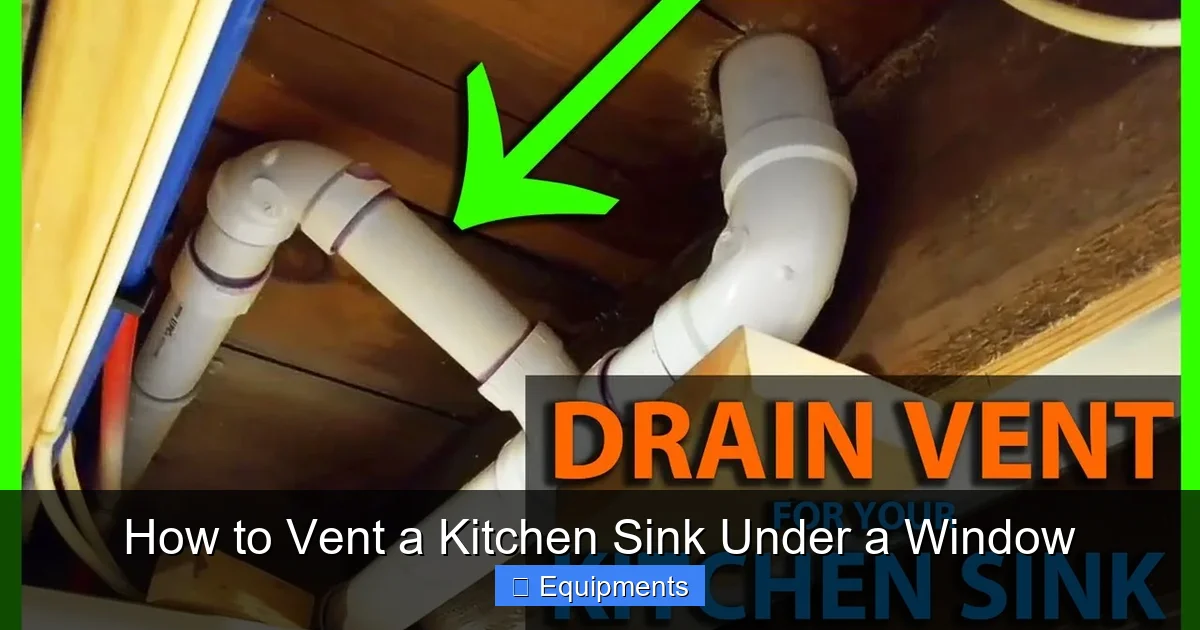
Visual guide about How to Vent a Kitchen Sink Under a Window
Image source: i.ytimg.com
Step-by-Step Breakdown of the Over-the-Top Method
Step 1: Locate and Plan Your Route. From the sink drain’s tailpiece (the straight pipe coming down from the sink), you’ll install a P-trap. The vent connection must be made on the drain line *after* the P-trap, at least 6 inches (IPC) from the trap weir (the top of the U-bend). Your horizontal run will start here. You need to map a clear path from this point, horizontally toward the window, then up, over, and down the other side. You’ll need to locate the exact position of the window header and any framing members. A stud finder is your best friend here.
Step 2: Drill Through the Header (The Critical Cut). This is the scariest part. The header above your window is a structural beam. You cannot compromise its integrity. The hole must be drilled through the center of the header, away from the edges, and must be no larger than 1/3 the depth of the header. For a typical 2×6 or 2×8 header, a 3-inch or 4-inch hole is usually permissible, but you must confirm this with a structural engineer or your local building department if you have any doubt. Never guess. Use a hole saw designed for wood and structural members. The vent pipe will pass through this hole.
Step 3: Assemble and Install the Horizontal Run. Using schedule 40 PVC (the standard white plastic pipe), assemble your horizontal section. This will be a straight piece of pipe running from the drain line connection point to the header. This horizontal section must be sloped slightly back toward the drain (1/4 inch per foot). Use pipe straps and screws to secure it to the floor joists or wall studs every 4-6 feet. The pipe should be as short and direct as possible to avoid excessive horizontal length, which can reduce venting efficiency.
Step 4: The “Over-the-Top” Turn. Where the pipe meets the header, you’ll install a 90-degree elbow (a “short radius” or “street” elbow is often used for tight spaces) to turn the pipe upward through the header hole. On the other side of the header, you’ll use another 90-degree elbow to turn the pipe back down vertically. You may need a small piece of straight pipe between the header and the downward elbow to get the correct alignment.
Step 5: The Vertical Ascent and Connection. The vertical pipe now runs down from the header on the opposite side. This vertical section must continue downward until it can connect to an existing main vent stack, or it can continue all the way up and out through the roof as a dedicated vent. The connection to the main stack must be made with a wye or a combo wye-and-1/8 bend fitting, with the vent inlet entering from the top or side, flowing in the same direction as the stack’s air movement. All vertical runs must be plumb and supported.
Alternative Solution: The Air Admittance Valve (AAV)
What if drilling through that header seems too daunting, or your local code simply won’t allow a long horizontal run? There’s a modern mechanical solution: the Air Admittance Valve, often sold under brand names like “Sure-Vent” or “Studor Vent.”
Visual guide about How to Vent a Kitchen Sink Under a Window
Image source: gofulldiy.com
How an AAV Works and When It’s Allowed
An AAV is a one-way mechanical valve installed *under the sink*, typically on the horizontal drain line between the P-trap and the sink drain. It opens under negative pressure (when water drains and creates suction) to let air into the drain line, breaking the vacuum and preventing gurgling and siphonage. It then closes under positive pressure, preventing sewer gases from escaping into your cabinet. It’s a fantastic, code-approved (in most, but not all, jurisdictions under the IPC) solution for remodels and tricky situations.
Critical Installation Rules for AAVs: It must be installed a minimum of 4 inches above the fixture’s flood level rim (the top of the sink basin). It must be accessible—you cannot bury it behind a wall or in a sealed cabinet; it needs air to work. It must be installed in a vertical position, with the air intake pointing up. It cannot be used as a substitute for a vent in a new construction main stack system, but for a single fixture like a sink, it’s often the perfect answer. You must check with your local building department. Some areas, particularly those that have adopted the UPC strictly, do not permit AAVs at all. Calling to ask “Are air admittance valves permitted for kitchen sink venting in [Your City]?” is a five-minute phone call that can save you a major redo.
Common Pitfalls and How to Avoid Them
Even with a good plan, mistakes happen. Here are the most frequent errors in how to vent a kitchen sink under a window projects and how to sidestep them.
Pitfall 1: Undersizing the Vent Pipe
Using a 1-inch pipe for a vent might seem like a cost-saving measure, but it’s a recipe for failure. An undersized vent can’t let in air fast enough, leading to the very slow drainage and gurgling you’re trying to fix. Always use at least 1 ¼-inch pipe for a sink, but 1 ½-inch is the industry standard and makes future connections easier.
Pitfall 2: Too Many 90-Degree Bends
Every 90-degree turn in a vent pipe creates resistance and restricts airflow. The goal is a smooth, laminar flow of air. Try to use two 45-degree bends instead of one 90 when possible, or use long-turn “sweep” 90-degree fittings designed for drainage lines. Keep the number of turns to an absolute minimum.
Pitfall 3: Forgetting the Slope on Horizontal Runs
People often think a vent pipe doesn’t need slope because it carries air, not water. But condensate from temperature differentials and occasional debris can accumulate. Without a slight downward slope (1/4″ per foot) back toward the drain, this moisture can pool, leading to corrosion in metal pipes or, in extreme cold, ice blockage in PVC. The slope is a code requirement for a reason.
Pitfall 4: Poor Support
PVC pipe, while light, needs support. Unsupported horizontal runs will sag over time, creating low spots that collect water and block airflow. Use proper pipe straps or hangers, securing them to studs or joists. Support vertical pipes at every floor penetration and at intervals not exceeding 10 feet.
Pitfall 5: Ignoring the “Wet Vent” Possibility
In some configurations, especially with a island sink, you might be able to use a “wet vent.” This is a single pipe that serves as both a drain for one fixture and a vent for another. For example, the drain from your sink could also act as the vent for a nearby toilet. This is a complex code calculation (based on fixture units) that can save a lot of pipe, but it must be done correctly. If you have multiple fixtures in the area, consult the code tables or a plumber to see if a wet vent is possible.
When to Absolutely Call a Licensed Plumber
There is no shame in calling a professional. Plumbing is a skilled trade for a reason. Here are the clear scenarios where DIY becomes a high-risk gamble:
- You are unsure about the header’s structural integrity. If cutting a large hole through a beam makes you nervous, get an engineer’s opinion. A compromised header can lead to sagging floors or, in worst cases, structural failure.
- Your local code prohibits your planned method. If the building department says “no” to your horizontal run plan or to AAVs, they may have a specific, code-compliant alternative you haven’t considered. A licensed plumber will know these local amendments.
- You need to run the vent through the roof. Cutting and flashing a roof penetration is a high-stakes task. Improper flashing leads to leaks that can cause catastrophic damage. This is a job for a pro with roofing experience.
- The existing plumbing is cast iron or galvanized steel. Working with old, heavy, threaded pipes requires special tools and skills. Cutting and threading these pipes correctly is not a beginner task.
- You encounter unexpected obstacles. If you start opening walls and find a maze of old pipes, wiring, or ductwork, it’s time to reassess and likely call in someone who can re-engineer the solution on the spot.
Remember, a plumbing permit is often required for this work. If you pull a permit, an inspector will eventually check your work. Having a licensed plumber do the job, or at least design and inspect it, ensures it passes inspection and, more importantly, works for 20 years without issue.
Conclusion: A Vent Well-Vented is a Home Well-Lived
Figuring out how to vent a kitchen sink under a window is a classic puzzle of residential plumbing. It forces you to balance code requirements, structural realities, and practical installation. The most reliable path is the meticulously planned horizontal run over the header, executed with precise cuts, correct slopes, and ample support. For many, the Air Admittance Valve offers a brilliant, space-saving alternative, provided your local laws allow it.
The core principle never changes: your sink’s trap must be protected. A properly vented sink drains quickly and quietly, smells fresh, and gives you peace of mind. While this project sits at the advanced end of the DIY spectrum, understanding the “why” behind the rules—airflow, pressure, gas prevention—empowers you to make the right decision, whether you pick up the tools yourself or the phone to call a trusted professional. In the end, a well-vented kitchen is a healthy, happy kitchen.
Frequently Asked Questions
Can I just use an Air Admittance Valve (AAV) and forget about running a pipe to the roof?
Possibly. An AAV is a fantastic, code-approved solution in many areas for a single fixture like a kitchen sink. However, you must first verify that your local plumbing jurisdiction (city or county building department) permits their use. Some areas still strictly require a traditional atmospheric vent that goes through the roof. A quick phone call is essential.
What if my window header is small or I can’t find a safe place to drill through it?
If the header is too small or structurally compromised to drill a proper hole, the over-the-top method is not safe. Your primary alternative is an Air Admittance Valve, if permitted. Another option might be to re-route the vent through an interior wall, going up and over the header within the wall cavity, but this involves significant drywall work and must still avoid structural members. Consulting a plumber for a custom solution is highly recommended.
How long can my horizontal vent pipe be before it becomes ineffective?
Plumbing codes don’t specify a maximum length for a horizontal vent run in isolation. Instead, they focus on the total developed length from the trap to the point where the vent connects to the main stack or the outside air. The key is maintaining the 1/4-inch-per-foot slope back toward the fixture and minimizing the number of 90-degree bends. Excessive length and too many turns increase air resistance and can reduce the vent’s effectiveness. Keep the run as short and straight as possible.
Is it okay to use the same pipe for both the drain and the vent?
Yes, this is called a “wet vent” and is a common and efficient practice when configured correctly. For example, the drain from your kitchen sink can also serve as the vent for a nearby bathroom group. However, the rules are strict and based on a “fixture unit” calculation from the plumbing code. You cannot arbitrarily decide to wet vent; the code tables must allow the specific combination of fixtures you are serving. It’s best to look up the wet venting tables in the IPC or consult a professional.
How much does it typically cost to have a professional vent a sink under a window?
Costs vary wildly by region, complexity, and whether you need roof work. For a straightforward horizontal run over the header inside the house, you might pay $300 – $700 for labor and materials. If the solution requires an AAV installation, it could be on the lower end ($200 – $500). If the vent must go through the roof with new flashing, add $500 – $1,500+ to the cost. Always get 2-3 detailed estimates from licensed plumbers.
What are the definitive signs that my sink’s vent is not working properly?
Listen and watch. The primary sign is a loud gurgling sound from the sink drain or nearby fixtures (like the dishwasher) during or after draining. Other signs include: water draining slowly or sporadically, even with no clog; the sink periodically bubbling as water goes down; and the occasional smell of sewer gas in the kitchen, especially after using the sink or when the house is depressurized (like on a windy day). If you notice any of these, your venting is likely compromised.
