Removing the light bulb cover in your Whirlpool refrigerator is a simple, safe task when done correctly. First, always unplug the refrigerator or turn off the circuit breaker to eliminate electrical risk. Most covers are held by small plastic clips or a single screw, located on the interior ceiling or side wall of the fridge. Gently pry or unscrew the cover, taking care not to break brittle plastic. Once removed, you can change the bulb or clean the cover. Reassembly is the reverse process—ensure the cover clicks or screws back securely before restoring power.
Key Takeaways
- Safety First: Always disconnect power by unplugging the fridge or switching off its dedicated circuit breaker before touching any internal components.
- Cover Types Vary: Whirlpool fridge covers use different fasteners—common types are snap-in plastic clips, a single center screw, or a twist-lock mechanism.
- Location is Key: The cover is almost always on the interior ceiling of the main compartment, but on some models, it may be on a side wall or Crisper drawer housing.
- Gentle Pressure Required: Use a flat-head screwdriver or your fingernail to gently pry at the seam. Never use excessive force to avoid cracking the plastic.
- Bulb Type Matters: Most modern Whirlpool fridges use an LED panel or a small wedge-base bulb (like an appliance bulb #40 or #60). Check your manual for the exact replacement.
- Clean Before Replacing: With the cover off, it’s a perfect time to wipe down the interior ceiling and the cover itself with a mild cleaner.
- Secure Reattachment: Ensure all clips are fully engaged or the screw is snug but not overtightened. A loose cover can rattle and eventually fall.
📑 Table of Contents
- Bright Ideas: A Friendly Guide to Removing Your Whirlpool Refrigerator’s Light Bulb Cover
- Why Would You Need to Remove the Light Bulb Cover?
- Essential Tools and Preparation: Your Pre-Removal Checklist
- Step-by-Step: How to Remove the Cover (The Three Most Common Methods)
- What to Do Once the Cover is Off: Bulb Replacement and Cleaning
- Reassembly: Putting the Light Cover Back On Securely
- Troubleshooting: What If the Cover Won’t Budge or Breaks?
- Safety and Best Practices: A Final Checklist
- Conclusion: You’ve Got This!
Bright Ideas: A Friendly Guide to Removing Your Whirlpool Refrigerator’s Light Bulb Cover
Have you ever opened your Whirlpool refrigerator door in the middle of the night, only to be greeted by a dark, shadowy interior instead of a bright, welcoming light? It’s a common, slightly frustrating little mystery of appliance ownership. Before you call for service or fumble in the dark for your snacks, you should know this: in most cases, the solution is a simple bulb replacement. And the very first step on that journey is learning how to remove that little plastic shield—the light bulb cover. It seems trivial, but if you’ve never done it before, that tiny cover can feel like a stubborn puzzle. This guide is here to change that. We’re going to walk through the entire process, from finding the cover to safely prying it off, all with the calm, clear instructions you’d get from a helpful neighbor. No special skills required, just a little patience and our step-by-step advice.
We’ll cover every common Whirlpool refrigerator design, because let’s be honest, not all fridges are built the same. Whether your cover snaps into place with invisible clips or is held by a tiny screw, we’ve got you covered. By the end of this article, you’ll not only know how to remove that cover but also understand the “why” behind each step, making you more confident and prepared for any future light-related hiccup in your kitchen. So, grab a flashlight (you might need it for a moment!), and let’s shed some light on this simple DIY task.
Why Would You Need to Remove the Light Bulb Cover?
It’s a fair question. The most obvious reason is a burned-out bulb. That’s the classic scenario. But there are other, equally valid reasons that might have you peering into the dark recesses of your fridge. Understanding these can help you confirm that removing the cover is indeed the correct first step.
Visual guide about How to Remove Light Bulb Cover in Whirlpool Refrigerator
Image source: i.ytimg.com
The Obvious: A Dead Bulb
This is the number one culprit. Refrigerator bulbs, especially older incandescent ones, have a finite life. The constant opening and closing, the cool but not freezing temperatures, and the humidity can wear them out. If the light works intermittently or not at all when you open the door, the bulb is the most likely suspect. Before you remove anything, it’s worth wiggling the bulb gently (once you have the cover off) to see if it’s just a loose connection, but usually, replacement is the fix.
The Not-So-Obvious: Cleaning and Maintenance
The area around your fridge’s light fixture can become a magnet for spills, sticky fingerprints, and dust. Food particles or condensation can get behind the cover, leading to grime buildup or even minor odors. Removing the cover gives you direct access to wipe down that often-forgotten ceiling space. It’s also a chance to clean the plastic cover itself, which can yellow or get stained over time. A quick clean during a bulb change keeps your fridge interior looking and smelling fresh.
Troubleshooting Electrical Issues
What if the bulb is new, but the light still doesn’t work? The problem could be with the light socket, the wiring behind it, or the door switch that activates the light when you open the door. Removing the cover is the essential first step to visually inspect the socket for corrosion or damage and to check the wiring connections. It’s the gateway to deeper diagnostic work.
Upgrading to Brighter, More Efficient Lighting
Many newer Whirlpool models use LED light panels instead of a single bulb. If you have an older model with a dim incandescent, you might consider upgrading to a brighter, more energy-efficient LED appliance bulb. To do this, you must first remove the existing cover to access the old bulb. It’s a simple upgrade that can make a huge difference in visibility.
Essential Tools and Preparation: Your Pre-Removal Checklist
Rushing into this with a butter knife and a hopeful heart is a recipe for a broken cover. A few minutes of preparation will save you time, frustration, and potentially a $20 replacement part. This isn’t about needing a full toolbox; it’s about having the right simple tools on hand and, most importantly, creating a safe working environment.
Visual guide about How to Remove Light Bulb Cover in Whirlpool Refrigerator
Image source: hometechowa.com
#1 on the List: SAFETY – Unplug the Refrigerator
This is non-negotiable. It is the single most important step in this entire guide. Your refrigerator is an electrical appliance. The light socket is live whenever the fridge is powered. Even though the risk of a serious shock is low (the voltage is low), it’s not zero. More importantly, you could accidentally short something out if you pry a metal tool near the socket while it’s energized. Always, always unplug the refrigerator from the wall outlet. If the plug is hard to reach behind the fridge, go to your home’s electrical panel and turn off the dedicated circuit breaker for the refrigerator. Wait a full minute after unplugging before you start. This ensures any residual power is drained. Safety isn’t just a suggestion; it’s the foundation of the job.
Basic Tools You’ll Likely Need
Gather these before you start. You probably have them already:
- A Small Flat-Head Screwdriver: Your primary prying tool. A 1/4-inch or smaller tip is ideal. A plastic prying tool (like those for phone screens) is even better as it won’t scratch the plastic if it slips.
- A Small Phillips-Head Screwdriver: Only needed if your cover is secured by a screw, which is common on many models.
- A Flashlight or Your Phone’s Light: Once you remove the cover, the fridge will be dark. Having a separate light source is crucial for seeing the bulb and socket.
- A Lint-Free Cloth: For cleaning the cover and the area around the socket.
- Gloves (Optional): A pair of disposable gloves can help you grip the cover better and keep your hands clean.
Proper Lighting and Workspace
Since you’re working inside a dark appliance, make sure the room you’re in has good general lighting. Clear a space on your kitchen counter to place the cover once you remove it. You don’t want to set it down on a dirty surface or, worse, lose it down the gap between the fridge and the wall. Have your replacement bulb ready and nearby so you can install it immediately after the cover is off.
Know Your Model (But Don’t Stress)
If you have your refrigerator’s model number sticker (usually inside the fridge on a side wall or on the door jamb), you can look up an exploded parts diagram online. This will show you exactly how your specific cover is attached. However, this guide covers the three most common attachment methods, so you’ll almost certainly be fine just by observing the cover itself. The design is almost always intuitive once you look closely at the seams.
Step-by-Step: How to Remove the Cover (The Three Most Common Methods)
Now for the main event. We’ll break this down by the type of fastener you encounter. In 95% of cases, your Whirlpool fridge cover will be one of these three styles. The key is to identify which one you have before you start prying. Look at the cover carefully. Are there any visible screws? Can you see a seam all the way around the edge? Is there a small notch or slot? The answer will point you to the correct method.
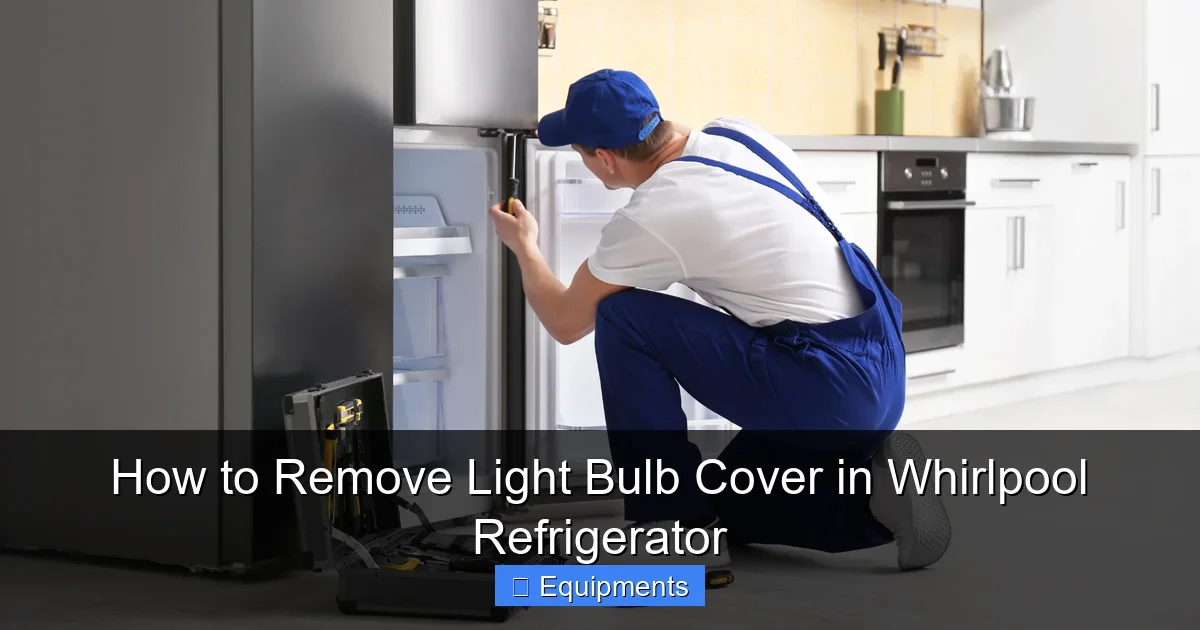
Visual guide about How to Remove Light Bulb Cover in Whirlpool Refrigerator
Image source: storables.com
Method 1: The Snap-In/Clip-On Cover (Most Common)
This is the design you’ll find on the vast majority of modern Whirlpool French door, side-by-side, and top-freezer models. The cover is a single piece of white or off-white plastic that is held in place by a series of small, flexible plastic clips on its backside. There are no screws. The cover simply pops into a matching plastic frame on the fridge’s ceiling.
How to Remove It:
- Locate the Seam: Look at the edge where the cover meets the plastic housing on the fridge ceiling. You should see a very slight gap all the way around.
- Find the Best Starting Point: Often, there is a small, intentional notch or a slightly wider gap on one side (sometimes near the front). This is your “release point.” If you don’t see a notch, start at one of the short ends (the front or back).
- Insert Your Tool: Gently slide the tip of your flat-head screwdriver into the seam at your chosen starting point. If there’s a notch, insert it there.
- Apply Gentle, Twisting Pressure: Don’t just lever the screwdriver up like a crowbar. That will crack the plastic. Instead, gently twist the handle of the screwdriver (like turning a very small key). This twisting motion helps disengage the first clip.
- Work Your Way Around: Once the first clip pops free (you’ll hear/feel a small snap), move your tool to the next spot a few inches away. Continue this gentle prying and twisting motion, working your way around the perimeter of the cover. The clips will release one by one. The cover will then drop down slightly, hanging by any remaining clips.
- Final Release: Once it’s loose, carefully use your fingers to pull the cover straight down and away from the housing. The last clips will disengage. Be mindful of any wiring or the bulb itself as the cover comes free.
Pro Tip: If the plastic feels very brittle or old, start at the center of one long side and work towards the corners. The corners are often the weakest points and most prone to cracking if forced.
Method 2: The Single Screw Cover
This style is very straightforward and common on older Whirlpool models or on some specific refrigerator styles. A single small screw—often a Phillips-head—holds the cover in place. The screw is typically located in the center of the cover or in a small, recessed hole at the front edge.
How to Remove It:
- Locate the Screw: Find the screw. It might be covered by a small plastic cap that you need to pry off first with your fingernail or screwdriver.
- Unscrew Carefully: Using your small Phillips-head screwdriver, turn the screw counter-clockwise (lefty-loosey). These screws are often small and can strip easily if you apply too much downward pressure. Just turn, don’t press hard.
- Remove and Secure: Once loose, remove the screw completely and set it aside in a safe spot. These tiny screws are easy to lose.
- Gently Tilt and Pull: With the screw removed, the cover should now be free. However, it may still have a couple of small alignment tabs. Gently tilt the front of the cover down (if the screw was at the front) or pull it straight out, depending on its design. It should come away easily.
Pro Tip: Before you start, check that your screwdriver tip fits the screw head perfectly. A poorly fitting screwdriver is the number one cause of stripped screws. If the screw is stuck, don’t force it. A tiny drop of penetrating oil (like WD-40) on the threads and a minute of waiting can help, but this is rare.
Method 3: The Twist-Lock or Bayonet Cover
This is less common but found on some Whirlpool refrigerator models, particularly certain bottom-freezer or compact units. The cover doesn’t pry or screw off; it twists and locks into place, similar to a light bulb itself. You’ll know you have this type if there are no screws and no visible seam for prying—instead, the cover is a smooth, round or oval dome.
How to Remove It:
- Locate the Grip Points: Look for small, flat areas or notches on the side of the cover. These are your hand grips. Sometimes you can grip the entire edge.
- Firmly Grasp and Turn: Using your fingers (gloves help with grip), firmly grasp the cover at these points. You will need to apply a moderate amount of rotational force.
- Turn Counter-Clockwise: Twist the cover to the left (counter-clockwise). You should feel it break free after about a 1/4 to 1/2 turn. It will then drop down.
- Lower and Remove: Once it unlocks, gently lower the cover straight down. There may be a short wire connected to it (for the light socket), so don’t let it dangle by the wire. Support it as you lower it.
Pro Tip: If it’s stuck, don’t use pliers—they’ll crack the plastic. Try pressing in on the cover slightly while you twist, as the locking lugs can sometimes get jammed. A gentle, steady pressure is more effective than a sudden jerk.
What to Do Once the Cover is Off: Bulb Replacement and Cleaning
Congratulations! The cover is in your hand, and the fridge’s interior ceiling is exposed. This is the moment you’ve been working towards. But don’t just jam a new bulb in there. Take this opportunity for a quick spot check and a bit of cleaning. It will make the reassembly smoother and your fridge nicer.
Identifying and Replacing the Bulb
Look at the socket. You’ll see one of two things:
- A Small, Glass Wedge-Base Bulb: This looks like a tiny, clear or frosted glass bulb with a wide, flat metal base that slides into a slot in the socket. This is the traditional appliance bulb. To remove it, you typically pull it straight out with a gentle, steady pressure. Some have a small metal tab that you need to press down to release. To install the new one, push it firmly but gently straight into the socket until it seats fully. Ensure the metal base makes good contact.
- An LED Light Panel or Strip: Many newer Whirlpool models don’t have a replaceable “bulb” at all. Instead, the entire light source is a thin, flexible LED panel that’s either screwed in or plugged into a connector. If your cover removal reveals this, you’ll need to find the exact replacement part number (usually on a sticker on the panel itself) and order it. Replacing it is usually as simple as unplugging the old connector and plugging in the new one, or unscrewing two small screws.
Critical: Before you buy a new bulb, check your refrigerator’s user manual for the exact type and wattage required. Using the wrong bulb can generate excess heat and damage the plastic cover or socket. Common replacements are 40-watt appliance bulbs or specific LED modules. When in doubt, take the old bulb with you to the hardware store.
The Golden Opportunity: Clean the Area
With the cover off, you have a perfect view of the ceiling and the back of the cover. Use your lint-free cloth, slightly dampened with a mild solution of water and dish soap or a vinegar-water mix, to wipe away any dust, sticky spills, or condensation residue. Pay attention to the area around the light socket. Avoid getting water directly into the socket itself. Wipe the back of the plastic cover as well. Let everything dry completely before proceeding. A clean socket and cover prevent future issues and keep your fridge hygienic.
Reassembly: Putting the Light Cover Back On Securely
This is the reverse of removal, but it’s just as important to do correctly. A poorly reattached cover will rattle, eventually fall off, or allow moisture in. Take your time here.
For Snap-In Covers
This is the trickiest to get right. Don’t just try to push it on all at once.
- Align First: Hold the cover up to the opening. Align it roughly with the housing. Most covers have small tabs or notches that must match up with slots in the frame. Get one side aligned first.
- Engage One Side: Starting at the same point you began removal (often the front or a notch), gently press the cover into the frame. You should feel the first few clips snap into place. Press until you feel resistance.
- Work Around: Now, moving to the adjacent area, press the cover in. You’ll feel and hear a series of small clicks as each clip engages. Apply even pressure around the entire perimeter. You may need to use the palms of your hands, not just your fingers, to apply uniform pressure.
- Final Check: Once you think it’s all the way in, run your fingers around the seam. There should be no gaps. The cover should be flush with the ceiling. Gently try to pry it up at a corner; if it’s secure, it won’t budge.
For Screw-On Covers
- Position and Align: Place the cover back in position, ensuring any alignment tabs are in their slots.
- Start the Screw by Hand: Place the screw in the hole and turn it clockwise with your fingers until it catches and is straight. This prevents cross-threading.
- Tighten Snugly: Use your screwdriver to tighten the screw. Turn until you feel resistance. Do not overtighten. Plastic can crack under excessive pressure. The screw’s job is to hold the cover in place, not to crush it. Tighten until the cover is secure and doesn’t wiggle.
For Twist-Lock Covers
- Position: Hold the cover under the opening and align it. Often, there are alignment marks or the shape itself is keyed, so it only fits one way.
- Engage and Twist: Push the cover up into the housing until it seats. You’ll feel it stop. Then, firmly twist it clockwise (righty-tighty) until it locks. You’ll feel a firm stop. It should not be able to twist any further.
- Final Test: Give it a gentle counter-clockwise twist. It should not move. If it does, it wasn’t locked fully.
Troubleshooting: What If the Cover Won’t Budge or Breaks?
Even with the best instructions, you might hit a snag. Let’s address the two most common problems.
The Cover is Stuck and Won’t Pop Off
This usually happens due to age. Plastic becomes brittle and clips can fuse or get jammed with dried food residue.
- Re-apply Heat (Carefully): Use a hairdryer on a warm (not hot) setting and warm the seam of the cover for 30-45 seconds. This can soften the plastic slightly and release a stuck clip. Keep the hairdryer moving.
- Use More Leverage, More Carefully: If your screwdriver slips, find a different spot. Sometimes starting at a different corner breaks the seal. Ensure your tool is fully seated in the seam before applying pressure.
- Inspect for Hidden Screws: Double and triple-check the entire perimeter, especially under the lip at the front. Some models have a screw hidden under a decorative plastic cap that looks like part of the cover.
- Last Resort: If it’s truly stuck and you’re willing to risk breaking it (you’d need a new cover anyway), you can apply more decisive prying force. But accept that the cover may crack. If it breaks, you’ll need to order a replacement part using your model number.
The Cover Cracked or Broke During Removal
Don’t panic. Plastic covers are not overly expensive. First, assess the damage. A small hairline crack might still hold, but it’s not ideal. A large crack means it needs replacement.
- Find Your Model Number: Look for the sticker inside your fridge (on a side wall, crisper drawer frame, or on the door jamb). It will be a long string of numbers and letters.
- Search Online: Go to a major appliance parts website (like PartSelect, AppliancePartsPros, or the official Whirlpool parts site). Enter your model number. Search for “light cover,” “lens,” or “interior light shield.”
- Order the Correct Part: Find the exact match. Pictures will help. Order it. Most covers are simple snap-in replacements. Installing the new one is the same process as reassembling the old one.
Proactive Tip: If your cover is old and yellowed/brittle, consider ordering a replacement now, before it breaks unexpectedly. It’s a cheap insurance policy against a future dark fridge.
Safety and Best Practices: A Final Checklist
Let’s circle back to safety, because it’s that important. Before you plug that fridge back in and close the door, run through this mental checklist:
- Power is OFF: Confirm the breaker is off or the plug is unplugged. This is your safety net.
- Cover is SECURE: Give the reattached cover a firm wiggle. It should not move, rattle, or feel loose. A loose cover can fall into your food or, worse, interfere with the door seal.
- Bulb is CORRECT: Verify the new bulb’s wattage and type match the old one or the recommendation in your manual. Using a 100-watt bulb where a 40-watt belongs is a fire hazard.
- Socket is CLEAN and DRY: Ensure no cleaning solution or moisture is inside the socket. Wipe it with a dry cotton swab if needed.
- No Tools Left Inside: This sounds silly, but a stray screwdriver or screw in the fridge is a disaster waiting to happen. Do a final sweep of the interior ceiling.
- Restore Power Slowly: Plug the fridge back in or turn the breaker on. Listen for any unusual sounds from the light area as it powers on. The bulb should light immediately when you open the door.
Conclusion: You’ve Got This!
There you have it. The mystery of the Whirlpool refrigerator light cover, solved. What seemed like a daunting, obscure task is really just a matter of identifying your cover’s fastening method and applying the correct, gentle technique. Remember the core principles: always disconnect power, work slowly and deliberately, and use the right tool for the job. Removing the cover is simply the gateway to a brighter, cleaner, and better-functioning refrigerator interior. You’ve now added a valuable skill to your home maintenance toolkit. The next time that kitchen light flickers out, you won’t need to Google in a panic. You’ll know exactly what to do. So go ahead, unplug that fridge, and bring the light back. Your midnight snack runs will never be the same.
Frequently Asked Questions
Do I need to unplug the refrigerator to change the light bulb?
Yes, absolutely. For your safety and to prevent damage to the electrical system, you must unplug the refrigerator or turn off its circuit breaker before attempting to remove the light cover or change the bulb. This eliminates the risk of electric shock and short-circuiting.
My Whirlpool fridge has no visible screw or seam. How do I remove the cover?
What if the plastic cover is yellowed and brittle? Is it safe to remove?
If the cover is very old, discolored, and feels brittle, handle it with extreme care. Use a plastic pry tool instead of metal. Apply minimal force and work slowly. If it cracks during removal, you will need to order a replacement part using your refrigerator’s model number. It’s often more cost-effective to replace a brittle cover proactively than to risk it breaking and leaving your fridge without a shield.
Can I use any 40-watt appliance bulb as a replacement?
While many Whirlpool models use a standard 40-watt appliance bulb (A15 shape), it’s always best to check your user manual for the exact specification. Some newer models require specific LED modules. Using an incorrect bulb can cause overheating, damage the plastic cover, or provide poor lighting. When in doubt, remove the old bulb and take it to the store for an exact match.
The cover is off, but the bulb won’t come out of the socket. What now?
For a wedge-base bulb, grip the glass part (not the metal base) firmly with your fingers or a soft cloth and pull straight out with steady pressure. Do not twist unless you see a locking tab that needs to be released. If it’s stuck, try gently wiggling it back and forth while pulling. Never use pliers on the glass, as it will shatter. If it’s an LED panel, it will be screwed or plugged in—do not pull on the panel itself.
After reattaching, the cover still feels a little loose. Is that normal?
No, a properly reinstalled cover should feel completely secure with no movement or rattling. If it’s loose, it likely means not all the plastic clips fully engaged. For a snap-in cover, press firmly and evenly around the entire perimeter until you hear all the clicks. For a screw-on cover, ensure the screw is snug but not overtightened. A loose cover can eventually fall off and is a sign it needs to be re-seated correctly.