Using the self-clean function on your IFB oven is a powerful, hands-off way to tackle baked-on grease and food residue. This feature heats the oven cavity to extremely high temperatures (around 500°C/932°F), incinerating grime into ash you can easily wipe away. However, it requires careful preparation: you must remove all racks, trays, and thermometer probes, and ensure the oven door is locked. The cycle is long (2-4 hours), produces strong fumes, and the oven will be very hot afterward. Always follow your specific model’s manual, but the universal principle is: clear the cavity, select the cycle, lock the door, and let the oven do the hard work. Post-cycle, simply cool, sweep out the ash, and wipe the interior with a damp cloth.
Key Takeaways
- The self-clean cycle uses extreme heat: It heats to approximately 500°C (932°F) to turn grime into ash, not to cook food.
- Complete preparation is non-negotiable: Remove EVERYTHING from inside—racks, trays, thermometer, and any accessories.
- The door will lock automatically: This is a critical safety feature; never force the door open during or immediately after the cycle.
- Expect strong odors and fumes: The burning-off process creates smoke and smells; ensure kitchen ventilation is on.
- Post-cycle cleaning is manual but easy: Once cooled, you simply sweep out the ash and wipe the walls with a damp cloth.
- Safety first for people and pets: Keep children and pets away from the kitchen during the cycle and until the oven is completely cool.
- It’s not for daily use: Limit the self-clean cycle to 2-4 times a year to prevent excessive wear on heating elements and gaskets.
[FEATURED_IMAGE_PLACEHOLDER]
📑 Table of Contents
- Introduction: Your Oven’s “Sauna Day”
- How the Self-Clean Function Actually Works: The Incineration Method
- Essential Pre-Cleaning Checklist: What You MUST Remove
- Step-by-Step: Running the Self-Clean Cycle on Your IFB Oven
- Post-Cycle Care: The Gentle Wipe-Down
- Troubleshooting: When Things Don’t Go Perfectly
- Safety First: Non-Negotiable Rules for Self-Cleaning
- Conclusion: A Powerful Tool for a Pristine Kitchen
Introduction: Your Oven’s “Sauna Day”
Let’s be honest—that beautiful IFB oven in your kitchen, the one that bakes your cakes and roasts your Sunday chicken, eventually faces a grim reality: built-up grease, carbonized sugar spills, and mysterious, fossilized bits of last year’s lasagna. Scrubbing this mess is a back-breaking, chemical-heavy chore. But what if your oven could clean itself? It can! The self-clean function on an IFB oven is a brilliant, high-tech solution to this messy problem. Think of it as giving your oven a intense, extremely hot sauna session where all the gunk burns away to nothing but a pile of easy-to-sweep ash.
However, this power comes with great responsibility. Using the self-clean cycle incorrectly can damage your oven, create hazardous fumes, or even pose a fire risk. This comprehensive guide will walk you through every single step, from the crucial pre-cleaning checklist to the final wipe-down. We’ll demystify the science behind it, share pro-tips for best results, and highlight the absolute safety rules you must follow. By the end, you’ll be confidently using this feature to keep your IFB oven sparkling and performing at its peak.
How the Self-Clean Function Actually Works: The Incineration Method
Before you press a button, it helps to understand what’s happening inside your oven. IFB’s self-clean (sometimes called “Pyrolitic” or “High-Temperature” cleaning) doesn’t use steam or chemical cleaners. It uses pure, unadulterated heat.
Visual guide about How to Use Self Clean on Ifb Oven
Image source: i.ytimg.com
The Science of Ash
The process is elegantly simple. When you activate the cycle, the oven’s heating elements (both the bake element at the bottom and the broil element at the top) ramp up to a scorching temperature of around 500 degrees Celsius (932 degrees Fahrenheit). At this heat, any organic material—food residue, grease, oil, sugar—undergoes a process called pyrolysis. This is essentially incineration without flame. The grime doesn’t melt; it carbonizes and oxidizes, turning into a white or gray, powdery ash. It’s a complete combustion process. The oven door locks to prevent you from opening it during this extreme heating phase, which would release a blast of super-heated air and ash.
Why This Method is Effective (and Demanding)
The beauty of this method is that it cleans every surface inside the cavity—walls, floor, ceiling, and even the door’s inner glass (though the outer glass remains cool). There’s no scrubbing of hard-to-reach corners. However, it’s a brutal process for the oven itself. The extreme heat stresses the door gasket (seal), the heating elements, and the electronic controls. That’s why manufacturers, including IFB, strictly advise against using it more than 2-4 times per year. Overuse can lead to premature wear and tear. Think of it as a deep, restorative spa treatment for your oven, not a weekly shower.
Essential Pre-Cleaning Checklist: What You MUST Remove
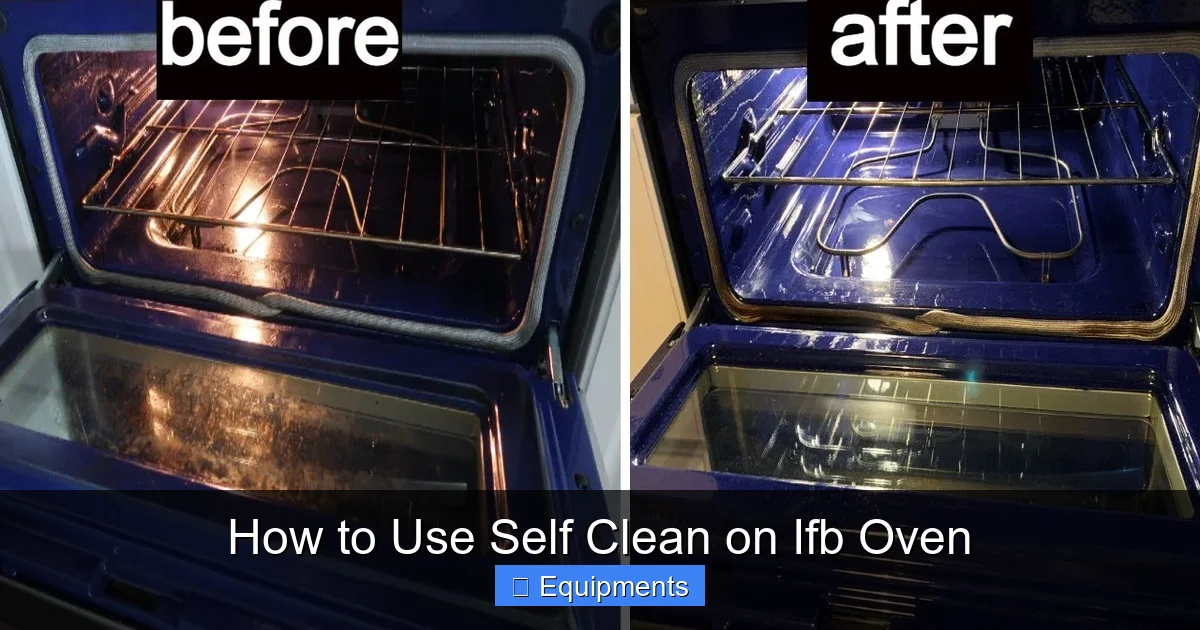
This is the most critical phase. Skipping this step can ruin your accessories, cause smoke, or even damage the oven. The rule is simple: if it’s inside the oven when you cook, it must be outside for the self-clean cycle.
Visual guide about How to Use Self Clean on Ifb Oven
Image source: i.ytimg.com
The “Everything Out” Rule
Open your oven door and conduct a thorough inventory. Remove these items without exception:
- All Racks and Shelf Supports: The high heat will warp and discolor metal racks. They may also melt any plastic or nylon coating on the rack guides. Place them in the sink or a large tub for separate manual cleaning.
- All Baking Trays, Pizza Stones, and Pans: Any cookware you normally use inside must come out.
- Thermometer Probes: Any digital or analog meat thermometer left inside will be destroyed.
- Oven Light Cover (if removable): Check your manual. Some models require you to remove the protective glass cover over the oven light bulb to prevent it from cracking or melting.
- Any Stickers or Labels: If you have any temporary labels (like from a new tray) stuck to the walls, peel them off. They can burn and create toxic fumes or stubborn residue.
Initial Manual Scrape (Optional but Recommended)
While the self-clean cycle is powerful, it has limits. For extremely thick, caked-on layers of grease or sugary spills (think burnt caramel or syrup), use a plastic or wooden scraper to gently remove as much of the bulk as possible before starting the cycle. This reduces the amount of material that needs to be incinerated, leading to less smoke and a more effective final result. Never use metal scrapers or sharp knives, as they can scratch the enamel coating. A dedicated plastic oven scraper works perfectly.
Final Sweep and Check
Once everything is out, use a soft brush or a vacuum with a crevice tool to sweep out any loose crumbs, food particles, or debris from the floor and corners. This prevents them from burning and creating extra smoke. Give the interior one last visual check. The oven should be completely empty. Ensure the door is clean on the inside, as any residue on the door glass will also burn.
Step-by-Step: Running the Self-Clean Cycle on Your IFB Oven
Now for the main event. While button layouts vary slightly between IFB models (like the Solo, Convection, or Microwave Oven with Convection), the core process is identical. Always refer to your specific model’s user manual for exact button names, but this guide will cover the universal sequence.
Visual guide about How to Use Self Clean on Ifb Oven
Image source: thespruce.com
Step 1: Close and Lock the Door
Ensure the oven door is firmly closed. On most IFB models, the self-clean function will automatically engage the door lock mechanism. You might hear a distinct locking sound or see a lock icon appear on the control panel. Do not attempt to force the door open at this stage. If your model has a manual lock lever, engage it now as per the manual instructions.
Step 2: Navigate to the Self-Clean Mode
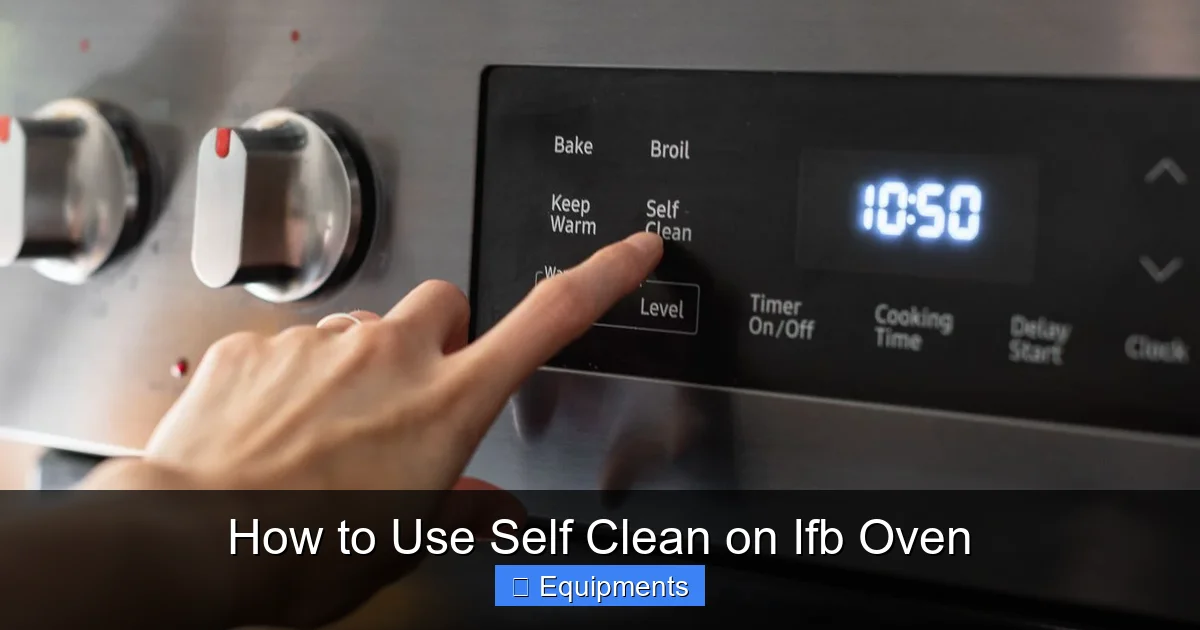
On your IFB oven’s control panel, look for a button labeled “Self Clean,” “Pyro Clean,” “Clean,” or an icon resembling a flame or a broom. Press this button. The display should change to show the self-clean mode is selected.
Step 3: Select the Cycle Duration (If Applicable)
Some IFB models offer a choice between a Light Clean (for minor spills, about 1.5-2 hours) and a Heavy Clean (for severe grime, about 3-4 hours). If your model has this option, use the “+” or “-” buttons, or a dedicated “Time” knob, to select the appropriate cycle. When in doubt, start with the Heavy Clean for a first-time or very dirty oven. The oven will calculate the time needed based on the amount of soil it senses, but manual override is often available.
Step 4: Initiate the Cycle
Press the “Start” or “OK” button. The oven will begin its pre-heat phase. You will hear the fans (if it’s a convection model) and the heating elements activate. The temperature will climb rapidly. The control panel will display the remaining time, which will count down from your selected duration (e.g., 3:00).
Step 5: The Waiting Game (Ventilation is Key!)
This is the passive part. The cycle will run its course. During this time:
- You will see smoke and steam coming from the oven vents, especially at the beginning. This is normal as the grease ignites.
- You will smell strong odors. They resemble burning oil or plastic. This is the residue burning off. Ensure your kitchen exhaust fan is running on high and open windows if possible.
- Do not open the door. The lock is engaged for your safety. Opening it could cause a flash fire or release superheated ash.
- Keep children and pets out of the kitchen. The oven exterior, especially the door and handle, can become very hot to the touch.
The cycle will end with a series of beeps. The display will typically show “End” or “0:00”. The door will remain locked for a cooling period, which can last 1-2 hours. Do not try to open the door until the lock disengages automatically and the oven feels cool to the touch on the outside.
Post-Cycle Care: The Gentle Wipe-Down
Once the oven is completely cool and the door unlocks, it’s time for the final, easy step. All the hard work was done by the heat.
Removing the Ash
Open the door. You will see a layer of fine, white or gray ash on the floor, walls, and possibly the door frame. Using a soft-bristled brush (a clean paintbrush or dedicated oven brush works well) or a vacuum with a crevice tool on low suction, gently sweep or vacuum up all the ash. Be careful not to scratch the enamel surface. Do this before introducing any moisture, as wet ash becomes a muddy paste.
The Final Wipe
Dampen a soft microfiber cloth with warm water. You can add a drop of mild dish soap if desired, but often plain water is sufficient. Wipe down all interior surfaces—walls, floor, ceiling, and the inside of the door glass—thoroughly to remove any remaining film or ash residue. Rinse the cloth frequently. For any stubborn spots left after the ash removal (which are rare), you can use a paste of baking soda and water, applied with a soft cloth, but avoid abrasive scrubbers.
Reassembling Your Oven
Once the interior is dry and clean, you can carefully return your oven racks and any other accessories. Wipe down the racks separately with a degreaser or in the dishwasher if they are dishwasher-safe. With the interior pristine, your oven is ready for its next culinary adventure.
Troubleshooting: When Things Don’t Go Perfectly
The self-clean cycle is robust, but you might encounter a few issues. Here’s how to handle them.
Problem: Excessive Smoke and Fumes
Cause: This usually means there was too much grease or food residue for the cycle to handle efficiently, or a sugary spill was present. The initial burning phase is the smokiest.
Solution: Always pre-scrape thick layers. Ensure your kitchen ventilation is maximized (exhaust fan + open windows). If smoke is billowing and not subsiding after 20 minutes, you can cautiously cancel the cycle (press “Stop/Cancel”), let the oven cool completely, manually clean the worst of the mess, and restart the cycle. Never open a hot, smoking oven.
Problem: Stubborn, Charred Residue Left After Cycle
Cause: Some materials, like melted plastic, foil, or heavy carbon deposits from years of neglect, may not fully incinerate and can leave a baked-on film.
Solution: Let the oven cool completely. Make a paste of baking soda and water, apply it to the residue, and let it sit overnight. The next day, use a damp cloth to wipe it away. For extremely tough spots, a dedicated commercial oven cleaner (used according to directions) may be necessary, but apply it only after the self-clean cycle, not before.
Problem: Error Code or Cycle Stuck
Cause: A malfunction in the temperature sensor, door lock mechanism, or control board.
Solution: The first step is to try a reset. Turn off the oven at the circuit breaker for 5 minutes, then turn it back on. If the error persists or the door remains locked, do not attempt to force it open. Contact IFB customer service or a certified appliance repair technician. Forcing the door can break the lock or seal.
Problem: Damaged Door Gasket
Cause: The high heat can degrade the rubber gasket over time, especially with frequent use. You might notice it becomes brittle, cracked, or shrunken.
Solution: Inspect the gasket after each self-clean cycle. If it shows signs of damage, it should be replaced to maintain proper sealing and cooking efficiency. Contact IFB for a replacement part.
Safety First: Non-Negotiable Rules for Self-Cleaning
We cannot stress this enough: the self-clean function is safe when used correctly, but it involves extreme conditions. These rules are not suggestions.
Never, Ever Leave It Unattended (Initially)
While you don’t need to watch it for 3 hours, be home and alert for at least the first 30-45 minutes. This is when the most intense smoking and heating occurs. Be prepared to address any unusual amounts of smoke or strange noises immediately by turning off the oven at the breaker if needed.
Ventilation is Not Optional
Do not run this cycle in a closed kitchen. Your range hood exhaust fan must be on high, and windows should be open. The fumes from burning grease contain byproducts that can be irritating. People with respiratory conditions like asthma should leave the house during the cycle.
Protect Yourself and Others
Wear oven mitts if you need to be near the oven during the cycle (e.g., to turn on the fan). Clearly warn all family members, especially children, that the oven is “on a special clean” and is extremely hot. Keep pets in another room. The exterior surfaces, particularly the door and control panel area, can become hot enough to cause burns.
No Chemicals Allowed
Never, under any circumstances, apply commercial oven cleaners, spray degreasers, or any chemical cleaning product inside the oven before or during a self-clean cycle. These chemicals can react violently with the extreme heat, producing toxic fumes, corrosive vapors, or even a fire. The self-clean feature is designed to work on physical grime alone.
Mind the Floor and Cabinetry
The heat radiating from the oven, especially from the vents and the door, can damage sensitive countertop materials (like certain laminates or stone) or melt the finish on nearby cabinet doors. If your oven is in a tight cabinet space, consider placing a heat-resistant barrier or large cutting board on the countertop in front of the oven during the cycle.
Conclusion: A Powerful Tool for a Pristine Kitchen
Mastering the self-clean function on your IFB oven transforms a dreaded chore into a simple, scheduled maintenance task. It’s the ultimate “set it and forget it” solution for a job that is otherwise messy, time-consuming, and physically demanding. By understanding the science behind the incineration process, committing to the essential preparation steps, respecting the extreme conditions, and following up with a gentle wipe-down, you can keep your oven looking and performing like new for years to come.
Remember, this is a heavy-duty feature, not a daily driver. Use it judiciously—2 to 4 times a year is the sweet spot for most households. Pair it with regular light cleaning (wiping spills as they happen, using the grill function to burn off minor debris) and your IFB oven will remain a reliable, hygienic, and beautiful centerpiece of your kitchen. Now, go ahead and schedule that “spa day” for your oven. You’ve earned the sparkling results!
Frequently Asked Questions
How long does a self-clean cycle take on an IFB oven?
A typical self-clean cycle on an IFB oven lasts between 2 to 4 hours, depending on the selected program (Light or Heavy) and the level of soil. The door will remain locked for an additional cooling period of 1-2 hours after the cycle ends.
Can I leave the oven racks in during the self-clean cycle?
No, you must always remove all oven racks, trays, and accessories before starting a self-clean cycle. The extreme heat will warp metal racks and can melt any nylon or plastic coatings, potentially damaging both the racks and the oven’s interior.
Is it safe to use the self-clean function? What about the fumes?
It is safe when all manufacturer guidelines are followed, especially removing all contents and ensuring ventilation. The cycle produces strong odors and smoke from burning grease, which can be irritating. Always run your kitchen exhaust fan on high and open windows. People with asthma or respiratory issues should leave the house during the cycle.
How often should I use the self-clean feature on my IFB oven?
IFB and most appliance experts recommend using the self-clean function no more than 2 to 4 times per year. Frequent use accelerates wear on the door gasket, heating elements, and electronic components due to the extreme heat stress.
What should I do if there is still residue left after the self-clean cycle?
For any remaining light film or ash, simply wipe with a damp microfiber cloth. For stubborn spots, make a paste of baking soda and water, apply it, let it sit overnight, and wipe clean the next day. Avoid abrasive scrubbers. Very heavy, melted plastic or foil may require a commercial oven cleaner used after the self-cycle.
My oven door is still locked after the cycle ended. What do I do?
The door lock is designed to stay engaged until the oven cavity cools down to a safe temperature, which can take 1-2 hours. Do not try to force it open. If the door remains locked for more than 3 hours after the cycle completes, there may be a fault. Try resetting the oven by turning off its power at the circuit breaker for 5 minutes. If it remains locked, contact IFB customer care or a qualified technician.