Annoying cabinet door collisions are a common kitchen woe with simple fixes. This guide covers everything from quick adhesive bumper installations to precise hinge adjustments. You’ll learn how to diagnose the problem, choose the right solution for your cabinet type, and implement both temporary and permanent fixes. Protect your walls, silence the bangs, and extend the life of your cabinets with these actionable steps.
That familiar thwack or the dreaded scrape of a cabinet door against your perfectly painted wall. It’s a small, repetitive sound that can fray nerves and, over time, leave unsightly scuffs, dents, or even chunks of missing drywall. You’ve probably winced, muttered something under your breath, and maybe even quickly closed the door to prevent further damage. But what if you could permanently stop cabinet door from hitting wall without calling a professional or breaking the bank? The truth is, this common kitchen annoyance almost always has a straightforward, fixable cause. Whether you’re dealing with a rogue upper cabinet in a tight corner or a lower door that swings too wide, the solution lies in understanding your cabinet’s mechanics and choosing the right tool for the job. This comprehensive guide will walk you through every possible remedy, from the 5-minute fix to a more involved hinge adjustment, ensuring your walls stay pristine and your kitchen remains a peaceful place.
Key Takeaways
- Identify the Cause: The issue is usually misaligned hinges, improper door swing clearance, or missing door stops, not just “bad luck.”
- Start Simple: Adhesive door bumpers are the fastest, cheapest, and renter-friendly first line of defense against wall contact.
- Adjust Hinges Carefully: Most European (cup) hinges have multiple adjustment points to correct door alignment and swing path.
- Install Physical Stops: Wall-mounted or hinge-mounted stops provide a guaranteed, hard limit to the door’s swing.
- Consider Decorative Options: Solutions like vintage doorstops or matching rubber bumpers can enhance your kitchen’s aesthetic.
- Check for Damage: Regularly inspect hinges and door edges for wear from repeated impact; address issues early to avoid costly repairs.
- Renter vs. Owner Solutions: Temporary adhesive fixes are ideal for renters, while owners can opt for integrated, invisible adjustments and stops.
📑 Table of Contents
- Understanding the “Why”: Diagnosing the Root Cause
- Solution Tier 1: The Quick & Easy Fixes (Bumpers & Stops)
- Solution Tier 2: The Corrective Fix (Hinge Adjustment)
- Solution Tier 3: The Permanent & Decorative Fix
- Special Considerations: Cabinet Type & Installation Context
- Prevention & Maintenance: Keeping the Problem Away for Good
Understanding the “Why”: Diagnosing the Root Cause
Before you buy a single bumper or grab a screwdriver, take a moment to observe. Why is your cabinet door hitting the wall? The answer isn’t always obvious and will dictate the most effective solution. Rushing to apply a bumper might stop the noise but could mask a larger alignment issue that will worsen over time.
The Most Common Culprits
- Misaligned Hinges: This is the #1 cause. Over time, screws can loosen, or the hinge itself can become slightly bent. A door that isn’t perfectly plumb will swing in a slight arc that brings its corner into contact with an adjacent wall or appliance.
- Inadequate Clearance: In tight kitchen layouts, especially with islands or narrow galley kitchens, the swing path of a cabinet door might simply be too large for the available space. The door is doing exactly what it’s designed to do—swing open—but the architecture is fighting it.
- Worn or Missing Door Stops: Many cabinets, especially older ones, have a small rubber or plastic “door stop” attached to the hinge arm or the cabinet frame. Its job is to cushion the door at its fully open position. If this is missing, cracked, or hardened, the door has nothing to gently bump against but your wall.
- Improperly Installed Hinges: During a cabinet installation or a DIY hinge replacement, the hinge cup (the part that sits inside the door) might be mortised too shallow or too deep, or the mounting plate on the cabinet frame might be slightly off. This changes the door’s pivot point and its entire swing radius.
- Door Warping: Less common but possible, especially with heavy solid wood doors in humid environments. A warped door will not sit flush in the frame and will have a corner that sticks out further than intended during its swing.
Diagnosis Tip: Open the problematic door slowly and watch the gap between the door edge and the wall/appliance. Is the gap consistent from top to bottom? Or does it widen or narrow dramatically? A varying gap points to a hinge alignment issue. If the gap is consistent but simply too small, you likely have a clearance problem. Have someone hold the door open while you inspect the hinge area for a missing or damaged stop piece.
Solution Tier 1: The Quick & Easy Fixes (Bumpers & Stops)
If your diagnosis points to simple clearance issues or a missing stop, and the hinge alignment looks reasonably good, start here. These solutions are fast, inexpensive, require no tools or skill, and are perfect for renters.
Visual guide about How to Stop Cabinet Door from Hitting Wall
Image source: officefixes.com
Adhesive Door Bumpers: The First Responder
These small, usually clear or white, rubber or silicone nubs with a sticky backing are your secret weapon. They absorb the impact energy and protect both the door and the wall.
- How to Install: Clean the corner of the cabinet door (the part that hits the wall) thoroughly with rubbing alcohol to remove grease. Let it dry. Peel the backing and firmly press one or two bumpers onto the corner. For upper cabinets that hit a side wall, place them on the top hinge side corner. For lower cabinets hitting a wall or island, place them on the bottom hinge side corner. Sometimes placing a small bumper on the wall itself (on a smooth surface) works too.
- Types: You’ll find standard dome-shaped bumpers, larger “corner guards,” and even elongated strips for longer contact points. For a nearly invisible look, opt for clear silicone. For a bit more cushioning, choose thicker, softer rubber.
- Pro Tip: If the door hits the wall along a vertical edge (like a tall pantry door), apply a row of small bumpers spaced about 2-3 inches apart along the entire striking edge.
Hinge-Mounted or Cabinet-Mounted Stops
These are a step up in durability from stick-on bumpers. They attach directly to the hinge arm or the cabinet stile (the vertical frame piece).
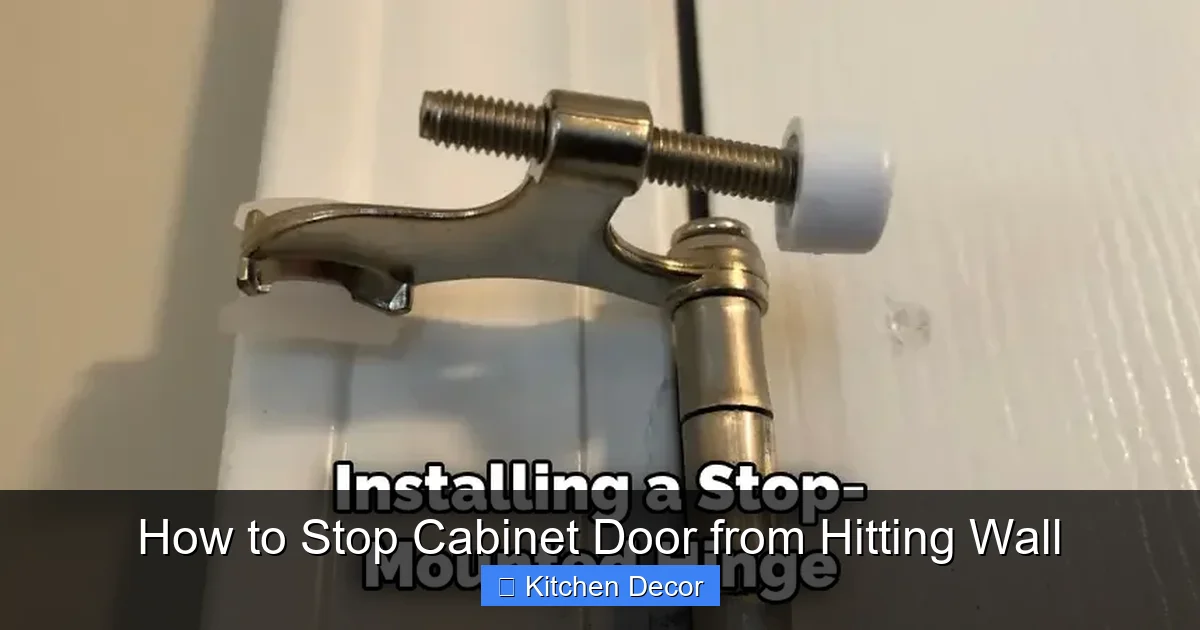
- Hinge-Arm Stops: These clip or screw onto the moving part of the hinge (the arm attached to the door). As the door opens, a small rubber pad on the stop contacts the cabinet frame or a mounted striker, limiting the swing. They are highly effective and keep the impact point on the cabinet, not the wall.
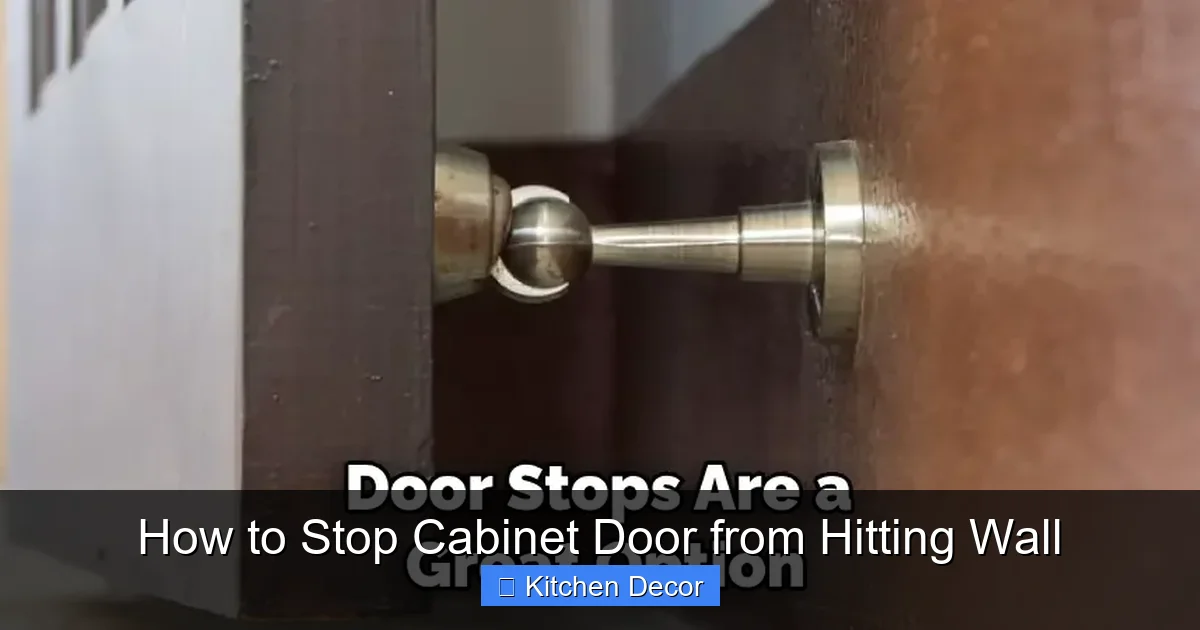
- Wall-Mounted Stops: A classic solution. A small post with a rubber tip is screwed into the wall at the exact point where the door should stop. You must measure precisely with the door open to mark the spot. This is a permanent, very sturdy solution but requires drilling into your wall.
- Overhead Cabinet Stops: For upper cabinets that hit a ceiling or a soffit, a small padded stop mounted on the cabinet’s underside can prevent over-swing.
Solution Tier 2: The Corrective Fix (Hinge Adjustment)
If your door is misaligned, bumpers are just a band-aid. The proper fix is to adjust the hinges. Don’t be intimidated—most modern cabinets use European-style (cup) hinges that are designed for easy tweaking. You’ll need the appropriate screwdriver (often a Phillips or hex/Allen key) and possibly a small flashlight.
Visual guide about How to Stop Cabinet Door from Hitting Wall
Image source: officefixes.com
Anatomy of a European Hinge
Familiarize yourself with these key parts:
- The Cup: The round, concave part that sits inside a mortise (hole) in the door edge.
- The Arm: The metal piece that connects the cup to the mounting plate on the cabinet frame.
- The Mounting Plate: The square or rectangular base screwed to the cabinet stile.
- Adjustment Screws: Typically, there are 2-3 screws on the arm or mounting plate that allow for movement. The most common are a vertical adjustment screw (moves the door up/down), a horizontal (side-to-side) adjustment screw (moves the door in/out from the cabinet), and a depth/adhesion screw (pulls the door tighter to the frame). Some systems have a single cam screw for all adjustments.
Step-by-Step Adjustment Guide
Goal: To make the door sit flush in the frame when closed and swing without hitting the adjacent wall.
- Check the Closed Position First: Is the door gap even all around? If it’s gapped at the top, you need to lower the hinge arm side (or raise the opposite side). Use the vertical adjustment screw. Turn it clockwise (usually) to raise the door on that hinge side, counter-clockwise to lower it. Make tiny adjustments (1/4 turn), close the door, and check.
- Address the “Flush” Issue: If the door protrudes or is recessed, use the depth adjustment screw (often the one that tightens the cup to the door). Turning it usually pulls the door tighter to the cabinet frame.
- Fix the Swing Path: This is key for wall contact. If the door hits the wall on the hinge side as it opens, the hinge arm is likely too far out from the cabinet. You need to pull the entire door in towards the cabinet on that hinge side. This is often done by loosening the mounting plate screws slightly (don’t remove them), gently pulling the plate inward, and retightening. Alternatively, some hinges have a horizontal adjustment screw on the arm that pulls the door in. The goal is to change the pivot point so the door swings more “into” the cabinet opening rather than “out” toward the wall.
- The Final Test: After each adjustment, open and close the door slowly 5-10 times. Watch the gap along the wall. It should be consistent and clear.
Caution: Do not overtighten screws, especially on particle board cabinets. If a screw hole is stripped, use a longer screw or a toothpick/wood glue plug to fill the hole before re-driving.
Solution Tier 3: The Permanent & Decorative Fix
When you want a flawless, integrated look or have a severe clearance issue, it’s time for more permanent solutions that can also add character to your kitchen.
Visual guide about How to Stop Cabinet Door from Hitting Wall
Image source: officefixes.com
Replacing or Installing Integrated Stops
Many cabinet hinge systems have optional, dedicated door stops that install cleanly onto the hinge arm or mounting plate. Brands like Blum, Hettich, and Grass offer these. They are designed to be virtually invisible when the door is closed and provide a positive, cushioned stop. Search for your hinge model number (often stamped on the hinge) to find the compatible stop. This is the professional, OEM (Original Equipment Manufacturer) solution.
Wall-Mounted Architectural Stops
Why hide a beautiful piece of hardware? A decorative brass or bronze doorstop mounted on the wall can become a design feature. Choose a style that matches your kitchen’s hardware (e.g., oil-rubbed bronze, polished nickel). These are incredibly sturdy and can stop even the heaviest door. Installation requires careful measurement and drilling, but the result is a high-end, built-in look.
The “Finger-Pull” or “Push-to-Open” Conversion
This is a more involved but brilliant fix for cabinets with handles. If the door is hitting the wall because you need to grip the edge to open it (requiring a wide swing), consider removing the handle and installing a push-to-open mechanism (a small spring-loaded latch inside the cabinet) or simply adding a finger-pull notch. This allows you to open the door by pushing on its face, which often requires less swing arc and keeps your hand away from the wall. It changes how you interact with the cabinet, solving the problem by redesigning the opening action.
Special Considerations: Cabinet Type & Installation Context
Your approach may vary slightly depending on what kind of cabinet you’re dealing with.
Upper vs. Lower Cabinets
Upper Cabinets often hit side walls or soffits. The adjustment is usually on the top hinge. A wall-mounted stop on the adjacent wall is very effective. For soffit contact, a padded stop on the cabinet’s top edge works.
Lower Cabinets frequently hit walls, islands, or adjacent base cabinets. The adjustment is on the bottom hinge. Check for a floor-mounted stop (less common). Hinge-mounted stops are excellent here. Also, consider if the countertop overhang is reducing clearance.
Frameless vs. Framed Cabinets
Frameless (European) cabinets have doors that overlay the cabinet front completely. They almost always use cup hinges. Adjustment is straightforward via the hinge screws. The full-overlay door means the hinge is set back from the door edge, giving you more surface area on the door to place a bumper if needed.
Framed cabinets have a visible face frame. The hinge mounts directly to this frame. Adjustment screws are usually more accessible. The door edge is the frame’s edge, which is narrower. Bumpers must be placed carefully to not interfere with the frame.
Renter-Friendly vs. Owner Solutions
If you rent, avoid any permanent modifications like drilling into walls or cabinet frames unless you have explicit permission. Stick to:
- High-quality adhesive bumpers (test for clean removal first).
- Temporary, clamp-on or tension-mounted stops that use friction (e.g., a rubber-tipped rod between floor and cabinet).
- Negotiating with the landlord for a proper fix, as repeated damage could come out of your security deposit.
If you own, feel free to explore all options, including integrated stops and precise hinge adjustments.
Prevention & Maintenance: Keeping the Problem Away for Good
Once you’ve solved the immediate banging, a little maintenance will ensure it stays solved.
Regular Inspection Routine
Every 6-12 months, do a quick check:
- Open and close all cabinet doors slowly. Listen for scrape or feel for resistance.
- Check the tightness of hinge screws. A loose screw is the first step toward misalignment. Tighten any that feel wobbly.
- Inspect door bumpers and stops. Are they cracked, flattened, or missing? Replace them. Silicone bumpers last longer than rubber.
- Look at the wall area. Is there a new scuff mark? That’s your clue the door is drifting out of alignment again.
Environmental Factors
Wood cabinets and doors are hygroscopic—they absorb and release moisture from the air. Seasonal humidity changes can cause slight swelling or shrinking in the wood, which can temporarily affect door fit and swing. If you notice the problem is worse in the humid summer or dry winter, this could be a factor. Maintaining stable indoor humidity (40-60%) can help. For severe swelling, a slight hinge adjustment may be needed seasonally.
Mindful Use
Sometimes, we’re the problem. Are you or a family member yanking doors open too fast? Are pots or pans stored inside pushing the door out when opened? Encouraging gentler operation and ensuring interior shelves are organized can reduce violent impacts that expedite wear and misalignment.
Frequently Asked Questions
Will adhesive bumpers damage my wall or cabinet finish when removed?
High-quality, branded bumpers (like 3M) are designed for clean removal. Always test on an inconspicuous area first. Slowly peel them off at a low angle. If any adhesive residue remains, use a gentle adhesive remover or a little rubbing alcohol on a soft cloth. Avoid harsh scrapers that can scratch paint or veneer.
My cabinet hinges are old and don’t seem to have adjustment screws. What can I do?
For non-adjustable, older mortise-and-tenon or basic butt hinges, your options are limited to bumpers or stops. You can try carefully very slightly bending the hinge leaf (the flat plate) with pliers to realign it, but this is risky and can weaken the metal. Often, replacing these hinges with modern European-style hinges (which require mortising the door) is the best long-term fix, though it’s a more significant project.
How do I know if I need to adjust the hinge or just add a bumper?
Open the door and look at the gap between the door edge and the wall/appliance along its entire length. If the gap is consistently small (e.g., 1/4 inch or less) all the way down, a bumper is likely sufficient. If the gap changes dramatically—wide at the top and tight at the bottom, or vice versa—the door is twisted or the hinges are out of alignment, and adjustment is necessary for a proper fix.
Is a wall-mounted stop better than a hinge-mounted stop?
It depends. A hinge-mounted stop keeps all hardware on the cabinet/door, preserving your wall’s appearance. It’s great for lower cabinets hitting a wall or island. A wall-mounted stop is generally more robust and can handle heavier doors or more forceful swings. It’s ideal for upper cabinets hitting a side wall where you want a very definite stop. Consider your aesthetic preference and the door’s weight.
The door still hits the wall after adjusting the hinges. What now?
You’ve likely made a minor adjustment in the wrong direction or missed a screw. Double-check that all hinge mounting screws on the cabinet frame are tight. Loosen them slightly, gently reposition the entire hinge plate (pulling in or out as needed), and retighten. Also, ensure the door itself isn’t warped. Visually inspect it from the side and diagonally. If it’s a solid wood door, warping may require planing or replacement.
Can I prevent this issue when installing new cabinets?
Absolutely. During installation, always check door swing clearance before final tightening. Open each door fully and use a flashlight to check for contact with walls, appliances, or other doors. Adjust the hinge positions on the cabinet frame slightly before the final screw-down to optimize the swing path. Installing integrated door stops at the factory stage is the best prevention.