Fixing chipped paint on kitchen cabinets is a manageable DIY project that can dramatically refresh your kitchen without a full remodel. The process involves carefully assessing the damage, thoroughly cleaning and sanding the area, applying a primer, and then skillfully painting and sealing to match the existing finish. With the right tools, patience, and attention to detail, you can achieve a professional, seamless repair that lasts for years, saving you significant money compared to replacement or professional refinishing.
Key Takeaways
- Proper assessment is crucial: Identify if chips are surface-level or deep to determine the correct repair method, preventing wasted effort and ensuring a durable fix.
- Surface preparation is non-negotiable: Cleaning with a degreaser and light sanding creates a “tooth” for new paint to adhere to, which is the single most important step for a lasting repair.
- Primer is your secret weapon: Always use a bonding primer, especially on glossy surfaces or in high-traffic areas like kitchens, to ensure new paint bonds strongly and prevents future peeling.
- Color matching requires patience: Test paint colors on an inconspicuous area and consider sheen (matte, satin, semi-gloss) to achieve a seamless blend with your existing cabinets.
- Technique matters more than tools: Use a fine brush for chips, apply thin layers, and sand lightly between coats to avoid a noticeable “blob” and achieve a smooth, integrated finish.
- Sealing protects your work: A final clear coat (like a water-based polyurethane) adds a tough, washable layer of protection against moisture, grease, and daily wear in the kitchen environment.
- Prevention extends the life of your repair: Address underlying causes like moisture, hardware impact, or poor adhesion to stop new chips from forming around your freshly fixed areas.
📑 Table of Contents
- Understanding the Enemy: Why Cabinet Paint Chips
- Gathering Your Arsenal: Essential Tools and Materials
- The Step-by-Step Surgical Procedure: Repairing Your Chips
- Advanced Techniques and Troubleshooting
- Prevention: Keeping Your Cabinets Chip-Free for the Long Haul
- Conclusion: The Satisfaction of a Seamless Fix
Understanding the Enemy: Why Cabinet Paint Chips
Before we dive into the “how,” let’s quickly talk about the “why.” Kitchen cabinets are battlegrounds. They face daily assaults from steam, grease splatters, humidity changes, frequent cleaning, and the inevitable bump from a pot or a hurried elbow. Paint chips when the bond between the paint film and the underlying surface (wood, MDF, or old paint) fails. This failure is rarely spontaneous; it’s the final symptom of a process. Common culprits include moisture seeping into joints or around sinks, poor surface preparation during the original paint job, the use of an incompatible paint (like latex over oil without proper priming), or simply the natural expansion and contraction of wood in a humid environment. Understanding this helps you not only fix the current chip but also address the root cause to prevent a recurring nightmare. For instance, a chip directly above the dishwasher is likely a steam issue, while one near a cabinet hinge might be from hardware stress.
The Different Types of Damage: Not All Chips Are Created Equal
When you inspect your cabinets, you’ll likely encounter one of three scenarios. First, there’s surface chipping, where only the top layer of paint is affected, often looking like a flake or a thin peel. This is the easiest to fix. Second, deep chipping has gone through all paint layers into the primer or bare wood/substrate. This requires more fill material and careful layering. Third, and most problematic, is edge peeling, where a large section is lifting from the cabinet face, often along the grain or an edge. This usually indicates a systemic adhesion failure and requires removing the loose section entirely and starting fresh. Your repair strategy will change dramatically based on which type you’re dealing with.
Gathering Your Arsenal: Essential Tools and Materials
A successful repair job starts with having the right tools on hand. Rushing to the hardware store mid-project is frustrating. For most standard chip repairs on painted cabinets, you’ll need a core set of supplies that won’t break the bank.
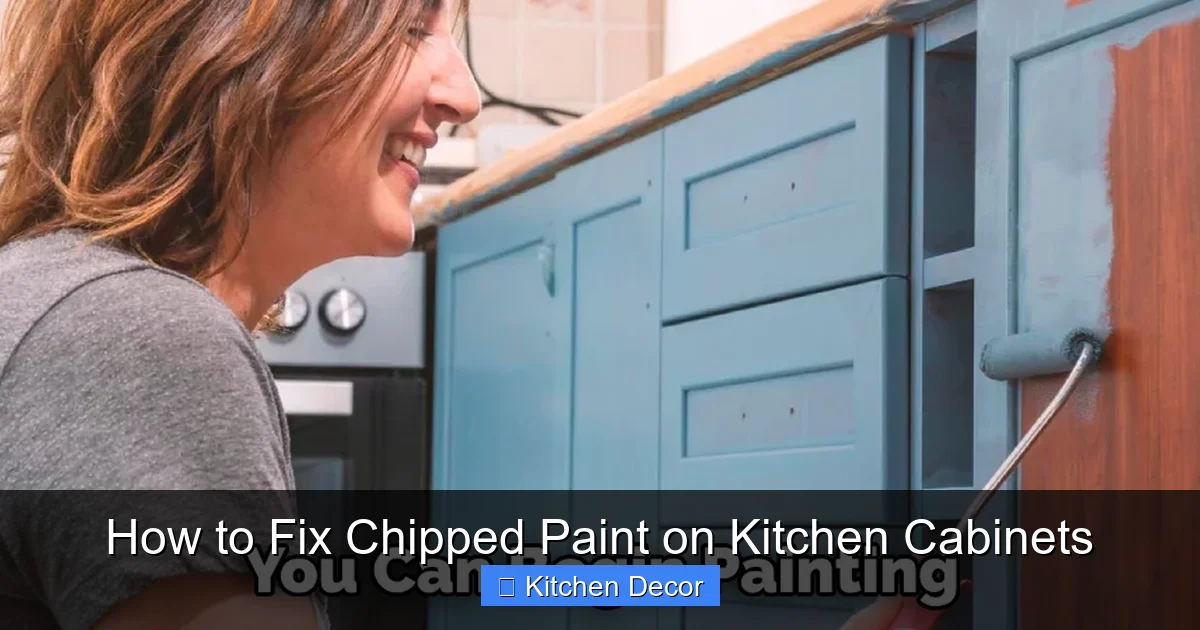
Visual guide about How to Fix Chipped Paint on Kitchen Cabinets
Image source: thekitchenix.com
Basic Toolkit for Small to Medium Chips
- Cleaning Supplies: TSP substitute or a heavy-duty degreaser (like Krud Kutter), rags, and rubber gloves. Grease is the enemy of adhesion.
- Sanding Tools: 220-grit and 320-grit sandpaper (or a sanding sponge), a small sanding block for flat areas, and a flexible sanding pad for contours. A tack cloth is essential for removing dust.
- Application Tools: A set of high-quality, synthetic-bristle (nylon/polyester) angled trim brushes in various sizes (1-inch and 2-inch are perfect). Foam brushes can work for very small areas but often leave a texture.
- Primer & Paint: A stain-blocking shellac-based or bonding acrylic primer (like Zinsser B-I or Bulls Eye 1-2-3). For paint, you must use the exact brand, color, and sheen as your existing cabinets. Get a sample can and test it first!
- Fillers & Putties: For deep chips, a water-based wood filler or a flexible acrylic putty (like DAP Alex Plus) that can be sanded smooth and takes paint well.
- Protective Topcoat: A clear, water-based polyurethane in the sheen of your cabinets (satin is most common). This is critical for kitchen durability.
Pro-Tip: The Color Match Conundrum
Even if you know your cabinet paint brand (e.g., Benjamin Moore, Sherwin-Williams), colors can fade or change slightly over a decade. The only surefire way to match is to take an actual door or a large, inconspicuous sample to the paint store for custom color matching. Many stores offer this service for free. Alternatively, if your cabinets are older and the brand is unknown, you will need to rely on the store’s color-matching technology. Always test the matched color on a hidden part of the cabinet and let it dry completely—wet paint looks different than dry paint.
The Step-by-Step Surgical Procedure: Repairing Your Chips
Now, to the operating room. Follow these steps meticulously for a repair that disappears into the background. The golden rule: thin coats, proper drying time, and light sanding between steps. Rushing is the #1 cause of noticeable repairs.
Visual guide about How to Fix Chipped Paint on Kitchen Cabinets
Image source: thekitchenix.com
Step 1: Diagnosis and Clean Scrape
Using a bright light, examine the chip. With a fingernail or a plastic putty knife, gently probe the edges. Is the paint firmly adhered around the chip? If you can lift an edge, carefully scrape away any loose, flaking paint back to a firmly bonded edge. This is critical; painting over a loose edge guarantees the new paint will chip too. For deep chips, use the tip of your putty knife to clean out any debris or old, crumbly filler.
Step 2: The Deep Clean: Degreasing
Kitchens are greasy. Even if you can’t see it, a film exists. Mix your TSP substitute per instructions. Wearing gloves, thoroughly wash the entire area you’ll be working on—the chip and at least a 2-inch border around it. Rinse with clean water and let dry completely. This step cannot be skipped. Grease will act as a release agent, causing your new paint to peel off like a sticker.
Step 3: Sanding for “Tooth”
With your 220-grit sandpaper or sanding sponge, lightly sand the entire repair zone. Your goal is not to remove paint but to roughen the surface microscopically. You should see a uniform, dull, chalky appearance where you’ve sanded. For a deep chip, you’ll also need to sand the inside of the hole and the edges of the surrounding sound paint to create a seamless transition. Wipe the area down with a tack cloth until no dust remains. A vacuum with a brush attachment can help get dust out of the chip recess.
Step 4: Priming: The Foundation of a Lasting Bond
Stir (don’t shake) your primer thoroughly. Using your small angled brush, apply a thin, even coat of primer only to the sanded area. For a deep chip, you may need to apply a little primer into the recess first. Let the primer dry fully according to the can’s directions (usually 1-2 hours). Once dry, gently sand the primed area with your 320-grit sandpaper to knock down any brush strokes or dust nibs. Wipe clean with tack cloth. This sanded primer surface is now perfectly prepared to receive your color.
Step 5: The Art of Color Application
This is the delicate part. Dip only the very tip of your brush into the paint. Wipe off excess on the can’s rim. You want the brush almost dry. This technique, called “dry brushing,” prevents over-application and drips. For a small chip, use the very point of the brush to “dot” paint into the recess, then use light, feathering strokes to blend it out over the sanded primer and slightly onto the surrounding original paint. Build the color in 2-3 ultrathin coats, sanding lightly with 320-grit between each coat and wiping clean. The goal is to build opacity slowly, mimicking the thin, even layer of the original factory finish. For a deep hole, you might need to use a small artist’s palette knife to apply a bit of paint filler-like to level the surface before the final feathering coats.
Step 6: Sealing the Deal with Topcoat
Once your final paint coat is dry and sanded smooth, it’s time for armor. Apply your water-based polyurethane in the same manner: thin coats, feathered edges. Two thin coats are usually sufficient. The first coat will look a bit milky; don’t worry, it dries clear. Sand lightly with 320-grit or a fine foam sanding pad between coats for an absolutely glass-smooth finish. Let the final coat cure for at least 24-48 hours before reassembling hardware or putting the cabinet back into heavy use. Curing is different from drying; it’s when the finish reaches full hardness.
Advanced Techniques and Troubleshooting
What if the chip is the size of a dime? What if you’re dealing with a raised panel with a molded edge? Here’s how to level up your repair game.
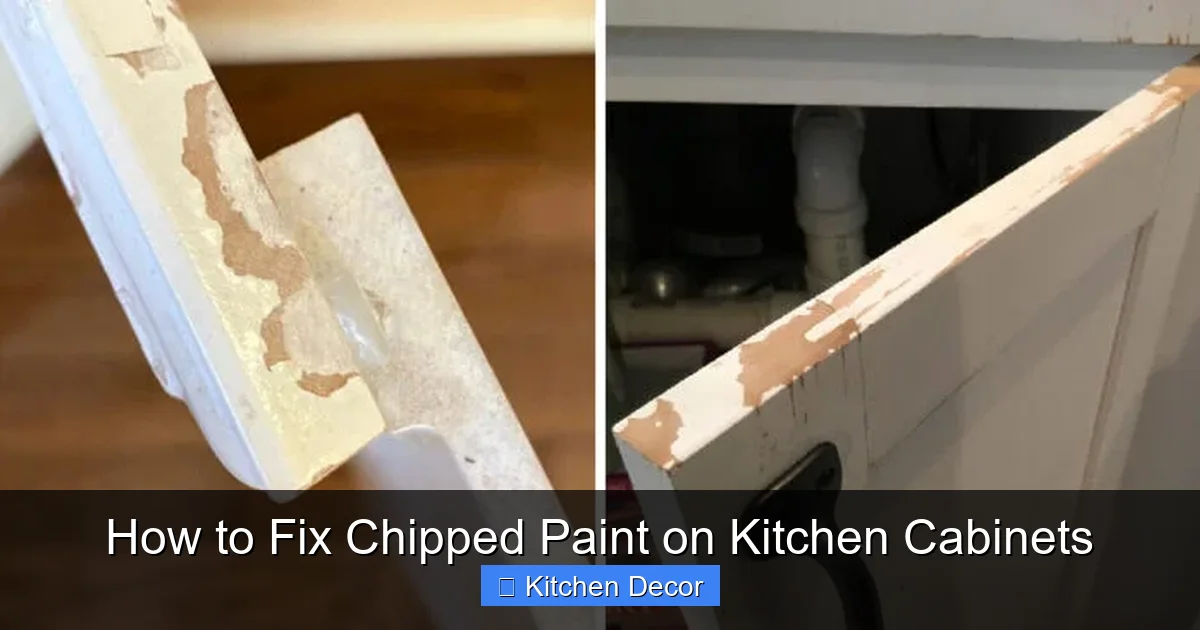
Visual guide about How to Fix Chipped Paint on Kitchen Cabinets
Image source: thekitchenix.com
Repairing Large or Deep Chips
For damage larger than a quarter or deeper than 1/8 inch, you’ll need a filler. After Step 2 (cleaning), apply your water-based wood filler or flexible acrylic putty with a putty knife. Press it firmly into the hole, overfilling slightly. Let it cure fully (check the manufacturer’s time). Once rock-hard, sand it flush with the surrounding surface using 220-grit, then proceed to priming. The key is using a filler that shrinks minimally and sands perfectly smooth without gumming up your sandpaper.
Matching the Sheen: The Final Frontier
This is where many DIY repairs are given away. A satin finish reflects light differently than a semi-gloss. If your cabinets are semi-gloss (very shiny, common in older kitchens), your repair must be too. If they are matte or flat (more modern), a glossy repair will look like a spotlight. Observe your cabinets from different angles under the kitchen light. The sheen is often more important than a perfect color match for a repair to vanish. Your topcoat must match the sheen of the existing finish exactly.
Dealing with Molded or Contoured Surfaces
Raised panels and routed edges are tricky. You cannot sand a contour flat. Instead, use a flexible sanding pad (like a 3M Sandblaster) to conform to the shape. For painting, a small, high-quality round brush might work better than a flat trim brush for following the curve. The feathering technique is even more important here to avoid building up paint on the high edges of the molding. Patience is paramount.
Prevention: Keeping Your Cabinets Chip-Free for the Long Haul
Fixing chips is satisfying, but preventing them is better. Once your repair is complete, adopt these habits to protect your investment and your new paint job.
Humidity and Moisture Control
Kitchens generate steam. Always use your range hood vent when cooking. If you have a dishwasher, ensure it’s sealed properly and that the door gasket is clean. For cabinets above a sink or near a dishwasher, consider applying a clear, water-based polyurethane to the *underside* of the cabinet (if it’s raw wood or a vulnerable edge) as a preventive measure. A small dehumidifier can help in very humid climates or poorly ventilated kitchens.
Hardware and Impact
Cabinet hinges and handles are common impact points. Check that all hardware is securely fastened. Loose hinges can cause the door to shift and rub, chipping paint at the frame. Consider adding small, clear rubber bumpers to the inside corners of cabinet doors where they meet the frame. This silently absorbs minor contact. When closing doors and drawers, cultivate a habit of doing so gently.
Cleaning the Right Way
Ditch the harsh ammonia-based glass cleaners and abrasive scrub pads on painted cabinets. Use a soft microfiber cloth dampened with warm water and a drop of mild dish soap. Wipe, then immediately dry with a clean, dry cloth. For greasy spots, use your TSP substitute solution, rinse, and dry. Never let water pool on a cabinet surface, especially at seams.
Conclusion: The Satisfaction of a Seamless Fix
Fixing chipped paint on your kitchen cabinets is more than a chore; it’s an act of preservation and a testament to the power of careful, methodical work. By investing a few hours and a small amount in supplies, you’ve not only erased an eyesore but also extended the life of your cabinetry and deferred a costly replacement. Remember, the magic is in the prep and the patience. A perfectly sanded, primed, and feathered thin coat will always outperform a hasty, thick application. Your kitchen is the heart of your home, and its cabinets tell a story. With this guide, you can ensure that story is one of meticulous care and enduring beauty, one seamless chip repair at a time. Now, go admire your invisible work—and maybe pour yourself a well-earned coffee in your refreshed space.
Frequently Asked Questions
Can I just paint over a chipped area without sanding or priming?
No. Painting over a chip without proper prep is a temporary fix at best. The new paint will not adhere well to the old, potentially glossy or contaminated surface and will likely peel or chip again quickly, often taking some of the original paint with it. Sanding and priming are essential for a durable bond.
What type of paint should I use for the repair?
You must use the exact same type of paint (e.g., acrylic latex, alkyd) and sheen (matte, satin, semi-gloss) as your existing cabinets. If you don’t know, take a sample to a paint store for identification. For the repair itself, a high-quality cabinet and trim paint is ideal as it is formulated to be hard and washable.
How long does the entire repair process take from start to finish?
For a small to medium chip, plan for 2-4 hours of active work, but the timeline is dictated by drying/curing times. After cleaning and sanding, primer needs 1-2 hours to dry. Each thin paint coat needs 1-2 hours to dry to the touch. The final clear coat needs at least 24 hours to cure enough for light use. Full cure can take up to a week.
My cabinets are a custom color. How can I possibly match the paint?
Take an actual cabinet door (or a large, hidden sample) to a professional paint store. They have spectrophotometers that can analyze the color and create a perfect custom match. Bring a door if possible, as lighting and existing sheen affect the match. Always test the matched color on an inconspicuous spot.
What if the chipped area is on a cabinet edge or corner?
Edge chips are common but require extra care. After cleaning and sanding, use a flexible sanding pad to conform to the edge. When painting, use a very fine brush and “pull” the paint from the center of the repair outward to avoid building up paint on the sharp edge, which would create a noticeable ridge. Feathering is even more critical here.
Is a topcoat really necessary over the repaired paint?
Absolutely, especially in a kitchen. The original factory finish on cabinets is almost always a tough, clear topcoat. Your repair paint, even if it’s the same color, lacks this protective layer. A water-based polyurethane topcoat in the correct sheen adds a sacrificial, hard, and washable layer that protects your repair from grease, moisture, and cleaning, making it last as long as the surrounding finish.