Staining and sealing your cutting board protects it from moisture, bacteria, and wear while enhancing the wood’s natural grain. The process involves careful preparation, applying a food-safe stain, and sealing with a durable, non-toxic finish. Following these steps ensures your board remains a functional, beautiful centerpiece in your kitchen for years.
Hey there! Have you ever looked at that beautiful, well-loved cutting board in your kitchen and wondered how to keep it looking its best for the long haul? Maybe it’s starting to look a little worn, with some stubborn stains or a dry, thirsty feel. That’s where the magic of staining and sealing comes in. It’s not just about making it pretty—though it absolutely does that—it’s a critical step in protecting your investment, ensuring food safety, and extending the life of one of your most-used kitchen tools. Whether you have a new board you want to customize or an old friend that needs some TLC, this complete guide will walk you through every single step. We’ll talk about the “why,” the “what,” and the exact “how,” all in simple, no-nonsense terms. Let’s get into it and give that board the glow-up it deserves.
Key Takeaways
- Preparation is everything: Thorough sanding and cleaning create the ideal surface for stain and sealant adhesion, preventing peeling and uneven absorption.
- Always use food-safe products: Only stains and sealants labeled explicitly as food-safe or FDA-approved for food contact should be used on cutting boards.
- Test before you commit: Always test stain on a hidden area or scrap wood to confirm color and absorption, as different woods react uniquely.
- Thin, even coats win: Multiple thin layers of stain and sealant are far superior to one thick coat, reducing drips and ensuring a smooth, durable surface.
- Curing time is non-negotiable: The sealant must cure fully (often 72+ hours) before use to form a hard, protective barrier against moisture and microbes.
- Maintenance prolongs life: Regular cleaning with mild soap, immediate drying, and periodic reapplication of mineral oil or board cream are essential for upkeep.
- Know when to refinish: Deep cuts, persistent odors, or a dull, dry feel signal it’s time to sand down and reapply the full stain and seal process.
📑 Table of Contents
- Why Stain and Seal Your Cutting Board? More Than Just Looks
- Essential Tools and Materials: Setting Up for Success
- Preparing Your Cutting Board: The Foundation of a Perfect Finish
- The Staining Process: Achieving Your Perfect Color
- Sealing for Long-Term Protection: Locking in Your Work
- Maintenance and Reapplication: Keeping the Good Times Rolling
- Common Mistakes and How to Avoid Them
Why Stain and Seal Your Cutting Board? More Than Just Looks
At first glance, you might think, “It’s just a piece of wood I chop onions on. Why all the fuss?” But your cutting board is a workhorse. It faces moisture from washing, juices from meats and veggies, constant knife scarring, and temperature changes. Staining and sealing is a two-part defense system that transforms raw wood into a resilient, hygienic surface. Let’s break down why skipping this process is a recipe for a short-lived board.
Protection Against Moisture and Bacteria
Wood is hygroscopic, meaning it absorbs and releases moisture from the air. Unsealed wood will soak up water from washing, food juices, and even humidity. This constant swelling and shrinking leads to cracks, warping, and splits. More importantly, those micro-cracks and knife scars become perfect hiding spots for bacteria like E. coli and Salmonella, which can persist even after regular washing. A proper sealant creates an impermeable barrier on the surface and within the top layer of wood fibers. This barrier prevents liquids and food particles from penetrating, making the board much easier to clean and sanitize thoroughly. It’s your first and most important line of defense for food safety.
Enhancing and Preserving Natural Beauty
Let’s be honest—part of the joy of a nice wooden board is looking at it! Staining allows you to deepen the wood’s natural color, bring out its unique grain patterns, or even change its hue entirely to match your kitchen decor. A rich, walnut stain can make a maple board look luxurious, while a lighter oak stain can brighten it up. But stain alone isn’t enough. Without a sealant, that beautiful color will fade quickly, especially in direct sunlight or with frequent washing. The sealant locks in that color, adds a subtle sheen (from matte to satin), and protects it from UV rays and everyday wear. It turns your board from a simple tool into a stunning piece of kitchen decor.
Extending the Lifespan of Your Investment
A good quality wooden cutting board can last decades, but an untreated one might crack or warp within a year. The cycle of absorbing water and drying out is incredibly damaging. Sealing interrupts this cycle. It stabilizes the wood, preventing the expansion and contraction that causes damage. Furthermore, a sealed surface is more resistant to scratches from knives. While all wood will show knife marks, a sealed board allows you to easily sand those marks out and reapply a fresh coat of sealant, essentially resetting the board’s surface. This means your board can be passed down, not replaced. It’s a small time investment for a huge return in longevity and value.
Essential Tools and Materials: Setting Up for Success
Before you dip a single brush into a can, you need the right supplies. Using the wrong products can ruin your board or, worse, make it unsafe for food. Let’s build your toolkit. Remember, when in doubt about a product’s safety, check the label for “food-safe,” “non-toxic when cured,” or “FDA compliant.” You can also review the manufacturer’s terms and conditions for specific usage guidelines and safety certifications.
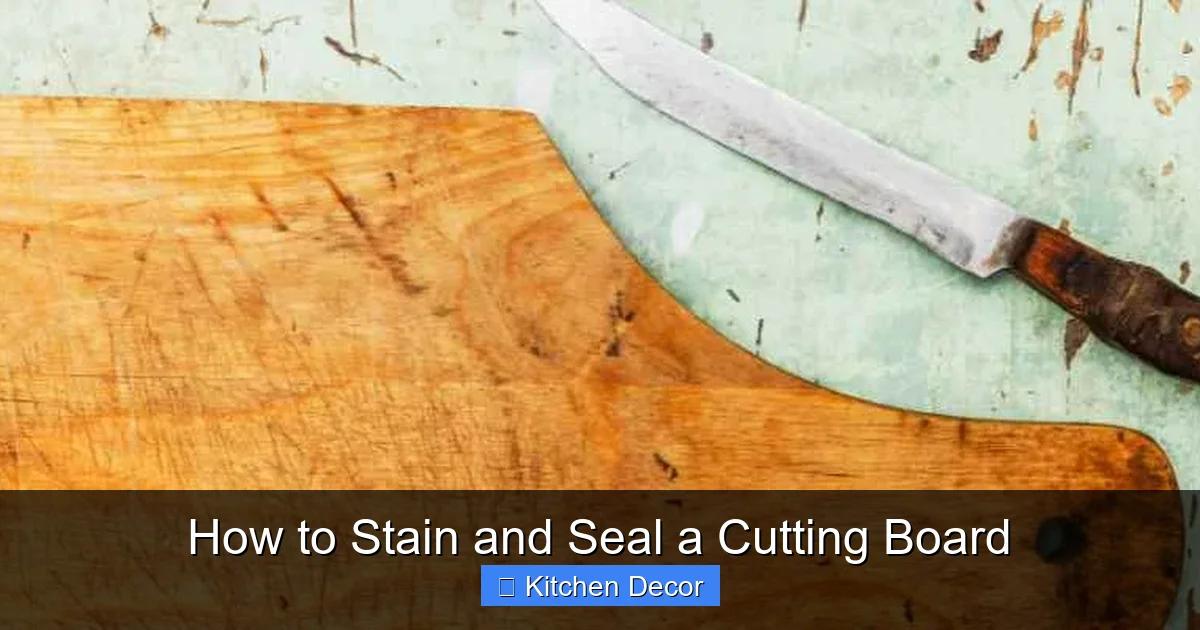
Visual guide about How to Stain and Seal a Cutting Board
Image source: homeimprovementway.com
Types of Wood Stains: Color and Penetration
Not all stains are created equal, especially for cutting boards. You have two main categories:
- Oil-Based Stains: These penetrate deeply into the wood fibers, offering rich, long-lasting color and excellent durability. They have a stronger odor and longer drying times (often 24+ hours). Brands like Minwax are common. Crucially, ensure any oil-based stain you use is labeled food-safe once fully cured.
- Water-Based Stains: These sit more on the surface, dry quickly (1-2 hours), have low odor, and are easier to clean up. They offer vibrant colors but may be less penetrating. Look for brands specifically marketed as non-toxic and safe for food contact after curing, like those from General Finishes.
- Natural Alternatives: For a very subtle tint, you can use food-safe oils like walnut oil or tung oil, which darken the wood slightly while primarily conditioning and sealing. These are excellent if you want minimal color change.
Pro Tip: Always test your chosen stain on a scrap piece of the same wood or an inconspicuous corner of your board. Woods like maple and birch are very closed-pore and take stain differently than open-pore woods like oak or ash.
Food-Safe Sealants: The Critical Barrier
This is the most important material choice. You need a finish that will form a hard, impermeable film that is completely inert and non-toxic once cured. Never use standard varnishes, polyurethanes, or lacquers from the hardware store unless they are explicitly labeled for food contact. Here are your best bets:
- Mineral Oil (Food-Grade, USP Grade): The classic, no-brainer choice. It’s odorless, tasteless, and completely inert. It doesn’t form a film on the surface; instead, it saturates the wood fibers, repelling water. It’s perfect for maintenance between deeper sealings. Look for pure, unscented mineral oil.
- Tung Oil (100% Pure, Food-Safe): A natural drying oil that polymerizes to form a tough, waterproof layer. It penetrates deeply and enhances the grain beautifully. Must be 100% pure tung oil, not “tung oil finish” which contains varnish.
- Beeswax/Board Cream: Often a blend of mineral oil and beeswax. The oil conditions, the wax adds a slight surface barrier and a soft sheen. Great for final polishing and regular upkeep, but not a primary sealant for bare wood.
- Commercial Food-Safe Finishes: Products like Howard Products’ “Cutting Board Oil & Finish” or “Tried & True” Danish Oil (which is 100% tung oil) are formulated specifically for this purpose and are foolproof for beginners.
Application Tools: Brushes, Rags, and Sandpaper
You’ll need a clean, lint-free workspace. For tools:
- Sanding Supplies: Start with 80-100 grit for heavy smoothing or removing old finish, then progress to 120, 150, and finally 180-220 grit for a perfectly smooth surface. A sanding block or orbital sander (used very lightly) helps with flat surfaces. Have multiple grits on hand.
- Applicators: For stain: use foam brushes, lint-free cotton rags (like old t-shirts), or a soft-bristle brush. For sealant: a foam brush or a clean, soft cloth rag works best. Avoid anything that sheds fibers.
- Protective Gear: Nitrile gloves, safety glasses, and a respirator mask (especially for sanding and oil-based stains) are highly recommended. Work in a well-ventilated area.
- Supplies for Cleanup: Mineral spirits for cleaning oil-based stain tools, soap and water for water-based, and plenty of paper towels or clean rags for wiping.
Preparing Your Cutting Board: The Foundation of a Perfect Finish
Rushing this step is the #1 reason for staining and sealing failures. You cannot apply a new finish to a dirty, greasy, or rough surface. The finish will not adhere properly, leading to flaking, blotchiness, or quick wear. Patience here pays off exponentially.

Visual guide about How to Stain and Seal a Cutting Board
Image source: homeimprovementway.com
Deep Cleaning and Degreasing
First, your board must be utterly clean. If it’s been used, scrub it with hot water and a mild dish soap, using a scrub brush to get into knife scars. Rinse thoroughly. For boards with built-up grease or old wax, create a paste of baking soda and coarse salt and scrub it with a half-cut lemon. The citric acid helps cut grease. Rinse again with hot water. This is not optional. Any residual oil or soap will create a barrier between the wood and your new stain/sealant. After rinsing, towel-dry the board immediately. Then, let it air-dry completely upright for at least 24 hours. Wood must be bone-dry (below 10% moisture content) for stain to be absorbed evenly.
The Sanding Sequence: From Rough to Glass-Smooth
Once dry, the real work begins. The goal is to create an even, smooth surface free of old finish, scratches, or debris.
- Initial Sanding (80-100 Grit): If your board has an old, flaking finish, start here to remove it completely. Sand with the grain of the wood, not in circles. Apply even pressure. For very rough or damaged boards, this step is essential. Wipe away dust.
- Medium Sanding (120-150 Grit): This removes the deep scratches from the coarse grit. Sand thoroughly until the surface feels uniformly smooth to the touch. Wipe dust.
- Final Sanding (180-220 Grit): This is the critical step for a perfect finish. Sand meticulously with this fine grit. It erases all visible sanding marks and preps the wood to accept stain evenly. Run your hand over the surface—it should feel like silk. Wipe with a tack cloth or a damp rag that’s been rinsed clean to remove all fine dust. Let dry.
Pro Tip: Always sand with the grain. Sanding across the grain will leave scratches that are nearly impossible to remove and will be highlighted by the stain.
Testing for Absorbency and Final Prep
Before you touch stain, do a simple test. Put a few drops of water on the board. If they bead up immediately, the wood is still too dense or possibly has a residual seal. If they soak in slowly, it’s ready. If they soak in instantly, great! Now, do your stain test on a hidden corner or a scrap piece. Apply a small amount with a rag, let it sit for the recommended time (usually 5-15 mins), then wipe off. Observe the color after it dries (1-2 hours). This tells you if you need a pre-stain conditioner (for very dense woods like maple) to prevent blotchiness. Finally, give the entire board one last wipe with a clean, dry microfiber cloth to remove any last speck of dust.
The Staining Process: Achieving Your Perfect Color
With your board perfectly prepped, it’s stain time. This step is about controlled color application. Remember: you can always add more stain, but you can’t take it away easily. Work in a dust-free area.
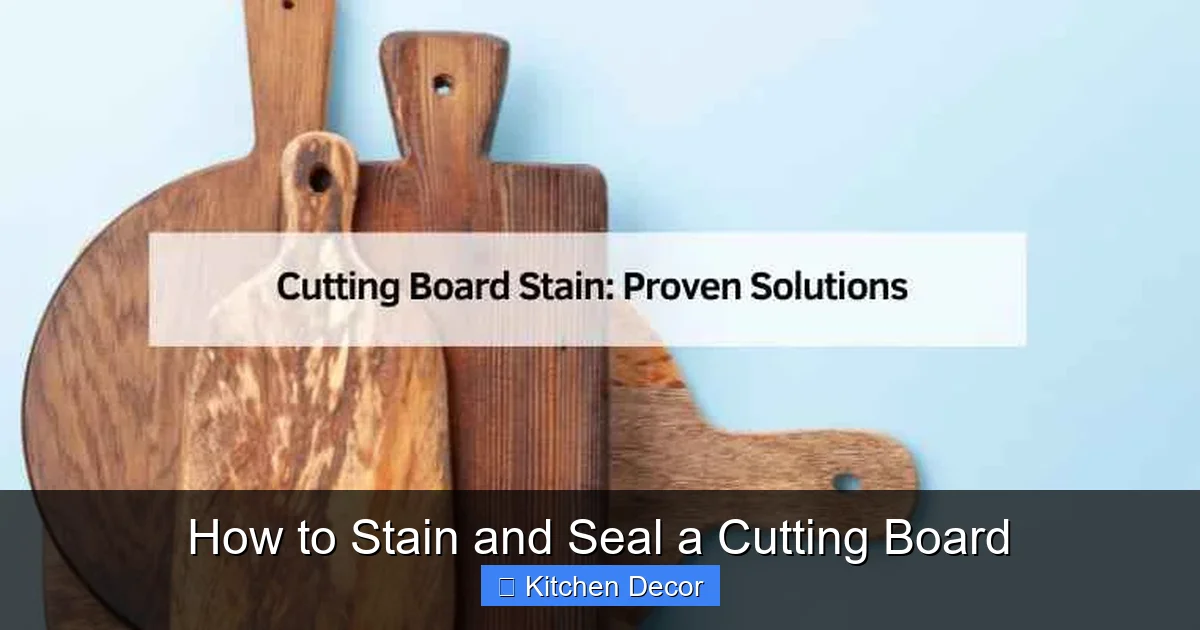
Visual guide about How to Stain and Seal a Cutting Board
Image source: homeimprovementway.com
Applying the Stain: Technique Matters
Shake your can of stain thoroughly. Using your chosen applicator (foam brush or lint-free rag), apply a generous, even coat following the direction of the wood grain. Don’t puddle it, but ensure the surface is fully covered. For a rag, use a circular motion to work it in, then wipe with the grain. Let the stain sit on the wood for the time specified on the can—this is the “dwell time” that allows pigment to penetrate. For a deeper color, you can let it sit a minute longer, but don’t let it dry completely.
Wiping and Drying: The Critical Moment
After the dwell time, use a clean, dry rag to wipe off all excess stain. Wipe firmly with the grain. This removes the stain sitting on top of the wood, which would just sit sticky and never dry properly. You should see the color you want on the wood. If it’s too light, you can apply a second coat after the first is completely dry (follow product instructions, usually 4-6 hours). Do not rush this drying phase. Place the board in a dust-free, well-ventilated area. Any dust that settles in the wet stain will be sealed in forever. Let it dry completely—overnight is best for oil-based, 2-4 hours for water-based. Touch it; it should feel dry, not tacky.
Multiple Coats and Color Building
If your first coat didn’t achieve the depth you wanted, you can apply a second coat after the first is fully dry. The second coat will be more subtle than the first, as the wood is becoming saturated. Three coats is usually the maximum before the stain starts to sit on the surface. Between coats, sand lightly with 320-grit sandpaper or a fine sanding sponge. This “de-nibs” the surface, removing any raised wood fibers and creating a slightly rough texture for the next coat to grip. Wipe away all dust with a tack cloth. This step between coats is what separates a professional-looking finish from a streaky one.
Sealing for Long-Term Protection: Locking in Your Work
Now for the grand finale—the sealant. This is what makes your board safe for food and durable for years. The sealing process is similar to staining but with a few key differences in product and curing.
Choosing the Right Sealant for Your Needs
Refer back to the materials section. For a beginner, a commercial food-safe blend like Howard Cutting Board Oil & Finish or pure, 100% tung oil is ideal. Mineral oil alone is a conditioner, not a true film-forming sealant, so it’s best for maintenance or over a stained board where you want the wood to remain “open.” If you used a water-based stain, a water-based food-safe sealant is a good match. If you used an oil-based stain, an oil-based sealant like tung oil is compatible. Never mix oil-based and water-based products without full curing in between.
Application Techniques for a Flawless Barrier
Apply the sealant exactly as you did the stain: with the grain, using a foam brush or clean lint-free rag. Pour a small amount onto the board and spread it evenly, covering every inch, including the edges and end grain. The end grain is more porous and will absorb more sealant—apply an extra coat there. Let it sit for 10-15 minutes to penetrate. Then, using a clean, dry rag, buff off all excess. This is crucial. You do not want a puddle of liquid sitting on the surface. It will dry sticky and gummy. The surface should look damp but not wet. Immediately wipe the edges and underside to catch any drips.
Curing and Finishing: Patience is a Virtue
This is where most people mess up. “Dry to the touch” is not “cured.” The sealant needs to fully polymerize and harden, which takes time. Place the board in a clean, dust-free, well-ventilated area with good air circulation. The temperature should be room temperature (65-75°F). Curing times vary:
- Mineral Oil: No real “cure,” it soaks in. Can be used lightly after 2-4 hours.
- Tung Oil: 24-48 hours to touch, 5-7 days for full cure.
- Commercial Blends: Check the can, but typically 24 hours to touch, 72 hours for full food-safe use.
Do not use the board for food prep during the full cure period. Once cured, the surface will be hard and resistant to water. You can test by putting a few drops of water on it—they should bead up.
Maintenance and Reapplication: Keeping the Good Times Rolling
Your beautifully stained and sealed board is now ready for action! But to keep it in prime condition, a little maintenance goes a long way. This isn’t complicated, but it is essential.
Daily and Weekly Cleaning: The Right Way
After each use, scrape off large debris with a bench scraper or the back of a knife. Wash with hot water and a mild dish soap. Use a soft sponge or scrub brush. Never soak your wooden board or put it in the dishwasher. The prolonged water exposure is the fastest way to ruin it. Rinse thoroughly and immediately dry completely with a towel. Stand it upright or on its edge to air-dry completely. For weekly sanitizing, you can wipe it down with a 1:1 solution of white vinegar and water or a 3% hydrogen peroxide solution. Let it sit for a few minutes, then rinse and dry.
The Ritual of Re-oiling: Conditioning the Wood
Even the best sealant will eventually wear down from knife cuts and washing. You’ll know it’s time when the wood looks dry, pale, or starts absorbing water quickly instead of beading. Every few weeks (or monthly in dry climates), apply a generous coat of food-grade mineral oil or board cream. Pour a small pool on the board, rub it in with a rag, let it soak in for a few hours or overnight, then wipe off any excess. This replenishes the wood’s oils from the inside out. This simple step is the single most important maintenance task.
When and How to Refinish: The Full Reset
Eventually, the sealant will wear through, and the board will develop deep cuts, stains, or odors that oiling can’t fix. This is when you need to do the full process again: sand down to bare wood (starting with 80 grit if needed), clean, and reapply stain and sealant from scratch. For most home kitchens, this full refinishing is only needed every 2-5 years, depending on use. For boards used for raw meat, you may need to refinish more frequently for hygiene. When sanding, always go with the grain and progress through the grits to end with 220 for a smooth base.
Common Mistakes and How to Avoid Them
Let’s talk about the pitfalls so you can sidestep them with ease.
Mistake 1: Skipping the Sanding or Using Too Fine a Grit First
If your board has an old finish or is rough, you must start with a coarse grit (80-100) to remove the old material. Starting with 220 grit will just clog the paper and not remove anything. Always work your way up to finer grits. A missed grit line will show through the stain.
Mistake 2: Using Non-Food-Safe Products
This is the cardinal sin. That beautiful marine polyurethane from the boat project? Not for your board. It contains chemicals that can leach into food, especially with acidic ingredients or heat. Only use products explicitly labeled for food contact. When in doubt, check the terms and conditions of the product for a food-safety guarantee or certification.
Mistake 3: Applying Thick Coats and Not Wiping Excess
More is not better. A thick coat of stain or sealant will never dry properly in the middle. It will stay sticky, attract dust, and eventually peel. Apply thin, even coats and always wipe off the excess after the dwell time. This leaves a thin, even film that cures hard and clear.
Mistake 4: Rushing the Curing Process
It’s so tempting to use that board the next day. But if you cut on it before the sealant is fully cured, you’ll cut into the soft, uncured layer, ruining the finish and potentially exposing raw wood. Stick to the full cure time. Your future self will thank you.
Mistake 5: Neglecting the End Grain
The end grain (the exposed ends of the wood boards) is like a bundle of straws—it soaks up liquid 10-20 times faster than the side grain. If you only coat the top, the end grain will dry out, crack, and split. Always pay extra attention to the ends. Apply an extra coat of sealant there during each application and an extra dose of mineral oil during maintenance.
By understanding these common errors, you’re already ahead of the game. Your cutting board is more than a tool; it’s a kitchen companion. With this knowledge, you can keep it looking fantastic, performing perfectly, and safely serving your family for generations. Now, go forth and stain and seal with confidence!
Frequently Asked Questions
Is it safe to use a stained and sealed cutting board for food preparation?
Yes, absolutely, but only if you use products explicitly labeled as food-safe and allow them to cure completely. Food-safe sealants form a hard, inert barrier that prevents stain pigments from contacting your food. Always verify the product is intended for cutting boards or food contact surfaces.
How long should I wait before using my board after sealing it?
This depends entirely on the sealant. For mineral oil, you can use it lightly after 2-4 hours. For tung oil or commercial blends, wait at least 24 hours before light use, and 72 hours for full, heavy food preparation. The “full cure” time (when the finish is at maximum hardness) can take up to a week for oils. When in doubt, check the manufacturer’s instructions.
Can I stain over an old, sealed finish without sanding it off first?
No, you cannot. Stain needs to penetrate raw wood to work. A sealed surface is a barrier. You must sand down through the old sealant until you reach bare wood. Start with a coarse grit (80-100) to remove the old finish, then progress through finer grits to smooth the surface before applying new stain.
What’s the difference between mineral oil and a board cream?
Mineral oil is a pure, conditioner-only oil that penetrates the wood to replenish moisture and repel water. Board cream is typically a blend of mineral oil and beeswax. The oil conditions, while the beeswax leaves a very slight surface barrier and a soft sheen. Board cream is excellent for regular maintenance and adding a bit of slip resistance, but mineral oil is better for deep conditioning of very dry wood.
How often do I need to reapply sealant versus just oiling?
Deep sealing with a film-forming finish like tung oil or a commercial blend is a major maintenance task needed every 2-5 years, depending on use. Oiling with mineral oil or board cream is a frequent, light maintenance ritual—think every few weeks or whenever the wood looks dry. Oiling helps prolong the life of your sealant but does not replace it.
My board still smells like food (like garlic or onion) after sealing. Is it ruined?
Strong, persistent odors usually mean the smell has penetrated deep into the wood, likely before you sealed it. A proper sealant should trap odors inside the sealed layer. If the smell is noticeable from the surface, the seal may be incomplete or the board wasn’t prepped (cleaned/sanded) thoroughly enough. You may need to sand down past the stained layer to remove the odor-absorbing wood and start fresh.