Adding a kitchen to your basement is a fantastic way to increase your home’s living space and value. It requires careful planning around unique challenges like moisture, egress, and utilities. Success hinges on securing the proper permits, implementing robust waterproofing and moisture barriers, designing an efficient layout, and installing code-compliant electrical, plumbing, and ventilation systems. With the right approach, you can create a beautiful, fully-functional basement kitchen that serves as a guest suite, in-law apartment, or entertainment hub.
Key Takeaways
- Permits are non-negotiable: Basement kitchens are considered “dwelling units” and require full building, electrical, and plumbing permits to be legal and safe.
- Moisture is the #1 enemy: A comprehensive waterproofing strategy from the exterior and interior is the absolute first step before any framing or finishes.
- Layout must prioritize egress and function: The sink, stove, and refrigerator must form a functional triangle, and a proper window or egress door is legally required for a bedroom if the kitchen is part of one.
- Ventilation is critical for air quality: You cannot use a simple recirculating fan. A dedicated, exterior-venting range hood is mandatory to remove cooking moisture, grease, and odors.
- Choose materials for damp environments: Select vinyl, tile, or waterproof laminate flooring; moisture-resistant drywall (green board or cement board); and semi-gloss or waterproof paint for walls.
- Utility upgrades are often significant: Expect to extend or upgrade electrical panels, add dedicated circuits, and potentially upgrade plumbing and gas lines, which can be major cost drivers.
- Think about resale and legal definitions: An improperly permitted basement kitchen can complicate a home sale. Confirm your local municipality’s definition of a “kitchen” versus a “wet bar” to understand permitting requirements.
📑 Table of Contents
- So, You Want a Basement Kitchen? Let’s Get Started!
- Phase 1: The Foundation of Success – Planning, Research, and Permits
- Phase 2: Winning the War on Moisture – Waterproofing and Drainage
- Phase 3: Designing a Functional and Legal Layout
- Phase 4: The Invisible Infrastructure – Electrical, Plumbing, and HVAC
- Phase 5: Selecting Materials That Survive Below-Grade
- Phase 6: The Final Flourish – Finishing Touches and Smart Details
- Conclusion: Your Dream Space Awaits
So, You Want a Basement Kitchen? Let’s Get Started!
Dreaming of a private guest suite, an “in-law apartment,” or the ultimate entertainment basement? Adding a full kitchen is often the key to unlocking that potential. It transforms a simple rec room into a self-contained living space, boosting your home’s utility and market value. But let’s be clear: a basement kitchen isn’t just an upstairs kitchen on a lower floor. The subterranean environment presents a unique set of rules and challenges. Ignoring them leads to mold, failed inspections, and costly re-dos. This guide will walk you through every critical phase, from the initial “Can I do this?” to the final cabinet knob. We’ll talk in plain language, focus on what *actually* matters, and help you avoid the pitfalls that trip up so many DIYers and first-time renovators.
Phase 1: The Foundation of Success – Planning, Research, and Permits
Before you buy a single appliance or draw a single line, you must do your homework. Rushing into demolition is the fastest way to a budget-busting disaster. This phase is all about paperwork, conversations, and understanding the rules that govern your project.
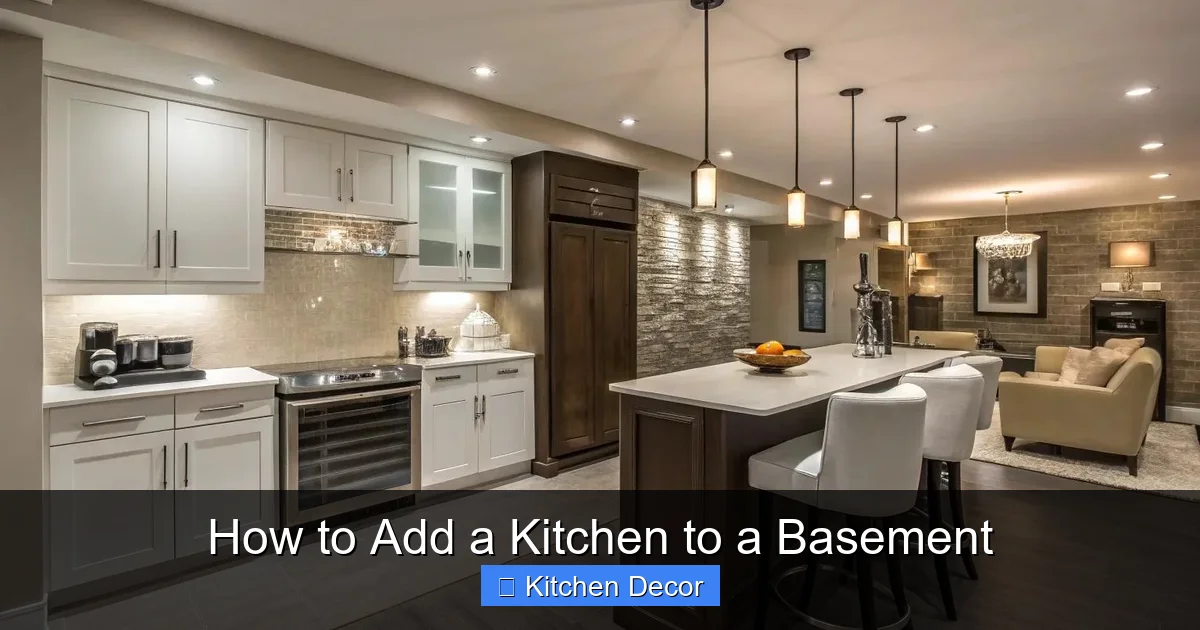
Visual guide about How to Add a Kitchen to a Basement
Image source: casolia.com
Understanding Your Local Building Codes
This is the most important step. Building codes vary dramatically by city, county, and state. What’s mandatory in one area might be optional in another. Your local building department is your new best friend. Call them or visit their website. You need to ask specific questions:
- What defines a “kitchen” versus a “wet bar”? Many jurisdictions have different rules for each. A wet bar might only require a sink and a small counter, while a kitchen typically needs a stove/oven, refrigerator, and sink, triggering full dwelling unit requirements.
- What are the egress requirements? If the kitchen is part of a bedroom (like a studio apartment), the room must have a window or door large enough for emergency escape and rescue. This often dictates where you can place the kitchen.
- What are the ceiling height requirements? Most areas require a minimum finished ceiling height (often 7 feet) for a legal living space. If your basement has low pipes or beams, this will impact your layout.
- Are there specific GFCI (Ground Fault Circuit Interrupter) requirements? Kitchens have strict rules about where GFCI outlets are required near water sources.
Securing the Proper Permits
You will need permits. Trying to skirt this is illegal, dangerous, and will void your homeowner’s insurance. When you sell, an unpermitted addition is a major red flag that can kill a deal or force you to rip it out. The three core permits for a basement kitchen are:
- Building Permit: Covers structural changes, insulation, drywall, and egress. The inspector will check framing, moisture barriers, and ceiling height.
- Electrical Permit: Covers all new wiring, outlets, switches, and lighting. Kitchens require dedicated circuits for the refrigerator, microwave, and dishwasher, and specific outlet placements.
- Plumbing Permit: Covers all new pipes for the sink, and if applicable, a gas line for a stove. This ensures proper slope, venting, and material use.
Pro Tip: For complex jobs, consider hiring a local architect or experienced designer. They know the codes, can create permit-ready plans, and often save you money by preventing errors.
Phase 2: Winning the War on Moisture – Waterproofing and Drainage
You cannot build a kitchen, or any living space, in a wet basement. Period. Moisture leads to mold, rot, warped floors, and ruined cabinets. This phase must be completed and verified *before* any framing goes in. It’s often the most expensive part of the project, but it’s non-negotiable.
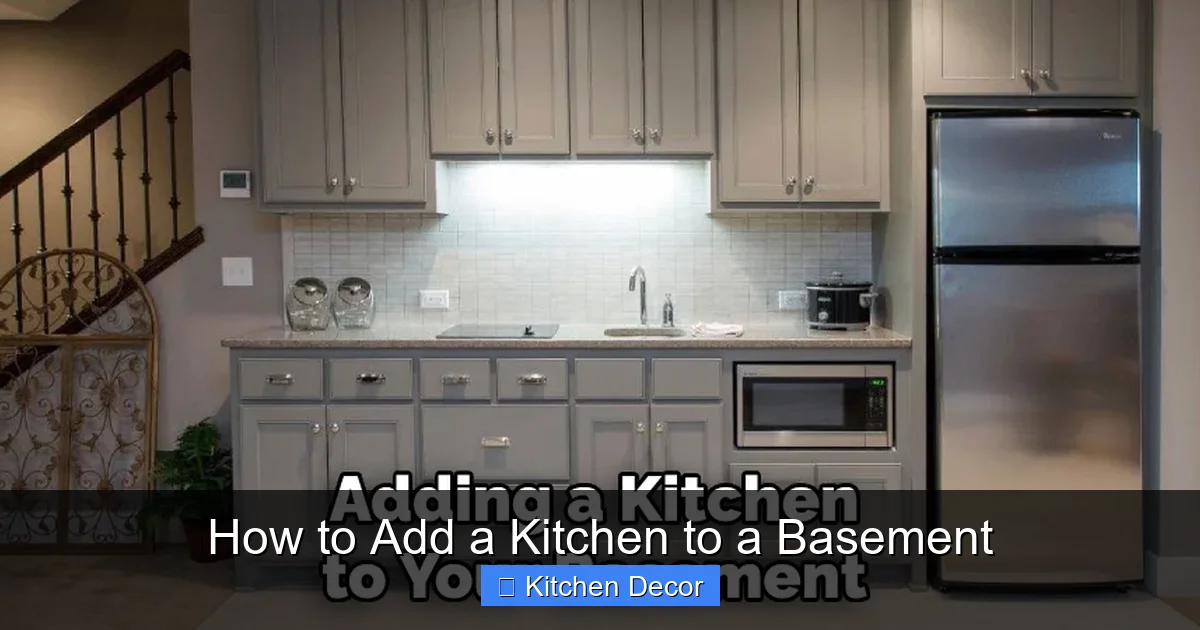
Visual guide about How to Add a Kitchen to a Basement
Image source: thekitchenix.com
Diagnosing the Source of Water
First, find out *why* your basement gets wet. Is it:
- Hydrostatic pressure? Water pushing in through the foundation walls or floor from a high water table. Look for water seeping through cracks or coming up through the floor slab.
- Poor exterior drainage? Downspouts dumping water next to the foundation, or a yard that slopes toward the house.
- Interior condensation? Warm, humid air from upstairs hitting cool basement walls and “sweating.” This is common in finished basements without proper dehumidification.
Implementing a Comprehensive Waterproofing System
You need a multi-layered defense. Start from the outside:
- Exterior Drainage: Clean gutters, extend downspouts at least 6 feet away from the foundation, and ensure the soil grades away from your house. Consider installing a French drain system around the perimeter at the footing level, which feeds into a sump pump.
- Sump Pump: A reliable, battery-backup sump pump is essential equipment for any basement kitchen. It actively removes water that accumulates under the slab.
- Interior Sealants & Barriers: Apply a waterproofing sealer (like a silicate-based or epoxy injection for cracks) to interior foundation walls. For new construction or major renovations, install a drainage mat or dimple board against the wall. This creates an air gap, allowing any water that gets through to run down to the floor drain instead of soaking into the wall.
- Vapor Barrier: A thick (6-mil or higher) polyethylene plastic sheeting must be laid over the concrete slab before any insulation or subfloor. All seams must be taped. This is your last line of defense against slab moisture.
Real-World Example: Don’t just paint the walls with “waterproofing paint.” It’s a temporary fix at best. The combination of exterior drainage, a sump, and an interior drainage plane is the gold standard for a dry, buildable basement.
Phase 3: Designing a Functional and Legal Layout
Now for the fun part! But remember, form follows function, and code follows both. You’re working with a often-awkward space with low ceilings, mechanicals, and limited natural light. Smart design is key.

Visual guide about How to Add a Kitchen to a Basement
Image source: happyhomehour.com
The Kitchen Work Triangle (and Basement Adjustments)
The classic rule: the sink, stove, and refrigerator should form a triangle with each side between 4 and 9 feet, and the total perimeter under 26 feet. This minimizes steps. In a basement, you have to work around:
- Mechanical Obstacles: Furnaces, water heaters, and ductwork are often in the basement. Your layout must either work around them or include plans to relocate them (a significant cost).
- Support Beams & Pipes: You can’t move these. Use them to your advantage! A beam can define a room, and a pipe chase can become a pantry wall.
- Egress Windows/Doors: If your kitchen is in a space that needs an egress window (like a potential bedroom), the window location dictates where you can place the “sleeping area,” which often influences the overall room layout.
Appliance Selection for Tight Spaces
Standard-sized appliances might overwhelm a small basement kitchen. Consider:
- Apartment-Sized or “Slab” Appliances: These are narrower (24″ wide vs. 30″) and shallower, perfect for galley kitchens.
- Drawer-Style Microwave: Saves valuable counter space.
- Induction Cooktop: These are flat, easy to clean, and don’t add ambient heat like gas or electric coils. They also have a smaller footprint.
- Undercounter Refrigerator Drawers: Fantastic for a secondary prep area or bar section.
- Ventless/Ductless Range Hood? NO. This is a critical mistake. Building codes for a kitchen require an exterior-venting hood. Ductless models do not remove moisture and grease effectively and are not code-compliant for a full kitchen. You must run a duct to the exterior.
Phase 4: The Invisible Infrastructure – Electrical, Plumbing, and HVAC
This is where professional expertise becomes crucial. Mistakes here are expensive, dangerous, and will fail inspection. Even if you’re a skilled DIYer, the permitting process often requires work to be done by licensed professionals (especially for gas and final hookups).
Electrical: More Than Just Outlets
Kitchens are power hungry. The National Electrical Code (NEC) mandates:
- Dedicated Circuits: The refrigerator, dishwasher, disposal, and microwave (if countertop) each need their own 20-amp circuit.
- Small Appliance Circuits: At least two 20-amp circuits must serve all countertop outlets. These cannot be shared with the dedicated appliance circuits.
- GFCI Protection: All outlets in the kitchen must be GFCI protected. This is usually done with GFCI breakers or GFCI receptacles.
- Adequate Lighting: You need ambient lighting (can lights), task lighting (under-cabinet), and potentially decorative lighting. Plan for switches at both room entrances.
Basement-Specific Note: If you’re adding a lot of circuits, your main electrical panel may need an upgrade. This is a common and significant cost.
Plumbing: Drains, Vents, and Supply Lines
The sink drain must tie into your main waste line with the proper slope (1/4″ per foot). It must also be properly vented to prevent sewer gases from entering your home and to allow water to drain smoothly. Running new supply lines (hot and cold) for the sink and dishwasher is straightforward. However:
- Adding a bathroom? If your kitchen project includes a bathroom, you’ll need a wet vent system or a new stack, which is complex plumbing.
- Gas Line: If you want a gas stove/oven, you must run a dedicated gas line from your main. This must be done by a licensed plumber or gas fitter. It involves shutting off the main, installing a new tee, and running black iron or CSST pipe.
HVAC: The Unseen Necessity
A basement kitchen generates a lot of moisture and heat. Your existing HVAC system likely wasn’t sized for this added load.
- Exhaust Venting is Law: As stated, your range hood must vent directly to the outside. This means running a duct, often through a rim joist or up through the floor/ceiling above. This is not optional.
- Make-Up Air: When you exhaust air outside, you need replacement air. In a tight basement, this can create negative pressure, drawing in radon or soil gases. Your HVAC contractor may need to add a dedicated make-up air inlet or adjust your system.
- Consider a Dedicated Dehumidifier: Even with perfect waterproofing, basements are naturally humid. A high-capacity, ducted dehumidifier integrated into your HVAC system is the best way to keep relative humidity below 50%, protecting your new investment.
Phase 5: Selecting Materials That Survive Below-Grade
Choosing the right finishes is about more than looks. It’s about durability in a potentially damp, dark environment. Every material should be evaluated for its moisture resistance.
Walls and Ceilings
- Drywall: Never use standard drywall. Use green board (moisture-resistant drywall) at minimum. For showers or areas with high splash potential (like behind a sink), use cement board. Always use mold-resistant joint compound (“hot mud” or setting-type compound is better than pre-mixed).
- Paint: Use a premium, semi-gloss or satin acrylic latex paint. These are more washable and resistant to moisture than flat or eggshell finishes. Look for paints with mold/mildew inhibitors.
- Alternative: For an industrial look, consider leaving the foundation walls painted with a waterproofing sealer and a masonry paint. Just ensure any efflorescence (white powder) is cleaned first.
Flooring: The Most Critical Choice
Concrete slab = potential moisture. Your flooring system must account for this.
- Floating Luxury Vinyl Plank (LVP) or Tile (LVT): This is the #1 recommendation. It’s 100% waterproof, looks like wood or stone, and is easy to install over a proper underlayment. Ensure the product is rated for below-grade installations.
- Porcelain Tile: The ultimate in durability and water resistance. Use a proper uncoupling membrane (like Schluter-DITRA) over the vapor barrier to prevent tile cracks from any minor slab movement. Grout must be sealed.
- Engineered Hardwood? Use Extreme Caution. Only if you have a verified, extremely dry basement (< 60% RH year-round) and a product specifically rated for below-grade with a moisture-resistant core (like many SPC or WPC floors). Solid hardwood is a hard no.
- Carpet: Generally a bad idea. If you must, use indoor-outdoor carpet with a thick, waterproof pad and be prepared for potential mildew issues.
Cabinetry and Countertops
- Cabinets: Choose all-wood construction (like maple or oak) with a waterproof finish, or better yet, thermofoil or PVC-wrapped cabinets. Avoid particleboard/MDF cores that swell when wet. Consider metal or stainless steel cabinets for a commercial look and ultimate moisture resistance.
- Countertops: Quartz is an excellent choice—non-porous and durable. Solid surface (Corian) is also good. Natural stone (granite, marble) must be sealed meticulously. Laminate is fine if edges are well-sealed.
Phase 6: The Final Flourish – Finishing Touches and Smart Details
You’ve got the bones in place. Now it’s time to add personality and practicality that makes the space truly enjoyable.
Lighting: Combat the Dungeon Effect
Basements lack natural light. Your lighting plan must be aggressive.
- Layered Lighting: Combine recessed can lights (LED, 3000K-4000K color temp) for ambient light with under-cabinet task lighting and pendant lights over the island for drama.
- Light Colored Everything: Use light paint on walls and ceilings. Light-colored cabinets and countertops will bounce light around.
- Consider a Light Tube/Solar Tube: If you have an egress window, a solar tube can channel amazing natural light into the center of the room without the cost of a full window well.
- Closet and Cabinet Lighting: Motion-sensor LED strips inside cabinets and pantries are a luxury that makes a huge difference in a dim space.
Storage Solutions for Awkward Spaces
Basement kitchens often have nooks, crannies, and low ceilings.
- Tall, Narrow Pantry: Use the full height of the room, even if it’s 8 feet. A floor-to-ceiling pantry cabinet maximizes storage in a small footprint.
- Pull-Out Shelving: Deep base cabinets are useless without pull-out shelves or lazy Susans. This is a must-have for accessibility.
- Utilize the “Unusable” Space: The area under a window? Make it a window seat with storage inside. The awkward corner by the beam? A custom corner cabinet.
- Open Shelving: In a dry, well-lit area, open shelves can make the space feel larger and provide easy access to everyday items.
Creating a Cohesive Look
Should your basement kitchen match the upstairs? Not necessarily. Many homeowners embrace a different style downstairs—a moody, modern, industrial, or rustic “bar” aesthetic that feels distinct and fun. Use consistent hardware and lighting fixtures to create a subtle thread, but don’t be afraid to have fun with a bold backsplash, a different cabinet color, or a unique island. This is your chance to create a destination space.
Conclusion: Your Dream Space Awaits
Adding a kitchen to a basement is one of the most rewarding home renovations you can undertake. It unlocks your home’s potential, creates a hub for family and friends, and adds tremendous value. But its success is entirely dependent on respecting the unique environment of the below-grade space. Never, ever shortcut the moisture control. Never ignore the permit process. Always design with both code and comfort in mind. By following this structured approach—starting with research and waterproofing, moving through smart layout and robust infrastructure, and finishing with appropriate materials—you will build a kitchen that is not only beautiful and functional but also dry, safe, and legal for decades to come. It’s a complex project, so assemble a trusted team of professionals for the specialized work. Your future self, enjoying a coffee in your bright, dry, fully-functional basement kitchen, will thank you for the meticulous planning.
Frequently Asked Questions
How much does it typically cost to add a basement kitchen?
Costs vary wildly based on size, finishes, and local labor rates, but a basic, code-compliant basement kitchen typically starts at $25,000-$40,000+. Major factors driving cost include extensive waterproofing, utility upgrades (especially electrical panel and gas line), and high-end finishes. Getting multiple detailed quotes after having a plan and permits is essential.
Can I use a standard gas range in my basement kitchen?
Yes, but only if you run a dedicated, properly sized and supported gas line from your main meter to the basement. This must be installed by a licensed plumber or gas fitter and inspected. You also must have the proper clearance from combustibles and the mandatory exterior-venting range hood.
What’s the biggest mistake homeowners make when adding a basement kitchen?
The single biggest mistake is underestimating or skipping proper moisture control. Starting construction without a verified dry basement guarantees future mold, mildew, and material failure. The second biggest mistake is not securing permits upfront, which can lead to forced removal, failed inspections, and sale complications.
Do I really need an exterior-venting range hood? Can’t I use a recirculating one?
For a full kitchen (with a stove/oven), yes, you absolutely need an exterior-venting hood. Building codes require it to remove grease-laden vapors and, more importantly in a basement, large amounts of moisture from cooking. Recirculating hoods only filter air and put all that moisture back into the room, promoting mold growth and failing inspection.
Can I install a basement kitchen myself to save money?
If you are highly skilled in all trades (framing, electrical, plumbing, HVAC), have pulled permits before, and understand your local codes, a DIY approach is possible for the finish work. However, the rough-in stages (electrical, plumbing, HVAC) are almost always required to be done by licensed professionals for the permit inspections. Most homeowners hire a general contractor or manage subcontractors to ensure code compliance.
Will adding a basement kitchen increase my home’s value?
Yes, but with a crucial caveat: it must be permitted and inspected. A legal, well-executed basement kitchen (or full apartment) significantly increases living square footage and appeal, especially for multi-generational living or rental potential. An unpermitted “illegal” kitchen is a liability that can decrease value and derail a sale. Always pull permits.