Separating your kitchen from the living room is essential for creating distinct functional zones in an open floor plan, enhancing both utility and style. You can achieve this without walls by using strategic furniture placement, room dividers like bookshelves or screens, and varied lighting or flooring to define each space visually and physically.
“`html
How to Separate the Kitchen from the Living Room
Let’s be honest: that gorgeous open-concept floor plan you fell in love with? It comes with a few… let’s call them “character-building” quirks. The sizzle of the frying pan becomes the soundtrack to your favorite show. The scent of last night’s garlicky pasta lingers comfortably on your couch cushions. You’re trying to relax in your living room, but your eye is constantly drawn to the stack of dishes waiting in the sink. You love the spacious feel, but sometimes, you just want to separate the kitchen from the living room without sacrificing the flow. If this sounds familiar, you’re in the right place. This isn’t about building a wall and undoing the open plan. It’s about creating smart, stylish, and functional zones that give you the best of both worlds: connection when you want it, and separation when you need it.
Over the years, I’ve helped friends and family navigate this very challenge in apartments, lofts, and suburban homes. The solution is never one-size-fits-all. It depends on your space, your budget, your design taste, and, honestly, your tolerance for cooking smells during movie night. This guide will walk you through the most effective, designer-approved methods to define your kitchen area, from subtle hints to deliberate barriers. We’ll look at permanent solutions, flexible options, and clever visual tricks that make a world of difference. Get ready to reclaim your living room’s peace and your kitchen’s functionality, all within the same beautiful, open space.
Key Takeaways
- Define zones with a partial wall or slim bookshelf. Creates separation without sacrificing light or flow.
- Use a large sofa or console table as a physical barrier. Strategically placed furniture naturally divides the spaces.
- Vary ceiling lighting to distinguish each area’s function. Different fixtures or brightness levels signal separate zones.
- Contrast paint or wallpaper colors between rooms. A visual break at the wall line reinforces the division.
- Incorporate dedicated storage for each zone. Assign cabinets or shelves to keep kitchen items out of the living area.
- Maintain an open sightline with low-profile dividers. Avoid tall, solid barriers that make the space feel smaller.
- Anchor each area with a distinct area rug. Floor coverings powerfully define separate functional spaces.
📑 Table of Contents
- 1. The Partial Wall: Half Walls, Knee Walls, and Bump-Outs
- 2. The Glass Barrier: See-But-Don’t-Touch Elegance
- 3. The Strategic Furniture Layout: Your Invisible Fence
- 4. The Kitchen Island as a Command Center and Divider
- 5. Soft Dividers: Curtains, Screens, and Mobile Solutions
- 6. Architectural Details: Open Shelving, Beams, and Lighting
- Conclusion: Finding Your Balance
1. The Partial Wall: Half Walls, Knee Walls, and Bump-Outs
When you think of “separating” spaces, your mind probably goes straight to a full wall. But in an open plan, that can feel too heavy and closed off. This is where partial walls come in as the gold standard for subtle, architectural separation. They provide a physical, knee-high barrier that blocks direct line-of-sight to the sink or counters, helping to visually and physically contain the kitchen’s activity without sacrificing light or the sense of openness.
What is a Half Wall or Knee Wall?
A half wall is exactly what it sounds like: a wall that stops short of the ceiling, typically at counter height (about 36 inches) or slightly higher (up to 42-48 inches). A “knee wall” is a specific type often used in sloped-ceiling areas but works perfectly here. They create a clear boundary. You can’t see the messy countertops from the sofa, but you can still see over them to maintain a connection with people in the living room. It’s the perfect compromise.
Design and Implementation Tips
- Material Match: For a seamless look, build the half wall using the same drywall and paint as your other walls. For a more decorative, architectural feel, use the same backsplash tile on the kitchen-side face of the wall, continuing your kitchen’s material palette into the living space.
- Top It Off: Consider what sits on top of your half wall. A wide, continuous countertop surface creates a fantastic serving bar or informal dining spot. Alternatively, a thick wooden cap or a ledge for plants and decor adds warmth and function.
- Integrate Storage: This is a pro move. Design the half wall to incorporate shallow cabinets or open shelving on the living room side. It becomes a beautiful display unit for books, art, or media, turning a divider into a feature.
- Bump-Outs: If you have a little extra room to play with, consider a “bump-out.” This is a partial wall that extends out into the living room space, creating a nook. You can then use the back of this bump-out for a entertainment center, a console table, or a bench with storage. It defines the kitchen’s perimeter aggressively while adding usable square footage to the living room.
Pros and Cons at a Glance
| Pros | Cons |
|---|---|
| Excellent visual and partial physical barrier | Requires permanent construction (permits may be needed) |
| Can add valuable counter or storage space | Higher cost and disruption than non-permanent options |
| Blocks direct line-of-sight to kitchen clutter | Can make a small space feel slightly more chopped up if not designed well |
| Reduces sound and odor transmission better than most alternatives | Not a flexible solution; very difficult to change later |
2. The Glass Barrier: See-But-Don’t-Touch Elegance
If you love the airy feel of an open plan but need a more definitive separator than a half wall, glass is your friend. Glass partitions offer the ultimate in modern separation. They block sound and smells effectively while maintaining an almost unimpeded visual connection, preserving that spacious, light-filled vibe. It’s like having your cake and eating it too.
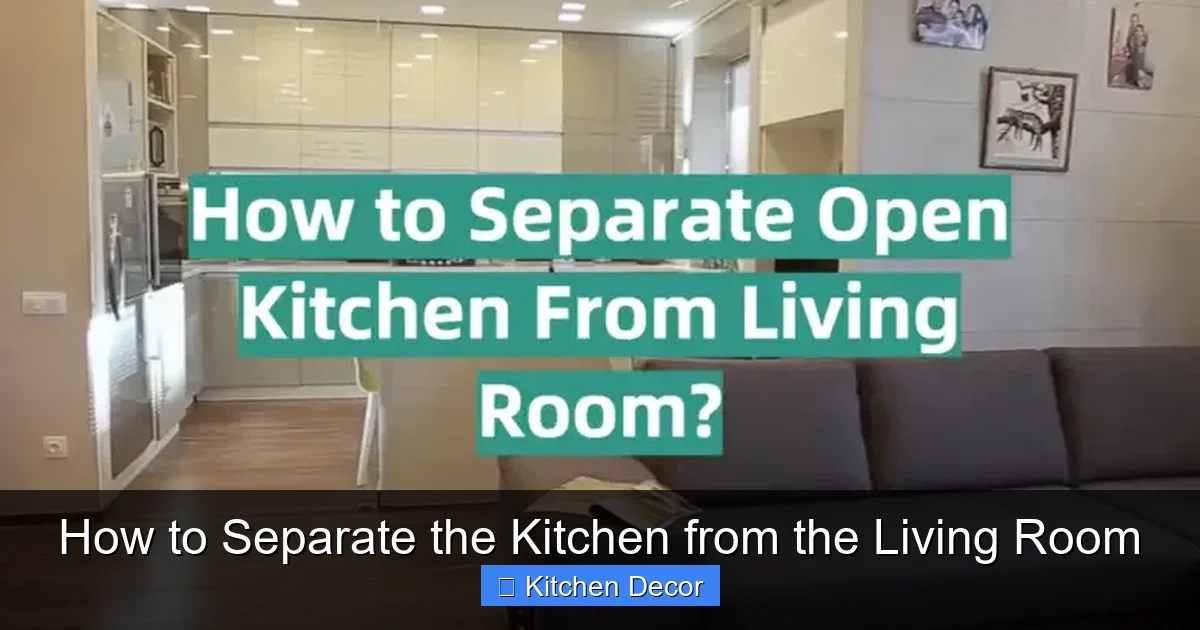
Visual guide about How to Separate the Kitchen from the Living Room
Image source: kitchenprofy.com
Types of Glass Partitions
- Fixed Glass Panels: These are stationary panels, often framed in metal or wood, installed from floor to ceiling or counter-to-ceiling. They act as a beautiful, transparent wall. Think of the glass walls you see in high-end restaurants or loft apartments.
- Sliding or Barn Door Glass: For ultimate flexibility, install a glass door on a track. A classic “barn door” style in frosted or clear glass can slide completely out of the way when you want full openness, and slide shut for TV time or formal gatherings. This is a hugely popular solution right now.
- Glass Block: For a more retro or textured look, glass block walls offer privacy and light transmission. They diffuse light beautifully and provide a stronger visual barrier than clear sheet glass while still feeling open.
Practical Considerations
Frosted or Textured vs. Clear: Clear glass maintains maximum visibility. Frosted, textured, or patterned glass offers more privacy, hiding the kitchen’s inner workings while still letting light through. Consider your need for privacy versus your desire for connection.
Cleaning: Let’s be real—glass shows fingerprints and smudges. Be prepared for a slightly more frequent cleaning routine, especially near the cooking area where grease can settle. A good glass cleaner and a microfiber cloth will be your new best friends.
Safety: Always use tempered or laminated safety glass for any installation, especially in a busy household. It’s much stronger and, if it does break, it shatters into small, less dangerous pieces.
3. The Strategic Furniture Layout: Your Invisible Fence
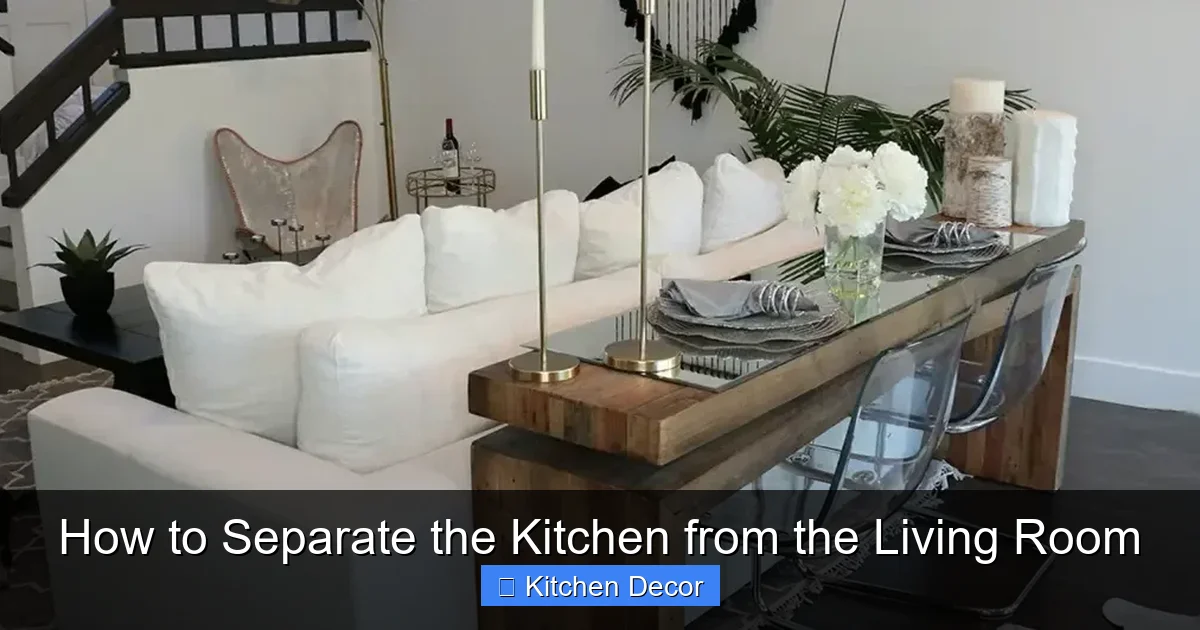
Before you pick up a hammer or call a contractor, look at your furniture. This is the most flexible, cost-effective, and renter-friendly way to separate the kitchen from the living room. You’re not building a barrier; you’re creating a psychological boundary through careful placement. The key is to use the back of a large piece of furniture as your “wall.”
Visual guide about How to Separate the Kitchen from the Living Room
Image source: kitchenprofy.com
The Console Table or Sofa Table Barrier
This is my all-time favorite first step. Place a long, shallow console table or a sturdy sofa table with its back facing the kitchen. The dining area or living room side of the table becomes your new “wall.” You can style it with lamps, books, plants, and baskets to hide any necessary items. It instantly blocks the view into the kitchen’s work zone. Bonus: it provides a surface for lamps, keys, or a drink when you’re in the living room.
The Bookshelf or Storage Unit Wall
A tall, open bookcase or a series of modular storage units placed perpendicular to the kitchen’s opening creates a strong, room-divider effect. Face the back of the bookshelf toward the kitchen. On the living room side, you have a stunning display for your favorite objects. This is a fantastic way to add height, storage, and serious definition to the space. Look for units that are deep enough (12-15 inches) to feel substantial but not so deep they eat into your living room footprint.
Orienting Your Seating
Sometimes, the solution is as simple as turning your sofa or armchairs so their backs are to the kitchen. This physically and psychologically says, “This is the living room zone.” If you have an open floor plan where the kitchen flows into the living room which flows into the dining room, arranging your main seating group with its back to the kitchen creates a distinct “living room” area, with the kitchen naturally becoming the “behind” zone. A low, long bench placed behind the sofa can also reinforce this boundary.
4. The Kitchen Island as a Command Center and Divider
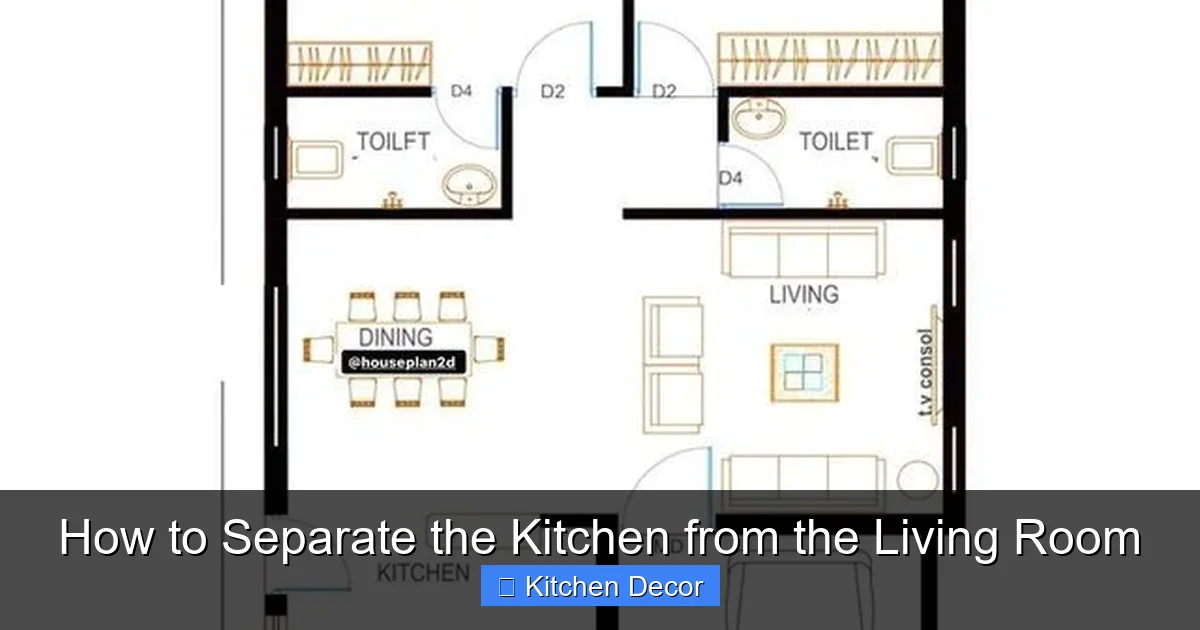
If your kitchen layout allows for it, your island is arguably your most powerful tool for separation. A large, substantial island doesn’t just provide counter space; it actively divides the room. It becomes a physical barrier you must walk around, defining the kitchen’s territory while serving as a hub for cooking, cleaning, and casual dining.
Visual guide about How to Separate the Kitchen from the Living Room
Image source: i.pinimg.com
Sizing and Placement for Maximum Impact
To act as a true divider, your island needs presence. Aim for an island that is at least 42 inches deep (standard is 24-36 inches) and long enough to span a significant portion of the opening. The deeper countertop creates a more substantial “wall” effect. Place it so that when you’re standing at the island prepping food, your back is to the living room, or so that people sitting at the island are facing into the kitchen, with their backs to the living room. This orientation solidifies the zones.
Height Matters: The Multi-Level Island
Consider a multi-level island. Have a standard 36-inch-height prep area on the kitchen side, but elevate the seating/overhang side on the living room side to 42 inches (a “bar height”). This taller section provides a more effective visual and physical barrier for someone sitting on the living room side of the island. It creates a distinct “bar” feel, separating the spaces while still allowing conversation across it.
Integrate Storage and Appliances
Make your island work double duty. Include deep cabinets or drawers on the side facing the living room to store items you don’t want on your main counters. You can even integrate a sink or cooktop into the island, anchoring the kitchen’s function squarely in the middle of its defined zone. When all the action happens at the island, the rest of the kitchen counter can be kept clearer, reducing visual clutter in the shared space.
5. Soft Dividers: Curtains, Screens, and Mobile Solutions
Not ready for a permanent commitment? Soft dividers are your best friend. They offer on-demand separation that you can roll, fold, or slide away when you want the full open feel again. This is ideal for renters, for seasonal changes (like holiday cooking chaos), or for those who just love flexibility.
Heavy-Duty Curtains or Drapes
Yes, curtains aren’t just for windows. Installing a robust curtain rod (think ceiling-mounted or a heavy-duty track) across the kitchen opening and using thick, sound-absorbing fabrics like velvet or blackout lining can work wonders. Pull them shut for movie night or when you have guests over to hide the kitchen entirely. Open them wide for everyday living. This is a surprisingly effective and stylish solution that adds softness and texture to the hard lines of a kitchen.
Decorative Room Dividers and Screens
A standalone, decorative screen can be a beautiful piece of furniture. Look for screens made of wood, rattan, metal, or even fabric panels. They come in all styles, from mid-century modern to bohemian. The beauty is you can move them as needed. Place one in front of the kitchen entrance to block the view, or use two to create a little nook. They are perfect for adding a sculptural element to your space.
The Folding Partition
For a more architectural look without construction, consider a folding room divider made of wood slats or rice paper. These are often seen in Japanese-inspired interiors. They offer a semi-private screen that filters light and defines space without feeling solid. They fold flat against the wall when not in use.
6. Architectural Details: Open Shelving, Beams, and Lighting
Sometimes, separation isn’t about a barrier at all. It’s about defining the zones through architectural and design cues that tell your brain, “You are now entering a different room.” These subtle methods work with the open plan, enhancing it rather than fighting it.
The Power of a Ceiling Beam or Pendant Lights
If you can add a single, substantial ceiling beam that runs perpendicular to the kitchen opening, it instantly creates a “header” that defines the kitchen’s ceiling plane. Even if it’s just a visual beam (a boxed-out piece of wood or drywall), it does wonders for spatial definition. Similarly, a row of linear pendant lights hung over your kitchen island or counters acts as a visual line, illuminating and declaring the kitchen zone. The light itself becomes the border.
Open Shelving as a Feature Wall
Instead of upper cabinets, consider a wall of open shelving on the living room side of your kitchen. This transforms that wall from a blank surface into an active, beautiful display. It pulls the kitchen’s aesthetic—dishes, glassware, plants, art—into the living room, creating a deliberate blend that feels intentional rather than accidental. It says, “This beautiful collection is part of the kitchen’s charm, and it’s meant to be seen.”
Contrasting Flooring or Area Rugs
This is a classic interior design trick. Use a different flooring material or a large, strategic area rug to anchor each zone. For example, if your living room has hardwood, continue it into the kitchen but add a large, low-pile rug under the kitchen table and island. Or, use a different tile or stone in the kitchen itself (like a herringbone pattern) to mark the transition. The change underfoot is a powerful subconscious signal that you’ve moved from one area to another.
Conclusion: Finding Your Balance
Separating the kitchen from the living room in an open-concept home is less about building walls and more about mindful design. It’s about creating a dialogue between the spaces, not a monologue from one to the other. As we’ve explored, you have a spectrum of options, from the permanent architecture of a half wall to the temporary softness of a curtain. The best solution for you depends on your specific pain points. Is noise the main issue? A glass partition or solid half wall will help most. Is visual clutter the culprit? A console table or bookshelf barrier is a perfect start. Do you want on-demand privacy? Explore curtains or screens.
Start simple. Try the furniture layout trick first—it costs nothing but your time and creativity. See how it feels. If you need more, consider a half wall or a substantial island. Remember, the goal isn’t to isolate your kitchen but to give it its own identity within your shared home. When each zone has a clear purpose and boundary, the entire open floor plan feels more intentional, more peaceful, and more functional. You can cook, chat, and relax without compromising. You can have the spacious, connected home you love, with the quiet, tidy living room you deserve. It’s all about drawing the line—in the smartest, most beautiful way possible.
“`
Frequently Asked Questions
What’s the best way to separate the kitchen from the living room?
The best method depends on your budget, home style, and goals. Popular options include installing a half-wall, using a large console or bookshelf, or adding a decorative screen to create a visual break without fully closing the space.
How to separate the kitchen from the living room without a wall?
You can use furniture like a sofa, console table, or tall bookshelf placed strategically to act as a room divider. Other effective no-wall solutions include changing the flooring material, installing a different ceiling treatment, or using a large indoor plant or room screen.
What are some cheap ways to separate a kitchen from a living room?
Budget-friendly ideas include using a folding screen, hanging curtains from the ceiling, placing a tall bookshelf or storage unit, or simply arranging furniture to form a natural pathway. Even a consistent change in paint color or a tall, narrow console table can define the zones affordably.
Can I separate the kitchen from the living room and still keep it open?
Yes, by using “soft” dividers like a low half-wall, open shelving, a see-through railing, or a change in flooring and lighting. These methods maintain sightlines and a sense of spaciousness while still defining the kitchen as a distinct functional area.
How do I separate the kitchen from the living room to block noise and smells?
For effective separation of noise and odors, a solid partial wall or a full-height door is most effective. Complement this with a powerful range hood that vents outside, and consider adding a heavy curtain or solid-backed bookshelf to further absorb sound and block travel paths.
Do I need a permit to put up a wall to separate the kitchen from the living room?
Yes, you typically need a building permit for any structural changes, including adding a new load-bearing wall. Always consult with your local building department and a structural engineer or contractor before starting, as permits ensure the work is safe and meets code.