Steam damage to kitchen cabinets is a common but fixable problem. This guide walks you through identifying the type and severity of damage—from minor finish bubbling to severe wood warping. You’ll learn precise repair techniques for each level, including drying methods, sanding, refinishing, and when replacement is the only option. Most importantly, we provide actionable prevention strategies to protect your cabinets from future steam exposure, saving you time and costly repairs.
Key Takeaways
- Identify the Damage Type First: Steam damage ranges from surface finish issues (blisters, peeling) to structural wood warping. Correct identification dictates the repair method.
- Immediate Drying is Critical: The first and most important step is to stop moisture and thoroughly dry the affected area using gentle, consistent airflow and dehumidifiers.
- Surface Damage is Often DIY-Friendly: Minor finish bubbling and peeling can usually be repaired by sanding, stripping, and refinishing the affected panel without professional help.
- Severe Warping May Require Replacement: If cabinet boxes or doors are severely warped, compromising their structure and function, repair is often impractical; replacement is the solution.
- Prevention is the Best Strategy: Installing proper ventilation (range hoods vented outside), using pot lids, and avoiding direct steam contact are the most effective long-term defenses.
- Match the Finish Exactly: Successful repairs are invisible only when you perfectly match the existing cabinet finish stain and sheen (e.g., satin, semi-gloss).
- Patience with Drying is Non-Negotiable: Rushing the drying process traps moisture, leading to mold, further warping, and failed repairs. Allow materials to dry completely, which can take days.
📑 Table of Contents
- Understanding Steam Damage: The Silent Kitchen Saboteur
- Step 1: Assessment and Identification – What Kind of Damage Do You Have?
- Step 2: The Critical Drying Phase – Stopping the Problem in Its Tracks
- Step 3: Repairing Surface-Level Damage (Finish Failure)
- Step 4: Tackling Severe Damage – Warping and Structural Issues
- Step 5: Refinishing and Finishing – The Final, Flawless Touch
- Step 6: Prevention – Your Long-Term Defense Strategy
Understanding Steam Damage: The Silent Kitchen Saboteur
Your kitchen cabinets are a major investment and a central feature of your home’s heart. Yet, they face a constant, invisible threat every time you cook: steam. That billowing cloud from your pasta pot or the lingering humidity from your dishwasher isn’t just air—it’s water vapor seeking out the warmest, most absorbent surfaces in the room. Over time, this moisture penetrates the cabinet’s protective finish and attacks the wood beneath, leading to a frustrating and unsightly condition known as steam damage. Repairing steam damage on kitchen cabinets is entirely possible, but it starts with understanding exactly what you’re up against. This isn’t just about a spot of water; it’s about a molecular invasion that compromises both the aesthetics and the integrity of your cabinetry.
The science is straightforward. Wood is a hygroscopic material, meaning it naturally absorbs and releases moisture from the air. The finish on your cabinets—whether it’s a durable lacquer, a classic varnish, or a modern polyurethane—is designed to be a barrier. Steam, especially when it’s hot and forced (like from a boiling pot or a malfunctioning dishwasher), can force its way through microscopic imperfections in this finish or find its way into raw, unfinished edges (like the inside of cabinet doors or the underside of shelves). Once the moisture is inside the wood fibers, it causes them to swell. As the wood dries unevenly, it shrinks, leading to stress, warping, and the dreaded finish failure you see as bubbles, cracks, and peeling. The key to a successful repair is interrupting this cycle and addressing the damage at its specific stage.
The Anatomy of Your Cabinets: Why Some Parts Are More Vulnerable
Not all cabinet surfaces are created equal in the battle against steam. Understanding where damage typically occurs will help you both diagnose existing problems and prevent future ones. The most vulnerable areas are those with the least protective finish or the most direct exposure.
- Cabinet Doors (Especially Edges and Undersides): The edges of doors, where the wood is often cut and may have less finish sealant, are prime entry points for moisture. The underside of doors, directly above a sink or stove, gets hit with rising steam and splashes.
- Cabinet Box Sides and Tops: The sides of the base cabinet box, particularly behind the stove, are subjected to intense, sustained heat and humidity. The top edge of a base cabinet, if not properly sealed, can absorb steam from the countertop above.
- Inside of Cabinets: The interior surfaces often have a thinner, less robust finish than the exterior. Steam from hot dishes placed inside or general kitchen humidity can cause interior panels to warp, making doors misalign.
- Around the Sink and Dishwasher: The constant presence of water and steam makes the cabinetry in this zone the most susceptible. Check for soft spots, discoloration, and finish failure here first.
By inspecting these high-risk zones regularly, you can catch minor moisture issues before they escalate into major steam damage requiring extensive repair.
Step 1: Assessment and Identification – What Kind of Damage Do You Have?
Before you pick up a single tool, you must become a damage detective. The repair method for a bubbled finish is completely different from the one for a warped door. Rushing into a repair with the wrong technique will almost certainly make the problem worse. Take your time to thoroughly assess the affected cabinet. Use a flashlight at an angle to highlight surface imperfections. Press gently on suspect areas with your fingernail to feel for softness or give. Open and close doors to check for alignment issues. This diagnostic phase is the most important in the entire process of how to repair steam damage on kitchen cabinets.
Visual guide about How to Repair Steam Damage on Kitchen Cabinets
Image source: nominimalisthere.com
Diagnosing Finish Failure: Bubbling, Blistering, and Peeling
This is the earliest and most common sign of steam damage. The finish itself—the clear coat—has lost its bond with the wood substrate underneath. You’ll see:
- Blisters/Bubbles: Small, raised pockets in the finish, often in clusters. They feel like tiny bumps and may pop if pressed.
- Cracking (Crazing): A network of fine lines or cracks in the finish, resembling a spiderweb. This indicates the finish has become brittle and is separating.
- Peeling/Flaking: The finish has completely detached in sheets or flakes. This is advanced finish failure, often following prolonged bubbling.
Cause: Moisture has gotten between the finish and the wood, breaking the adhesive bond. The wood swelled, pushing the finish up, and as it dried, the finish remained separated.
Repairability: Excellent. This is a surface-level issue. The wood underneath is likely still sound and flat. The repair involves removing the failed finish and applying a new one.
Diagnosing Wood Damage: Swelling, Warping, and Discoloration
This is a more serious condition where the wood fibers themselves have been compromised. The damage goes beyond the finish.
- Swelling/Cupping: The wood surface is visibly raised or concave. You can often see and feel a dip or crown across the grain. Doors may not close properly or may “float” away from the frame.
- Warping/Twisting: The panel is no longer flat. It may twist like a propeller or bow outward. This severely affects door function and alignment.
- Discoloration & Dark Stains: The wood has darkened, often unevenly. This can be a tannin stain from water or, more worryingly, a sign of mold or mildew growth within the wood.
- Soft Spots: Pressing on the wood yields a spongy, soft feeling. This indicates significant fiber breakdown, often from prolonged saturation.
Cause: The wood absorbed a significant amount of water, causing the fibers to swell. As it dried, it shrank unevenly, creating internal stresses that permanently deformed the panel.
Repairability: Poor to Impossible. Once wood fibers are broken and deformed, they cannot be restored to their original flat, stable state through sanding alone. Severe warping in a cabinet box side or door panel usually means that component must be replaced.
Step 2: The Critical Drying Phase – Stopping the Problem in Its Tracks
No repair can begin until the cabinet is completely, utterly dry. Attempting to sand, stain, or seal over a damp substrate is a recipe for disaster. The trapped moisture will cause the new finish to fail prematurely, potentially within weeks, and can promote mold growth inside the wood. This phase is about patience and creating the ideal environment for slow, even evaporation.
Visual guide about How to Repair Steam Damage on Kitchen Cabinets
Image source: nominimalisthere.com
Creating the Ideal Drying Environment
Your goal is to move air gently over the wet surfaces while reducing overall humidity. Aggressive heat (like a hair dryer on high) will cause the surface to dry too fast, sealing moisture inside—a phenomenon called “case hardening.” This traps water in the core, leading to future problems.
- Increase Air Circulation: Place a box fan or several oscillating fans in the kitchen, aimed *at* the damaged cabinets from a few feet away. Do not blast them directly, which can force moisture deeper. The goal is a gentle breeze.
- Dehumidify: A portable dehumidifier is your best friend here. Run it continuously in the kitchen, emptying the reservoir regularly. It actively pulls moisture from the air and the wood itself, speeding up the process safely.
- Control Temperature: Keep the room at a moderate, consistent temperature (70-75°F / 21-24°C). Do not use space heaters to try to bake the cabinets dry.
- Expose All Surfaces: Remove everything from inside the affected cabinets. Leave cabinet doors and drawers open as much as possible to expose interior surfaces to air.
How Long Does Drying Take?
This is the hardest part: there is no fixed timeline. It depends on the extent of saturation, the type of wood (oak is more porous than maple), the thickness of the panel, and your ambient conditions. For a cabinet door with significant bubbling, expect a minimum of 3-5 days of constant fan and dehumidifier use. For a warped base cabinet box that was soaked, it could take 1-2 weeks or more. To test for dryness, press your palm firmly against the wood in several spots. It should feel cool and dry, not cool and damp. You can also use a moisture meter—a valuable tool for this job—to get a numerical reading. Aim for a moisture content within 2-4% of your home’s normal ambient humidity level. When in doubt, wait another day. Rushing this step ruins all subsequent work.
Step 3: Repairing Surface-Level Damage (Finish Failure)
Once your cabinets are bone-dry, you can address the bubbled, cracked, or peeled finish. This is the most common and rewarding repair, as it can restore your cabinets to near-original condition. The process is essentially a localized refinishing job. You are not refinishing the entire cabinet face, but only the damaged area, with the goal of blending the repair seamlessly.
Visual guide about How to Repair Steam Damage on Kitchen Cabinets
Image source: sswaterrestoration.com
Tools and Materials You’ll Need
- Safety Gear: Safety glasses, a respirator mask (rated for sanding and finishing), and nitrile gloves.
- Removal Tools: A plastic putty knife or scraper (to avoid gouging), and possibly a chemical stripper for stubborn, large areas of peeling.
- Sanding Supplies: Sandpaper in various grits (start with 120-grit to remove failed finish, move to 150-grit, finish with 220-grit for smoothness). A sanding block or orbital sander (use with extreme caution and light pressure). A vacuum and tack cloths for dust removal.
- Staining Supplies: A high-quality wood stain that matches your cabinet color. You will likely need to test several on an inconspicuous area. A stain conditioner (for softwoods like pine) is often necessary to prevent blotchiness.
- Finishing Supplies: A clear topcoat that matches the existing sheen (satin, semi-gloss, gloss). Water-based polyurethane is easier to work with and dries clear; oil-based gives a warmer tone but has stronger fumes. A high-quality synthetic brush and/or a lint-free cloth for application.
The Step-by-Step Surface Repair Process
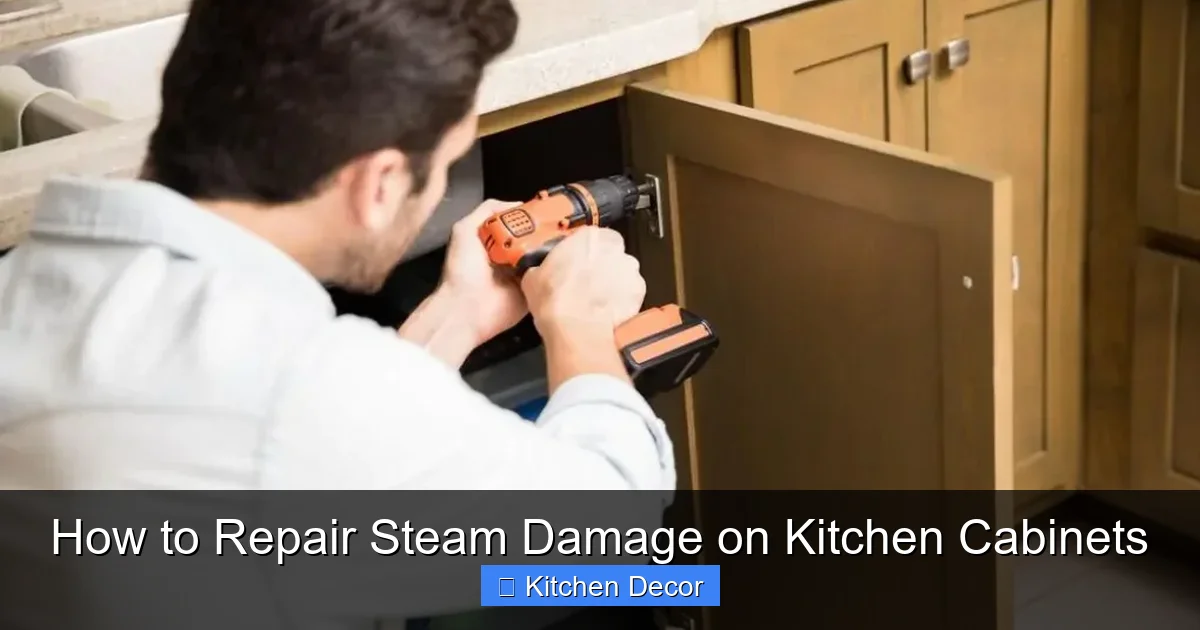
1. Remove the Failed Finish: Use your plastic putty knife to gently lift and scrape away all blistered, cracked, or peeling finish. Work slowly to avoid damaging the underlying wood. For large, stubborn sheets, apply a gentle, gel-style chemical stripper according to the manufacturer’s instructions, then scrape. The goal is to get down to bare, solid wood.
2. Sand the Area Smooth: Starting with 120-grit sandpaper, sand the entire damaged area and slightly beyond its edges (feathering) to create a smooth, uniform surface. The wood should feel smooth to the touch. Switch to 150-grit to remove the scratches from the 120-grit. Finally, go over it with 220-grit for a silky finish. Always sand with the grain of the wood. Vacuum all dust thoroughly and wipe with a tack cloth. Any dust left will ruin your stain.
3. Stain (If Necessary): This is the trickiest part. If the bare wood matches the surrounding color, you may skip staining and go straight to topcoat. Usually, the new wood is lighter. Test your stain on a hidden part of the cabinet or a scrap piece of similar wood. Apply a thin, even coat with a brush or cloth, let it sit for a few minutes, then wipe off excess. Let it dry completely (check product instructions). If the color is too light, apply a second coat. For blotchy-prone woods, use a pre-stain conditioner first.
4. Apply the Clear Topcoat: This protects the stain and provides the final sheen. Apply 2-3 thin coats, following the manufacturer’s dry time between coats (usually 2-4 hours). Use a high-quality brush and apply in long, smooth strokes with the grain. Watch for drips. Sand lightly with 320-grit sandpaper between coats for a glass-smooth finish, wiping clean with a tack cloth after each sanding. The final coat should be flawless.
5. Blending is Key: The success of your repair hinges on making the transition between the repaired spot and the original cabinet finish invisible. This is achieved through meticulous feathering of your sanding and careful application of stain and topcoat to match the surrounding area’s color and sheen exactly. Sometimes, you may need to lightly scuff-sand and apply one final topcoat layer over a wider area that includes both the repair and a bit of the original finish to unify the sheen.
Step 4: Tackling Severe Damage – Warping and Structural Issues
When steam damage has progressed beyond the finish and into the wood fibers, causing permanent warping or swelling, the repair options become limited and more drastic. You must honestly assess whether the component is functionally and structurally salvageable.
Evaluating Warped Doors and Panels
A slightly warped door might still function if you adjust the hinges. However, a severely warped door that won’t close, gaps significantly, or has twisted so the hinge screws are pulled out of alignment is likely beyond repair. Try this test: remove the door from the cabinet. Place it on a perfectly flat surface like a workbench. If it rocks or has a visible gap between the door and the surface, the warp is significant. You can attempt to reduce warping through moisture and weight, but you cannot reverse it to perfect flatness.
The “Moisture & Weight” Method for Minor Warps
For a door that has a slight bow or cup, you can try this technique. It’s not guaranteed but can be effective for minor issues.
- Lightly mist the concave (sunken) side of the warped panel with water. Do not soak it.
- Place the door on a flat surface, warped side up.
- Apply weight evenly across the entire surface. Heavy books, sandbags, or a flat piece of plywood with weights on top will work.
- Leave it for several days, checking daily. The moisture will cause the fibers on the dry, convex (bowed) side to swell slightly, while the weight forces the panel flat. As it dries under pressure, it may hold a flatter shape.
Important: This is a temporary fix at best. The wood’s memory often returns, especially if humidity fluctuates. It is not a solution for cabinet boxes, which are structural.
When Replacement is the Only Logical Choice
There is no shame in replacing a steam-damaged component. It is often the most cost-effective and aesthetically perfect solution in the long run. You should strongly consider replacement when:
- The cabinet box (the main structure) is warped. This affects all attached doors and drawers and compromises the entire unit’s integrity.
- A door is severely warped, cracked, or has soft, rotten spots.
- The cost and labor of intricate repair (e.g., veneer matching, complex staining) approach or exceed the cost of a new door or cabinet.
- You cannot find a matching finish for a repair, and an obvious patch would be unacceptable.
For replacement, contact your cabinet manufacturer for a matching door. If the line is discontinued, you may need to have a custom door made or, as a last resort, replace all cabinet faces for a uniform look. Sometimes, replacing just the damaged door and refacing the others is a viable compromise.
Step 5: Refinishing and Finishing – The Final, Flawless Touch
Whether you repaired a surface or replaced a component, the final step to a professional-looking result is in the refinishing and application of the protective topcoat. This is what provides durability, sheen, and that “like-new” appearance. Rushing or cutting corners here will undermine all your hard work.
Choosing the Right Topcoat for Kitchens
Kitchens are high-traffic, high-moisture, high-grease environments. Your topcoat must be tough.
- Water-Based Polyurethane: The modern favorite. It dries crystal clear (won’t amber over time), has low odor, cleans up with water, and is very durable and resistant to yellowing. Excellent for maintaining the original color of stained wood.
- Oil-Based Polyurethane: The traditional choice. It adds a warm, rich amber tone and is extremely hard-wearing. It has strong fumes, requires mineral spirits for cleanup, and takes longer to dry. It’s a good choice if you want to warm up a cool-stained cabinet.
- Lacquer: Used by professionals. It dries incredibly fast and can be buffed to a high gloss. However, it’s very toxic, requires spray equipment for best results, and is less chemically resistant than polyurethane. Not recommended for DIYers.
- Varnish: Similar to oil-based poly but often less durable. Not the best choice for kitchen cabinets.
Recommendation: For 95% of DIY cabinet repairs, a high-quality water-based polyurethane in a satin or semi-gloss sheen is the perfect balance of ease of use, clarity, and kitchen-grade durability.
Application Technique for a Perfect, Professional Finish
Patience and thin coats are the golden rules.
- Environment: Work in a clean, dust-free, well-ventilated area. If possible, remove the cabinet door or drawer front and work on a horizontal surface like a sawhorse.
- Preparation: Ensure your stained (or bare) surface is perfectly clean and dry. Wipe with a damp cloth and let dry.
- First Coat: Stir (do not shake) your polyurethane gently to avoid creating bubbles. Using a high-quality synthetic bristle brush, apply a thin, even coat in long, smooth strokes with the grain. Don’t over-brush. Cover the entire surface, but avoid puddles.
- Drying and Sanding: Let the coat dry completely as per the label (usually 2-4 hours for water-based). Once dry, sand lightly with 320-grit sandpaper or a fine sanding sponge. The goal is to knock down any dust nibs or brush strokes and create a slight tooth for the next coat. Wipe clean with a damp cloth, then a dry tack cloth.
- Subsequent Coats: Apply 1-2 more thin coats, repeating the drying and light sanding process between each. Two coats are often sufficient for a satin finish; three may be needed for a higher-gloss sheen or maximum protection.
- Curing: The finish is “dry to touch” in hours, but it takes 5-7 days to fully cure to its maximum hardness. Avoid closing cabinet doors, placing heavy objects, or cleaning with harsh chemicals during this curing period.
Step 6: Prevention – Your Long-Term Defense Strategy
You’ve successfully repaired your cabinets. Now, the most important question: how do you prevent this from happening again? An ounce of prevention is worth a pound of repair. Integrating these habits into your kitchen routine will protect your investment for years to come.
Master Your Kitchen’s Microclimate
The goal is to manage steam and humidity at the source.
- Ventilation is Non-Negotiable: Use your range hood every time you cook, and ensure it is vented to the outside, not just recirculating air. Turn it on a few minutes before cooking and leave it on for 10-15 minutes after. This is your single most effective tool.
- The Pot Lid Rule: Get in the habit of using lids on pots and pans while boiling water or simmering sauces. This contains 90% of the steam at the source.
- Mind the Dishwasher: Do not open the dishwasher door immediately after a cycle. Let it sit for 15-30 minutes to allow the interior steam to dissipate into the kitchen air (which your hood should be pulling away). Ensure your dishwasher’s vent is not blocked.
- Strategic Drying: When hand-washing large pots or dishes, dry them with a towel before placing them on the counter or in a cabinet. Never put a dripping-wet dish into a cabinet.
- Control Ambient Humidity: In very humid climates or during summer, using a dehumidifier in the kitchen can make a significant difference. Monitor humidity levels; ideal indoor humidity is 30-50%.
Smart Kitchen Habits and Upgrades
- Install a Backsplash That Extends: A full-height backsplash that continues behind the stove and up the wall protects the cabinet sides from direct heat and steam spray.
- Use Cabinet Liners: Consider breathable, non-plastic shelf liners in cabinets above the stove or sink. They can absorb minor condensation and can be easily removed and washed.
- Check Seals: Periodically check the sealant/caulk where your countertop meets the backsplash and where the backsplash meets the wall. A broken seal allows moisture to wick into the wall and behind cabinets.
- Inspect Regularly: Make a habit of looking at the inside of your sink cabinet and the wall behind your stove every few months for early signs of moisture or softness. Early detection is everything.
By combining vigilant habits with proper ventilation, you create an environment where steam damage struggles to gain a foothold. Repairing steam damage on kitchen cabinets is a skill, but preventing it is a mindset.
Frequently Asked Questions
Can I use a hair dryer to speed up the drying process?
No, you should avoid using a concentrated heat source like a hair dryer. It will cause the surface to dry too quickly while trapping moisture deep inside the wood, a condition called “case hardening.” This leads to future warping and finish failure. Always use gentle airflow from fans and a dehumidifier for slow, even drying.
Is it worth repairing a steam-damaged cabinet, or should I just replace it?
It depends entirely on the severity. If the damage is limited to finish bubbling or peeling on a flat panel, repair is almost always worth it and yields excellent results. If the wood itself is severely warped, cracked, or soft (especially in a cabinet box), repair is usually not practical or durable. In that case, replacing the damaged door or cabinet is the better long-term solution.
How do I match the existing cabinet stain and finish when doing a repair?
Matching is the hardest part. Start by testing stains on an inconspicuous area or a scrap piece of the same wood. You may need to use a stain conditioner first on softwoods to prevent blotchiness. For the topcoat, identify the existing sheen (satin is most common). Apply several thin coats of a water-based polyurethane, which dries clear and won’t alter the stain color, sanding lightly between coats for a perfect match.
What’s the biggest mistake people make when repairing steam damage?
The single biggest mistake is not letting the wood dry completely before starting the repair. Impatience leads to trapping moisture, which causes the new finish to fail, promotes mold, and can worsen warping. Ensure the wood is at equilibrium with your home’s humidity, which takes days or even weeks, not hours.
Can I prevent steam damage without a range hood?
While a properly vented range hood is the most effective solution, you can mitigate risk without one by being extremely diligent: always use pot lids, wipe dishes dry before storing, avoid placing hot, wet items on countertops near cabinets, and use fans to circulate air away from cabinetry during cooking. However, for heavy cooking, a vented hood is highly recommended.
Should I use a chemical stripper to remove the bubbled finish?
Chemical strippers can be effective for large areas of failed finish, but they are messy, toxic, and can damage the wood if not used carefully. For most localized bubbling, a careful plastic scraper and sanding are sufficient and safer. Reserve strippers for situations where the finish is thick, stubborn, and peeling in large sheets. Always test in a small area first and follow all safety instructions.