Installing sliding drawers is a manageable DIY project that dramatically improves kitchen functionality. By carefully measuring, selecting the right hardware, and following a precise installation process, you can replace stiff, outdated drawers with smooth, full-extension slides. This upgrade maximizes usable space, prevents items from getting lost in the back, and makes every cabinet contents easily accessible.
Let’s be honest: that one kitchen cabinet drawer that sticks, swells, or simply won’t open fully is a daily frustration. You know the one—where the serving spoons live in the back, forever out of reach. The solution isn’t necessarily a full cabinet remodel. Installing modern sliding drawers is a powerful, cost-effective DIY upgrade that transforms awkward cabinet space into a smooth, highly functional storage zone. This comprehensive guide will walk you through every single step, from planning to the final satisfying glide. You don’t need to be a master carpenter; you just need patience, precision, and the willingness to measure twice.
We’ll demystify the process, covering how to choose between side-mount and undermount slides, the exact way to measure your cabinet’s unique interior, and the pro techniques for getting that perfectly level, silent slide. By the end, you’ll have the knowledge and confidence to tackle this project in a single weekend, turning those problem cabinets into your kitchen’s most organized and accessible spots. Say goodbye to digging and hello to effortless organization.
Key Takeaways
- Measure meticulously: Accurate inside cabinet width, depth, and height measurements are the non-negotiable first step to ensure your new drawers and slides fit perfectly.
- Choose the right slides: Select side-mount or undermount slides based on your cabinet design and desired aesthetic, ensuring they match the drawer’s length and weight capacity.
- Remove old hardware completely: Take out the entire old drawer box and any existing slide brackets to start with a clean, empty cabinet shell for precise new installation.
- Level is critical: Use a spirit level to ensure both drawer slides are installed perfectly horizontal and aligned with each other; this prevents binding and ensures smooth operation.
- Test before finalizing: Insert the drawer box without the front attached to test slide movement. Adjust positioning while slides are still screwed loosely before final tightening.
- Mind the clearances: Account for the thickness of slide brackets and any cabinet side obstructions like trim or molding when planning your drawer dimensions.
📑 Table of Contents
- Why Upgrade to Sliding Drawers?
- Essential Tools and Materials Checklist
- Step 1: Measure and Plan Precisely
- Step 2: Removing Old Drawer Hardware
- Step 3: Installing the Drawer Slide Mechanisms
- Step 4: Mounting the Drawer and Final Adjustments
- Step 5: Troubleshooting and Pro Tips for Flawless Operation
- Conclusion: Enjoy Your Newly Transformed Kitchen
Why Upgrade to Sliding Drawers?
Before we grab a tool, let’s talk about the “why.” Standard cabinet drawers often rely on simple plastic guides or basic roller systems that wear out, warp, and limit access. Upgrading to full-extension ball-bearing slides changes everything.
Unmatched Accessibility and Visibility
The primary benefit of a true full-extension slide is simple: it lets you see and reach everything inside the drawer. No more shadowy corners or forgotten utensils. Whether it’s a deep drawer for pots and pans or a shallow one for lids, a full pull-out brings every item into the light. This is especially crucial for base cabinets where bending is already a factor. You won’t have to kneel on the floor to fish out a baking sheet from the back.
Increased Weight Capacity and Durability
Modern sliding drawer systems are engineered for strength. Heavy-duty ball-bearing slides can easily support 50 to 100 pounds, making them ideal for storing cast iron skillets, stand mixer bowls, or heavy serving platters. This is a massive leap from the flimsy plastic guides in many older homes that crack under pressure. The smooth rolling action also distributes weight evenly, reducing stress on the drawer box itself and preventing sagging over time.
Improved Organization and Space Utilization
When you can fully access a drawer, you organize it better. You’re more likely to use dividers, trays, and containers to keep things tidy. Furthermore, sliding drawers allow for clever storage solutions like pull-out pantry shelves or waste bin cabinets that would be impossible with a static drawer. You’re essentially turning dead space into active, usable storage.
Aesthetic and Resale Value
Undermount slides, in particular, offer a clean, minimalist look since the hardware is hidden from view. The drawer box sits neatly inside the cabinet with no visible brackets. Even side-mount slides, when chosen in a sleek finish like brushed nickel or black, look more intentional and high-end than worn-out old hardware. For potential homebuyers, functional, modern storage is a subtle but significant selling point.
Essential Tools and Materials Checklist
Gathering everything before you start prevents frustrating mid-project trips to the hardware store. Here’s your definitive list.
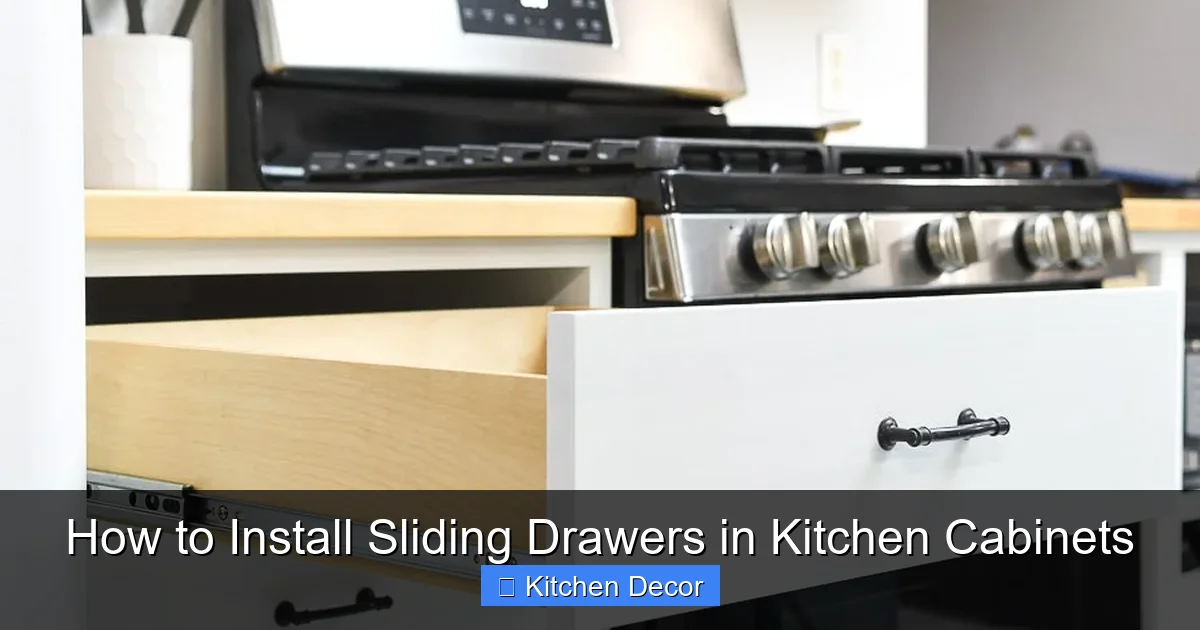
Visual guide about How to Install Sliding Drawers in Kitchen Cabinets
Image source: housefulofhandmade.com
Core Tools
- Tape Measure: A must. Use a durable, lockable one.
- Pencil: For marking clear, erasable lines on wood.
- Spirit Level (or Laser Level): Critical for ensuring slides are perfectly horizontal. A small 12-inch level is sufficient.
- Power Drill/Driver: A cordless drill/driver is ideal. Ensure you have fresh batteries.
- Set of Drill Bits: Including bits for pilot holes (typically 1/16″ or 3/64″) and bits for the screw heads (usually a Phillips #2). A countersink bit is a nice bonus for a clean finish.
- Socket Wrench or Ratchet Set: Often needed for the mounting bolts on some slide systems, especially if tightening in a confined space.
- Rubber Mallet: For gently tapping slides or drawer boxes into place without marring the finish.
- Utility Knife: To score any rough edges or trim shims.
- Clamps: Optional but helpful for holding slides in place while you drill pilot holes.
- Safety Glasses and Dust Mask: Always wear protection when drilling or sawing.
Materials & Hardware
- Drawer Slides: The heart of the project. You need a pair (left and right) for each drawer. Measure your cabinet’s inside depth (from front to back) to determine slide length. Common lengths are 10″, 12″, 14″, 16″, 18″, and 20″. Always choose slides where the drawer extends fully beyond the cabinet face when pulled. Buy quality. Brands like Blum, Hettich, Soft-Close, and Accuride are industry standards for a reason. Consider soft-close for a premium, quiet finish.
- Drawer Boxes: You can reuse your existing drawer box if it’s in good shape, square, and made of sturdy material like solid wood or plywood. Particleboard often fails under the stress of slides. If reusing, you may need to trim the sides to fit the new slide brackets. Otherwise, purchase new drawer boxes sized to your cabinet opening and slide length.
- Screws: Slides typically come with screws. Ensure they are long enough to bite deep into the cabinet side (at least 1/2″ penetration) but not so long they poke through. #8 x 1-1/4″ is common. Have extras on hand.
- Drawer Front: If you’re reusing the old front, you’ll need to reattach it to the new/refurbished drawer box. Have wood glue and clamps ready if you need to re-glue it.
- Shims: Thin wood or composite shims are invaluable for fine-tuning the level and alignment of slides.
Step 1: Measure and Plan Precisely
Rushing this step is the number one cause of installation failure. You must get three key measurements from the inside of your cabinet opening.
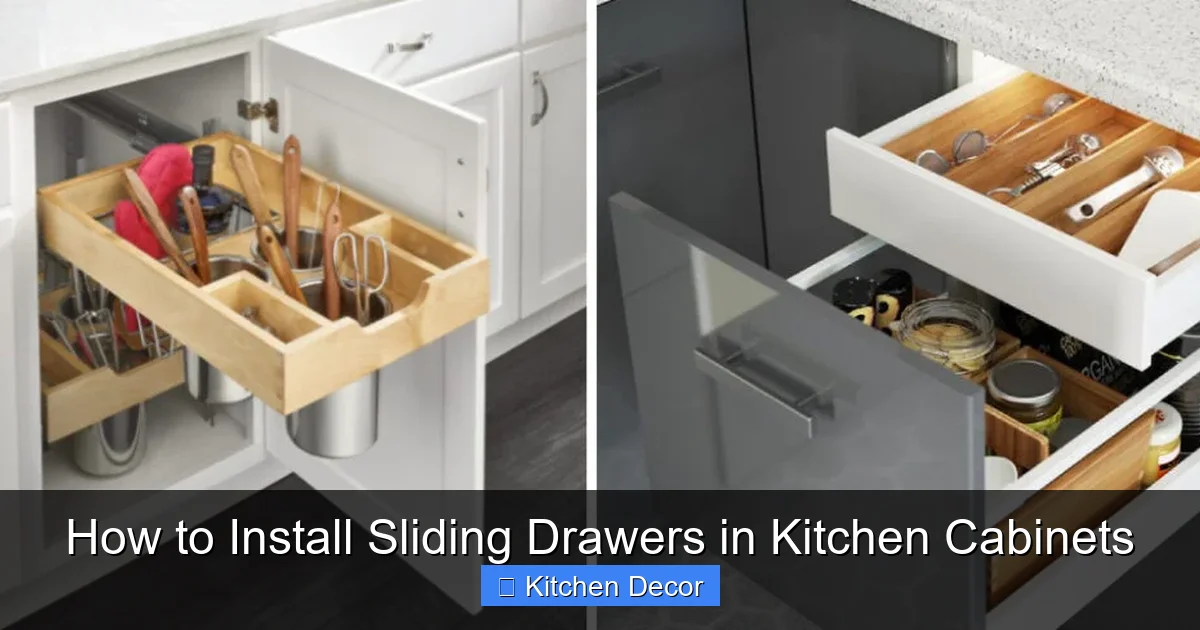
Visual guide about How to Install Sliding Drawers in Kitchen Cabinets
Image source: thekitchenix.com
The Three Critical Measurements
Using your tape measure, record the following to the nearest 1/16th of an inch:
- Inside Width: Measure from the inside of the left cabinet side wall to the inside of the right side wall at the front, middle, and back. Cabinets can be out of square. Use the smallest of these three measurements as your “working width.”
- Inside Depth: Measure from the inside of the front cabinet frame (the stile) to the inside of the back wall. Again, take a front, middle, and back measurement. The smallest number dictates your maximum slide length. For example, if your depth is 22″, you can use 20″ slides but not 22″ slides.
- Inside Height: Measure from the bottom of the cabinet’s top frame rail to the top of the bottom rail (or floor). This determines the maximum possible height of your drawer box. Remember to subtract the thickness of your chosen drawer slides’ brackets if they mount on the side.
Choosing Your Drawer and Slide Size
With your “minimum” width and depth in hand, select your slides. A standard rule is that the slide length should be 2-3 inches shorter than the cabinet’s inside depth to allow for the front and rear brackets. If your cabinet depth is 24″, 22″ slides are a perfect fit. The drawer box itself should be built to be 1/2″ to 3/4″ narrower than the inside width measurement (total, so 1/4″ to 3/8″ per side) to allow for clearance between the drawer sides and the cabinet walls. This gap is essential for smooth operation.
Example: Your cabinet inside width is 24″. Your new drawer box should be approximately 23-1/2″ wide. The slides will be mounted to the cabinet sides, and the drawer’s side brackets will attach to the drawer box sides, creating that necessary clearance.
Planning for Obstructions
Look inside the cabinet with a flashlight. Are there any wires, pipes, or a center rail (common in wider cabinets)? You must work around these. For a center rail, you may need to use shorter slides that mount only to the sides, or use a specific rail-mounting bracket system. For pipes, you might need to reroute them (a plumber’s job) or choose a shallower drawer box that doesn’t interfere.
Step 2: Removing Old Drawer Hardware
Now, clear the slate. Start with an empty cabinet and drawer.
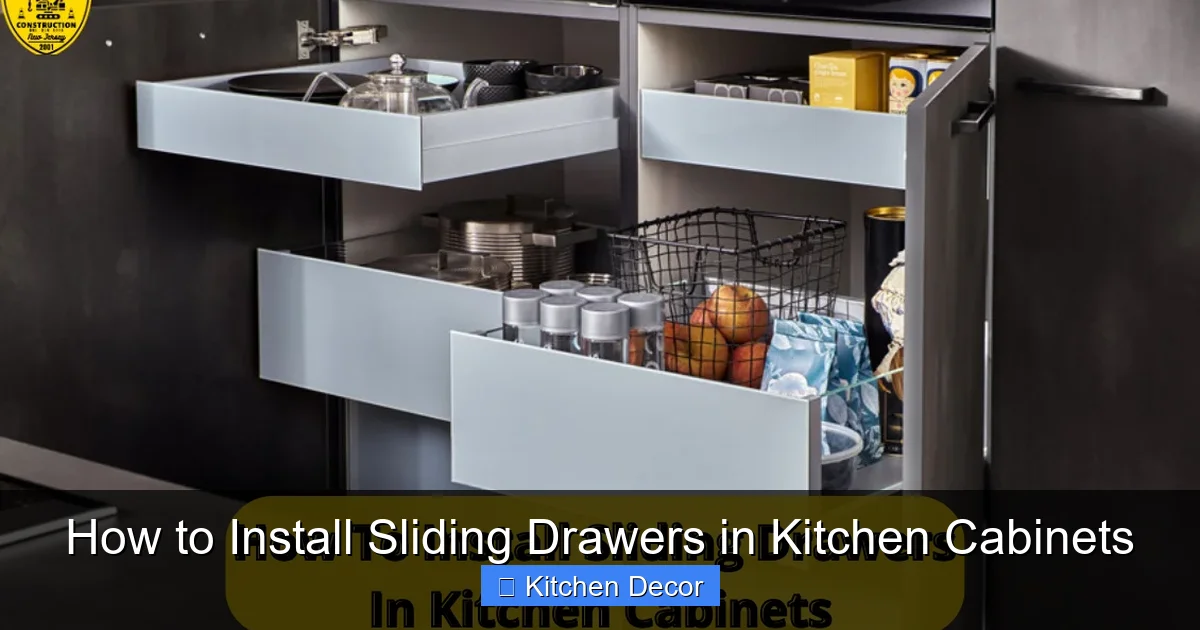
Visual guide about How to Install Sliding Drawers in Kitchen Cabinets
Image source: shrikiconstruction.com
Safe Removal of the Old Drawer
Pull the old drawer all the way out. Most will have a simple plastic retaining clip on the drawer side that hooks onto the slide. Depress the clip (often with a flathead screwdriver) and lift the drawer slightly to disengage it from the slides. Set the old drawer aside for measurement or disposal. If the drawer is stuck, check for broken plastic guides jammed in the track.
Detaching the Old Slides
With the drawer out, you’ll see the old slides attached to the cabinet sides and the drawer box. These are usually screwed in place. Use your drill/driver to remove all screws securing the slides to the cabinet interior. Important: Do not remove the screws from the drawer box yet if you plan to reuse that box. You’ll need those slides attached to the box as a template later. If you’re installing a completely new drawer box, remove all old hardware from the cabinet and the old box. Thoroughly clean the cabinet interior of any dust, debris, or broken plastic pieces.
Inspecting and Repairing the Cabinet
This is your chance to fix any issues. Look at the cabinet side walls where the new slides will mount. Are they solid wood? Is the veneer peeling? Any major dents? Fill any significant holes with wood filler and sand smooth. If the cabinet side is thin or damaged, you may need to add a 1/4″ plywood backing strip screwed to the cabinet’s inner frame to provide a solid nailing surface for the new slide screws. This is a common and crucial fix for older cabinets with thin sides.
Step 3: Installing the Drawer Slide Mechanisms
This is the most critical phase. Perfect slide installation equals perfect drawer operation.
Understanding Slide Types: Side-Mount vs. Undermount
Your choice here dictates the entire look and installation sequence.
- Side-Mount Slides: These are the most common and easiest for DIY. The slide mechanism is visible on the outside of the drawer box when it’s pulled out. They attach directly to the inside of the cabinet side and the outside of the drawer side. They are very forgiving in terms of alignment and are great for heavy loads.
- Undermount Slides: These offer a clean, invisible look when the drawer is closed. The slide mechanism mounts underneath the drawer box, connecting to a bracket on the cabinet side. They require a specific drawer box design (usually with a routed groove or clamp) and are less tolerant of misalignment. They are excellent for high-end, frameless cabinets.
For this guide, we’ll focus on the more DIY-friendly side-mount system, but the principles of leveling and alignment are identical.
Positioning the Cabinet-Mount Member
Take the slide that attaches to the cabinet (often called the “outer” or “cabinet” member). Hold it against the inside of the cabinet side wall. The standard position is with the front edge of the slide bracket flush with the inside front edge of the cabinet face frame. However, always follow the manufacturer’s instructions, as designs vary.
Place the slide on the left side first. Use your level to check it is perfectly horizontal. The slide must be absolutely level from front to back. Even a 1/16″ tilt will cause the drawer to bind. Use a pencil to lightly mark the screw hole locations on the cabinet side through the slide’s holes. Repeat this process for the right side.
The Dry-Fit and Shim Technique
Before you drill a single hole, do a dry fit. With the slides loosely held in place (maybe with one screw in the front hole), take your drawer box (or the old box with its old slides still attached as a template). Engage the drawer slides with the cabinet slides. Push the drawer in and out. Does it move smoothly? Is it level? Is there any rubbing on the cabinet sides?
If the drawer rides low at the back, you need to shim behind the front of the cabinet slide to raise its front edge. If it rides high at the back, shim behind the rear of the slide. Use thin cardboard or wood shims. Adjust until the drawer slides in and out with no resistance and is perfectly centered vertically within the cabinet opening. Once perfect, remove the drawer and firmly secure the cabinet slides with all screws, tightening them securely.
Step 4: Mounting the Drawer and Final Adjustments
With the cabinet slides perfectly installed, it’s time to attach the drawer box.
Attaching the Drawer-Mount Member
If you are using a new drawer box, you must attach the drawer (or “inner”) member of the slide to the outside of each drawer side. The position is critical. The front of this bracket should typically align exactly with the front edge of the drawer box. Use your level again! Place the drawer on a flat surface, position the slide bracket, and screw it in place. Ensure both left and right brackets are at the exact same height relative to the drawer front.
Pro Tip: If you are reusing your old drawer box, the old slides are already attached. You can leave them if they are compatible with your new slides (many systems are proprietary). If not, you must remove the old slides from the box and attach the new drawer-mount slides as described above.
Engaging and Testing
Now, the moment of truth. Lift the drawer and align the drawer-mount slides with the installed cabinet-mount slides. Tilt the front of the drawer up slightly (about 15 degrees) to engage the hooks or rollers, then lower the drawer flat and push it in. It should glide smoothly. Pull it all the way out. Does it extend fully? Does it sit level? Listen for any grinding or feel for any tight spots.
Fine-Tuning the Alignment
If the drawer binds or is not level, do not force it. Pull it out and inspect. The issue is almost always a slight misalignment of the drawer slides on the box. Loosen the screws on the drawer-mount slides (not the cabinet ones). Gently tap the front or back of the drawer box side with a rubber mallet to shift it a fraction of a millimeter up/down or in/out. Retighten the screws and test again. This iterative process of loosen, adjust, test, tighten is the key to a perfect fit. For side-mount slides, you can also adjust the cabinet slide brackets slightly if needed, but it’s harder once they’re fully screwed.
Attaching the Drawer Front
Once the drawer slides in and out flawlessly, it’s time to attach the front. This is the final aesthetic step. Position the drawer front on the box. Use clamps to hold it perfectly aligned—check that it’s flush with the cabinet face and level with neighboring drawer fronts. From inside the drawer, drive screws through the mounting holes in the drawer front into the drawer box. Use long screws that go deep into the box for strength. Remove the clamps and give the front a firm tug to ensure it’s secure.
Step 5: Troubleshooting and Pro Tips for Flawless Operation
Even with careful work, minor issues can arise. Here’s how to solve them.
The Drawer Sticks or Binds
Cause: The most common culprit is an out-of-level slide or drawer box.
Solution: Re-check the level on both cabinet slides. Use a long level across the front of both mounted slides. They must be in a perfect, straight line. Then, check if the drawer box itself is square. Place it on a flat surface; if it rocks, the box is warped and may need replacement or shimming against the slides.
The Drawer Sags or Drops When Opened
Cause: The drawer-mount slides are not securely fastened to the drawer box, or the box itself is undersized/weak.
Solution: Ensure all screws attaching the slides to the drawer box are tight and biting into solid wood. If the drawer side is thin particleboard, the screws won’t hold. You may need to glue and screw a small wood block behind the screw hole for reinforcement. Consider a sturdier drawer box for the future.
The Drawer Doesn’t Pull Out All the Way
Cause: The slide length is insufficient for the cabinet depth, or the rear bracket of the slide is not fully engaged.
Solution: Verify your slide length is appropriate (2-3″ shorter than cabinet depth). Ensure the rear bracket of the slide is screwed down completely. Sometimes, a rear stopper on the slide can be adjusted; consult your slide’s manual.
Pro Tips for a Professional Result
- Pre-Drill All Holes: Always drill pilot holes for your screws, especially near the edges of the cabinet sides, to prevent splitting.
- Use a Backing Board: If your cabinet sides are thin or suspect, install a 1/4″ plywood strip (cut to the height of the slide) behind where the slide will mount. Screw this backing strip solidly to the cabinet’s inner frame first, then mount the slide to it. This creates a rock-solid anchor.
- Check for Interference: Before final tightening, slide the drawer in and out several times with the front unattached. This ensures the drawer box itself isn’t rubbing on the cabinet’s back wall or any internal rails.
- Label Everything: If doing multiple drawers, lightly label the drawer box and its corresponding cabinet location (e.g., “Left, Top”) with a pencil to avoid mix-ups.
- Soft-Close Retrofit: If you love soft-close but bought standard slides, you can often add a separate soft-close adapter that clips onto the slide and drawer. It’s an easy upgrade.
Conclusion: Enjoy Your Newly Transformed Kitchen
Congratulations! You’ve navigated measurements, conquered levels, and fine-tuned slides. That frustrating, stuck drawer is now a thing of the past, replaced by a silky-smooth, full-extension compartment that makes every pot, pan, and utensil easy to find and grab. The satisfaction of a perfectly installed sliding drawer is immense—it’s a tangible improvement you use every single day.
This project reinforces a core DIY truth: success is 90% preparation. Your time spent measuring, planning, and dry-fitting pays off in a flawless final installation. You’ve not only upgraded your kitchen’s functionality but also added value and a touch of modern craftsmanship. Now, go open that new drawer all the way and admire your handiwork. You’ve earned it. Then, maybe tackle the next cabinet.
Frequently Asked Questions
What is the most common mistake when installing sliding drawer slides?
The most frequent error is failing to ensure the slides are installed perfectly level and aligned with each other. Even a slight tilt or height difference between the left and right slides will cause the drawer to bind, stick, or derail. Always use a long spirit level across both mounted slides before tightening the final screws.
Can I install sliding drawers in cabinets with a center support rail?
Yes, but it requires planning. You must use slide systems specifically designed for rail-mounted cabinets or use side-mount slides that are short enough to not interfere with the rail. You will mount the slides only to the cabinet side walls, ensuring the rail does not obstruct the drawer’s travel path. Measure carefully from the rail to the side wall to determine your maximum slide length.
How long does a typical sliding drawer installation take for a beginner?
For a single drawer, a beginner should allocate 1 to 2 hours, including measuring, removing old hardware, installing new slides, and fine-tuning. The first drawer will be the slowest as you learn the process. Subsequent drawers in the same cabinet will go much faster, perhaps 45 minutes each, as you use the first as a perfect template.
Are undermount slides harder to install than side-mount slides?
Generally, yes. Undermount slides require precise routing or clamping mechanisms on the underside of the drawer box, which demands more precision and often specialized tools. They are also less forgiving of minor misalignments. Side-mount slides are more straightforward, as they attach to the outer side of the drawer box and are easier to adjust during installation. For a first-time DIYer, side-mount is the recommended starting point.
What if my cabinet interior depth is an odd size, like 23 inches?
You will select a slide length that is 2-3 inches shorter than your depth. For a 23″ deep cabinet, a 20″ or 22″ slide is appropriate. The unused 1-3 inches at the rear of the cabinet is standard and allows space for the rear bracket of the slide. Always choose the slide length based on your cabinet’s smallest inside depth measurement.
How much weight can a standard sliding drawer hold?
Weight capacity varies significantly by slide model and quality. Basic 12″ side-mount slides may hold 50-75 lbs. Heavy-duty 18″ or 20″ slides can support 100-150 lbs or more. Always check the manufacturer’s specifications. For a kitchen, choose a slide with a capacity at least 20% higher than your expected maximum load (e.g., if storing heavy pots, choose a 100 lb+ capacity slide) for safety and longevity.