Removing your Whirlpool oven door is a manageable DIY task that makes deep cleaning and repairs much easier. The process primarily depends on your oven’s hinge design—most use either a standard hinge or a hidden “snap” hinge. Always prioritize safety by unplugging the oven and having a helper, as the door is heavy and awkward. With the right tools and a careful approach, you can detach the door in minutes without damaging your appliance.
So, you’ve got a greasy, baked-on mess on your oven door’s interior glass, or maybe you need to access the interior for a deeper repair. Whatever the reason, the thought of wrestling with that heavy, awkward door can be daunting. You might be wondering, “Is this something I can actually do myself without breaking something or, worse, hurting myself?” The great news is that with the right knowledge and a calm, methodical approach, how to remove the door on a Whirlpool oven is a straightforward process. It’s one of the most common and useful DIY tasks for oven maintenance. This guide will walk you through every single step, from identifying your specific hinge mechanism to safely lifting that door off and putting it back on. We’ll demystify the process so you can tackle this project with confidence.
First, let’s address the elephant in the room: safety. An oven door is not a lightweight panel. It’s a heavy assembly of glass, metal, and insulation. Dropping it can shatter the glass, damage your kitchen floor, or cause a serious injury. Furthermore, you’re working with an appliance that’s connected to high-amperage electricity and, in gas models, a gas line. The absolute first rule is to eliminate all power sources. For electric ovens, unplug the unit from the wall outlet. If the plug is inaccessible, turn off the dedicated circuit breaker in your electrical panel and verify it’s off with a voltage tester. For gas ovens, you must also shut off the gas supply valve, usually located behind the oven or on the wall. Never attempt this with the oven hot. Let it cool completely. Once power and gas are off, clear a large, soft space nearby—lay down thick blankets or towels—to place the door once it’s removed. And seriously, recruit a helper. This is not a solo maneuver. Two people can manage the weight and coordination safely; one person should not attempt it.
The second critical piece of knowledge is understanding that not all Whirlpool oven doors are removed the same way. Over the years, Whirlpool (and its brands like KitchenAid and Maytag) has used a couple of primary hinge designs. Identifying which one you have is the key that unlocks the entire process. Don’t just start unscrewing things randomly—you could damage the hinge mechanism or the door frame. We’ll dedicate the next section to helping you pinpoint your hinge type with absolute certainty. From there, the steps are a logical sequence of unlocking, supporting, and lifting. It’s less about brute strength and more about understanding the mechanism. So, take a breath. You’ve got this. Let’s get into the details.
Key Takeaways
- Safety is non-negotiable: Always disconnect the oven from power (unplug or turn off the breaker) and clear the area to prevent injury or damage.
- Identify your hinge type first: Whirlpool ovens primarily use two systems: a traditional pivot hinge with locking levers or a hidden “snap” hinge with release latches. Your method hinges on this.
- Gather the correct tools: You’ll typically need a Phillips screwdriver, a putty knife or flathead, and possibly a socket set. A helper and soft blankets are essential.
- Door removal is a two-person job: Oven doors are deceptively heavy and bulky. One person supports the weight while the other operates the hinge locks/latches.
- Handle with extreme care: Never force the door. If a hinge is stuck, re-check for missed screws or latches. Carry the door upright to avoid strain on the hinges and glass.
- Reinstallation is the reverse process: Carefully align the hinge arms with the socket slots, ensure they click/lock fully, and verify the door is seated correctly before restoring power.
- Know when to call a pro: If hinges are visibly broken, corroded, or if the door glass is damaged, seek a certified appliance technician to avoid safety hazards.
📑 Table of Contents
- Safety First: The Non-Negotiable Foundation
- Identifying Your Whirlpool Oven Hinge Mechanism
- Essential Tools and Preparation Checklist
- Step-by-Step: Removing the Whirlpool Oven Door
- Handling, Transporting, and Storing the Door
- Reinstalling the Whirlpool Oven Door Correctly
- Troubleshooting Common Issues and When to Seek Help
Safety First: The Non-Negotiable Foundation
Before we even talk about hinges or screws, we must solidify the safety groundwork. Rushing this step is the single biggest cause of accidents during appliance repair. The risks are real: electrocution, gas leaks, crushing injuries, and broken glass. Let’s build a safe work environment.
Power and Gas Disconnection
For an electric oven, the safest method is to physically unplug the appliance from the wall outlet. This is a definitive break in the circuit. If your oven is hardwired (the wires connect directly to a junction box behind it), you must switch off the dedicated 240V circuit breaker in your main panel. Use a non-contact voltage tester on the oven’s power cord or terminal block afterward to confirm there is no live current. For gas ovens, the process is twofold. First, turn off the electrical supply as described above. Second, locate the gas shut-off valve. It’s typically a lever or knob on the flexible gas line behind the oven or on the wall near the floor. Turn it until it’s perpendicular to the pipe. After turning it off, smell for gas. If you detect a strong odor, do not proceed. Ventilate the area and call a professional. Once both power and gas are off, wait a few hours if the oven was recently used to ensure everything is cool.
Workspace Preparation and Personal Protection
Clear a 6×6 foot area directly in front of the oven. Cover the floor with moving blankets, thick towels, or a soft rug. This is your door landing zone. Have a sturdy chair or stool nearby to place tools. Wear sturdy, closed-toe shoes and work gloves to protect your hands from sharp metal edges on the hinge mechanisms. Safety glasses are a good idea in case a small piece of debris or a spring (on some models) were to dislodge. Ensure you have adequate lighting—a portable work light can be a huge help. Keep children and pets out of the kitchen entirely during this operation.
Identifying Your Whirlpool Oven Hinge Mechanism
This is the pivotal step. Whirlpool has predominantly used two hinge systems for their freestanding ranges and wall ovens over the last 15-20 years. You need to look at the area where the door meets the oven cabinet, specifically at the hinges themselves. You may need a flashlight.
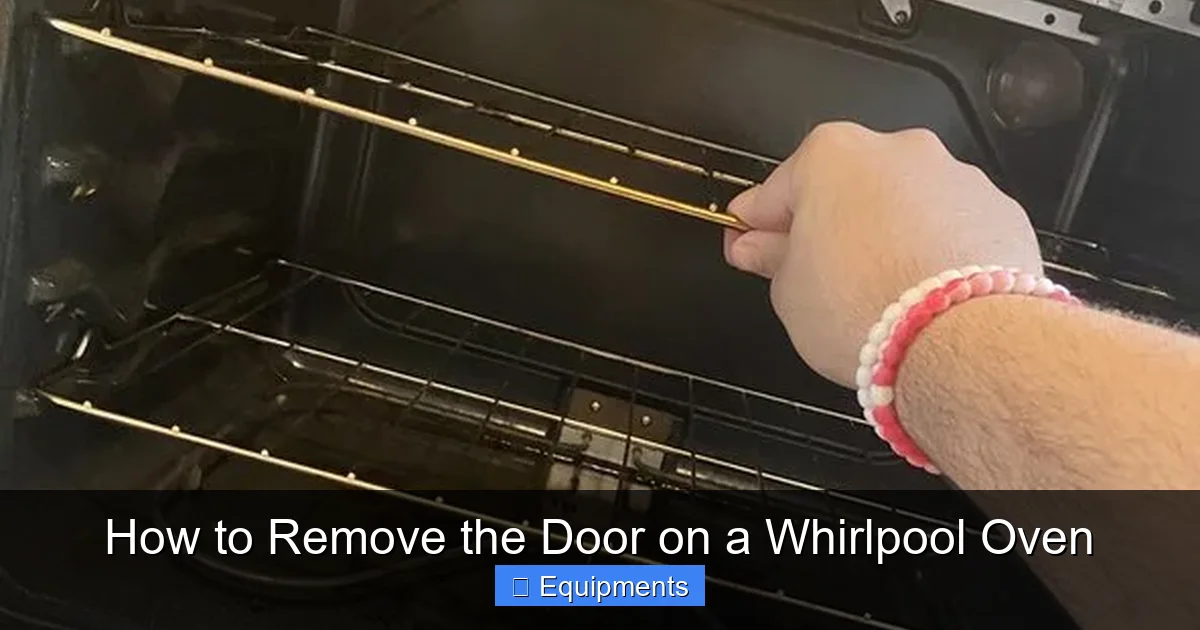
Visual guide about How to Remove the Door on a Whirlpool Oven
Image source: guide-images.cdn.ifixit.com
Type 1: The Traditional Pivot Hinge with Locking Levers
This is the older, more common design and is often what people picture. When the oven door is closed, you can usually see a metal hinge arm that protrudes from the bottom corners of the door and inserts into a socket on the oven frame. On many models, there is a small metal lever, tab, or clip located on the hinge arm itself or on the socket. This is a manual safety lock. When engaged (which it is when the door is closed), it prevents the hinge arm from sliding out of the socket. To remove the door on this type, you must first disengage these locks. They are often spring-loaded levers you flip up or down, or small tabs you pry inward with a flathead screwdriver. Once both locks (left and right) are disengaged, the hinge arms can be pulled straight down and out of their sockets. The door will then pivot forward slightly and can be lifted straight up off the hinges.
Type 2: The Hidden “Snap” or “Clamp” Hinge
This is a more modern, streamlined design found on many newer Whirlpool, KitchenAid, and Maytag models. The hinge mechanism is completely enclosed within the oven door frame at the bottom corners. When closed, there is no visible lever or tab. Instead, the hinge arm snaps into a locked position within a housing. To release it, you must access a small slot or opening on the *inside* of the door frame, near the bottom corner. Using a flathead screwdriver or a putty knife, you insert it into this slot and gently pry or twist to release the internal clamp. You should hear or feel a distinct “snap” or “click” as the hinge arm disengages from its locked position. You must do this on both sides. Once released, the process is the same: the door pivots forward slightly, and you lift it straight up and off the hinge arms. Pro Tip: Search online for your exact oven model number (found on a sticker inside the oven door edge or on the back panel) plus “door removal.” A 30-second video will instantly confirm your hinge type and the exact release point.
Essential Tools and Preparation Checklist
Armed with the knowledge of your hinge type, gather your tools. Having everything within arm’s reach prevents frantic searching mid-job and keeps you focused on safety.
Visual guide about How to Remove the Door on a Whirlpool Oven
Image source: i.ytimg.com
The Core Toolset
- Phillips Head Screwdriver: The most common screw head you’ll encounter for any access panels or trim pieces.
- Flathead Screwdriver or Putty Knife: Crucial for prying and releasing the hidden snap hinges without marring the finish. A plastic trim removal tool is even better if you have one.
- Socket Set or Nut Driver (1/4″ or 3/8″ drive): Some models, especially older ones or certain gas ranges, use hex-head bolts to secure the hinge to the door or oven frame. A 5/16″ or 7/16″ socket is common.
- Work Light/Flashlight: To see into the dark hinge pockets and slots.
Support and Protection Gear
This is not optional. You need a helper. Agree on clear communication beforehand—a simple “Ready? On three. One, two, three, lift.” is effective. Have at least two thick blankets or moving pads. You’ll use one to lay the door on and another to cushion it if you need to set it down temporarily during the process. Have a sturdy chair or stool to place your tools on. Do not place tools on the oven floor where they can slide and cause you to lose balance.
Step-by-Step: Removing the Whirlpool Oven Door
Now, let’s execute. Follow these steps in order. If at any point something feels stuck or doesn’t move as described, stop. Re-examine your hinge type. You may have missed a locking lever or a retaining screw.
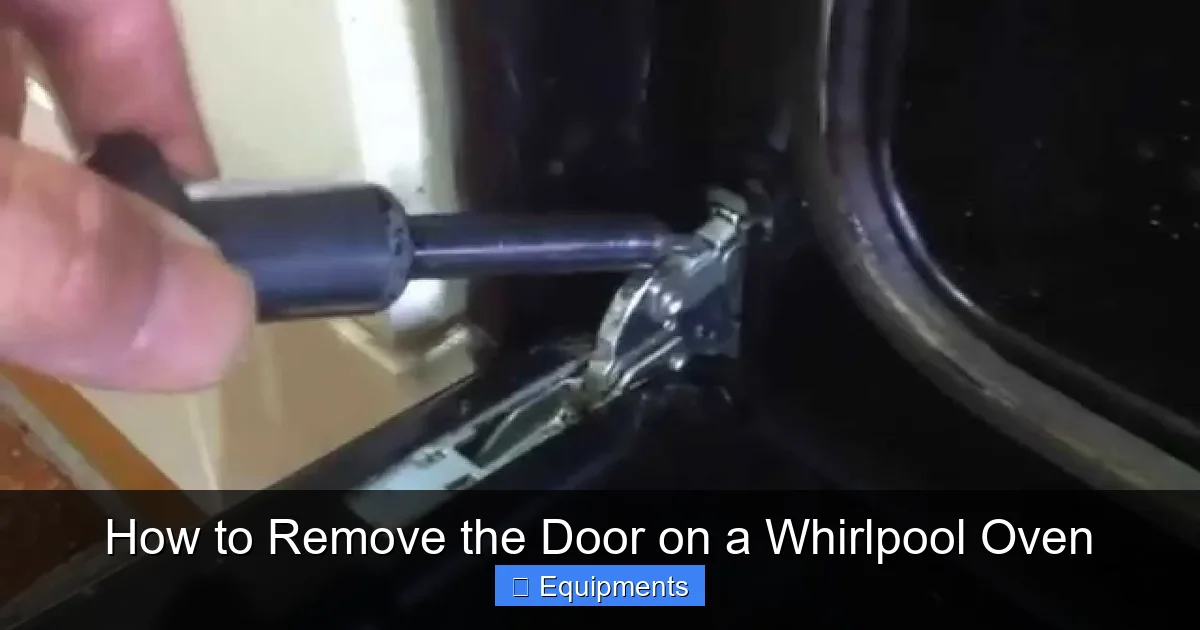
Visual guide about How to Remove the Door on a Whirlpool Oven
Image source: i.ytimg.com
Step 1: Access and Release (The Critical First Moves)
Open the oven door fully. For Traditional Lever Hinges: Look at the bottom corners of the door, where the hinge arms are visible. You should see a small metal lever, often spring-loaded, mounted on the hinge arm or the oven frame. Using your fingers (or a flathead if it’s tight), flip this lever to the unlocked position. It will usually move about 45 degrees. You must do this on both the left and right sides. For Hidden Snap Hinges: Close the door slightly until it’s about 10-15 degrees open. Look at the *inside* bottom corner of the door frame. You’ll see a small horizontal or vertical slot. Insert your flathead screwdriver or putty knife into this slot. Gently pry inward/upward. You should feel a firm resistance, then a give, followed by a click. This is the internal clamp releasing. Repeat on the other side. Important: The door may now be slightly unstable. Have your helper place a hand on the door to support its weight before proceeding.
Step 2: The Initial Lift and Pivot
With both hinges released (you should feel the door is no longer held rigidly in the closed position), the next move is to create a small gap. While your helper supports the bottom of the door, gently pull the door outward and away from the oven by about 1-2 inches. You are not lifting it yet; you are sliding it straight out to disengage the hinge arms from their deep socket pockets. You may hear a soft scraping sound as the arm clears the socket. Once you have this small gap, the door will now pivot forward on its own weight slightly. Your helper should continue to support the door’s weight from the bottom.
Step 3: The Final Lift – Straight Up and Out
This is the moment of truth. Communicate clearly with your helper. You will each take one bottom corner of the door. On the count of three, you will both lift the door straight up in a vertical motion. Do not try to swing it forward or backward. The hinge arms are tapered; lifting straight up allows them to clear the oven’s hinge sockets. Lift with your legs, not your back. The door will come free. Once it’s clear of the oven (about 6 inches up), you can carefully tilt it forward to a horizontal position, but only once it’s fully clear. Immediately, carry it to your prepared blanket and set it down gently, glass side up, on the soft surface.
Handling, Transporting, and Storing the Door
The door is now off, but the job isn’t done until it’s safely stored or worked on. Improper handling of the detached door is a prime way to cause costly damage.
Carry and Set-Down Technique
Always carry the door upright, as if it were still on the oven. This keeps the hinge arms (which are still attached to the door) pointing downward, aligning with their natural stress direction. Carrying it sideways or flat puts lateral stress on the hinge pins and the glass seals, which can lead to cracks or misalignment later. When setting it down, do so on the soft blankets. Never place it directly on a hard floor, a countertop with a small overhang (it could tip), or on its glass face. The safest position is standing upright, leaning against a wall with a blanket behind it, or lying flat on a padded surface with the glass facing up.
What to Do Next: Cleaning or Repair
With the door off, you now have unimpeded access. For cleaning, you can safely spray and scrub the interior glass, the door gasket (the rubber seal), and the oven’s frame where the door seats. Use a non-abrasive cleaner and a soft cloth. For repairs, you might be replacing the door gasket, fixing a broken hinge (a more advanced task), or addressing a broken inner glass pane (which requires disassembling the door itself—consult a specific guide for that). If your goal was just cleaning, you can now work comfortably without worrying about dripping cleaner into the oven cavity or on the controls. Once your task is complete, you’re ready for the most important part: putting it back on correctly.
Reinstalling the Whirlpool Oven Door Correctly
Reinstallation is simply the removal process in reverse, but it requires even more precision to ensure the door seals properly and operates smoothly. A misaligned door will leak heat, smoke, and cause the self-clean cycle to fail.
Alignment is Everything
First, ensure the hinge arms on the door are clean and free of debris. Locate the hinge sockets on the oven frame. They are usually U-shaped or C-shaped pockets. You must align the hinge arms perfectly with these sockets before lifting. This is where your helper is crucial. One person should hold the door at a slight outward angle (about 10-15 degrees from vertical) to present the hinge arms. The other person should guide the arms into the sockets. You may need to gently wiggle the door. The arms should slide in smoothly with slight resistance. Do not force them. If they don’t go in, you are misaligned. Pull them out and try again.
Securing and Testing
Once the hinge arms are fully seated in their sockets (you should not see any gap between the arm and the socket frame), slowly lower the door into its closed position. For traditional lever hinges, you will hear/feel the locking levers automatically snap into the engaged position as the door closes fully. For snap hinges, you must ensure the internal clamps have engaged—closing the door firmly usually does this. Listen for the solid “thunk” of the door sealing against the gasket. Open and close the door several times. It should move smoothly without binding, scraping, or uneven gaps. Check the seal by placing a dollar bill in various spots around the closed door; there should be slight, even resistance when you pull it out. If the door is crooked or doesn’t seal, the hinges are not fully seated. Remove the door and try again.
Troubleshooting Common Issues and When to Seek Help
Even with a perfect guide, you might encounter a snag. Here’s how to handle the most common problems.
“I Can’t Find the Release Lever/Slot!”
Double-check your hinge type identification. Is your oven a newer model with a fully enclosed hinge? The slot is tiny and can be painted over or clogged with gunk. Use your flashlight and a flathead to gently probe the bottom inside corner of the door frame. If you have an older model with visible hinges, look for a small wire clip or metal tab. Sometimes these levers are broken or missing. If a lever is broken off, you may need to manually hold the hinge arm compressed while lifting—this is tricky and risky. A lost or broken lever often means the hinge needs professional replacement.
“The Door Feels Stuck and Won’t Lift After Releasing.”
This usually means one of two things: 1) You didn’t fully disengage the lock on both sides. Go back and check. The lever might need to be flipped further, or the snap hinge might need a firmer, more definite pry. 2) The hinge arms are rusted or corroded in their sockets. Do not use brute force. Try gently wiggling the door side-to-side while applying upward pressure. You can also try a tiny amount of penetrating oil (like WD-40) applied to the gap between the hinge arm and socket, let it sit for 10 minutes, and try again. If it’s severely corroded, the hinge may need to be replaced.
“The Door is Off, But Now I’m Afraid to Put It Back On.”
This is common. The key is patience and alignment. Have your helper hold the door at the correct angle. You, with your head near the oven opening, guide the hinge arms into the sockets. Use a slow, deliberate motion. Once the arms are in, lower the door slowly. The weight of the door will help seat the hinges. If it doesn’t close fully or feels like it’s hitting the oven frame, it’s misaligned. Lift it slightly (an inch is enough) and gently shift it left or right, then try closing again. Small adjustments make big differences.
When to Call a Professional
There is no shame in calling an appliance repair technician. Do so if: you see a visibly broken hinge arm or cracked hinge housing; the inner door glass is shattered (this requires complete door disassembly and is a safety hazard); you smell gas at any point during the process; or after multiple attempts, you cannot achieve a proper seal. A professional has specialized tools, replacement parts, and the experience to ensure the repair is safe and correct. For a complex issue, the cost of a service call is worth the peace of mind and safety.
Frequently Asked Questions
Can I remove a Whirlpool oven door by myself?
While technically possible, we strongly advise against it. An oven door is very heavy and awkward. Removing it safely requires two people: one to support and lift, and one to manage the hinge releases and guide alignment. Attempting it alone risks dropping the door, causing injury or significant damage to the oven and your flooring.
What if the hinge release lever is broken or missing?
A broken or missing lever complicates the process significantly. You may need to manually compress the hinge spring mechanism while lifting, which is difficult and can be dangerous as the spring has tension. In this case, it’s best to order a replacement hinge assembly from an appliance parts store (using your model number) and install the new part first, or consult a professional technician who can handle the spring tension safely.
Is the process different for a wall oven versus a freestanding range?
The fundamental hinge mechanism (traditional lever or hidden snap) is the same across most Whirlpool brands. However, access can be trickier on a built-in wall oven due to limited space above or beside it. You may need to remove the oven’s vent grille or trim pieces to get enough clearance to tilt and lift the door. Always consult your specific model’s technical sheet if possible.
Can I remove the door to clean the inside of the oven frame?
Absolutely. This is one of the best reasons to remove the door. It gives you full access to wipe down the interior ceiling, walls, and the door gasket seat on the oven frame, which is nearly impossible to clean thoroughly with the door in place. Just be sure to use a non-abrasive cleaner suitable for oven interiors.
The door is off, but now it won’t go back on properly. What do I do?
First, don’t force it. The most common issue is misalignment of the hinge arms with the socket slots. Fully support the door, lift it slightly off the hinges, and gently shift it left or right by a quarter-inch. Try lowering it again. Ensure both hinge arms are fully inserted into their sockets before closing. If it still won’t seat correctly, one hinge may not be fully released or is damaged. Double-check the release mechanism on both sides.
Will removing the door void my warranty?
No, normal maintenance like door removal for cleaning does not void a warranty. However, if you damage the oven or hinges during the process, that specific damage would not be covered. The warranty covers defects in materials or workmanship, not damage caused by user error. Following this guide carefully mitigates that risk. If your oven is under warranty and you’re uncomfortable, you can always request service; a technician can quickly show you how or perform the task for you.