Removing the ice dispenser cover on a Whirlpool refrigerator is a simple DIY task that typically requires only a few common tools and about 10-15 minutes. The process usually involves prying off a plastic trim piece to access hidden screws, though some newer models use a different release mechanism. Always unplug the refrigerator or turn off the ice maker first to prevent accidental dispensing or electrical shock. This guide provides detailed, model-specific instructions to help you complete the job safely and efficiently.
Key Takeaways
- Safety First: Always disconnect power by unplugging the fridge or turning off the ice maker circuit before starting any work on the dispenser.
- Two Main Methods: Most Whirlpool models use a pry-off plastic bezel to hide screws, while some newer ones have a release lever or clip system.
- Tool Kit is Simple: You’ll typically just need a flat-head screwdriver or a plastic pry tool, and sometimes a Phillips screwdriver.
- Model Matters: The exact procedure varies by refrigerator series (e.g., French Door, Side-by-Side, Bottom Freezer). Identifying your model number is key.
- Gentle Pressure is Key: When prying plastic components, work slowly and evenly to avoid cracking or breaking the cover.
- Document Your Steps: Taking a photo before disconnecting any wires or hoses can save you headaches during reassembly.
- Clean During Access: With the cover off, it’s the perfect time to clean the dispenser well, chute, and seal thoroughly.
📑 Table of Contents
- Introduction: Why Would You Need to Remove That Cover?
- Understanding Your Whirlpool Refrigerator’s Dispenser Design
- Essential Tools and Safety Precautions
- Step-by-Step: Removing the Cover on the Classic Pry-Off Model
- Step-by-Step: Removing the Cover on the Release Clip Model
- Troubleshooting Common Problems During Removal
- Deep Cleaning and Inspection: The Real Reason to Remove It
- Conclusion: You’ve Got This
Introduction: Why Would You Need to Remove That Cover?
So, you’re standing in your kitchen, looking at your Whirlpool refrigerator’s sleek ice and water dispenser panel. Maybe the ice is jammed, or water is leaking from the dispenser area. Perhaps you just want to give the whole assembly a deep, thorough clean that a quick wipe-down can’t provide. Whatever the reason, you’ve hit a common snag: that smooth, one-piece front cover seems like it’s designed to never come off. Don’t worry. You’re not facing a permanent, factory-sealed barrier. Whirlpool, like most appliance manufacturers, designs these covers to be removable for exactly these kinds of service and maintenance tasks.
Removing the ice dispenser cover on a Whirlpool refrigerator is a straightforward process once you know the secret. For the vast majority of models, the cover isn’t held on by visible screws. Instead, it’s secured by a hidden fastener system behind a decorative trim or bezel. This guide will walk you through that process, step-by-step. We’ll cover the different design variations you might encounter, the simple tools you need, and the crucial safety steps to take. By the end, you’ll have the confidence to access the inner workings of your dispenser for cleaning, repair, or inspection.
Understanding Your Whirlpool Refrigerator’s Dispenser Design
Before you start prying anything, it helps to understand what you’re looking at. Whirlpool has used a few primary designs for their exterior ice/water dispensers over the years. Identifying which one you have is the first step to a smooth removal.
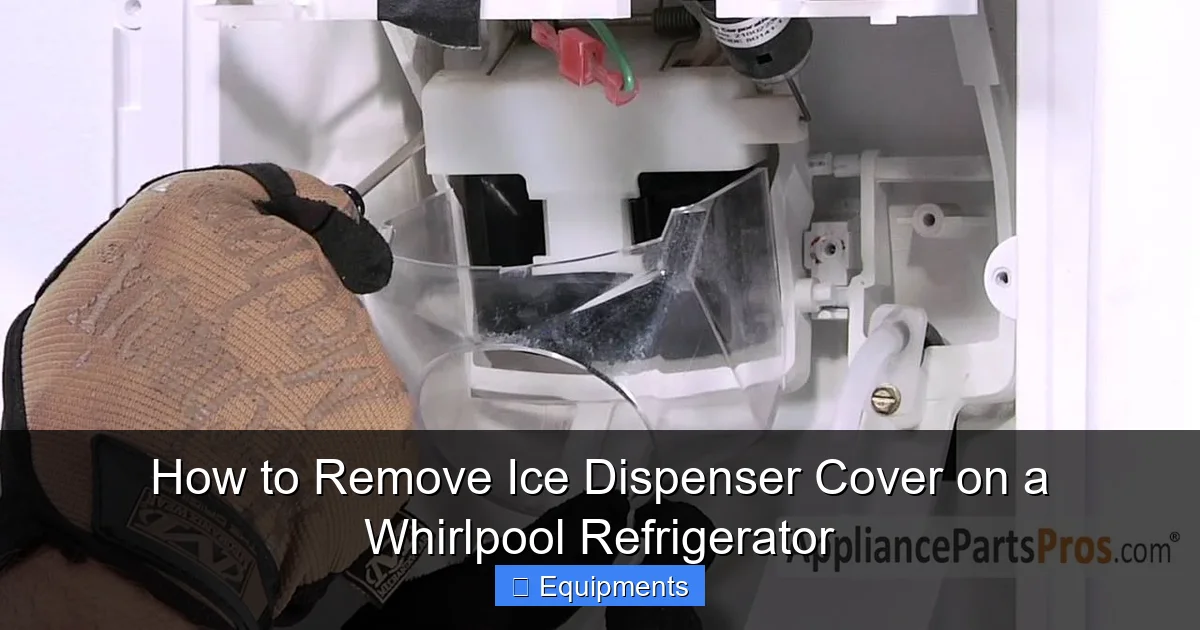
Visual guide about How to Remove Ice Dispenser Cover on a Whirlpool Refrigerator
Image source: wehomedeco.com
The Classic “Pry-Off Bezel” Design
This is the most common design found on Whirlpool French Door and many Side-by-Side models from roughly the mid-2000s to the late 2010s. The entire plastic fascia—the part with the buttons and the LCD display—is actually a separate piece that snaps over a metal or plastic mounting frame. To remove it, you need to gently pry this bezel away from the main refrigerator door. Behind it, you’ll find the screws that hold the deeper ice dispenser assembly in place. This design is user-serviceable and the one this guide will focus on most extensively.
The “Release Lever/Clip” Design
On some newer Whirlpool models, particularly certain French Door lines, the cover may not have hidden screws at all. Instead, it’s secured by a series of internal plastic clips. There is often a small release lever or hole, sometimes hidden under a rubber grommet or at the bottom edge, that, when pressed or pried, disengages the clips. This method requires no screw removal but can be trickier to find the release point.
The “Entire Panel” Design
Less common for the dispenser itself but possible on some integrated designs is a setup where the entire door control panel (including the temperature settings) is one unit that must be removed to access the dispenser mechanism behind it. This usually involves unplugging several wire harnesses after removing the panel.
Pro Tip: Your refrigerator’s model number is the ultimate source of truth. It’s usually on a sticker inside the fresh food compartment on a side wall, on the ceiling, or on the door jamb. A quick online search for “[Your Model Number] ice dispenser cover removal” will often yield a specific service manual or video tutorial.
Essential Tools and Safety Precautions
Gathering your tools and taking safety steps might seem like a preamble, but it’s the most important part of the process. Rushing this stage leads to broken plastic clips, stripped screws, or worse.
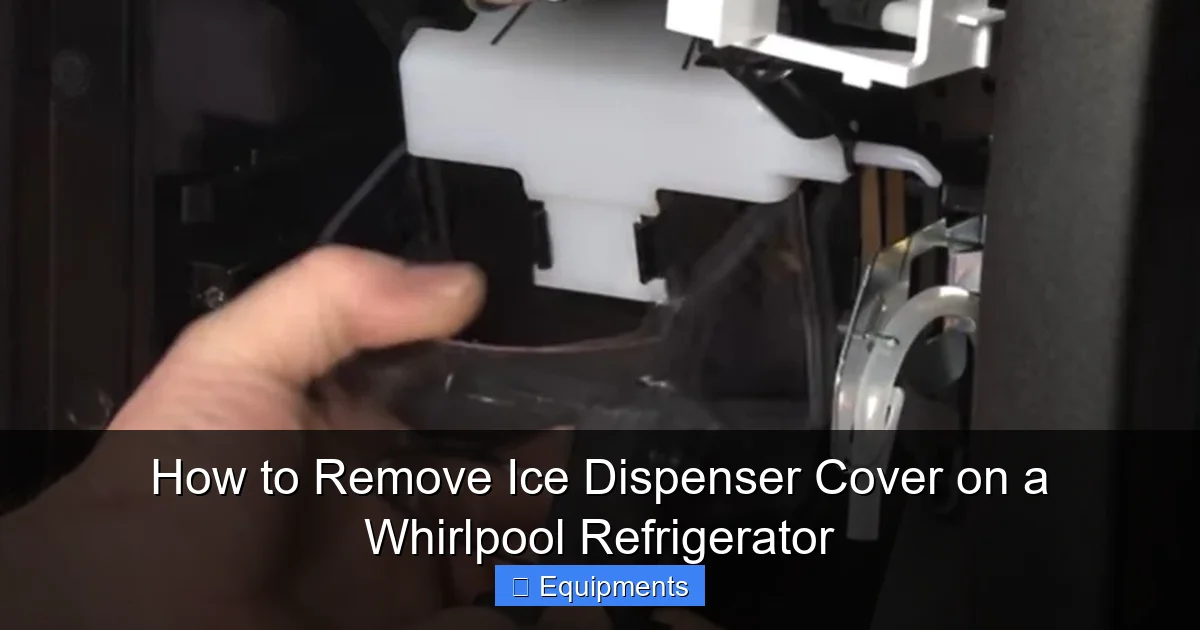
Visual guide about How to Remove Ice Dispenser Cover on a Whirlpool Refrigerator
Image source: refrigeratorsolutions.com
Your Minimalist Tool Kit
You don’t need a toolbox full of equipment. For 90% of Whirlpool models, you need:
- A Flat-Head Screwdriver: A standard, medium-sized flat-head is perfect for inserting into pry slots. A smaller, precision flat-head can be useful for tighter spots.
- A Plastic Pry Tool or Old Credit Card: This is actually better than a metal screwdriver for the initial bezel prying. It reduces the risk of marring the plastic or the fridge’s finish. You can buy a set of plastic pry tools for electronics very cheaply.
- A Phillips Screwdriver: Once the bezel is off, you’ll almost certainly need this to remove the screws holding the dispenser mechanism.
- A Flashlight or Headlamp: The area behind the bezel is dark. A light source is non-negotiable for seeing screw holes and connectors.
- A Small Container or Magnetic Tray: For the screws. They are small and easy to lose down a dark crevice.
Non-Negotiable Safety Steps
Your refrigerator is an appliance with moving parts (the auger) and electricity. Treat it with respect.
- Disconnect Power: This is the golden rule. Unplug the refrigerator from the wall outlet. If the plug is inaccessible, turn off the dedicated circuit breaker for the fridge in your home’s electrical panel. Simply turning off the fridge’s internal ice maker switch is not sufficient, as the dispenser solenoid can still be energized.
- Relieve Pressure: If your model has a water line for the dispenser, turn off the water supply valve (usually under the sink or behind the fridge) and depress the water dispenser lever to release any built-up pressure in the line.
- Empty the Ice Bin: Take the ice bin out completely and set it aside. This gives you clear access and prevents ice from spilling everywhere.
With power off and the area clear, you can begin.
Step-by-Step: Removing the Cover on the Classic Pry-Off Model
This section details the most common procedure. We’ll break it down into clear, sequential steps. The key is locating the pry points.
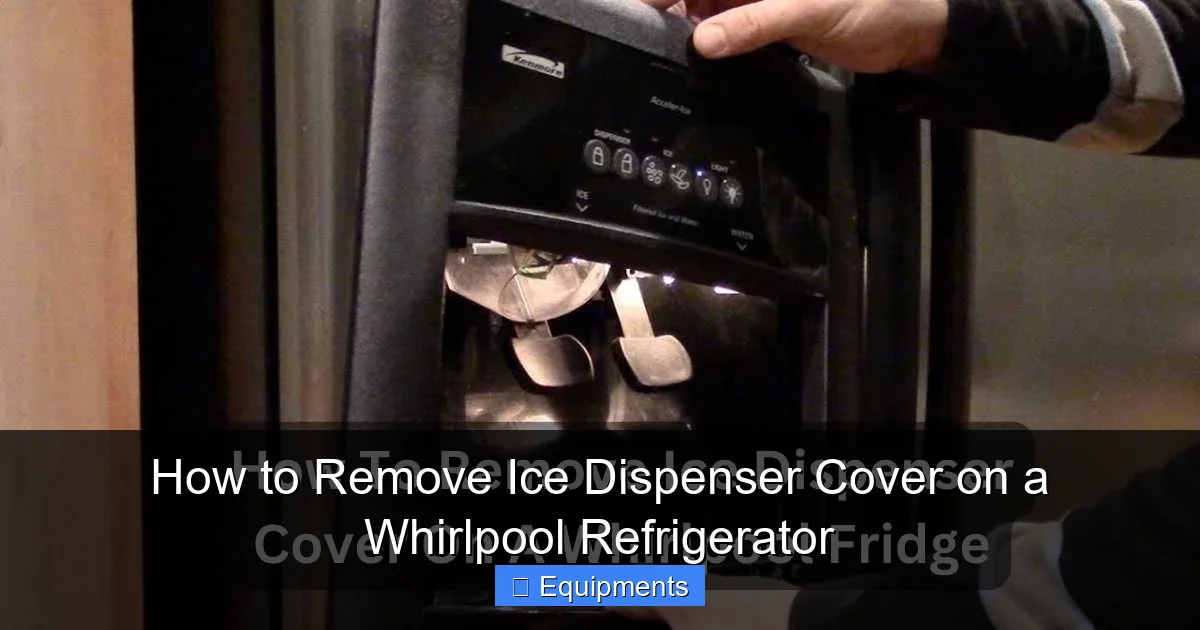
Visual guide about How to Remove Ice Dispenser Cover on a Whirlpool Refrigerator
Image source: refrigeratorsolutions.com
Step 1: Locate the Pry Grooves
Examine the perimeter of the dispenser bezel (the plastic faceplate with the buttons). You are looking for a very small, narrow gap—often no more than 1/8th of an inch—between the bezel and the main door plastic. This gap is your entry point. Common locations are:
- At the very top, just below the lip of the freezer door (on French Door models).
- At the bottom, near where the bezel meets the refrigerator door.
- At the sides, often near the corners.
Sometimes these gaps are intentionally designed as slots. Run your fingernail along the seam; you might feel a slight give or hear a faint click as you push inward on the bezel.
Step 2: Gently Pry the Bezel
Insert your flat-head screwdriver or, better yet, a plastic pry tool into the gap you found. Apply firm, steady, outward pressure. Do not twist or lever violently. Your goal is to pop the first plastic clip free. You’ll hear and feel a distinct snap. Start at one corner or side. Once the first clip releases, you can often work your way along the seam, gently prying to release the remaining clips. The bezel should then pull away from the door easily. If it resists, you’ve missed a clip—find the next gap and try again.
Step 3: Unplug the Electrical Connector
With the bezel removed, you’ll see the back of the button panel and the main dispenser assembly. Look for a large, usually black or white, plastic wiring harness connector. It has a plastic locking tab. Press the tab down (or sometimes up) and pull the connector straight apart. Do not pull on the wires themselves. Grasp the hard plastic housing. Set the bezel aside in a safe spot.
Step 4: Remove the Mounting Screws
Now you have full view of the dispenser mechanism housing. You will see 2 to 4 screws (typically Phillips head) securing this housing to the door. They may be at the top, bottom, or sides. Remove all of them and place them in your container. Note: Some models also have a long screw that runs through the entire assembly from the inside of the door. You won’t see it from the front; you’ll deal with it after the housing is loose.
Step 5: Carefully Pull the Dispenser Assembly Forward
With all visible screws removed, gently grasp the dispenser housing and pull it straight out toward you. It will likely be attached by a water line (a small, flexible plastic tube) and possibly a larger ice chute assembly or wiring for the auger motor. Do not yank it. Support the assembly as you pull it just a few inches to create slack. Your goal is to access the connections behind it.
Step 6: Disconnect the Water Line and Other Connections
Behind the assembly, you’ll find the water line connection. It’s usually a simple plastic quick-connect fitting. To disconnect it, push the release tab (often a small ring or collar) inward toward the fitting while pulling the tubing out. Have a small cup or towel handy, as a small amount of water may drip. If there is a wiring harness for the auger or solenoid, unplug it now using the same tab-and-pull method as before.
Step 7: Remove the Assembly Completely
With all connections freed, you can now fully withdraw the dispenser assembly from the door opening. You now have complete access to the ice chute, the solenoid that controls the flap, the water valve, and the mounting points. This is your workspace for cleaning, inspection, or part replacement.
Reassembly is the Reverse:
To put it back, first reconnect the water line and any wiring. Then, carefully seat the assembly back into the door opening, ensuring the water line isn’t kinked. Hand-thread any long door screws, then tighten all mounting screws. Reconnect the main harness to the bezel, snap the bezel back into place by aligning the clips and pressing firmly around the perimeter until all clips engage. Restore power and water, and test the dispenser.
Step-by-Step: Removing the Cover on the Release Clip Model
If you didn’t find hidden screws behind a pry-off bezel, your model likely uses a clip system. The process is different but still simple.
Finding the Release Point
Inspect the very bottom edge of the dispenser cover. Look for a small, narrow slot or a tiny rubber plug/grommet. Sometimes the release is a small hole. On some models, you must first remove a small, separate plastic piece that forms the bottom lip of the cover. This piece may be held by a single screw hidden under a rubber plug.
Using the Release Tool
Once you’ve located the release hole or slot, insert your flat-head screwdriver or a plastic pry tool. Instead of prying outward, you are often prying upward or inward to disengage a locking tab. Apply gentle pressure. You may feel a slight give. While holding this pressure, go to the opposite side (top or other bottom corner) and do the same. The cover should then pivot or pop free.
Access and Disconnection
With the cover removed (it may hinge upward on a wire or cable), you should have direct access to the dispenser mechanism. The water line and wiring may still be connected to the mechanism itself, which is now exposed. You can proceed to disconnect them as described in the previous section. The mounting screws for the mechanism are usually visible immediately.
Troubleshooting Common Problems During Removal
Even with a good guide, you might hit a snag. Here’s how to handle the most frequent issues.
“The Bezel Won’t Budge, and I’m Afraid to Break It.”
This is the most common hurdle. You’re likely prying in the wrong spot or not using enough steady pressure.
- Re-examine the entire seam. Use a flashlight at a low angle to highlight the gap.
- Try a different corner. Sometimes one corner is the designated “easy release” point.
- Use a plastic tool. A metal screwdriver can dig into the plastic, creating a stress point that leads to cracks.
- Apply pressure outward and slightly upward. The clips often have a slight angle.
If you hear cracking, stop immediately. You’re applying force in the wrong direction or at a weak point.
“I See Screws, But They’re Stripped or Rounded Off.”
This happens with age and over-tightening.
- Use a rubber band: Place a wide rubber band over the stripped screw head, then press your screwdriver firmly into it. The rubber fills the gaps and provides grip.
- Try a different screwdriver size—a slightly smaller or larger tip might catch.
- As a last resort, use a precision rotary tool (Dremel) with a cutting disc to cut a straight slot across the head, then use a flat-head screwdriver.
“The Water Line is Stuck and Won’t Disconnect.”
The quick-connect fitting can get stiff with age.
- Make sure you are depressing the release tab all the way.
- While holding the tab in, gently twist the tubing side-to-side as you pull.
- Do not pull on the tubing itself; pull on the hard plastic connector attached to the fridge’s valve.
- If it’s truly stuck, you may need to cut the tubing (leave a few inches) and install a new push-to-connect repair coupling later.
“There’s a Long Screw I Can’t Reach.”
On some models, a long screw goes through the dispenser housing and threads into the door frame from the inside. After removing the housing, you might see the tip of this screw poking through a hole in the plastic. You’ll need to reach into the dispenser opening from the front and unscrew it by hand. It’s often finger-tight or requires a gentle turn with needle-nose pliers.
Deep Cleaning and Inspection: The Real Reason to Remove It
Now that the cover and assembly are off, you have a golden opportunity. This is why many people undertake this job.
What to Clean
- The Ice Chute: This is the dark tunnel where ice slides down. It accumulates dust, mold, and mineral deposits from ice. Use a soft brush (an old toothbrush works perfectly) and a solution of warm water and mild dish soap or vinegar. Scrub thoroughly.
- The Dispenser Well: The area where the ice and water actually come out. Remove the plastic splash guard/well if possible. Clean all surfaces, paying attention to the gasket or seal around the opening. This seal often harbors grime and can become brittle.
- The Flap and Solenoid: The little door that opens when you press for ice. Make sure it moves freely and isn’t coated in sticky residue. Check the solenoid (the electrical part that pulls the flap open) for any signs of wear or corrosion.
- The Auger (Ice Spiral): If you can see it, wipe it down. Ice cream or sugary drinks can coat it, causing jams.
What to Inspect
- Water Line: Check for cracks, kinks, or signs of leakage at the connection point.
- Gaskets/Seals: Feel the dispenser well seal. Is it supple or hard/cracked? A bad seal causes frost buildup and leaks.
- Wiring Harnesses: Look for any frayed wires, cracked plastic connectors, or corrosion.
- Plastic Housing: Look for cracks, especially around screw holes. A cracked housing needs replacement to prevent leaks and misalignment.
After cleaning and inspection, dry everything completely with a lint-free cloth before reassembly. Moisture can freeze and cause new jams.
Conclusion: You’ve Got This
Removing the ice dispenser cover on your Whirlpool refrigerator is not a job for a service technician only; it’s a perfectly manageable homeowner task. The key is patience, the right tools, and understanding the two primary design types—the pry-off bezel and the release clip system. Always, always start by disconnecting the power. Then, methodically locate your pry points or release mechanism, work slowly to avoid breaking plastic clips, and document the disconnection of any wires or hoses.
The real reward comes after you’ve cleared the way. A deep clean of the dispenser chute, well, and mechanism can solve many common problems like slow ice dispensing, unusual tastes in water, or frost buildup. It also lets you inspect for wear and tear, potentially catching a small issue before it becomes a big, expensive repair. So next time you face that seemingly impenetrable plastic panel, remember: it’s designed to come off. With this guide in hand, you have the map. Take your time, be gentle with the plastic, and you’ll have that cover off and your dispenser refreshed in under 20 minutes.
Frequently Asked Questions
Is it safe to remove the ice dispenser cover myself?
Yes, it is safe if you follow the critical first step of disconnecting the refrigerator’s power by unplugging it or turning off its circuit breaker. This prevents any risk of electric shock or the dispenser accidentally activating while you’re working.
What if I can’t find a gap to pry the cover off?
Examine the seam very carefully with a flashlight. The gap is often tiny and located at the top corners or bottom edge. Try gently running your fingernail around the entire perimeter; you may feel where the plastic flexes. If no gap exists, your model may use the release clip system instead of a pry-off bezel.
Will removing the cover break the plastic clips?
It shouldn’t, if done correctly. Use a plastic pry tool instead of a metal screwdriver to avoid marring the plastic. Apply steady, firm outward pressure at a clip location until you hear it pop, then move to the next. Forcing it in the wrong spot or using excessive leverage is what causes cracks.
Do I need to turn off the water supply?
Yes, it is highly recommended. Before disconnecting any water line behind the dispenser assembly, turn off the shut-off valve (usually under the kitchen sink or behind the refrigerator). Then, press the water dispenser lever to release any residual pressure in the line to minimize dripping.
My model has a touch panel. Does that change anything?
The procedure is essentially the same. The touch-sensitive buttons are part of the plastic bezel you will pry off. Once the bezel is removed, you will see the electrical connector that plugs into the back of that panel—unplug it before setting the bezel aside.
What if I break a plastic clip or lose a screw?
Broken clips usually require replacing the entire bezel or housing, which can be sourced using your model number. Lost screws can often be replaced with a generic #8 or #10 Phillips screw of appropriate length from a hardware store. Taking a photo before disassembly helps ensure you know exactly where every part goes.