Acting quickly is crucial when a burn mark occurs on your quartz countertop. Always start with the gentlest methods, like a baking soda paste, before progressing. Never use abrasive scrubbers, steel wool, or excessive heat, as these can permanently damage the resin-bound surface. For deep, discolored burns, professional refinishing may be the only solution. Prevention—using trivets and hot pads—is the most reliable strategy to keep your quartz flawless.
Key Takeaways
- Quartz is not heat-proof: While durable, the resin binder in quartz countertops can scorch and discolor from direct, high heat, creating a permanent-looking mark.
- Gentle is the rule: Always begin with the mildest cleaning methods (baking soda paste, gentle cleaners) to avoid creating scratches or further damage the resin.
- Baking soda is your first friend: A paste of baking soda and water, applied gently with a soft cloth, is the safest and most recommended DIY method for superficial burn marks.
- Test everything first: Before applying any cleaner or paste to the visible area, test it on a small, inconspicuous spot (like under the sink or behind the faucet).
- Deep burns may need a pro: If the burn has changed the color of the quartz itself or penetrated deeply, DIY methods won’t work. A professional countertop refinisher may be required.
- Prevention is paramount: Consistently use trivets, hot pads, and cutting boards. Never place hot pans, curling irons, or lit candles directly on the quartz surface.
📑 Table of Contents
- The Sizzling Truth: Understanding Burn Marks on Quartz
- Immediate Action: The First 60 Seconds Matter
- The DIY Arsenal: Gentle, Effective Home Methods
- Commercial Cleaners & Polishing Compounds: Stepping It Up
- The Nuclear Option: When DIY Fails and Professional Help is Needed
- Prevention: The Only Guaranteed Strategy
The Sizzling Truth: Understanding Burn Marks on Quartz
You’re cooking a beautiful steak, and in a moment of distraction, you set the screaming-hot cast-iron skillet directly on your pristine quartz countertop. Or maybe a forgotten curling iron leaves its circular signature. That sickening, whitish or dark scorch mark isn’t just a surface blemish—it’s a sign that the heat has affected the very binder that holds your countertop together. Quartz countertops are engineered stone, made of about 90-95% ground quartz particles and 5-10% polymer resins and pigments. It’s the resin that gives quartz its non-porous, flexible, and seamless quality. Unfortunately, that resin has a melting point. When exposed to temperatures typically above 300-400°F (150-200°C), it can scorch, melt, or discolor, creating that dreaded burn mark. Unlike a stain on natural stone, a burn mark is often a physical change to the resin matrix itself. This guide will walk you through exactly how to identify your burn mark and, more importantly, how to safely and effectively attempt to remove burn marks from quartz countertops, starting with the safest methods first.
Is It Really a Burn? Identifying the Damage
Before you start scrubbing, it’s vital to confirm you’re dealing with a thermal burn and not a stubborn food stain or a chemical etch. A true burn mark from heat usually appears as a white, gray, or yellowish discoloration that is often circular or matches the shape of the hot object. You might also notice a slight textural change—the area can feel smoother or slightly melted compared to the surrounding textured surface. If the mark is dark brown or black and feels gritty, it’s more likely a burnt-on food residue that can be scraped and cleaned. A chemical etch from a harsh cleaner will feel rough to the touch. Correct identification dictates the correct treatment. For a suspected burn, our goal is to gently abrade the top layer of discolored resin without harming the surrounding quartz particles or creating a visible scratch.
Immediate Action: The First 60 Seconds Matter
What you do in the first minute after the burn happens can significantly impact the final result. If the hot object is still on the counter, do not try to lift it with your bare hands. Use a pot holder or oven mitt to carefully remove it. Your immediate goal is to cool the area down as quickly and safely as possible to halt the thermal damage.

Visual guide about How to Remove Burn Marks from Quartz Countertops
Image source: thekitchenix.com
Cooling the Countertop: Do’s and Don’ts
DO: Run cool (not ice-cold) water over a clean, soft cloth and place it gently over the scorched area. The goal is gradual, even cooling to prevent thermal shock. You can also apply a cold compress or a bag of frozen vegetables wrapped in a thin towel. Leave it on for 5-10 minutes. This won’t reverse the burn, but it stops the resin from continuing to degrade.
DON’T: Never dump a glass of ice water directly onto the hot spot. The sudden, extreme temperature change can cause thermal shock, potentially cracking the quartz slab or damaging the finish. Also, avoid using any abrasive tools immediately—the resin will be soft and vulnerable.
Initial Cleaning: Removing Surface Residue
Once the area is cool to the touch, your next step is to clean away any physical debris. Often, a burn mark is accompanied by a layer of charred food or melted plastic. Use a plastic scraper (like a credit card edge or a dedicated plastic scraper) held at a low angle to gently lift away any solid, crusty residue. Be patient; let the scraper do the work. Do not gouge or press hard. After scraping, wipe the area with a damp cloth and a drop of mild dish soap. Rinse thoroughly with a clean, damp cloth. This prepares the surface for the actual burn mark treatment by ensuring you’re not grinding in any particles.
The DIY Arsenal: Gentle, Effective Home Methods
For the majority of light to moderate burn marks—those that are mostly surface discoloration—you can achieve excellent results with common household items. The philosophy here is micro-abrasion: you are very gently sanding away the topmost, discolored layer of resin to reveal the fresh, colored resin (or quartz particles) underneath. Aggressive methods will create a visible depression or scratch that is worse than the burn.

Visual guide about How to Remove Burn Marks from Quartz Countertops
Image source: thekitchenix.com
Method 1: The Baking Soda Paste (Your Primary Weapon)
Baking soda is a mild, controlled abrasive with a Mohs hardness of about 2.5, which is softer than the quartz (7) but perfect for scouring resin. It’s the safest, most recommended starting point for how to remove burn marks from quartz countertops.
- How to Make & Apply: Mix 3 parts baking soda with 1 part water to form a thick, spreadable paste. Using a soft cloth (microfiber is ideal) or a soft-bristle toothbrush (non-scratch), apply a generous amount of paste directly onto the burn mark.
- The Technique: Using very light pressure, rub the paste over the mark in small, circular motions for 60-90 seconds. You are not scrubbing hard; you are allowing the mild abrasive to do its work. Periodically wipe away the paste with a damp cloth to check your progress. The mark should gradually lighten.
- Rinse & Repeat: After working the area, rinse thoroughly with clean water and a soft cloth. If the mark is still visible, let the area dry completely and repeat the process. You may need 2-3 applications for moderate burns. Patience is key.
Pro Tip: For a slightly more abrasive but still safe alternative, you can use a paste of baking soda and a few drops of hydrogen peroxide (3%). The peroxide can help with light oxidation/discoloration.
Method 2: The Magic Eraser (Melamine Foam)
A Mr. Clean Magic Eraser or any generic melamine foam is a fantastic tool for this job. It’s essentially a very fine abrasive foam that works like a microscopic sandpaper. It’s excellent for lifting light discoloration without leaving scratches.
- How to Use: Wet the Magic Eraser and squeeze out excess water until it’s just damp. Gently rub the damp eraser over the burn mark using light, even pressure. You’ll often see the discoloration transfer onto the eraser itself.
- Important: Do not use a dry Magic Eraser, and do not press hard. The combination of moisture and the foam’s structure does the work. Rinse the area well after use, as melamine foam can leave a slight dusty residue if not fully rinsed.
Method 3: Hydrogen Peroxide & Flour Paste (For Light Stains)
This method is better suited for marks that have a yellowish tint (often from a lower-heat burn or a melted plastic item) rather than a true white scorch.
- How to Make & Apply: Mix enough 3% hydrogen peroxide with white flour to create a thick paste that will adhere to the vertical surface if needed. Spread the paste over the burn mark to a thickness of about 1/8 inch.
- Process: Allow the paste to sit and dry completely, which can take several hours or overnight. As it dries, it may draw out some of the discoloration. Once fully dry, brush off the crusty paste with a soft brush and wipe the area clean with a damp cloth.
Caution: Do not use this method on dark-colored quartz, as prolonged exposure to hydrogen peroxide could potentially lighten the pigment. Always test first.
Commercial Cleaners & Polishing Compounds: Stepping It Up
When the baking soda paste isn’t quite cutting it, it’s time to consider products specifically designed for composite surfaces. The key is to avoid anything with harsh acids (like vinegar or toilet bowl cleaner) or gritty, all-purpose cleansers (like Comet or Ajax), which will dull the finish.
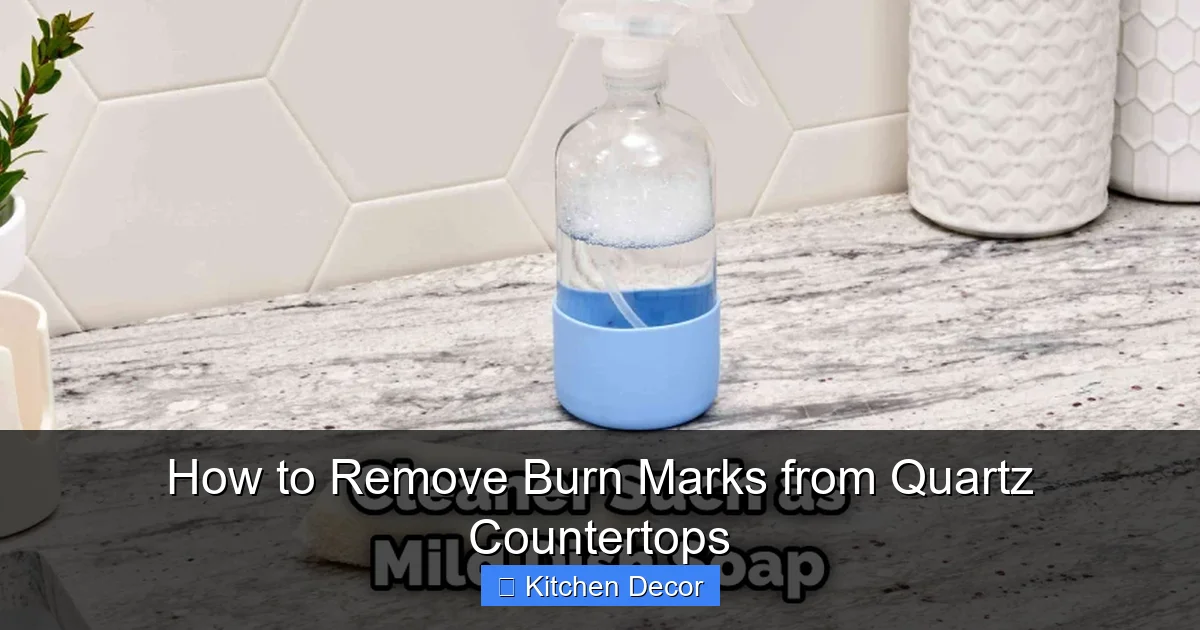
Visual guide about How to Remove Burn Marks from Quartz Countertops
Image source: thekitchenix.com
Non-Abrasive Cleaners First
Before moving to abrasives, try a dedicated quartz countertop cleaner or a non-abrasive cleaner like Bar Keepers Friend Gentle (the non-scratch formula). Spray it on, let it sit for a minute, and gently agitate with a soft cloth. Rinse extremely well. Sometimes, a burn mark is partly a carbonized residue that a specialized cleaner can break down.
Specialized Polishing Compounds
Products like Granite Gold Quartz Brite or Stone Pro Quartz Polish & Cleaner are formulated to be safe for engineered stone. They contain very fine abrasives designed to restore shine and remove minor imperfections like light scratches and burn marks.
- Application: Follow the manufacturer’s instructions precisely. Typically, you apply a small amount to the burn mark and buff it in with a soft, clean cloth or a low-speed buffer pad (if you have one) for a specified time.
- The Goal: These compounds work by removing a microscopic layer of the surface uniformly. If your burn is shallow, this can effectively blend it away. If the burn is deep, this method may only lighten it slightly and will require multiple applications.
The Nuclear Option: When DIY Fails and Professional Help is Needed
If you’ve diligently tried the gentle baking soda method and a commercial polish, and the burn mark remains a stark, obvious white or dark circle, you are likely dealing with a deep burn. The resin in that spot has been significantly altered or melted through to the quartz aggregate below. At this stage, further DIY abrasive attempts will likely create a visible dent or crescent-shaped scratch that is more noticeable than the original mark. This is the point where you must accept the limitation of home repair.
What Professional Refinishing Entails
A professional countertop restoration company has tools and materials unavailable to consumers. They use industrial-grade, variable-speed polishers with diamond pads of increasing grit (from a coarse 200-grit up to a fine 3000-grit or higher). The process involves:
- Wet Sanding: They wet-sand the area with progressively finer grits, removing a thin, uniform layer of the countertop surface across a wider area than just the burn mark. This evens out the topography.
- Polishing: They then apply a series of diamond polishing pads and/or a high-quality quartz polish to restore the high-gloss factory finish.
- Sealing: While quartz is non-porous and doesn’t require sealing, a final coat of a professional-grade enhancer can be applied to unify the sheen.
A good professional will be able to blend the refinished area so seamlessly that the burn mark becomes invisible to the eye and touch. The cost for a small spot repair can range from $150-$300, which is often far less than the cost and hassle of replacing an entire countertop section.
Prevention: The Only Guaranteed Strategy
No method of removing burn marks is perfect. The absolute best way to deal with a burn on quartz is to ensure it never happens. Quartz’s Achilles’ heel is its resin binder, and protecting it from extreme heat is simple but requires consistent habit.
Establish a “Hot Zone” Rule
Designate a specific area of your countertop—ideally near the stove or sink—as a temporary landing spot for hot items, and always place a trivet or hot pad there. Make it a non-negotiable rule: No direct heat on quartz, ever.
- Trivets & Hot Pads: Use thick, cork, or silicone trivets for pots, pans, and baking dishes. Use fabric or silicone hot pads for curling irons, straighteners, or hot hair tools. Ensure the bottom of the trivet is clean and dry to prevent slipping.
- Cutting Boards are Non-Negotiable: Never use your quartz as a cutting board. Not only can knives scratch the surface, but the friction from cutting hard foods can generate heat. Always use a separate cutting board.
- Candle Safety: Use hurricane lanterns or sturdy candle holders. Never leave a burning candle unattended, and ensure it’s on a stable, heat-resistant surface far from any flammable materials.
- Small Appliances: Be mindful of toasters, air fryers, and coffee makers. Ensure their exteriors don’t get excessively hot, or place them on a small silicone mat.
Frequently Asked Questions
Can I use a magic eraser on a quartz countertop burn mark?
Yes, a damp Magic Eraser (melamine foam) is a safe and effective first step for light burn marks. It acts as a very fine abrasive. Use light pressure and rinse the area thoroughly afterward to remove any residue.
Will baking soda scratch my quartz countertop?
No, baking soda (Mohs hardness ~2.5) is much softer than quartz (Mohs hardness 7). When used as a paste with water and applied with a soft cloth using gentle, circular motions, it is a safe abrasive for removing surface-level resin discoloration without scratching the quartz surface.
What should I absolutely never use on a quartz burn mark?
Never use steel wool, abrasive scrub pads (like SOS pads), gritty powdered cleansers (Comet, Ajax), straight vinegar, or undiluted bleach. These can permanently dull the finish, etch the surface, or cause further discoloration. Also, never use a heat gun or hair dryer to try and “blot out” the mark, as this will worsen the damage.
My burn mark is deep and white—can I fix it myself?
For a deep, white burn mark where the resin has been significantly melted, DIY methods are unlikely to restore the color and may create a visible depression. At this stage, the most reliable solution is to consult a professional countertop restoration specialist who can wet-sand and polish the area to blend the damage away.
How often should I polish my quartz countertops to prevent damage?
You should not need to polish quartz countertops regularly as part of routine maintenance. A simple clean with mild soap and water is sufficient. Polishing compounds are only needed to address specific issues like light scratches, dullness, or minor burn marks. Over-polishing can eventually wear down the surface finish.
Are quartz countertops heat-resistant at all?
Quartz countertops are heat-tolerant to a degree, meaning they can withstand brief contact with warm objects. However, they are not heat-proof. Prolonged or direct contact with very hot items (above 300-400°F) can cause permanent damage to the resin binder, leading to discoloration and scorch marks. Always use protection.