Removing a double oven from the wall is a complex, heavy-duty task that requires meticulous planning and strict adherence to safety protocols. The process involves disconnecting potentially hazardous utilities (electricity and/or gas), unsealing the oven from surrounding cabinetry, and carefully extracting a 200-300 lb appliance. This guide provides a comprehensive, tool-by-tool breakdown of the entire procedure, emphasizing critical safety steps, common pitfalls to avoid, and clear disposal pathways for your old unit.
Key Takeaways
- Safety is the absolute priority: Always disconnect power at the breaker and shut off gas lines before touching any connections. Ventilate the area if dealing with gas.
- This is not a one-person job: A double oven weighs 200-300 lbs. You absolutely need at least one, preferably two, strong helpers to maneuver it safely and prevent injury or damage.
- Know your utility connections: Identify if your oven is hardwired electric or uses a 240V plug, and whether it’s gas-powered. The disconnection process differs significantly.
- Inspection is key: Before starting, thoroughly inspect the oven’s installation. Look for trim kits, screws behind the control panel, securing brackets at the top or bottom, and any sealing caulk.
- Prepare for the aftermath: Have a disposal plan in place (appliance recycling, scrap metal, new appliance delivery pickup) and materials to patch the wall and flooring left behind.
- When in doubt, call a pro: If you are uncomfortable with any step, especially gas line work, or lack the proper tools and help, hiring a licensed technician is the smart and safe choice.
📑 Table of Contents
- Introduction: Why You Might Need to Remove Your Double Oven
- Section 1: The Non-Negotiable Foundation – Safety Protocols & Pre-Removal Checklist
- Section 2: The Surgical Approach – Locating and Removing All Securing Mechanisms
- Section 3: The Extraction – How to Physically Remove the Oven
- Section 4: The Aftermath – Wall, Floor, and Utility Finishing
- Section 5: Disposal Pathways – What To Do With Your Old Double Oven
- Section 6: The Professional vs. DIY Decision Matrix
- Conclusion: Success is in the Preparation
Introduction: Why You Might Need to Remove Your Double Oven
So, you’re standing in your kitchen, looking at your trusty double wall oven. Maybe you’re dreaming of a sleek new model with smart features. Maybe you’re renovating and the cabinet layout is changing. Or perhaps, unfortunately, the unit has reached the end of its life and needs to go. Whatever the reason, the thought of removing a double oven from the wall can feel daunting. It’s not like unplugging a toaster. This is a major, built-in appliance, often weighing as much as a small person, and it’s connected to your home’s vital utilities.
The goal of this guide is to demystify that process. We will walk you through every single step, from the initial safety checks to the final cleanup. Think of it as a roadmap for a major DIY project. We’ll cover the essential tools, how to safely disconnect power and gas lines, the techniques for freeing the oven from its cabinet prison, and the best ways to dispose of it responsibly. By the end, you’ll have a clear understanding of what this project entails and whether it’s a task you feel confident tackling yourself or if it’s time to call in the professionals.
Section 1: The Non-Negotiable Foundation – Safety Protocols & Pre-Removal Checklist
Before you lift a single screwdriver, you must internalize one rule: safety is not optional when you remove a double oven from the wall. The risks are real: electrocution, gas leaks, physical injury from a falling appliance, and damage to your home. Rushing into this job is the single biggest mistake you can make. This section is your mandatory pre-flight check.
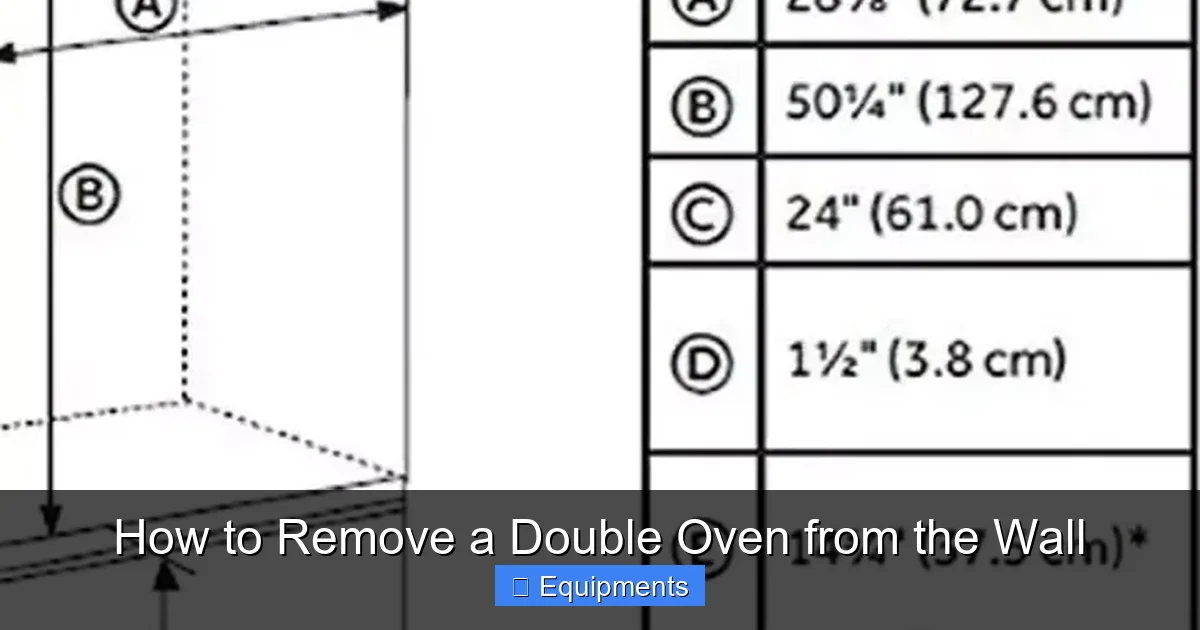
Visual guide about How to Remove a Double Oven from the Wall
Image source: cdn-fastly.upgradedhome.com
1.1. The Power Down: More Than Just Unplugging
Many double ovens are hardwired directly into your home’s electrical system, meaning they don’t have a plug you can simply pull. Even if yours has a plug, the outlet is likely behind the oven, inaccessible until it’s moved a few inches. Therefore, your first action is at the main electrical panel.
- Locate the Correct Breaker: Find your home’s breaker panel. You need to identify and turn OFF the dedicated circuit for the oven. It will typically be a double-pole breaker (two switches connected) labeled “Oven,” “Range,” or “Kitchen.” If it’s not labeled, turn it off and use a non-contact voltage tester on the oven’s terminal block (once you access it) to confirm power is dead.
- For Hardwired Units: Once the breaker is off, you must access the oven’s junction box, usually behind an access panel on the back or inside the control panel. Here you will see wire nuts connecting the oven’s wires to the house wiring. You will need to untwist these. Never just pull on the wires.
- For Plug-in Units: You still need to turn off the breaker. Once the oven is pulled out far enough, you can unplug the heavy-duty 240V plug from the receptacle behind it.
Pro Tip: After turning off the breaker, tape over the switch with a note that says “DO NOT TURN ON – OVEN REMOVAL IN PROGRESS.” This prevents a well-meaning family member from accidentally re-energizing the circuit.
1.2. The Gas Line imperative (If Applicable)
If your double oven is gas-powered, this step is critical and requires extreme caution. A gas leak is a fire and explosion hazard.
- Locate the Shut-Off Valve: This is usually a lever-style valve on the flexible gas line (CSST or corrugated stainless steel tubing) that connects to the back of the oven. It may be behind the oven, under the counter, or in a basement/crawlspace below. It is often a bright yellow handle. Turn it perpendicular to the pipe to close it.
- Test for Gas: After shutting the valve, sniff for gas (it smells like rotten eggs). You can also apply a soapy water solution to the connection points. If bubbles form, there is a leak. Do not proceed.
- Disconnection: Using two wrenches (one to hold the pipe, one to turn the nut), carefully unscrew the union connecting the gas line to the oven’s gas regulator. Always use two wrenches to avoid twisting and potentially damaging the gas line or the oven’s connection.
- Capping the Line: Once disconnected, you must immediately cap the open end of the house gas line with a properly sized threaded cap. Do not leave it open. Use pipe joint compound (pipe dope) or Teflon tape rated for gas on the cap threads.
If you smell a strong gas odor at any point, evacuate the house, do not use any electrical switches (including lights), and call your gas company or 911 from a safe location.
1.3. The Physical & Tool Preparation Checklist
Gathering your tools and clearing the workspace *before* you start saves immense time and frustration.
- Essential Tools: Set of socket wrenches and ratchets (1/4″ and 3/8″ drives), multiple screwdrivers (Phillips and flathead), adjustable wrench, pliers, putty knife/caulking removal tool, flashlight, utility knife, pry bar (with care!), work gloves, safety glasses, dust mask, and a sturdy appliance dolly or hand truck rated for 500+ lbs.
- Supplies: Old blankets or moving pads, cardboard or plywood sheets to protect your floor, plastic sheeting and painter’s tape to seal off the work area, trash bags, and a bucket for any debris.
- Workspace Prep: Clear a path from the kitchen to your disposal point (garage, driveway). Remove any obstacles – rugs, chairs, small appliances. Lay down your protective floor coverings. Have a dedicated spot for screws and small parts, like a magnetic tray or labeled container.
- The Team: Confirm your helpers are available, strong, and understand they must follow your lead. A third person to guide and spot is invaluable.
Section 2: The Surgical Approach – Locating and Removing All Securing Mechanisms
Your double oven is not just sitting in the cabinet opening; it is fastened in place. Manufacturers use a variety of methods to prevent the unit from shifting or falling. Your mission is to find and defeat every single one. Skipping this step will result in a stuck oven, stripped screws, or damaged cabinetry.
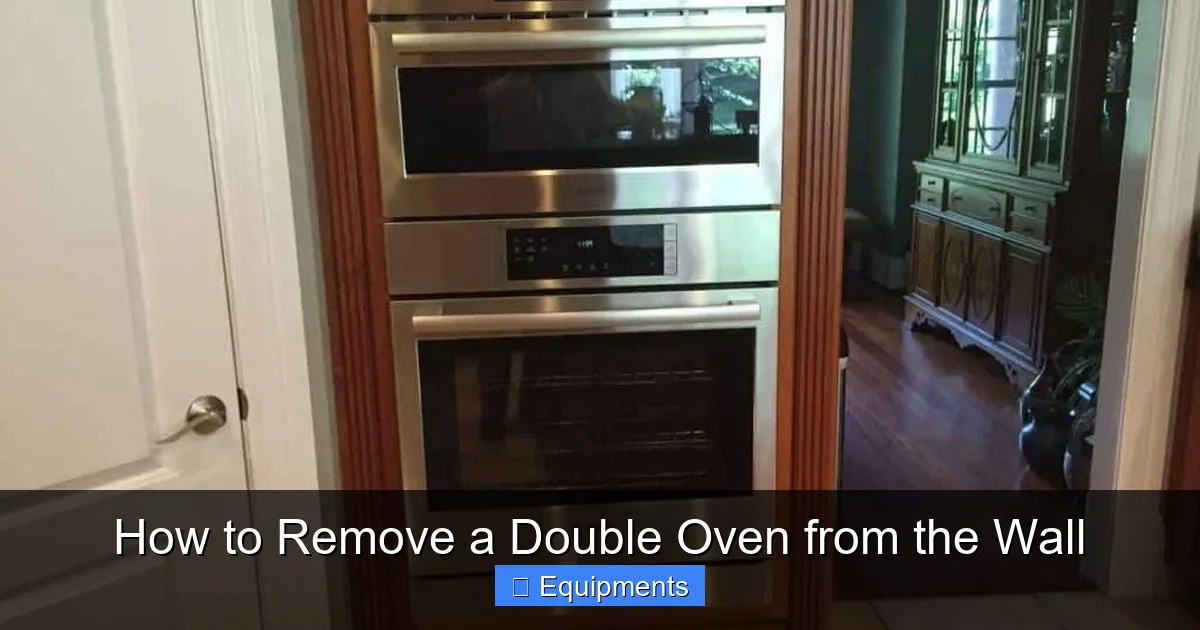
Visual guide about How to Remove a Double Oven from the Wall
Image source: prolineappliance.com
2.1. The Trim Kit and Faceplate
The decorative trim that bridges the gap between the oven door and your cabinet face is almost always separate from the oven itself. It is typically screwed to the cabinet sides or the oven’s outer shell.
- Run your fingers along the seam where the trim meets the cabinet. You will feel screw heads, often covered by plastic caps that snap off.
- Remove all visible screws. Some may be hidden under the bottom edge of the trim or behind the oven door (if the trim is part of the door assembly). Consult your oven’s installation manual online (search by model number, usually on a tag inside the door or on the back) for exact locations.
- Gently pry the trim away from the cabinet using a putty knife wrapped in a cloth to avoid scratching. It may be sealed with a bead of caulk. Carefully cut through this with a utility knife.
2.2. The Internal Securing Points
This is the most common and critical set of fasteners. They prevent the oven from being pulled straight out.
- Top Mounting Screws: Open the oven doors. Look up into the cabinet above the oven. You will often see 2-4 screws (usually Phillips head) driven down through the cabinet floor into the top flange of the oven. Remove these.
- Side Mounting Screws/Brackets: Look into the cabinet on either side of the oven. There may be L-shaped brackets screwed to the cabinet side and then to the oven’s side panel, or long screws driven directly through the cabinet side into the oven’s frame. Remove all of them.
- Bottom Securing: Less common, but check underneath the oven’s front lip. Sometimes there are screws or a retaining bracket that hooks onto the cabinet’s toe-kick area.
Key Insight: As you remove each screw, gently try to wiggle the oven forward. If it doesn’t budge, you missed a fastener. Do not use brute force. Find the hidden screw.
2.3. The Final Unsealing
After all screws are out, the oven may still be “stuck.” Why?
- Caulk and Sealant: Installers often use a bead of silicone caulk around the oven’s perimeter to create a seamless look and prevent debris from falling behind. Run your putty knife along all four sides between the oven and cabinet. You should hear a slight “pop” as the seal breaks.
- Debris Buildup: Years of crumbs and grease can act like a glue. Thoroughly clean out the cabinet floor and the bottom edge of the oven before attempting to move it.
- Cabinet Warping: In humid kitchens, cabinet boxes can warp slightly, creating a tight friction fit. Patience and gentle, alternating pressure on both sides is key.
Section 3: The Extraction – How to Physically Remove the Oven
This is the moment of truth. All utilities are disconnected, all fasteners are removed, and the seal is broken. Now, you must extract a very heavy, awkward object from a confined space without damaging your cabinets, floors, or yourself.
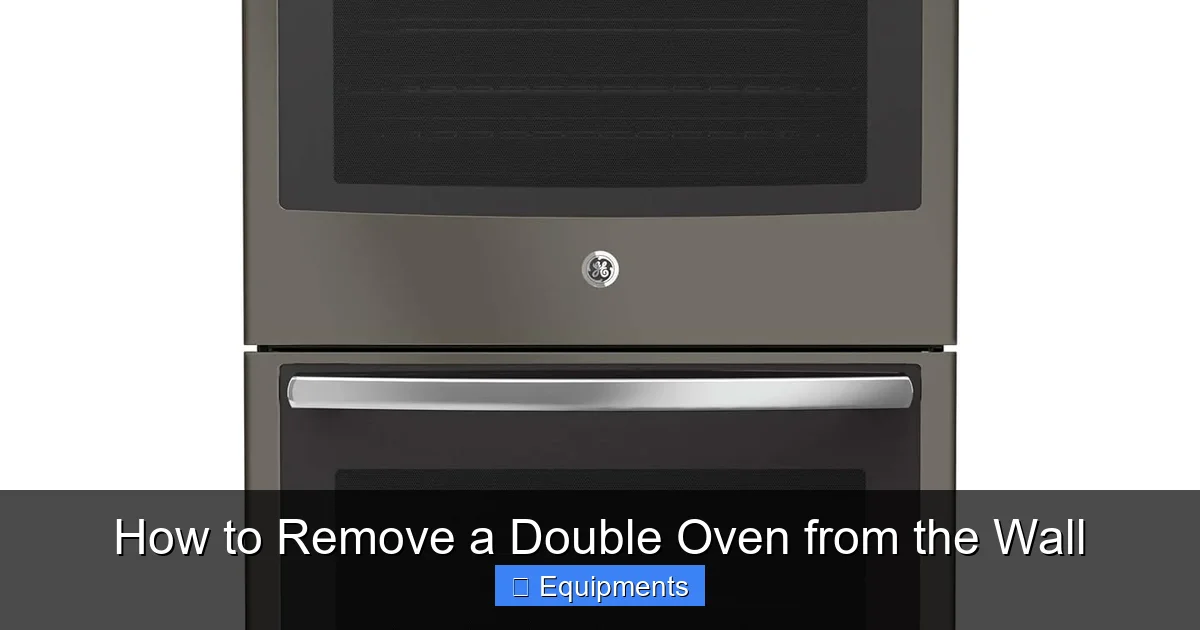
Visual guide about How to Remove a Double Oven from the Wall
Image source: images-na.ssl-images-amazon.com
3.1. The Initial Inch: Breaking the Static Friction
With your helpers positioned on either side of the oven:
- Place a sturdy blanket or moving pad on the floor in front of the oven to protect your flooring as it slides out.
- Have one person brace the oven from the top (if possible) to prevent it from tipping backwards as it comes forward.
- Grip the oven firmly at the bottom corners or the handle (if it’s a strong, integrated part of the frame). Do not grip the glass door.
- On a count of three, pull the oven forward with a steady, continuous force. It will likely resist for the first half-inch to an inch as the last bit of caulk and debris gives way. Once it breaks free, it should slide more easily.
3.2. The Slide Out: Controlled Movement
Once the oven is free, your goal is to get it onto your dolly.
- Pull it straight out. Do not angle it side-to-side within the cabinet opening, as this can gouge the cabinet sides.
- Pull it only as far as you need to safely access the back. For most installations, pulling it 6-12 inches is sufficient to clear the cabinet face and access the utility connections you already disconnected.
- If the oven has a rear access panel, you may need to pull it further to remove that panel and access hardwired connections. This is why accessing and disconnecting everything from the front/sides first is crucial.
- Once clear of the cabinet, carefully tilt the oven backward just enough to slide your appliance dolly underneath it. The dolly’s platform should go under the oven’s center of gravity, usually near the middle.
- Secure the oven to the dolly with straps. Never rely on gravity alone.
3.3. The Heavy Lift: From Dolly to Disposal
Now the real work begins. A loaded appliance dolly is a heavy, unbalanced object.
- Team Lift Technique: One person should steer and balance the dolly from the front/handle. One or two people should lift from the back/sides to help with weight distribution and navigating turns.
- Stairs are the Enemy: If you have stairs to navigate (from a basement, to a garage), this is the most dangerous part. Consider hiring a professional for this alone. If you must do it, use a stair-climbing dolly or have one person at the top and bottom controlling the dolly with ropes, moving one step at a time.
- Doorways and Turns: Measure your doorways beforehand. Tilt the dolly slightly (never more than 45 degrees) to get through narrow openings. Communicate constantly.
- Loading for Transport: Load the oven onto a truck or trailer. Place it against the cab or bulkhead, and secure it with ratchet straps to the truck’s anchor points. It must not shift during transit.
Section 4: The Aftermath – Wall, Floor, and Utility Finishing
Your old oven is gone, but your job isn’t done. You now have a gaping hole in your kitchen that needs attention before a new appliance can be installed or the space can be finished.
4.1. Patching the Wall and Cabinet
- Inspect the Damage: Look for holes where trim screws were, torn veneer on cabinet sides, and gaps where caulk was.
- Repair Cabinet Faces: Small screw holes can be filled with wood putty. Chips in laminate can be repaired with laminate repair kits. For significant damage to cabinet sides, you may need to replace a side panel, which is a more advanced carpentry project.
- The Wall Opening: The wall behind the oven is often unfinished (just drywall) or may have a simple backer board. You can leave it as is if you’re installing a new oven (it will cover it). If you’re closing the space permanently, you must install a drywall patch, tape, mud, sand, and paint to match. This is a perfect time to run new electrical or data cables if you’re repurposing the space.
4.2. Flooring Considerations
- The area under the oven is often a different finish or not finished at all. You may see the subfloor.
- If you are keeping the same flooring type (e.g., vinyl, laminate), you can cut a piece to fit the opening and secure it.
- If you are installing a new oven, ensure the flooring under the new unit’s footprint is clean and level. Some ovens require a solid, flat surface.
4.3. Electrical and Gas Line Capping
- Electrical: The wires in the junction box must be capped with wire nuts and the box covered with a blank plate. This is a code requirement. If you are installing a new oven, the new unit’s wires will connect here. If not, the wires must be safely terminated and the box left accessible (not buried behind drywall).
- Gas: The capped gas line must remain accessible. The cap should be checked for leaks annually. If you are permanently removing a gas appliance and have no future plans for one, you may need to have the gas line capped at a more permanent point by your gas utility, which may involve shutting off the service to that branch.
Section 5: Disposal Pathways – What To Do With Your Old Double Oven
You’ve successfully removed it. Now, it’s a 250-lb paperweight in your garage. You cannot just put it on the curb. Here are your responsible disposal options, in order of preference.
5.1. The Retailer Take-Back (The Easiest Path)
If you are buying a new oven, the retailer or installer will almost always offer to take your old one away for a fee (typically $50-$150). This is by far the simplest method. They have the equipment and licensed haulers to handle it. Always get this quote in writing before purchase.
3.2. Municipal Appliance Recycling (The Responsible Free Path)
Many cities and counties have bulk waste or special appliance recycling programs. They will pick up large appliances for free or a small fee, often on a scheduled bulk pickup day. Crucially, they recycle the metal and safely dispose of hazardous components like capacitors and insulation. Contact your local waste management authority. You will likely need to schedule a pickup and may have to remove doors for safety.
5.3. Scrap Metal Recyclers (The Cash Path)
Scrap yards will pay for the metal in your oven (mostly steel, some copper wiring). However, the payout for a single appliance is often low ($20-$50) and you must deliver it yourself. They may not take it if it’s not cleaned out. Call ahead to confirm their appliance policy and any preparation requirements.
5.4. Donation (The Charitable Path)
If the oven is still in good working order, charities like Habitat for Humanity ReStore or local thrift stores may accept it. They often have volunteers who will pick it up. This is a great way to give it a second life and get a tax deduction. It must be clean, functional, and usually less than 10-15 years old.
5.5. The Last Resort: Junk Removal Services
Private junk hauling companies (like 1-800-GOT-JUNK?) will come and remove it for a price. This is convenient but typically the most expensive option. Ensure they are licensed and insured and that they will recycle the appliance rather than just dumping it.
Section 6: The Professional vs. DIY Decision Matrix
Now you have all the information. How do you decide if this is a project for you? Use this matrix.
6.1. DIY is Likely Viable If:
- You have confirmed the oven is electric only (no gas line).
- You are physically capable of lifting and maneuvering heavy objects (or have strong, reliable help).
- You have a basic set of tools and are comfortable using them.
- You can identify all securing screws and have patience for the “hunt.”
- You have a clear, easy disposal path (retailer take-back or municipal pickup scheduled).
- Your installation is standard (no custom built-ins, no unusual obstructions).
6.2. Call a Licensed Professional If:
- Your oven is gas-powered. Gas work requires licensing in most areas for a reason. The risk of a leak is too high for casual DIY.
- You cannot confidently turn off and verify the power is off at the breaker.
- The oven is in a tight, high-end cabinet installation where prying could cause thousands in damage.
- You need to navigate multiple flights of stairs.
- You lack the necessary physical help or proper equipment (like a stair-climbing dolly).
- You are on any tight timeline. This job rarely goes exactly as planned.
The Cost-Benefit: A professional removal service might cost $200-$500. Weigh that against the potential cost of a medical injury, a gas explosion, or a $5,000 cabinet repair bill. For gas units and difficult installations, that fee is cheap insurance.
Conclusion: Success is in the Preparation
Removing a double oven from the wall is a significant undertaking, but it is a manageable project for a prepared and safety-conscious DIYer with the right help. The core principles are simple: disconnect every utility first, find and remove every fastener, and move with deliberate, controlled force. Never, ever rush the safety steps. The most common failures happen because someone skipped a screw, didn’t fully shut off a valve, or tried to move the oven alone.
Take the time to inspect your specific installation. Take pictures as you go, especially of wire connections and gas line configurations. Label wires with tape if needed. Have your disposal plan solidified before you even start turning screws. By treating this as a methodical deconstruction project rather than a brute-force demolition, you will protect your home, your health, and your wallet. If at any point the path forward is unclear or feels unsafe, pause and consult a professional. There is absolutely no shame in knowing your limits. Good luck, and work smart!
Frequently Asked Questions
Do I need to turn off the breaker for a double oven with a plug?
Yes, absolutely. Even if the oven has a plug, it is a 240V outlet, which is behind the oven and inaccessible until it’s moved. You must turn off the dedicated double-pole breaker at the panel before attempting to unplug it or move the oven to avoid electrocution.
Can I remove a gas double oven myself?
While it’s physically possible, it is strongly discouraged unless you are a licensed professional. Working with natural gas requires specific knowledge to ensure leak-free disconnection and capping. A gas leak is extremely dangerous. For gas ovens, hiring a licensed technician is the only recommended safe course of action.
How many people do I need to remove a double oven?
You need a minimum of two strong adults. A double oven weighs 200-300 lbs. One person cannot safely control the weight, balance, and maneuvering. A third person is highly recommended to guide, spot, and manage tools or the dolly, especially for navigating stairs or tight turns.
What if I damage my cabinets while removing the oven?
Cabinet damage is common from hidden screws or prying. Minor scratches or small nail holes can be repaired with wood putty and touch-up paint. For larger chips or torn laminate, you may need to replace the affected cabinet side panel, which is a more advanced carpentry project. Prevention—careful inspection and using a putty knife—is the best strategy.
What is the best way to dispose of an old double oven?
The easiest and most responsible method is to have the retailer or installer take it when delivering your new oven (for a fee). Next, check your local municipality for a free appliance recycling/bulk pickup program. Donation to a charity like Habitat ReStore is excellent if it still works. Scrap yards pay little and require self-transport.
When should I definitely call a professional instead of DIY?
Call a pro if your oven is gas-powered, if you are uncomfortable or unsure about electrical work, if you need to navigate stairs, if the installation is custom and tight, if you lack sufficient strong helpers, or if you discover unexpectedly complex connections. The cost of a professional is far less than the potential cost of injury, fire, or major home damage.
