Installing a kitchen faucet supply line is a manageable DIY task with the right approach. Always start by shutting off the water supply to prevent flooding. Use Teflon tape on threaded connections and ensure all fittings are snug but not overtightened to avoid leaks. Testing for leaks after installation is crucial before using the faucet.
Key Takeaways
- Shut Off Water: Locate and turn off the hot and cold water valves under your sink before starting any work.
- Use Teflon Tape: Wrap all threaded connections with plumber’s tape (Teflon tape) to create a reliable, watertight seal.
- Avoid Over-Tightening: Hand-tighten connections first, then use a wrench for only a quarter to half turn more to prevent cracking fittings.
- Identify Hot & Cold: Most supply lines are color-coded (red/blue) or labeled; connect hot to the left faucet inlet and cold to the right.
- Check Compatibility: Ensure your new supply lines match the thread size of your shut-off valves (usually 3/8″ or 1/2″) and faucet inlets.
- Test Thoroughly: After installation, slowly open the water valves and check every connection for drips or seeps before using the sink.
- Inspect Old Valves: If the existing shut-off valves are corroded or leaking, replace them along with the supply lines for a long-lasting fix.
📑 Table of Contents
- Introduction: Taking Control of a Common Household Task
- Understanding Your Kitchen Faucet Supply Lines
- Gathering Your Tools and Materials
- Step-by-Step Installation Guide
- Troubleshooting: What to Do When Things Don’t Go Perfectly
- When to Call a Professional Plumber
- Conclusion: Your Confidence, Your Faucet
Introduction: Taking Control of a Common Household Task
That slow drip under your sink isn’t just annoying—it’s a sign that your kitchen faucet supply lines, the humble heroes of your plumbing, are wearing out. These flexible tubes are the vital link between your home’s water pipes and your faucet, and when they fail, they can cause water damage and wasted money. The good news? Learning how to install a kitchen faucet supply line is one of the most accessible and rewarding DIY plumbing projects you can tackle. You don’t need to be a master plumber; you just need patience, the right tools, and a clear plan. This guide will walk you through every single step, from understanding what’s in your toolbox to troubleshooting a post-installation drip. By the end, you’ll have the confidence and knowledge to complete this job cleanly, saving you the cost of a service call and giving you a sense of accomplishment every time you turn on the tap.
Understanding Your Kitchen Faucet Supply Lines
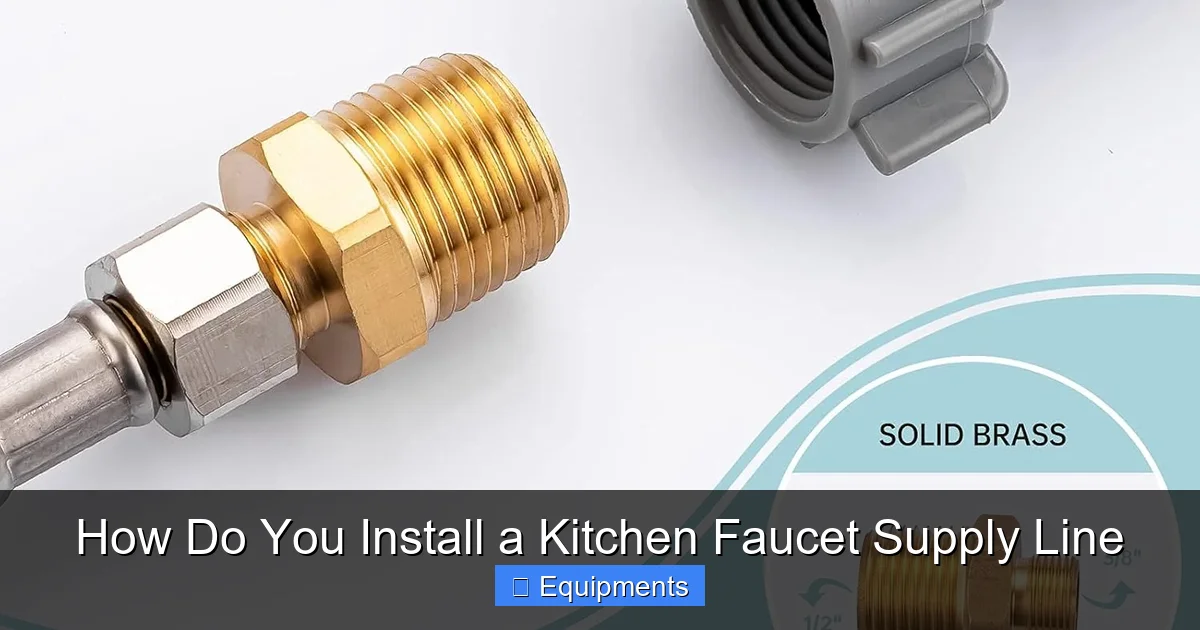
Before you buy a single tool, it’s important to know exactly what you’re working with. A kitchen faucet supply line is a short, flexible tube (usually 12 to 24 inches long) that connects the water shut-off valves under your sink to the inlets on the bottom of your faucet. They are the unsung workhorses, constantly flexing as you pull out the sprayer or swivel the faucet head. Understanding their components and types will help you choose the correct replacement and install it properly.
Visual guide about How Do You Install a Kitchen Faucet Supply Line
Image source: m.media-amazon.com
The Two Main Types of Supply Lines
You’ll primarily encounter two types of supply lines at your local hardware store, and your choice will impact the installation process.
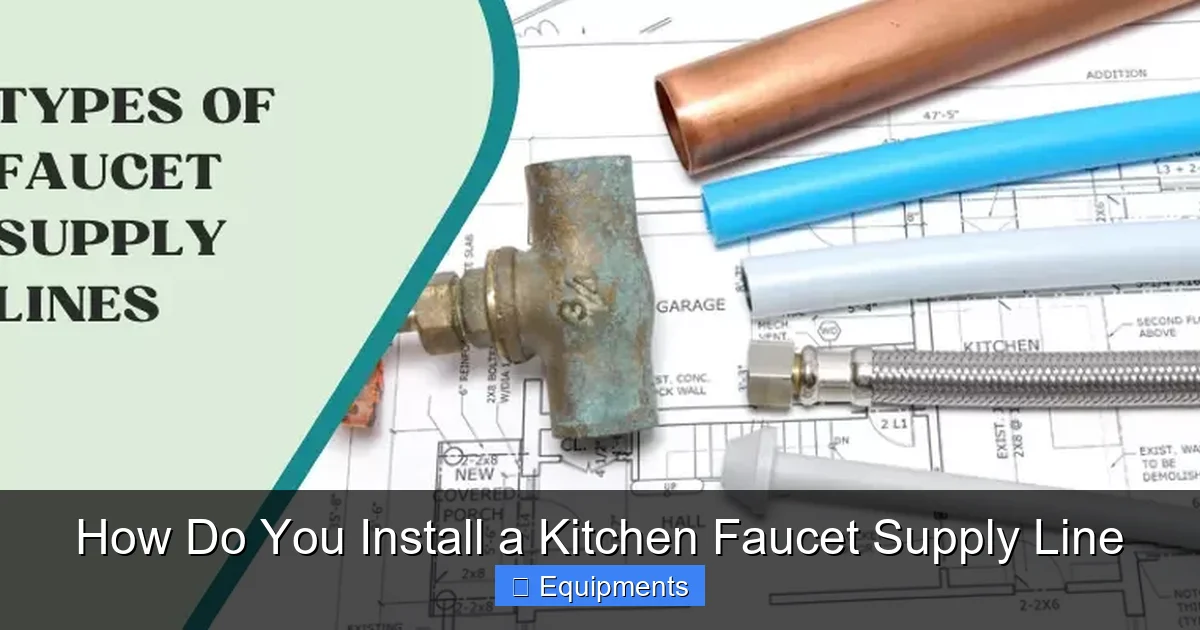
- Braided Stainless Steel Lines: These are the industry standard for durability. They have an inner rubber or plastic tube for water, reinforced by a woven stainless steel mesh exterior. They are highly resistant to kinking and bursting, handle both hot and cold water, and typically have compression nuts on both ends. They are slightly more expensive but offer peace of mind and a long service life.
- Plastic or Vinyl Lines: These are less expensive and common in basic installations. They are made of reinforced plastic. While suitable for many applications, they are more susceptible to damage from heat (from a dishwasher nearby, for example) and can become brittle over time. They are also more prone to kinking if sharply bent.
Our Recommendation: For a kitchen, where lines may be exposed to heat and frequent movement, braided stainless steel lines are almost always the better investment. The small extra cost is worth the dramatically increased lifespan and reliability.
Decoding Connections: Threads, Fittings, and Compatibility
A successful installation hinges on matching three key components: the shut-off valve outlet, the supply line inlet, and the faucet inlet. Mismatches are a primary cause of leaks.
- Shut-Off Valve Threads: The valves under your sink have small outlet stems. The most common thread sizes are 3/8-inch (for most modern homes) and 1/2-inch. You must buy supply lines with matching nuts. Bring the old line or a photo to the store to be sure.
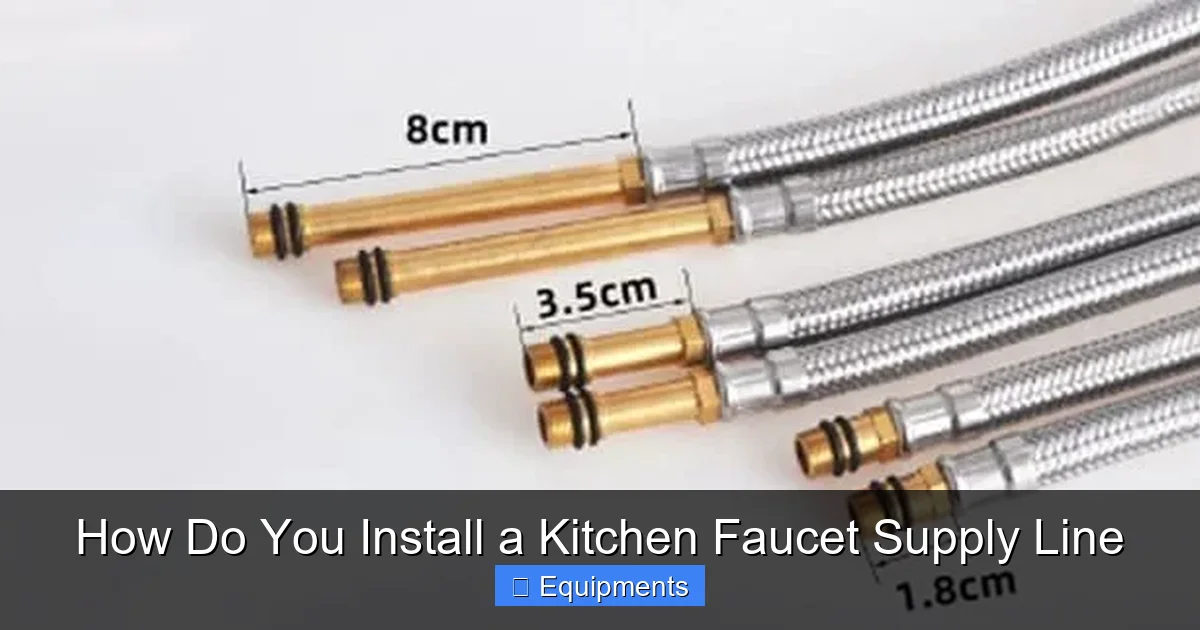
- Faucet Inlets: Your faucet has two small threaded inlets (for hot and cold). These are typically 1/2-inch or sometimes smaller. The supply line must have a nut that fits these. Most modern supply lines come with a universal 1/2-inch nut that works with most faucets.
- Connection Types: There are two main styles:
- Compression Fittings: The most common. A threaded nut compresses a rubber washer against the valve/faucet inlet to seal. This is what you’ll see on most braided lines.
- Threaded Direct: The supply line itself has male threads that screw directly into the valve or faucet. Less common for modern braided lines but seen on some plastic lines.
Pro Tip: When you remove the old supply line, take a close-up photo of each connection before disconnecting it. This visual reference is invaluable when you’re at the store or staring at your new parts under the sink.
Gathering Your Tools and Materials
Having everything within arm’s reach before you start will make the job smooth and prevent frantic searches for a missing tool mid-project. Here is your comprehensive checklist.
Visual guide about How Do You Install a Kitchen Faucet Supply Line
Image source: faucetsavvy.com
Essential Tools
- Adjustable Wrench or Channel-Lock Pliers: The workhorse. An adjustable wrench is often preferred as it’s less likely to mar fittings. You’ll use it to loosen and tighten the connection nuts.
- Bucket or Large Bowl: Crucial for catching any residual water left in the lines when you disconnect them. Place it directly under the connections.
- Towels or Rags: Several for drying hands, wiping up spills, and providing a non-slip surface for your tools.
- Flashlight or Headlamp: The space under sinks is notoriously dark and cramped. A hands-free light source is a game-changer.
- Penetrating Oil (e.g., WD-40):strong>: For those stubborn, corroded shut-off valve nuts that won’t budge. Spray it on and wait 10-15 minutes.
- Pipe Thread Sealant (Teflon Tape): The unsung hero of leak-free connections. You’ll use this on the male threads of the valves and faucet inlets (if they are threaded). Do not use it on compression nuts.
Materials and Replacement Parts
- New Supply Lines: As discussed, we recommend braided stainless steel. Buy two (one for hot, one for cold). Ensure the length is sufficient to reach from your valves to the faucet inlets without stretching or kinking. 20-24 inches is typical.
- New Shut-Off Valves (Optional but Recommended): If your existing valves are old, corroded, or difficult to turn, now is the perfect time to replace them. A simple angle stop valve is inexpensive and will make future maintenance much easier. You’ll need a pipe wrench for this additional step.
- Plumber’s Putty or Silicone (Optional): If your faucet base requires sealing to the countertop, you may need this. Not related to supply lines, but often part of a full faucet installation.
Safety First: Put on a pair of work gloves to protect your hands from sharp edges under the sink and from potential dirt or debris in the pipes.
Step-by-Step Installation Guide
Now, let’s get to work. Follow these steps in order. Take your time; rushing is the enemy of a good seal.
Visual guide about How Do You Install a Kitchen Faucet Supply Line
Image source: faucetu.com
Step 1: Shut Off the Water Supply (The Non-Negotiable First Step)
This is the most critical safety step. Locate the two small shut-off valves (angle stops) directly under your sink, one for hot and one for cold. They are usually connected to the existing supply lines and the water pipes coming from the wall or floor.
- Turn each valve handle clockwise until it is tight. If the valves are stiff, use a gentle but firm pressure. If they won’t move, apply a small amount of penetrating oil to the base of the stem, wait, and try again. Do not use excessive force that could break the valve.
- Once turned off, go to the faucet and turn both the hot and cold handles on. This will relieve pressure in the lines and drain any remaining water. You’ll hear a sputter and then a drip. Let it run until it stops completely.
- Now, go back under the sink and use your bucket and towels to dry the area around the connections as best you can.
Step 2: Removing the Old Supply Lines
With the water off and drained, it’s time to disconnect the old lines. You’ll be working at both ends: the connection to the shut-off valve and the connection to the faucet.
- Disconnect from the Shut-Off Valve: Place your bucket directly under the valve connection. Using your adjustable wrench, turn the nut on the supply line counter-clockwise to loosen it. Once loose, you should be able to finish unscrewing it by hand. Be prepared for a final small gush of water into your bucket.
- Disconnect from the Faucet: Repeat the process at the faucet end. These nuts can sometimes be in a tighter space. You may need to use the wrench at an angle or have a helper hold the faucet steady from above to prevent it from turning. If the line is stuck, do not force it; try the penetrating oil again.
- Inspect and Clean: Once both ends are free, remove the old lines. Take a moment to inspect the shut-off valve threads and the faucet inlet threads. Use a rag to clean off any old plumber’s tape, debris, or mineral deposits. This ensures a clean, fresh surface for your new connections.
Key Insight: If the shut-off valve itself is leaking around the stem when you turn it, or if the valve body is corroded and you can’t get a wrench on it without rounding the edges, stop. This is a sign the valve needs replacement before you proceed. Replacing a valve is a slightly more advanced but very doable task involving a pipe wrench and a new valve with a compatible thread.
Step 3: Preparing and Connecting the New Supply Lines
This is the core of the installation. Preparation is key to a leak-free result.
- Prepare the Threads: Take your roll of Teflon tape (often pink for water). Hold the male thread (on the shut-off valve outlet or the faucet inlet) with one hand. With the other, start wrapping the tape clockwise (the direction you will screw the nut on). Wrap it tightly, overlapping each turn by about 50%, and cover the entire threaded portion. Typically, 4-6 full wraps is sufficient. Press the end of the tape down firmly. Important: Do not wrap Teflon tape on the female threads of the supply line nuts or on compression fittings. It is only for the male threaded parts.
- Hand-Tighten First: Take your new supply line. Connect one end to the shut-off valve. Align the nut and turn it clockwise by hand until it is snug. You should feel it become tight. Repeat for the other end on the faucet. Do not cross the lines—hot to hot, cold to cold. Most lines are labeled.
- Final Tightening with a Wrench: Using your adjustable wrench, give each nut a firm, but controlled, additional turn. The rule of thumb is hand-tight plus a quarter to half turn. You are aiming for a solid seal, not to crush the washer or threads. Overtightening is a common cause of cracked nuts and stripped threads, which leads to leaks.
Visual Check: Ensure the supply lines have a gentle, natural curve. Do not kink or sharply bend them, especially near the connections. The line should lie flat against the cabinet wall or floor without tension.
Step 4: The Moment of Truth – Testing for Leaks
Do not skip this step. A slow leak can go unnoticed for days, causing significant damage.
- Dry Everything: Use a dry towel to completely wipe down both connection points (valve and faucet ends) and the length of the new supply line. You want a perfectly dry surface so any moisture that appears is clearly from a leak.
- Slowly Open the Water: Go back to your shut-off valves under the sink. Turn each one counter-clockwise to open it fully. Do this slowly. You will hear water rushing into the lines.
- Observe and Wait: Watch each connection point intently for 2-3 minutes. Look for any signs of dripping, seeping, or even a fine mist. Also, check along the body of the braided line for any bulges or leaks.
- Addressing a Small Drip: If you see a very small drip at a connection, turn the water off. Try tightening that nut an additional tiny fraction of a turn (1/8th of a turn). Sometimes the washer just needs a bit more compression. If it continues to leak after a slight tightening, the washer may be defective or pinched. In that case, disconnect that end, check that the Teflon tape is intact and the washer is seated properly, and reconnect.
- Final Check: Once all connections are dry, go to the faucet and turn both handles on. Let the water run for a minute. Check the connections again under the sink. Then, turn on the hot and cold separately, checking for any mixing or leaks at the other end. Finally, run the sprayer if you have one, as this puts the line under a different kind of stress.
Success! If everything remains completely dry after several minutes of use, your installation is complete and successful. Wipe down the area, store your tools, and enjoy your leak-free, newly functional sink.
Troubleshooting: What to Do When Things Don’t Go Perfectly
Even with careful work, minor issues can arise. Here’s how to diagnose and fix the most common problems.
“I still see a leak after tightening.”
First, identify the source. Is it coming from the threaded connection itself or from around the nut/body?
- Leak from threads: This means the seal isn’t holding. Turn off the water. Disconnect the nut. Check that the Teflon tape is applied correctly (clockwise, no gaps) and that the threads are clean. Re-wrap with fresh tape and reconnect. Hand-tighten firmly before using the wrench.
- Leak from around the nut or from the line body: This often indicates a damaged compression washer inside the nut. These washers are small, flat, and can become pinched, twisted, or defective. You will need to disconnect the fitting and inspect/replace the washer. Supply lines usually come with extra washers. Ensure the old washer is fully removed and the new one sits perfectly flat in its groove before reassembling.
“The shut-off valve won’t turn off completely or is leaking from the stem.”
This means the valve itself is faulty, not your supply line. The internal washer or packing is worn. The solution is to replace the shut-off valve. This involves turning off the main water supply to your home, draining the lines, and using a pipe wrench to remove the old valve and install a new one. If you’re uncomfortable with this, it’s the perfect time to call a plumber.
“The new line is kinked or can’t reach.”
Do not force a kinked line; it restricts water flow and can lead to a burst. You need a longer supply line. Measure the distance from your valve to your faucet inlet, then add 4-6 inches for ease of connection. Purchase a line of the appropriate length. Never stretch a shorter line to fit.
When to Call a Professional Plumber
While this is a fantastic DIY project, there are clear scenarios where professional help is the smarter, safer, and often more economical choice in the long run.
- No Accessible Shut-Off Valves: If there are no valves under your sink, or they are hidden behind a wall, installing them requires cutting into plumbing, which is a pro-level job.
- Corroded or Frozen Pipes: If the pipes leading to your valves are old, corroded, or you suspect they may be frozen (in cold climates), attempting any work could cause a major break. A pro can assess and replace the necessary sections.
- Persistent, Unexplained Leaks: If you’ve followed all steps correctly—new lines, Teflon tape, proper tightening—and you still have a leak at the valve outlet, the valve itself is likely compromised internally and needs replacement.
- Lack of Confidence or Tools: If the thought of working under a cramped sink with wrenches makes you anxious, or you don’t have the basic tools, the cost of a plumber’s visit is worth the stress saved and the guarantee of a correct, code-compliant installation.
Remember: A small water leak can cause thousands of dollars in damage to cabinetry, flooring, and the subfloor. If there is any doubt about your ability to create a permanent seal, calling a professional is an investment in your home’s integrity.
Conclusion: Your Confidence, Your Faucet
You’ve done it. By understanding your supply lines, gathering the right tools, following the methodical steps of shutting off water, removing the old, preparing with Teflon tape, connecting carefully, and testing rigorously, you’ve mastered a fundamental home maintenance skill. Installing a kitchen faucet supply line isn’t just about stopping a drip; it’s about taking ownership of your home’s systems. You’ve demystified a piece of plumbing that works tirelessly every day. The next time you hear that familiar sound of running water or see a clean, dry cabinet floor, you’ll have the quiet satisfaction of knowing exactly how that essential connection was made—and that you made it yourself. So go ahead, roll up your sleeves, and tackle that next small plumbing challenge with the confidence that comes from true hands-on knowledge.
Frequently Asked Questions
What should I do if my shut-off valves are stuck and won’t turn?
Apply a penetrating oil like WD-40 to the base of the valve stem where it meets the valve body. Let it soak for 10-15 minutes. Try turning it gently with an adjustable wrench. If it still won’t budge, the valve may be corroded solid and will need to be replaced by a professional, as forcing it could break the pipe.
Can I use any supply line I find at the store?
No, you must ensure compatibility. Check the thread size at both ends (usually 3/8″ for valves and 1/2″ for faucets). Also, confirm the length is sufficient. When in doubt, bring a photo or the old line to the store for a perfect match. Using an incompatible line is the #1 cause of installation failures.
How tight is too tight when connecting the supply lines?
“Hand-tight plus a quarter turn” is the golden rule. After you’ve screwed the nut on by hand until it’s snug, use a wrench for only one more firm quarter-turn. Overtightening can crack the nut, strip threads, or compress the washer too much, causing it to fail and leak. If it leaks after this, check the washer and Teflon tape, don’t just tighten more.
Do I need Teflon tape on all the connections?
Use Teflon tape only on the male threads—the threads on the shut-off valve outlet and the faucet inlet. Do not use it on the female threads inside the supply line nuts or on compression fittings, as it can prevent the washer from sealing properly and can actually cause leaks.
I see a very small drip after testing. Is this normal?
No, a drip is not normal. A properly installed connection should be bone dry. A small drip usually means the compression washer is not seated correctly or is defective. Turn off the water, disconnect that end, inspect and replace the small rubber washer (supply lines usually come with spares), ensure it’s sitting flat, and reconnect. If it persists, the threads may need more Teflon tape or the nut may be cross-threaded.
Should I replace my shut-off valves at the same time as the supply lines?
It’s highly recommended. Supply lines are a wear item, but shut-off valves are meant to last the life of the home. If yours are old, stiff, or corroded, replacing them while you have the water off and the area cleared is a smart upgrade. It ensures you have fully functional, reliable control for any future maintenance and prevents a valve failure from ruining your new supply line work.