Dealing with rat pee smell in your oven is a serious health hazard, not just a nuisance. The odor indicates contamination with urine, feces, and potentially dangerous pathogens. Simply wiping it away is insufficient. You must undertake a thorough, deep-cleaning process using specific disinfectants, followed by a rigorous inspection and sealing of your kitchen to prevent a recurrence. Ignoring it risks your family’s health and can lead to a worsening infestation.
That unmistakable, sharp, ammonia-like smell wafting from your oven isn’t just unpleasant. It’s a major red flag. It means a rodent, almost certainly a rat or mouse, has used your cooking appliance as a bathroom, and possibly a nest. Your immediate reaction might be disgust, but your next steps must be about safety and eradication. Rat urine is not merely smelly; it’s a biohazard. The uric acid crystals it leaves behind are notoriously stubborn and continue to emit odor until they are fully broken down and removed. More critically, rodent excreta are vectors for serious diseases. This guide will walk you through exactly how to get rat pee smell out of your oven, from the initial safety precautions to the final sealant application on your home’s exterior. We will cover natural methods, chemical disinfectants, and when to call in the pros, ensuring your kitchen is safe and fresh again.
Key Takeaways
- Safety First: Always wear heavy-duty gloves, an N95 mask, and protective eyewear. Rat urine carries pathogens like Hantavirus, Leptospirosis, and Salmonella.
- Ventilation is Non-Negotiable: Open windows and use fans to circulate air. The smell is a signal of harmful aerosols; do not breathe them in during cleaning.
- Baking Soda & Vinegar are Foundational: This combo is excellent for neutralizing odors and breaking down uric acid crystals, the source of the persistent smell.
- Deep Cleaning Requires Disassembly: To be effective, you must remove oven racks, heating elements, and panels to access hidden crevices where urine has soaked in.
- Enzyme Cleaners are Superior for Organic Matter: After initial cleaning, a commercial enzyme-based cleaner will “eat” the remaining organic proteins causing the smell, providing a biological solution.
- Inspect and Seal the Entire Kitchen: Finding the smell in the oven means rats are active nearby. You must find and seal all entry points (holes as small as ¼ inch) in walls, cabinets, and around pipes.
- Professional Help is Often Wise: If the infestation was large or you are uncomfortable, hire a pest control pro for removal and an appliance specialist for deep oven sanitation.
📑 Table of Contents
- Why This Is a Serious Health Issue, Not Just a Smell
- Immediate Actions: Safety and Initial Assessment
- Step-by-Step Deep Cleaning Process for Your Oven
- Natural vs. Chemical Cleaners: Making the Choice
- When to Call a Professional: No-Shame Situations
- Prevention: The Only Permanent Solution
- Conclusion: A Fresh, Safe Kitchen is Within Reach
Why This Is a Serious Health Issue, Not Just a Smell
Before we grab the cleaning supplies, understanding why this is so critical is paramount. The smell is a symptom. The real problem is what you cannot see. Rat urine contains a complex mix of urea, water, and salts. As it dries, the water evaporates, leaving behind concentrated uric acid crystals. These crystals are what produce that lingering, pungent odor. They are hygroscopic, meaning they pull moisture from the air, which can reactivate the smell even after you think you’ve cleaned it.
The Pathogen Problem
Beyond the odor compounds, rodent urine and feces can harbor a suite of dangerous pathogens. Hantavirus Pulmonary Syndrome (HPS) is a severe, sometimes fatal respiratory disease transmitted through aerosolized particles from dried urine, feces, or saliva. Leptospirosis is a bacterial infection spread through contact with contaminated water or soil, which can lead to kidney damage, liver failure, or meningitis. Salmonella and E. coli are also common. When you open your oven door and disturb dried urine crystals, you risk inhaling these particles or touching them and then transferring them to your mouth. This is why the protective gear mentioned in the key takeaways is not an exaggeration; it is essential.
Why Your Oven is a Rodent’s Favorite Spot
Ovens provide a perfect storm of attractions for rodents seeking shelter. They are warm, especially after use, offering respite from cold weather. They are dark and enclosed, providing a sense of security from predators. The insulation within oven walls and behind panels offers ideal nesting material. If there’s a food source nearby—like crumbs in a toaster, open pantry items, or even grease spills—the oven becomes part of a rodent’s established highway. Finding urine here means an active rodent was present, and if it was there long enough to urinate repeatedly, it likely built a nest. You must assume there is a nest nearby, possibly behind the oven, under the range hood, or within the wall cavity it accessed.
Immediate Actions: Safety and Initial Assessment
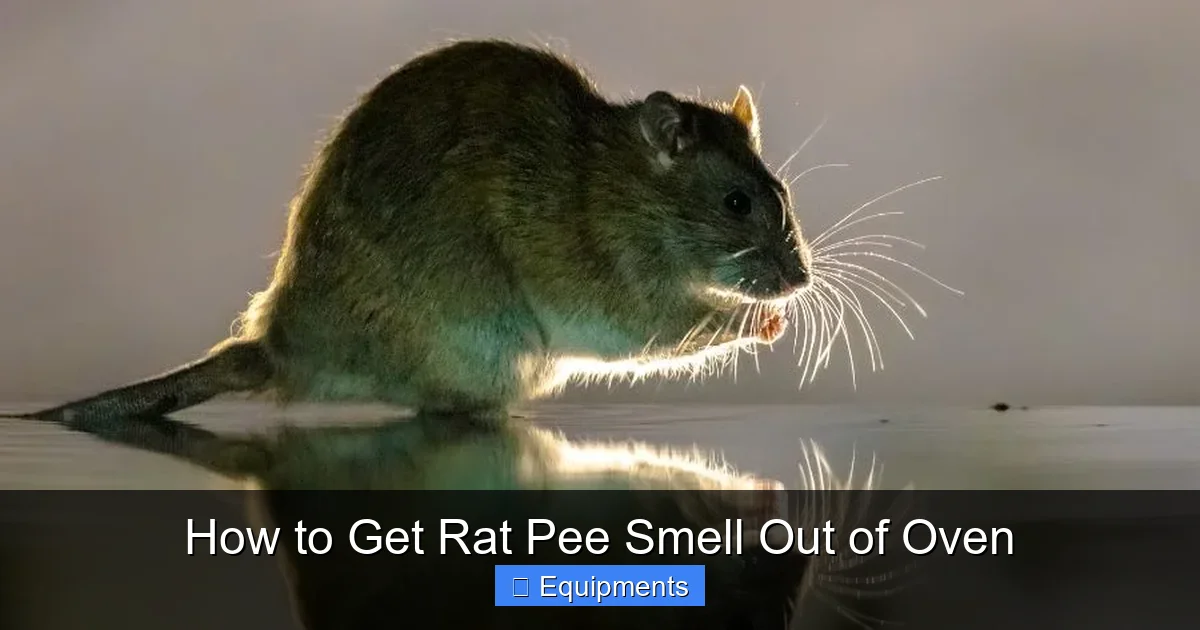
The moment you suspect or confirm the presence of rat urine in your oven, your first actions are about containment and safety. Do not turn the oven on. Do not attempt to “burn off” the smell. This will aerosolize pathogens and potentially spread urine residue through the convection fan if it’s a convection oven.
Visual guide about How to Get Rat Pee Smell Out of Oven
Image source: misfitanimals.com
Gear Up and Ventilate
Put on your protective equipment before you even approach the oven. This includes:
- N95 or P100 Respirator: A simple dust mask is useless against viruses and bacteria. You need a respirator that filters airborne particles.
- Heavy-Duty Nitrile Gloves: Thick, puncture-resistant gloves. Change them if they become contaminated.
- Safety Goggles: To protect your eyes from any splashes or dust.
- Long Sleeves and Pants: Consider wearing a disposable coverall if the infestation seems severe.
Next, ventilate the entire kitchen. Open all windows. Place a box fan in one window blowing outward to create negative air pressure, pulling contaminated air from the kitchen and exhausting it outside. Close doors to other parts of the house to contain the contamination.
Locate the Source and Assess the Extent
With your gear on, carefully pull the oven away from the wall. This is a critical step. You need to see behind and underneath it. Use a flashlight to look for:
- Visible urine stains (yellowish or brownish, often sticky).
- Droppings (dark, rice-sized pellets).
- Nesting materials (shredded paper, insulation, fabric, dried vegetation).
- Gnaw marks on wiring, cabinetry, or the oven’s back panel.
- Smear marks from oily fur along walls or the oven’s sides (rub marks).
If you find a nest or large amounts of droppings/urine behind the oven, the problem is extensive. You are dealing with an active or recent infestation. If the oven is a built-in wall unit, the investigation becomes more complex and may require a professional.
Step-by-Step Deep Cleaning Process for Your Oven
Now for the meticulous work. The goal is to remove all organic material (urine crystals, feces, nesting debris) and then disinfect the surfaces. This requires disassembly. If your oven is self-cleaning, do not use that cycle. The high heat can bake the uric acid crystals further into surfaces and create toxic fumes when it interacts with the pathogens.

Visual guide about How to Get Rat Pee Smell Out of Oven
Image source: pestclue.com
Phase 1: Removal and Dry Clean
1. Remove all removable parts: Take out the oven racks, thermometer, rotisserie (if any), and any other accessories. Place them in a large tub or bathtub for separate cleaning.
2. Vacuum carefully: Using a vacuum with a HEPA filter (crucial to trap pathogens), gently vacuum up any loose debris, droppings, or dried urine crystals from inside the oven cavity, behind it, and on the floor underneath. Do not use a standard shop vac without a HEPA filter, as it will blow contaminants back into the air. After vacuuming, immediately seal the vacuum bag/contents in a plastic bag, dispose of it in an outdoor trash bin, and wash your hands thoroughly.
3. Scrape stubborn deposits: Use a plastic scraper (not metal, which can scratch enamel) to gently lift any crusted-on urine or food residue.
Phase 2: The Cleaning Solution Assault
You have two main paths here: a powerful natural approach or a chemical disinfectant. For most DIYers, starting natural is best, then escalating if needed.
Method A: The Natural Power Duo (Baking Soda & Vinegar)
This is highly effective for uric acid and general deodorizing.
- Make a paste: Mix baking soda with a small amount of water to form a thick paste.
- Apply: Spread this paste liberally over all interior surfaces of the oven cavity, the door gasket, and the back wall. Pay special attention to seams, corners, and the area behind the oven if accessible. The paste should be about ¼ inch thick.
- Let it sit: Allow the baking soda paste to sit for at least 12 hours, preferably 24. This gives it time to break down the uric acid crystals and absorb odors.
- Vinegar spray: After the waiting period, spray white distilled vinegar over the dried baking soda paste. It will fizz and bubble. This chemical reaction helps lift grime.
- Scrub and wipe: Using a non-abrasive sponge or scrub pad, agitate the mixture. Then, wipe everything clean with damp cloths. You will need multiple cloths, rinsing them frequently. The water will be dirty—that’s the contamination coming out.
Method B: Chemical Disinfectant (For Severe Cases)
If the smell is overpowering or you had a large infestation, you need a registered disinfectant.
- Choose the right product: Look for a disinfectant labeled to kill viruses, bacteria, and specifically effective against “enveloped viruses” (like Hantavirus) or with an EPA registration number. Products like Lysol Disinfectant Spray, Simple Green (full strength), or a 10% bleach solution (1 part bleach to 9 parts water) can work. Caution: Bleach can corrode metal parts and its fumes are harsh. Test on a small, inconspicuous area first. Never mix bleach with vinegar or ammonia, as it creates deadly chlorine gas.
- Application: After the dry vacuuming and scraping, saturate all surfaces with your chosen disinfectant. Let it dwell for the full contact time specified on the label (usually 5-10 minutes). This is the “kill time” for pathogens.
- Rinse thoroughly: Wipe down all surfaces multiple times with clean water to remove both the disinfectant and the dissolved contaminants.
Phase 3: The Oven Racks and Exterior
The oven racks you removed earlier need the same treatment. Soak them in a bathtub with hot water and a heavy-duty cleaner (like oven cleaner or a degreaser) for several hours. Scrub vigorously with a non-scratch pad. For baked-on urine, a paste of baking soda and hydrogen peroxide can be effective. Let it sit, then scrub. The exterior of the oven, the control panel, and the door should be wiped down with your disinfectant solution (avoiding electronic components directly—spray on a cloth first).
Phase 4: The Final Flush and Dry
Once all parts are scrubbed and rinsed, it’s time for a final rinse cycle on the interior. Fill a spray bottle with plain water. Liberally spray the entire interior cavity and wipe with clean microfiber cloths. Repeat this “water rinse” process 3-4 times to ensure no cleaning residue or remaining contaminants are left. Then, leave the oven door open and allow it to air dry completely for 24-48 hours. Moisture can reactivate any remaining odors. Place bowls of white vinegar or open boxes of baking soda inside the cold, dry oven to help absorb any last vestiges of smell.
Natural vs. Chemical Cleaners: Making the Choice
The debate between natural and chemical cleaners is relevant here because you’re dealing with a biohazard. The “natural” approach (baking soda, vinegar, hydrogen peroxide, borax) is excellent for odor neutralization and breaking down organic matter. It is non-toxic and safe for food-contact surfaces after a thorough rinse. However, its disinfectant power against specific pathogens like Hantavirus is not always guaranteed or scientifically proven in a home setting.
Visual guide about How to Get Rat Pee Smell Out of Oven
Image source: archute.com
When to Lean Chemical
If your assessment revealed a large nest, many droppings, or if someone in your household is immunocompromised, elderly, or very young, the chemical disinfectant route is the safer, more responsible choice. An EPA-registered disinfectant provides a legally validated claim of killing specific viruses and bacteria. The risk of incomplete disinfection with natural methods, in this specific scenario, outweighs the benefits. You can use a hybrid approach: the baking soda/vinegar paste for its incredible odor-fighting and grime-lifting power, followed by a thorough rinse and then a final application of chemical disinfectant for the pathogen kill step.
A Word on Enzyme Cleaners
This is a special category worth its own mention. After you have completed the deep cleaning and disinfection steps, consider using an enzymatic cleaner (like Rocco & Roxie, Nature’s Miracle). These cleaners contain live bacteria/enzymes that specifically digest the organic proteins in urine that cause the smell. They are not disinfectants—they do not kill pathogens—so they must be used after your disinfectant step. Once the area is clean and rinsed, spray the enzymatic cleaner according to the directions, let it sit (often overnight), and then let it air dry. It continues working for hours, eating any microscopic urine residue you may have missed. This is the secret weapon for eliminating that last, stubborn whiff.
When to Call a Professional: No-Shame Situations
There is no prize for suffering through a hazardous cleanup. Knowing when to call a pro is a sign of smart homeownership. Call a professional in these situations:
Signs of a Large或 Active Infestation
If you saw the rat, found a large nest with many droppings, or notice new gnaw marks or droppings daily, you have an active problem. Pest control professionals will not only remove the rodents but also use industrial-grade rodenticides (if chosen) and, more importantly, perform a comprehensive inspection to find and seal all entry points. They have tools and experience you lack, like telescoping cameras to inspect wall voids.
Built-In Ovens or Extensive Contamination
If your oven is a built-in wall unit, accessing the back, sides, and surrounding cabinet walls is extremely difficult. A professional appliance repair technician can often disassemble the oven’s cabinet to access internal panels and insulation, which may be saturated. Insulation behind an oven that has been soaked with rodent urine often needs to be removed and replaced entirely. This is not a DIY job for most people.
Health Concerns
If you are pregnant, have a compromised immune system, or respiratory issues like asthma, do not attempt this cleanup. The risks from aerosolized pathogens are simply too high. The cost of a professional cleanup is an investment in your health.
What to Expect from Pros
A pest control company will typically provide a full exclusion service. An appliance specialist will do a “strip and clean,” removing all possible components, power-washing the interior, and possibly replacing contaminated insulation. They use commercial-grade disinfectants and ozone generators sometimes to neutralize odors at a molecular level. Get multiple quotes and ensure they are licensed and insured.
Prevention: The Only Permanent Solution
Cleaning the oven is treating the symptom. Prevention is curing the disease. If you do not seal your home, the rats will return, and you will be doing this again. Rodents can squeeze through a hole the size of a quarter. Your mission is to find and seal every opening.
Conduct a Full Perimeter Inspection
On a sunny day, do a slow walk-around of your entire home’s foundation. Look for:
- Cracks in foundation or concrete slabs.
- Gaps around where pipes, cables, or wires enter the house (gas line, water line, electrical conduits).
- Gaps under doors, especially garage doors.
- Holes in vent screens (dryer vent, stove vent, foundation vents).
- Rotting wood or siding that has developed gaps.
- Openings around windows and where the roof meets the soffits.
Sealing Materials and Techniques
Use the right material for the job. For small holes (¼ inch to ½ inch), use steel wool (rodents cannot chew through it) packed tightly, then cover with a durable sealant like acrylic latex caulk or polyurethane construction adhesive. For larger holes (½ inch to 3 inches), use 1/4-inch hardware cloth (galvanized steel mesh) secured with screws or construction adhesive, then seal edges. For very large gaps or foundation cracks, use concrete patching mix or hydraulic cement. For vents, install stainless steel mesh screens with ¼-inch or smaller openings. Never use plastic, wood, or soft rubber to seal holes; rodents will chew through them.
Kitchen-Specific Prevention
Inside the kitchen, make it inhospitable:
- Food Storage: Store all food, including pet food, in hard plastic or glass containers with tight-sealing lids. Never leave food out overnight.
- Trash Management: Use trash cans with locking lids. Take out the trash regularly, especially if it contains food waste.
- Cleanliness: Wipe down counters, sweep floors, and clean under appliances daily to remove crumbs and grease spills.
- Declutter: Reduce nesting material by keeping cabinets and pantries tidy. Store items in sealed containers, not cardboard boxes.
- Inspect Regularly: Every few months, pull the oven out and check behind it and under the sink for new signs of activity.
Conclusion: A Fresh, Safe Kitchen is Within Reach
Discovering rat pee smell in your oven is a jarring experience that triggers both disgust and worry. But now you have a clear, actionable roadmap. Remember the core principles: protect yourself first with proper gear and ventilation, disassemble and deep clean using a combination of odor-neutralizing pastes and pathogen-killing disinfectants, and enzymatic cleaners for the final polish. Most importantly, understand that cleaning the oven is only half the battle. The other half is a relentless, thorough campaign to find and seal every possible entry point into your home and maintain a scrupulously clean kitchen. If at any point the scale of the contamination feels overwhelming, or if you have health concerns, do not hesitate to call a licensed pest control professional and an appliance specialist. Your family’s health is worth the investment. By following these steps, you can transform that hazardous, smelly oven back into a safe, functional, and fresh center of your kitchen.
Frequently Asked Questions
Can I just use my oven’s self-cleaning feature to burn off the rat pee smell?
No. The self-cleaning cycle reaches extremely high temperatures (around 900°F). This will incinerate any organic matter, creating toxic fumes from burning rodent waste and potentially releasing airborne pathogens. It can also bake uric acid crystals permanently into the oven’s porcelain finish, making the smell worse and permanent. Self-cleaning is for food residue, not biological contaminants.
Is it safe to use bleach directly inside my oven to kill the germs from rat urine?
What if the rat pee smell comes back after I’ve cleaned it thoroughly?
If the smell returns, it means some uric acid crystals or organic residue were left behind, likely in an inaccessible spot like inside insulation, behind a panel, or within a crevice. You must re-inspect and likely disassemble more of the oven. An enzymatic cleaner is your best next step, as it can break down residual proteins that other cleaners missed. The return of smell also strongly suggests an active or new rodent presence, so you must re-check your entire home for entry points and signs of infestation.
How dangerous is hantavirus from dried rat urine in an oven, really?
Hantavirus is rare but extremely serious, with a mortality rate of about 38%. It is primarily transmitted by inhaling aerosolized particles from dried rodent urine, feces, or saliva. The act of cleaning—scrubbing, sweeping, or even just opening the oven door—can disturb these dried particles and make them airborne. This is why the CDC and health departments emphasize extreme caution, including the use of an N95 respirator and wet-mopping methods instead of dry sweeping or vacuuming without a HEPA filter, when cleaning any area with rodent contamination.
After all this cleaning, is it safe to cook in the oven again?
Yes, but only after you have completed the entire process: thorough disassembly, physical removal of all debris, disinfection with a proper agent, multiple rinses with clean water, and allowing the oven to dry completely for 24-48 hours. Once it is fully dry and you have run it empty on a low temperature (like 200°F) for 30 minutes with the door closed to burn off any remaining volatile odors, it should be safe. However, if the infestation was large and urine soaked into insulation or wiring, those components may need to be replaced by a professional to be truly safe.
Will my homeowner’s insurance cover professional cleanup for a rodent infestation?
It depends entirely on your policy and the cause. Most standard HO-3 policies exclude damage from “pests” or “vermin.” This typically means the cost to repair damage (like chewed wires or soiled insulation) and the cleanup is your responsibility. However, if the rodent entry was a direct result of a sudden, accidental, and covered peril—like a tree falling and creating a hole in your wall—the resulting pest damage might be covered. Always read your policy’s “Exclusions” section and call your agent to ask before spending money on a claim. Pest control and exclusion work are almost always considered maintenance, not a covered peril.
