Refinishing your dove gray kitchen cabinets is a cost-effective, high-impact DIY project that can completely transform your kitchen’s aesthetic without the expense of a full remodel. The process involves meticulous preparation (cleaning, deglossing, and sanding), followed by applying a new finish—either a translucent gray stain to highlight wood grain or an opaque gray paint for a solid, modern look. Success hinges on patience, the right tools, and careful execution of each step, from removing cabinet doors to applying final protective topcoats. With proper technique, you can achieve a durable, professional-grade finish that revitalizes your space for years to come.
Key Takeaways
- Preparation is Everything: Proper cleaning, deglossing, and sanding are non-negotiable for a finish that adheres and lasts. Skipping these steps is the primary cause of DIY failure.
- Stain vs. Paint Defines the Look: A dove gray stain penetrates the wood, preserving grain for a natural, warm feel. Dove gray paint creates a solid, uniform, contemporary surface that can cover imperfect wood.
- Test, Test, Test: Always test your chosen stain or paint on a hidden cabinet area or a spare piece of identical wood to confirm the exact “dove gray” shade and see how it interacts with your cabinet’s wood species.
- Tool Quality Matters: Invest in good sandpaper (multiple grits), a quality brush/roller, and a reliable sander (optional but helpful). Cheap tools lead to streaks, dust nibs, and an uneven finish.
- Patience with Coats and Cure Time: Multiple thin coats are vastly superior to one thick coat. Rushing the sanding between coats or the final cure period (often days, not hours) results in a soft, easily damaged surface.
- Hardware is Part of the Design: Consider removing and updating pulls and hinges. Cleaning existing hardware or replacing it with new, complementary finishes (like brushed nickel or matte black) completes the transformation.
- Environment is Key: Work in a clean, well-lit, dust-free area with good ventilation and stable temperature/humidity. Ideal conditions prevent dust bugs and ensure proper drying.
📑 Table of Contents
- How to Refinish Dove Gray Kitchen Cabinets: A Complete DIY Guide
- Phase One: The Meticulous Tear-Down and Preparation
- Phase Two: Choosing and Applying the Dove Gray Finish
- Phase Three: Reassembly and the Final Flourish
- Maintaining Your Beautiful Dove Gray Cabinets
- Troubleshooting Common DIY Refinishing Problems
How to Refinish Dove Gray Kitchen Cabinets: A Complete DIY Guide
Have you ever walked into a kitchen and been instantly captivated by the soft, sophisticated elegance of dove gray cabinets? That perfect, muted gray with a hint of blue or warmth can make a space feel airy, modern, and timeless all at once. If your kitchen currently sports dated oak, honey-stained maple, or a tired painted finish, you might be dreaming of that dove gray look but cringing at the cost of a full cabinet replacement. The fantastic news? You can achieve that high-end, custom appearance yourself by refinishing your existing cabinets. It’s a project that demands effort and precision, but the financial savings and personal satisfaction are immense. This guide will walk you through every single step, from tearing down your kitchen to enjoying your stunning new dove gray sanctuary.
The term “dove gray” itself is wonderfully vague, encompassing a spectrum from a barely-there, warm greige to a cooler, serene gray-blue. This versatility is what makes it such a popular choice. However, that very variability means you must be intentional about your product choices. Whether you want the depth of a stained dove gray that lets the wood’s natural grain whisper through, or the clean slate of a painted dove gray for a crisp, modern feel, the path you take starts with the same fundamental foundation: flawless preparation. Think of it like building a house—you wouldn’t paint on a shaky foundation, and you shouldn’t apply finish to an unclean, glossy surface.
This article is your definitive roadmap. We’ll demystify the materials, break down the tools, and provide the detailed, actionable steps to refinish your cabinets like a pro. We’ll tackle common hurdles like dealing with a glossy polyurethane finish, choosing between spray and brush application, and achieving that perfectly smooth, dust-free topcoat. By the end, you’ll have the knowledge and confidence to embark on this transformative project and create the kitchen you’ve always wanted.
Understanding Your Starting Point: Wood Species and Existing Finish
Before you buy a single can of finish, you need to become an detective. Your cabinet’s existing construction and finish will dictate your entire approach. Run your hand over the surface. Is it smooth and glassy? That’s likely a multiple-coat polyurethane or lacquer, common on factory-finished cabinets from the 90s and 2000s. Is it textured with a pronounced grain? You’re probably looking at oak or another open-grained wood. Is the paint chipping or peeling? This indicates adhesion problems that must be addressed first.
Common Cabinet Wood Types: Oak has a bold, open grain that will show through a stain unless heavily filled. Maple is fine and dense, taking stain very evenly but can blotch if not pre-treated. Cherry is reddish and will warm any gray stain. Pine is soft and prone to dents; it stains easily but can become blotchy. Knowing your wood helps you choose the right stain conditioner (a pre-stain wood sealer) and sets realistic expectations for the final look. A dove gray stain on oak will look distinctly different from the same stain on maple—more character versus more uniformity.
Assessing the Existing Finish: A simple tape test can reveal layers. Press a piece of painter’s tape firmly onto a surface, then rip it off. If old paint or finish flakes away, you have a adhesion issue and will need to strip those areas completely. If the tape comes off clean, the finish is likely sound but may be too glossy for new paint to bond. This guides your sanding/degloosing strategy. For those with a very glossy surface, a chemical deglosser (like Krud Kutter or an 80-100 grit sanding block) is your first best friend before you even touch the orbital sander.
Phase One: The Meticulous Tear-Down and Preparation
This phase is 80% of the battle. Rushing here guarantees a subpar result. Your goal is to create a perfectly clean, matte, and sound surface for your new finish to grip. The golden rule: work in a clean, well-ventilated space like a garage or basement, protected from dust and direct sunlight.
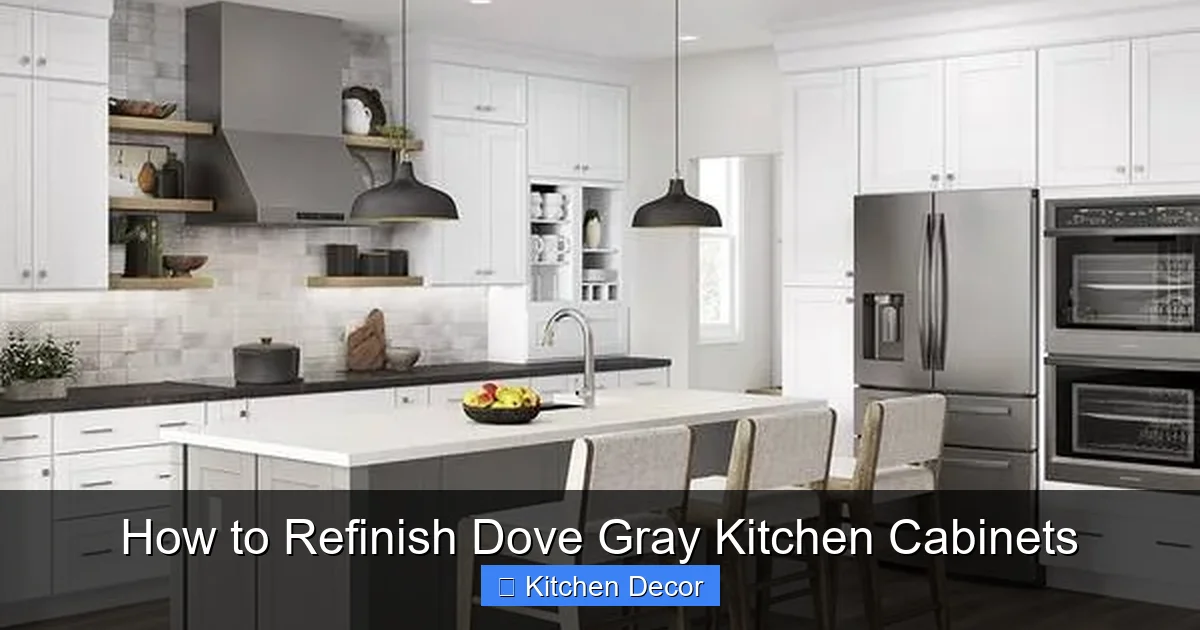
Visual guide about How to Refinish Dove Gray Kitchen Cabinets
Image source: images.thdstatic.com
Step 1: Remove Doors, Drawers, and Hardware
This seems obvious, but do it systematically. Use a cordless drill/driver to remove all hinges and pulls. Pro Tip: Before you remove anything, label each door and its corresponding cabinet opening with a piece of painter’s tape and a number (e.g., “A1” for door, “A1” on frame). This saves immense confusion during reinstallation. Place hinges and screws in labeled baggies. Lay doors on a pair of sawhorses with a padded blanket or cardboard underneath to prevent scratches. Drawers can be removed entirely. Leave the cabinet boxes (the frames) in place in the kitchen—you’ll refinish them in situ.
Step 2: Deep Cleaning and Deglossing
Years of cooking grease, fingerprints, and cleaning residue form a film that will sabotage your finish. Mix a solution of TSP substitute (like Simple Green or a dedicated cabinet cleaner) with warm water according to directions. Wipe every surface—doors, frames, inside and out—with a rag, rinsing frequently. For stubborn grease, use a dedicated degreaser. Rinse thoroughly with clean water and allow to dry completely. This may take several hours.
Now, address the gloss. For a glossy finish, you must dull it. You have two main options:
- Chemical Deglosser: Apply with a lint-free cloth per manufacturer instructions. It chemically etches the surface. Excellent for intricate details where sanding is hard. Wear gloves and eye protection. Rinse after the specified time.
- Hand Sanding: Use 80-100 grit sandpaper or a sanding sponge. The goal is not to remove the finish, but to scuff it up. Focus on creating a uniform, matte “frosted” appearance. This is tedious but crucial. Dust thoroughly with a vacuum and a tack cloth afterward.
Step 3: Sanding for Perfection
Now, regardless of your path (stain or paint), you need a perfectly smooth, uniform surface. This is where an orbital sander earns its keep, but you can do it by hand.
- First Pass: Use 120-grit sandpaper. Sand with the grain of the wood (this is critical—sanding across grain leaves scratches that will show through finish). Your goal is to remove the sheen from the deglossing and smooth out any minor imperfections. You should see a consistent, white, powdery dust.
- Second Pass: Move to 150-grit sandpaper. This refines the surface, removing the scratches from the 120-grit. Sand until the surface feels uniformly smooth to the touch.
- Final Pass: For a stain finish, stop at 150 or 180 grit. For a paint finish, go to 220 grit. This ultra-fine grit creates a glass-smooth “tooth” for paint to grab onto and helps eliminate brush strokes. Never skip the grit progression. Jumping from 80 to 220 doesn’t work; each grit removes the scratches of the previous one.
Critical: After every sanding step, vacuum the surface with a brush attachment, then wipe down with a tack cloth or a damp microfiber rag. Any dust left behind will be sealed into your finish. This is the single most common cause of a gritty, bumpy final product.
Step 4: Repairing and Filling
Now is the time to address dents, dings, and grain holes. For a painted finish, use a water-based wood filler that sands easily. Press it into holes, let it cure, sand flush with 220 grit. For a stained finish, your options are trickier. You can use a stainable wood filler, but it will rarely match perfectly. Often, it’s better to leave small nail holes and character marks—they add authenticity. For open-grained oak, a wood grain filler (applied, let to haze, then wiped off) can create a smoother surface for stain, but it will mute the grain. Decide your aesthetic tolerance here. For cracks in cabinet frames, use a flexible paintable caulk in the joint, wipe smooth, and let cure.
Phase Two: Choosing and Applying the Dove Gray Finish
Here is the pivotal decision point. The path you choose—stain or paint—will define the final character of your kitchen. Let’s explore both in depth.
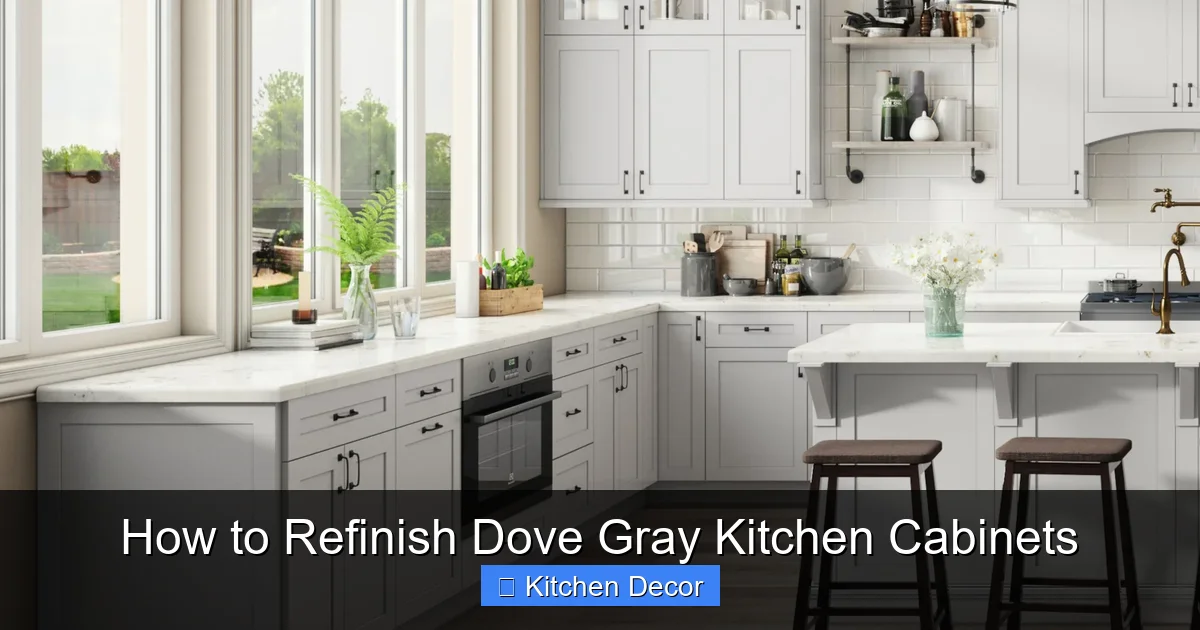
Visual guide about How to Refinish Dove Gray Kitchen Cabinets
Image source: rileyandhiggs.com
The Path of Stain: Achieving a Warm, Natural Dove Gray
A stain is translucent. It adds color while allowing the wood’s natural grain and knots to show through. This creates a warm, organic, and often more traditional feel. The challenge is achieving an even, consistent color, especially on blotchy-prone woods like pine or maple.
Product Selection: Look for “gray wash,” “weathered gray,” or “dove gray” wood stains from reputable brands like General Finishes, Minwax, or Varathane. Water-based stains are easier to clean up, dry faster, and are less likely to raise the wood grain than oil-based. For a very subtle look, consider a gel stain—it sits more on top of the wood, providing more even color on blotchy species.
The Non-Negotiable Pre-Stain Conditioner: For maple, birch, pine, or any wood that tends to blotch, a pre-stain wood conditioner is essential. It partially seals the wood, forcing the stain to be absorbed more uniformly. Apply it with a brush or rag, let it sit for 5-15 minutes, and wipe off excess. Do not let it dry completely before applying stain. Always follow the conditioner manufacturer’s timing.
Application Technique:
- Stir the stain thoroughly (do not shake—it creates bubbles).
- Using a staining brush or lint-free cloth, apply a generous, even coat in the direction of the grain. Work on one cabinet door at a time.
- Let the stain sit for 5-15 minutes. The longer it sits, the darker and more saturated the color. For a light dove gray, wipe off most of it after 5 minutes.
- Wipe off excess stain with a clean, dry cloth, again moving with the grain. This is where you control the final intensity.
- Allow to dry completely (check can for time, usually 4-6 hours for water-based, longer for oil).
- Apply a second coat if a deeper color is desired, following the same process.
- Topcoat is Mandatory: Stain alone offers zero protection. You must seal it with at least 2-3 coats of a clear protective finish. For a natural look, use a water-based polyurethane in satin or semi-gloss. Apply thinly with a high-quality synthetic brush or a lint-free cloth, sanding lightly with 320 grit between coats. The topcoat will slightly darken the stain, so factor that in.
The Path of Paint: Achieving a Solid, Modern Dove Gray
Paint provides a uniform, opaque color that completely covers the wood grain. It’s the go-to for a sleek, contemporary, or farmhouse-modern aesthetic and is more forgiving on imperfect wood. However, it requires an impeccable prep and sanding regimen to avoid brush strokes and ensure adhesion.
Product Selection: For cabinets, you need a durable, scrubable paint. Don’t use wall paint. Look for:
- Water-Based Enamels: Like Benjamin Moore Advance or Sherwin-Williams ProClassic. They level beautifully (minimize brush strokes), dry hard, and have low odor. They have a longer open time (workability) but a longer cure time (up to 30 days to full hardness).
- Oil-Based Enamels: Like Rust-Oleum Professional Oil-Based. They are extremely hard and durable, dry faster to the touch, but have high VOCs and require mineral spirits for cleanup. They are less common now due to regulations.
- Chalk-Style Paints: (e.g., Annie Sloan, Rust-Oleum Chalked). They require little to no prep and have a matte, velvety finish. However, they are not as hard-wearing as enamels for high-traffic cabinets unless heavily topcoated. Not the best choice for a busy kitchen’s uppers and lowers.
Primer: The Secret Weapon: Never skip primer on cabinets, especially if switching from a dark stain to a light gray or if the old finish is unknown. A high-quality bonding primer (like Zinsser B-I or Bulls Eye 1-2-3) creates a universal, non-porous surface that locks in stains and ensures your topcoat of paint adheres flawlessly. Tint the primer slightly toward your final dove gray color for better coverage.
Application Technique for a Smooth Finish:
- Prime: Apply one full coat of primer with a high-quality synthetic brush (for water-based) or natural bristle (for oil-based) for the edges and details. Use a small foam roller for large flat panels. Sand lightly with 220 grit after it dries. Wipe clean.
- First Paint Coat: Use the same brush/roller combo. Apply a thin, even coat. Don’t overwork it. For flat panels, a foam roller gives the smoothest result. For raised panels, a brush is necessary for the recessed areas. Back-brush (lightly go over with the brush) roller marks on flat surfaces.
- Sand Between Coats: Once dry (refer to paint can), sand very lightly with 320 grit sandpaper or a fine sanding sponge. This is not to remove paint, but to knock down any dust nibs or brush strokes. Wipe meticulously with a tack cloth.
- Second Coat: Apply your final, thin coat of paint. This should be your best, most careful coat. The first coat provides coverage; the second provides the final color and smoothness.
- Curing: This is where patience pays off. The paint may be “dry to touch” in hours, but it takes days to weeks to fully cure and harden. Avoid reinstalling hardware or closing cabinet doors for at least 48 hours, and wait a full week before normal, vigorous use.
Phase Three: Reassembly and the Final Flourish
You’ve survived the sanding and painting marathon. The finish is flawless and fully cured. Now, the satisfying final steps.
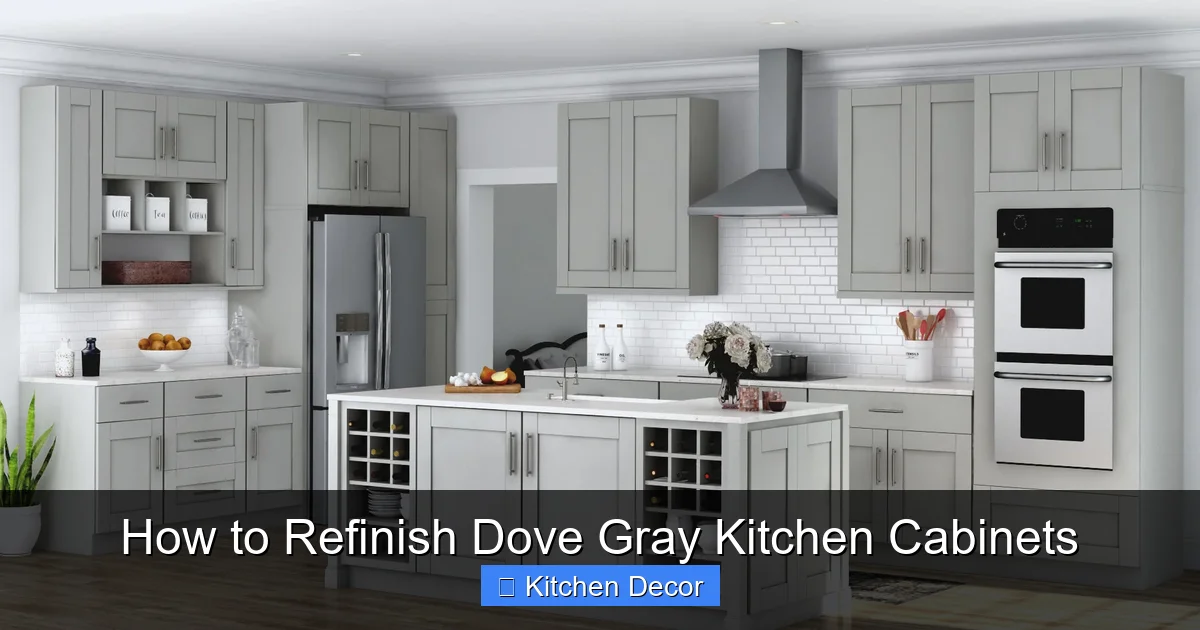
Visual guide about How to Refinish Dove Gray Kitchen Cabinets
Image source: contentgrid.homedepot-static.com
Hardware: Clean, Update, or Replace
This is your moment to elevate the design. Remove all old hardware. Soak it in a vinegar-water solution or a degreaser to remove decades of grime. Scrub with an old toothbrush. If it’s in good shape and you like the style, this is a free refresh. If not, now is the time to invest in new pulls and knobs. The style of hardware can make or break the dove gray look. For a modern feel, choose sleek, minimalist pulls in brushed nickel, matte black, or even polished chrome. For a warmer, transitional look, consider oil-rubbed bronze or antique brass. Ensure the new pulls use the same hole spacing (measure the distance between existing screw holes) or be prepared to fill and re-drill.
Rehanging Doors and Drawers
Refer to your labels! Reattach hinges to the cabinet boxes first. It’s often easier to hold the door in place and screw the hinge to the door while it’s aligned. Have a helper for this. Start all screws loosely, then tighten once the door is properly aligned. Check for even gaps between doors and between doors and frames. Most hinges have small adjustment screws (usually on the hinge arm attached to the box) to move the door in/out, up/down, and left/right. Use a screwdriver to fine-tune until all gaps are uniform. Reinstall drawer fronts, ensuring they are level and have even spacing.
Final Touch-Ups and Cleaning
Do a final walkthrough. Use a bright flashlight held at an angle to spot any drips, missed spots, or dust nibs. You can carefully scrape off a dried drip with a razor blade and sand/repolish that tiny area. Touch up any imperfections with your leftover paint/stain. Once satisfied, give all cabinets a final wipe-down with a soft, dry microfiber cloth to remove any lingering dust from reassembly. Clean your new countertops and sink, and step back. The transformation is complete.
Maintaining Your Beautiful Dove Gray Cabinets
All that hard work deserves protection. Dove gray, especially in a painted finish, can show grease splatters and water spots more than a dark wood. A simple maintenance routine will keep them looking pristine for years.
Daily/Weekly Care
Wipe down cabinet fronts with a soft, damp microfiber cloth. For routine cleaning, a mild dish soap diluted in water is sufficient. Always wring the cloth out well—excess water can seep into seams and damage the wood or finish over time. Immediately dry with a clean, dry cloth. Avoid harsh aerosol cleaners, bleach, or abrasive scrubbers (like SOS pads or Comet), which will dull and damage the finish.
Handling Spills and Grease
Address spills immediately, especially on painted surfaces. For dried-on food or grease, make a paste of baking soda and water, apply gently, and rub softly with a damp cloth. Rinse. For stubborn grease on a painted finish, a dedicated kitchen degreaser (test in an inconspicuous spot first) can be used. For stained finishes, be even more gentle; you don’t want to wear through the thin color layer.
Long-Term Protection
Consider applying a furniture wax or a spray-on furniture polish (like Howard Products) every 3-6 months. This adds a microscopic layer of protection against moisture and fingerprints and enhances the sheen. For painted cabinets, there are also clear, wipe-on sealants like Clear Coat by Rust-Oleum that can add an extra layer of scratch resistance. Never use wax on a surface you plan to repaint in the future, as it creates a barrier that prevents adhesion.
Troubleshooting Common DIY Refinishing Problems
Even with the best plan, things can go awry. Here’s how to fix the most common issues.
The “Orange Peel” or Textured Finish
This looks like the skin of an orange—a bumpy, uneven texture. Cause: Paint was applied too thickly, sprayed in high humidity, or the paint was too cold. Fix: Once fully cured (wait at least a week), sand the area smooth with 320 grit sandpaper, wipe clean, and apply a thin, final coat of paint. Prevention is key: thin your paint slightly (5-10% water for water-based), apply thin coats, and work in a controlled environment (70°F, low humidity).
Brush Streaks and Lines
Visible lines from your brush. Cause: Using a low-quality brush, over-brushing, or applying paint too thickly. Fix: After curing, sand the streaks smooth and repaint the area, using a high-quality brush (like a Purdy or Wooster brush for water-based paints) and a light touch. For the best results on flat panels, use a high-density foam roller.
Stain Blotchiness
Uneven color absorption, with some areas dark and some light. Cause: Skipping the pre-stain conditioner on a blotch-prone wood, or applying stain unevenly. Fix: This is hard to correct on a finished surface. The only reliable fix is to strip the stain, apply conditioner correctly, and restain. On small blotchy spots, you can try using a gel stain, which is more forgiving, but results vary.
Dust Nibs and Particles in Finish
Tiny bumps in your otherwise smooth finish. Cause: Dust in the air or on the surface settling into wet paint. Fix: Once fully cured, sand the entire surface lightly with 320 or 400 grit sandpaper, then apply one more thin, final coat of finish. For the future, ensure your workspace is as dust-free as possible. Use a damp cloth to wipe down surfaces and the floor before starting, and consider painting when the HVAC system is off to avoid circulating dust.
Peeling or Poor Adhesion
The new finish flakes off. Cause: The underlying surface was not properly cleaned and deglossed, or there was a waxy/oily residue. Fix: This is catastrophic and requires stripping the entire cabinet back to bare wood and starting over. Prevention is absolute: clean with TSP substitute, degloss thoroughly, and sand to a uniform matte surface. If you suspect a wax-based polish was used on the old cabinets, a stronger chemical stripper may be needed initially.
Frequently Asked Questions
How long does it take to refinish kitchen cabinets?
A full refinishing job for an average kitchen (30+ cabinets) typically takes 5-7 days of active work, spread over 2-3 weeks due to drying and curing times. This includes 2-3 days for removal, prep, and sanding; 1-2 days for staining/painting with intermediate sanding and drying; and 1 day for reinstallation. The final cure (when cabinets are fully hard) can take up to 30 days for some paints.
Is it cheaper to refinish or replace kitchen cabinets?
Refinishing is almost always significantly cheaper. Professional refinishing costs $3,000-$8,000 for a typical kitchen. DIY costs range from $200-$600 for materials (sanders, sandpaper, primer, stain/paint, topcoat, supplies). New cabinet boxes alone start at $5,000-$10,000+, not including installation, countertops, or appliances. Refinishing saves 50-75% or more.
Can I refinish laminate or thermofoil cabinets?
It is very difficult and often not recommended. These surfaces are non-porous plastics. Paint will not adhere well long-term, and sanding can damage the surface. The only reliable method is to completely remove the laminate/thermofoil (often requiring steam and careful prying) to expose the underlying particleboard, then prime and paint. This is labor-intensive and risks damaging the cabinet. Replacing is usually more practical.
Do I have to remove the cabinets from the kitchen to refinish them?
For best results and least mess, yes, you should remove all doors and drawers. However, the cabinet boxes (the frames fixed to the wall) can be refinished in place. You must protect your countertops, floors, and appliances with drop cloths and plastic sheeting. Use painter’s tape to mask off walls, countertops, and appliances meticulously. Work in sections if space is limited.
What is the hardest part of refinishing cabinets?
For most DIYers, the two biggest challenges are: 1) Patience with drying/curing times. Rushing between coats or reinstalling hardware too soon leads to dents and soft finish. 2) Achieving a dust-free environment. Even a garage with a slight breeze can deposit dust in wet paint. Setting up a dedicated, sealed-off painting booth with wet floor cloths and a filtered fan (blowing out) is crucial for a professional result.
How do I get a super smooth, professional finish without a sprayer?
You can achieve excellent results with a brush and roller by following these steps: 1) Use a high-quality, ultra-smooth synthetic brush for details. 2) Use a high-density foam roller for all large flat panels. 3) Apply multiple thin coats (2-3 for paint, 1-2 for stain + 2-3 topcoats). 4) Sand lightly with 320+ grit between every single coat. 5) Maintain a clean workspace and a steady hand. The final sanding and last coat are what create the glass-smooth surface.