Layout is everything for recessed kitchen lighting. A poor plan leads to dark spots and shadows, while a strategic layout transforms your kitchen into a bright, functional, and beautiful space. This guide breaks down the exact steps—from measuring and planning to choosing the right fixtures and spacing—to help you achieve professional-looking results, whether you’re a DIYer or hiring a pro. Get it right the first time.
So, you’re thinking about adding recessed lighting to your kitchen. Smart move. Those little cans tucked into the ceiling offer a clean, modern look that pendant lights and bulky fluorescents just can’t match. But here’s the thing everyone forgets to tell you: the magic isn’t in the fixture itself; it’s 100% in the layout. A bad recessed lighting layout in a kitchen is worse than no lighting at all—you’ll end up with harsh shadows right where you need light most, like over your cutting board or sink. A great layout, however, makes your kitchen feel larger, safer, and more inviting. It’s the difference between a functional workspace and a beautifully lit room you actually want to be in.
We’re going to walk through this together, step-by-step. No confusing jargon. Just clear, practical advice you can use this weekend. We’ll talk about measuring your space, understanding beam angles, spacing fixtures for even coverage, and layering light so your kitchen works for every task, from morning coffee to midnight snack. By the end, you’ll look at your ceiling not as a blank slate, but as a grid waiting to be perfectly planned.
Key Takeaways
- Start with a Light Plan, Not Guesswork: Always sketch your ceiling, mark cabinets, sinks, and islands, then plot fixture locations before buying anything. This prevents costly mistakes.
- Task Lighting is Non-Negotiable: Prioritize bright, focused light over key work zones: the sink, stove, and countertops, especially the main prep area. This is your first layout rule.
- Spacing is a Math Problem: The general rule is to space fixtures at half the ceiling height (e.g., 8 ft ceiling = 4 ft spacing). Adjust for beam angles and room shape.
- Choose the Right Beam Angle for the Job: Use narrow (25°) spots for accenting art, medium (35°) for general task lighting, and wide (60°) for ambient fill light over islands or open spaces.
- Layer Your Light: A great kitchen uses three layers: ambient (overall), task (focused work areas), and accent (highlighting features). Recessed lights handle all three when planned well.
- Dimmers are Essential: Install dimmers on at least one circuit. They let you adjust brightness for cooking, cleaning, or dining, saving energy and setting mood.
- Mind the Obstacles: Check for joists, HVAC vents, and wiring in the ceiling. Use a stud finder and plan your layout around these fixed elements to avoid re-routing.
📑 Table of Contents
- Why Kitchen Recessed Lighting Layout is Different (And More Important)
- The Essential Pre-Planning Checklist: Measure, Map, and Mind the Ceiling
- Layout Patterns: The Grid, The Perimeter, and The Hybrid
- Beam Angle & Spacing: The Secret to Shadow-Free Light
- Getting Specific: Layouts for Different Kitchen Shapes
- Installation Tips & Pro Secrets for a Flawless Finish
- Common Mistakes & How to Avoid Them
- Conclusion: Your Bright, Beautiful Kitchen Awaits
Why Kitchen Recessed Lighting Layout is Different (And More Important)
You might be thinking, “Can’t I just dot the ceiling with lights?” The short answer is no. The kitchen is the most tool-intensive, detail-oriented room in your house. It’s where you chop, dice, simmer, and clean. Bad lighting here isn’t just an annoyance; it’s a safety issue. A poorly placed shadow over your knife or stovetop is a recipe for a nicked finger or a burned pot.
Unlike a living room where you might want soft, ambient glow, a kitchen demands excellent task lighting. That means light that is bright, shadow-minimizing, and placed directly over the surfaces where work happens. But a great kitchen also needs ambient lighting to make the space feel open and welcoming when you’re not actively cooking. And sometimes, you want accent lighting to highlight a beautiful backsplash or piece of art. Recessed lighting can do all three, but only with a deliberate, zoned layout. Your first job is to identify these zones before you even pick up a drill.
Identifying Your Kitchen’s Lighting Zones
Grab a pencil and your kitchen floor plan (or just walk around and sketch it). Circle these critical areas:
- The Prep Zone: This is your main countertop area, usually where the sink is located. This zone needs the most intense, shadow-free light.
- The Cooking Zone: Over the stovetop and range. If you have a wall oven, consider lighting over that workspace too.
- The Island/Table Zone: If you have an island or a breakfast nook, this is a secondary task area and a social hub. It needs good light, but the placement might differ from perimeter counters.
- The General Ambient Zone: The open floor space in the middle of the room. This light fills in gaps and lifts the overall ceiling brightness.
Mark these zones clearly. Your fixture layout will be built around serving these areas first.
The Essential Pre-Planning Checklist: Measure, Map, and Mind the Ceiling
Before you buy a single fixture, you need to become a ceiling detective. Rushing this step is the #1 cause of failed DIY recessed lighting projects. You need to know what’s *in* your ceiling and exactly what’s *on* your walls and floors.
Visual guide about How to Layout Recessed Lighting in Kitchen
Image source: i.pinimg.com
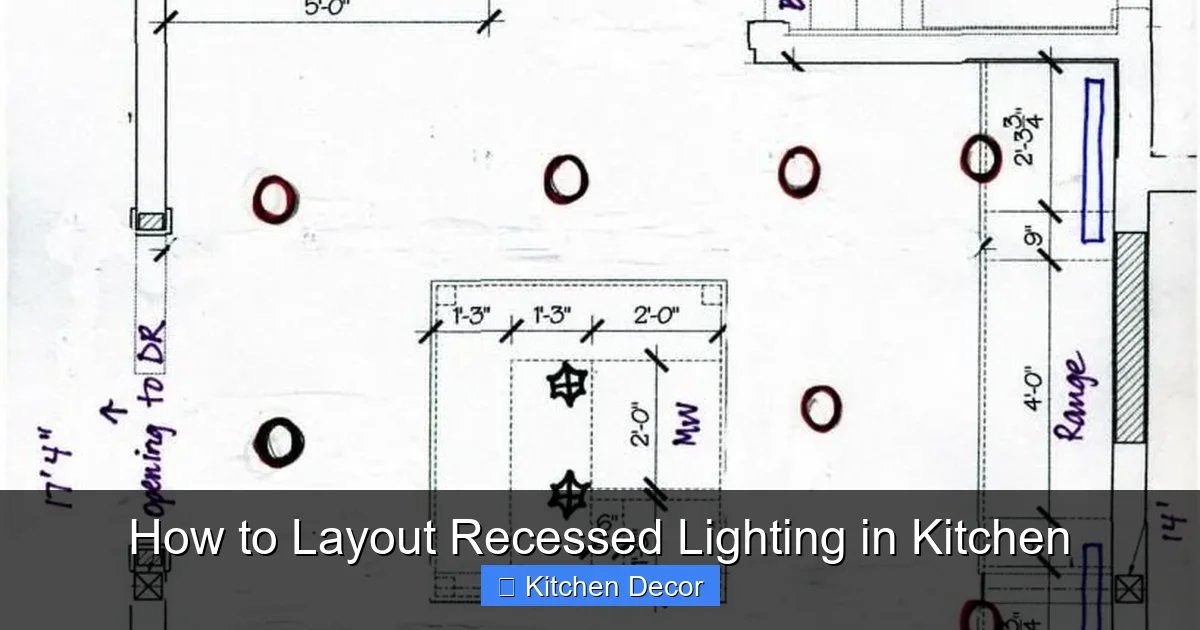
Step 1: The Detailed Ceiling Sketch
Get a sheet of graph paper (or use a free online room planner). Draw your kitchen’s footprint to scale. Then, meticulously add:
- All cabinets: Upper cabinet locations are critical. The space between upper cabinets and countertops (the “backsplash zone”) is a prime spot for lighting, but you must ensure fixtures won’t clash with cabinet trim or doors.
- Sink, stove, and refrigerator: Mark their exact centers.
- Island or peninsula: Outline its shape and size.
- Windows, doors, and vents: Note their positions.
- Any ceiling obstacles: This is huge. Use a stud finder with AC wire detection to map out all joists, electrical wires, and HVAC ducts or vents. Draw these on your sketch. Your entire layout must work around these immovable objects.
Step 2: Determine Your Ceiling Height and Type
Ceiling Height: This dictates your fixture choice and spacing. Standard 8-foot ceilings are easy. For 9+ foot ceilings, you may need deeper, higher-output cans or adjust spacing for better coverage.
Ceiling Type: Is it drywall? Plaster? Is there insulation above? This determines if you need IC-rated (insulation contact) fixtures and what type of housing (remodel vs. new construction) you can install. IC-rated is almost always required for safety if insulation is present.
Step 3: Choose Your Fixture Type (Housing & Trim)
This is technical but crucial. For existing ceilings (most remodels), you’ll use remodel housings. These clamp to the ceiling from below after you cut the hole. For new construction or major reno, new construction housings are nailed to joists before drywall.
For the trim (the visible part), choose based on your need:
- Baffle Trim: Black interior reduces glare. Best for task lighting.
- Reflector Trim: Polished metal for maximum light output. Good for high ceilings.
- Gimbal Trim: Adjustable. Perfect for accenting art or aiming at specific task areas.
- Square/Pendant Trims: Modern aesthetic, often with a slight downward aim.
Layout Patterns: The Grid, The Perimeter, and The Hybrid
Now, the fun part: placing the dots on your sketch. There are three primary layout patterns for kitchens. Choose the one that fits your space’s shape and your lighting goals.
Visual guide about How to Layout Recessed Lighting in Kitchen
Image source: media.angi.com
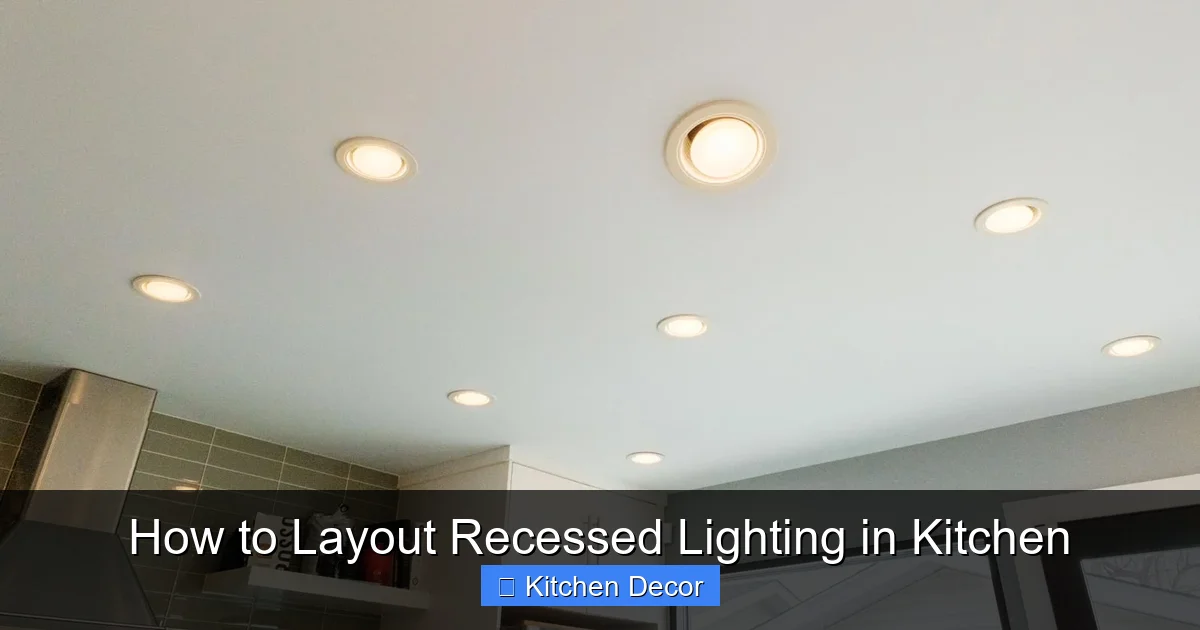
Pattern 1: The Even Grid (Best for Square/Rectangular Kitchens)
This is the most common and often most effective pattern. You create a symmetrical grid of lights across the entire ceiling. The key is to align the grid with your cabinet runs.
How to do it:
- Find the center point of your kitchen.
- Decide your spacing based on ceiling height (Rule of Thumb: Ceiling Height ÷ 2 = Spacing in Feet. So 8 ft ceiling = 4 ft on-center spacing between fixtures).
- Lay out rows parallel to your upper cabinets. If your cabinets are in a straight line along one wall, your rows of lights should run perpendicular to that wall.
- Start from the center and work outward, ensuring lights are centered over the countertops, not the spaces between cabinets.
- Critical Adjustment: Your first and last row of lights should be 12-24 inches from the wall. This prevents a “wall of light” effect that creates harsh shadows on the walls and ensures the light washes down the cabinets evenly.
Example: A 12×16 ft kitchen with 8 ft ceilings. Grid spacing of 4 ft. You’d likely have 4 rows of lights (12 ft width ÷ 4 ft = 3 spaces = 4 lights per row) and 5 columns (16 ft length ÷ 4 ft = 4 spaces = 5 lights per column), for a total of 20 fixtures. You’d adjust the outer rows to be 1.5 ft from the walls.
Pattern 2: The Perimeter/Staggered Layout (Best for Galley & L-Shaped Kitchens)
In long, narrow kitchens (galley) or L-shapes, an even grid can waste light in the open center. Instead, focus light where the work is: along the perimeter countertops.
How to do it:
- Place a row of lights directly down the center of the countertop run. If you have upper cabinets, center the fixture in the space between the cabinet face and the wall (the backsplash area).
- For countertops deeper than 24-26 inches, you may need a second row of lights closer to the cabinets to eliminate shadows cast by the person standing at the counter.
- Stagger the lights. If your first row has a light at the sink, place the second row’s light offset, centered between the sink and the next cabinet. This creates a more even, overlapping light pattern and avoids a “stadium” look.
- Light the island separately with its own dedicated row or grid, centered over the island.
Pro Tip: For a galley kitchen, you might have two rows of lights down each long wall, staggered relative to each other, with no lights in the center open space. This is highly efficient.
Pattern 3: The Hybrid/Zoned Layout (Best for Complex Kitchens)
Modern kitchens often have multiple zones: a main run, an island, a pantry, a breakfast nook. Treat each as its own lighting zone with its own pattern.
- Main Perimeter: Use a single row of lights centered over the countertops.
- Island: Use a multi-light pendant or a dedicated row of recessed lights centered over the island. The spacing here can be wider (5-6 ft on center for a 3 ft wide island) since the light source is closer to the work surface.
- Open Area: Add 1-2 ambient lights in the center of the room to lift the general illumination and connect the zones.
This approach is flexible and efficient, ensuring you don’t over-light empty floor space.
Beam Angle & Spacing: The Secret to Shadow-Free Light
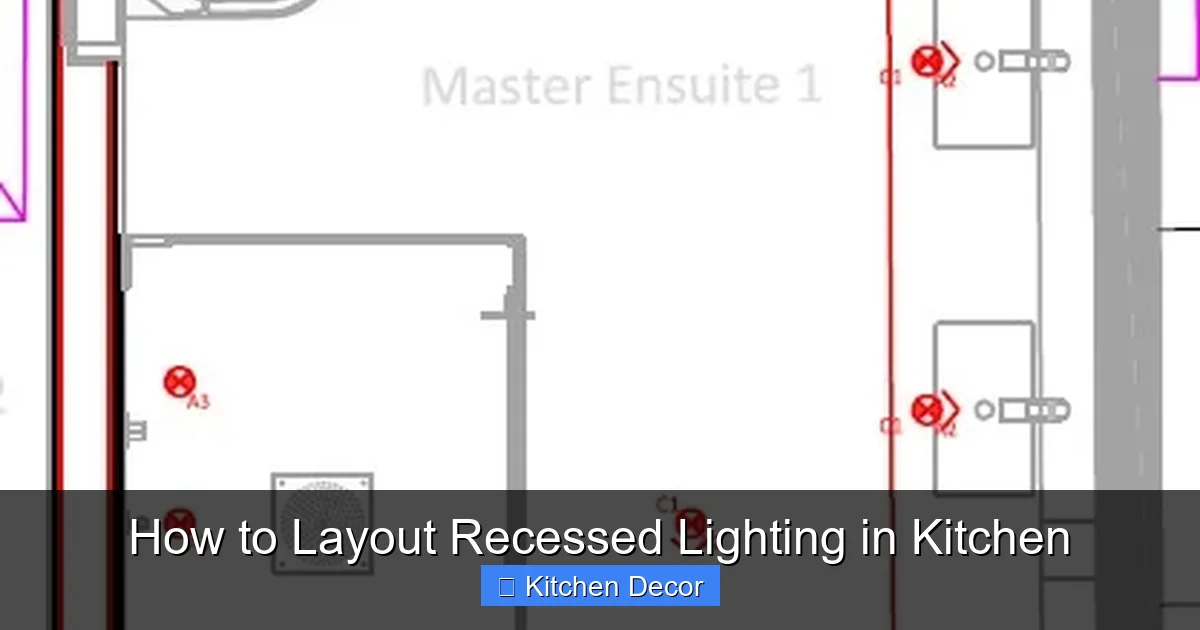
This is where professional planners separate themselves from amateurs. The beam angle of your fixture’s trim determines the spread of light on your counter. A wrong beam angle will leave you with dark spots between lights.
Visual guide about How to Layout Recessed Lighting in Kitchen
Image source: quickandeasylighting.com
Understanding Beam Angles
Think of it like a flashlight. A narrow beam (spotlight) is a tight circle. A wide beam (floodlight) is a broad oval.
- Narrow (15°-25°): Very focused. Used for accenting paintings, cabinets, or a specific small area. Rarely used for general kitchen task lighting as it creates harsh edges and deep shadows between fixtures.
- Medium (30°-38°): The workhorse for kitchen task lighting. This is your go-to for lights over counters. It provides a good pool of light on the surface while overlapping sufficiently with the next fixture to avoid dark bands. Most standard baffle trims are in this range.
- Wide (45°-60°+): A soft, broad spread. Excellent for ambient lighting in the center of the room, over islands (where the light is already close), or for general fill light in high-ceilinged rooms where you need to spread light further.
Matching Beam Angle to Spacing
Your fixture spacing and beam angle must work together. The goal is for the light pools to overlap by about 30-50% at the work surface (counter height, ~36″).
- For Medium Beam (35°) on 8 ft ceilings: A 4-5 ft on-center spacing is ideal. This ensures the light pools overlap nicely at the counter.
- For Wide Beam (60°) on 9+ ft ceilings: You can space fixtures 5-6 ft apart because the light spreads further before it hits the counter.
- Never use a narrow beam for general counter lighting. You’ll get a series of bright circles with dark valleys between them.
Practical Test: Before finalizing, use a flashlight with a beam spread similar to your chosen trim. Tape it to a broom handle at ceiling height, aim it down, and see what the circle looks like on your counter at 4 ft away. Adjust your spacing plan accordingly.
Getting Specific: Layouts for Different Kitchen Shapes
Let’s apply these principles to actual kitchen floor plans. These are common scenarios.
The Galley Kitchen (Long & Narrow)
The goal here is to light the two long counter runs without wasting light down the center.
- Layout: Two single rows of fixtures, one down each wall.
- Placement: Center each fixture in the countertop depth. If your counter is 24″ deep with 18″ of upper cabinet, center the light in that 18″ space, about 12-15″ from the wall.
- Spacing: Start 24″ from the ends of the counter run. Space fixtures 4-5 ft on-center based on your beam angle.
- Staggering: If the galley is very long (over 20 ft), stagger the lights on opposite walls so they don’t form a repetitive pattern that can look like a tunnel.
- No Center Lights: Typically, you do not need lights over the open center aisle unless it’s very wide (over 5 ft).
The L-Shaped Kitchen
This layout has two perpendicular runs. Treat each run as its own perimeter line.
- Layout: Two separate rows following the inside corner of the “L”.
- The Corner: This is tricky. You have two options: 1) Place a fixture at the inside corner, aimed down the bisector of the corner. 2) Omit the corner fixture and rely on the lights from each leg overlapping in the corner area. Option 2 is often cleaner and avoids a fixture directly in the corner where it might conflict with wall cabinets or look odd.
- Spacing: Measure each leg independently. Space fixtures 4-5 ft apart along each wall, starting and ending 12-24″ from the ends.
- The Short Leg: If one leg is very short (less than 6 ft), you might only need 1-2 fixtures on that wall.
The U-Shaped Kitchen
This is essentially three galley runs forming a “U”.
- Layout: Three separate rows, one on each wall.
- The Corners: Same principle as the L-shape. Avoid placing a fixture directly in the sharp inside corner. Let the lights from the adjacent walls overlap to light the corner workspace.
- Ends of the “U”: Pay special attention to the two ends where the runs terminate. These are high-traffic areas (often near the fridge or entry). Ensure you have a light fixture within 12-18″ of these end points to avoid a dark spot.
The Island-Centric Kitchen
Here, the island is the star. Lighting must serve both the island and the perimeter.
- Perimeter: Use a single row of lights centered over the countertops on the surrounding walls.
- The Island: This is a separate zone. You have two main choices:
- A Row of Recessed Lights: Centered over the island. Space them 5-6 ft apart for a 3-4 ft wide island. This is sleek and minimalist.
- Pendant Lights: 2-3 small pendants over the island. This adds decorative style and very focused task light. If using pendants, you may reduce or eliminate recessed lights directly over the island.
- Coordination: The row of recessed lights over the island should align visually with the perimeter rows. Often, they are placed in a line perpendicular to the island’s length, creating a cross-axis grid.
Installation Tips & Pro Secrets for a Flawless Finish
You have your plan. You’ve bought your fixtures. Now, the execution. These tips will save you from headaches and ensure a clean, professional look.
The Template & Cutting Hole Hack
Every remodel can comes with a paper template. Don’t just trace it and cut. Here’s the pro way:
- Use the can itself as a template: Remove the trim and bulb. Place the housing’s metal collar flush against the ceiling. Trace the inside of the collar. This gives you the exact hole size needed.
- Cut Slightly Smaller: When you cut with a hole saw, the cut can be rough. If you trace the inside and cut exactly on the line, the housing might not fit. Instead, trace the inside, then cut 1/8″ inside that line. You can always enlarge a hole, but you can’t shrink it. The housing’s clamps will pull the metal housing tight against the drywall edge.
- Check for Joists: Before cutting, use your stud finder one last time at the exact hole location. A 1/8″ adjustment can mean the difference between hitting a joist or missing it.
Wiring & Circuit Planning
Don’t put all your lights on one switch. This is a huge convenience fail. Plan your switches:
- Zone 1: All perimeter task lights. (Often on a dimmer).
- Zone 2: Island lights (on a separate dimmer).
- Zone 3: Ambient/center lights (on a dimmer).
- Zone 4: Under-cabinet lighting (on its own switch/dimmer).
This lets you have bright task light for cooking, dim ambient light for cleaning up, and everything off for a dinner party. Run your wires to a central junction box in the attic or basement for each zone. If you’re not comfortable with wiring, hire an electrician for this part only and do the physical install yourself.
Aiming & Trim Installation
For non-adjustable trims (most baffles), simply push the trim up until it clicks. For gimbals or accent trims:
- Install the trim loosely.
- Turn the lights on.
- From below, adjust the aim of each fixture. Aim task lights straight down or with a very slight forward tilt (5-10°) to throw light slightly onto the counter from the back. Aim accent lights at your artwork or feature wall.
- Tighten the adjustment screws once perfect.
Final Check: With all lights on at full brightness, stand at your sink, your stove, and your main prep area. Look for shadows on the counter. You should see very few. If you see a distinct shadow from your own body, that fixture’s placement or beam angle needs adjustment.
Common Mistakes & How to Avoid Them
Let’s review the pitfalls so you can sidestep them.
Mistake 1: Spacing Too Far Apart
The Problem: You get “light wells” – dark bands between bright pools. This is the most common error.
The Fix: Use the ceiling height ÷ 2 rule as a starting point, but always verify with your beam angle. For 8 ft ceilings with 35° trims, 4 ft spacing is the max. For 9 ft ceilings, you might need to go to 3.5-4 ft spacing or switch to a wider beam angle.
Mistake 2: Ignoring Cabinet Overhangs
The Problem: You place a light centered in the counter, but the upper cabinet overhang blocks the light, creating a dark strip right at the back of the counter.
The Fix: Measure the depth of your upper cabinet overhang (usually 12-18″). Your light fixture should be placed so its beam center is in front of that overhang. Often, this means centering the light in the space between the wall and the cabinet face, not in the counter depth itself.
Mistake 3: Using the Same Light Everywhere
The Problem: You buy 100 identical medium-beam cans and dot them everywhere. This creates a flat, institutional look and wastes light in open areas.
The Fix: Use a mix! Use medium-beam (35°) for task areas. Use wide-beam (60°) or even lower-lumen fixtures for ambient center-of-room lighting. Use narrow-beam (25°) gimbals to highlight a beautiful tile backsplash or piece of art. Layering different fixtures creates depth and interest.
Mistake 4: Forgetting About Color Temperature
The Problem: You buy cheap 3000K (warm white) bulbs, but your under-cabinet lights are 5000K (cool white). The mismatch is jarring and looks unprofessional.
The Fix: Decide on a single color temperature for all permanent lighting in the kitchen. 2700K-3000K is warm and inviting, great for residential kitchens. 3500K-4000K is neutral and clean, popular for modern homes. Stick to your chosen temperature everywhere—recessed, pendant, under-cabinet. Buy all bulbs from the same product line to ensure consistency.
Conclusion: Your Bright, Beautiful Kitchen Awaits
Planning your recessed lighting layout isn’t an afterthought; it’s one of the most important design steps in your kitchen. It requires a little patience with a tape measure and some graph paper, but the payoff is enormous. You’ll have a kitchen that is perfectly lit for every task, feels spacious and safe, and looks like it was designed by a pro.
Remember the golden rules: plan first, prioritize task zones, respect the beam angle, and layer your light. Start with that detailed ceiling sketch, mind the obstacles, and choose your pattern based on your kitchen’s shape. When in doubt, space your lights a little closer rather than farther. It’s easier to dim a fixture than to create light where there is none.
Now, take a deep breath, grab your tools, and start mapping. Your future self, standing at a brilliantly lit counter chopping vegetables without a shadow in sight, will thank you.
Frequently Asked Questions
What is the ideal spacing for recessed lights in an 8-foot kitchen ceiling?
A great starting point is 4 feet on-center between fixtures. This is calculated by dividing your ceiling height (8 ft) by 2. However, always check your fixture’s beam angle. For a standard 35° beam, 4 ft is the maximum before you get dark spots between lights on the counter.
Should recessed lights be placed over the sink and stove?
Absolutely. These are critical task zones. Place at least one fixture directly over the sink center and one over the stovetop. For the sink, position it 12-18 inches in front of the sink edge to avoid shadows from your body when washing dishes.
Can I install recessed lighting myself, or should I hire an electrician?
If you are a confident DIYer with experience in electrical work, you can install the fixtures (cutting holes, mounting housing, connecting wires) yourself. However, the initial wiring from the switch to the first fixture and the final connection to your home’s electrical panel must be done by a licensed electrician in most areas for code and safety. Many DIYers do the physical install and hire an electrician just to pull the permit, do the “hot” connections, and inspect the work.
What color temperature (Kelvin) is best for kitchen recessed lighting?
For a warm, inviting residential kitchen, choose 2700K to 3000K. For a cleaner, more modern, and slightly brighter feel (often preferred for task lighting), 3500K to 4000K is excellent. The most important rule is to use the same color temperature for all permanent light sources in the kitchen—recessed cans, pendants, and under-cabinet lights—to avoid a mismatched, jarring look.
How far from the wall should my first row of recessed lights be?
Place your outermost row of lights 12 to 24 inches from the wall. This is crucial. Placing a light too close to the wall creates a “wall washer” effect that casts harsh shadows on the wall and leaves the counter edge dark. This distance allows the light to wash down the cabinets and onto the countertop evenly.
Do I need a separate switch for my island recessed lights?
Yes, you should. Creating separate lighting zones is a hallmark of a well-designed kitchen. At minimum, have: 1) A switch/dimmer for perimeter task lights, 2) A separate switch/dimmer for island lights. This allows you to have bright task light over the island for homework or prep, while keeping perimeter lights off for an intimate dinner, or vice versa. Adding a third zone for ambient center lights provides even more control.