Transforming your kitchen by changing the cabinet color is one of the most impactful and cost-effective upgrades you can do. This guide breaks down every method, from simple painting to full refacing, helping you choose the right approach for your skill level and budget. We cover essential prep, color theory for kitchens, and step-by-step processes to ensure a professional, durable finish that revitalizes your space.
Let’s be honest: a kitchen can feel dated in what feels like the blink of an eye. And while a full remodel is a massive (and expensive) undertaking, there’s one superhero move that can make your entire kitchen feel brand new without tearing down walls: changing the cabinet color. It’s the single biggest visual factor in the room. Swap out those tired oak cabinets for a crisp white, a moody navy, or a warm gray, and it’s a total game-changer. But how do you actually do it? And more importantly, how do you do it well so it lasts for years? This is your ultimate, no-fluff guide to every single way you can change kitchen cabinet color, from a weekend paint job to a professional-level overhaul. We’ll walk through the decision-making process, the nitty-gritty prep work, the step-by-step application, and the color secrets that will make your project look like a million bucks.
Key Takeaways
- Assess Your Cabinet Material: Solid wood, MDF, and laminate each require specific prep and products for a successful color change.
- Choose the Right Method: Painting is the most common DIY option, while refinishing and refacing serve different needs and budgets.
- Color is Crucial: Consider kitchen size, lighting, and existing fixtures. Test swatches in your space at different times of day.
- Prep is Non-Negotiable: Proper cleaning, sanding, and priming are 90% of the battle for a smooth, lasting finish.
- Invest in Quality Tools & Paint: A good brush/roller, a paint sprayer for a pro look, and cabinet-specific paint make a dramatic difference in the final result.
- Patience Pays Off: Allow adequate drying/curing time between coats and before reinstalling to prevent dust, scratches, and peeling.
- Protect Your Work: Use a durable, water-based topcoat (polyurethane or lacquer) to seal your new color against kitchen wear and tear.
📑 Table of Contents
- First Things First: What Are Your Cabinets Made Of?
- Choosing Your Color Change Method: Paint, Refinish, or Reface?
- The Art of Color Selection: More Than Just “What Looks Good”
- Step-by-Step: The Painting Process (The Most Common Journey)
- Refinishing or Refacing: The Alternative Paths
- Common Costly Mistakes (And How to Avoid Them)
- Conclusion: Your Kitchen, Your Masterpiece
First Things First: What Are Your Cabinets Made Of?
Before you buy a single can of paint, you need to play detective. Your cabinet’s construction material dictates the entire game plan for your color change project. Using the wrong method on the wrong surface is a recipe for peeling, chipping, and a whole lot of heartache. Here’s how to identify what you’re working with.
Identifying Solid Wood
Solid wood cabinets are the gold standard and the easiest to work with for a paint finish. You can usually tell by the end grains on the cabinet doors and drawers. Look at the top, bottom, and edges. If you see wood grain that matches the face of the cabinet, you’re likely dealing with solid wood (like oak, maple, cherry, or pine). Solid wood will sand beautifully, accept primer readily, and provide a very stable base for paint. The main consideration with solid wood is the existing finish—is it a stain, a lacquer, or a paint?—which dictates your sanding aggressiveness.
Working with Engineered Wood (MDF & Plywood)
Most modern cabinets, especially the box (the structural part), are made from engineered wood. Medium-Density Fiberboard (MDF) is incredibly common for cabinet doors. It’s smooth, dense, and has no wood grain. It’s actually a fantastic surface for painting because it’s so uniform. However, MDF is vulnerable to water. If the existing finish is compromised and moisture gets in, it can swell. The key with MDF is using a water-based primer and paint to avoid any moisture absorption issues. Plywood cabinets, often with a veneer, are also good painters if the veneer is well-adhered. The main risk is veneer delamination; if it’s bubbled or peeling, you must address that first, possibly with wood glue and clamps.
The Laminate & Thermofoil Challenge
This is the trickiest substrate for a color change. Laminate cabinets have a plastic-like, glossy surface. Thermofoil is a vinyl-like finish heat-applied to MDF. Both are essentially non-porous, slick surfaces that paint will not adhere to on its own. You cannot just sand and paint. You must use a specific high-adhesion bonding primer (often labeled for ” slick surfaces” or “laminate”) designed to chemically grip to that glossy finish. Even then, the durability is a concern. For laminates, many professionals recommend full refacing or replacement over painting for a long-term solution, as the paint-to-laminate bond is inherently weaker than paint-to-wood. If you proceed, extreme care in prep and product selection is mandatory.
Choosing Your Color Change Method: Paint, Refinish, or Reface?
Now that you know what you’re painting, you need to decide how you want to change the color. There are three primary paths, each with a different cost, time, and skill requirement.
Visual guide about How to Change the Kitchen Cabinet Color
Image source: nhance.com
Method 1: Painting (The Most Popular DIY Route)
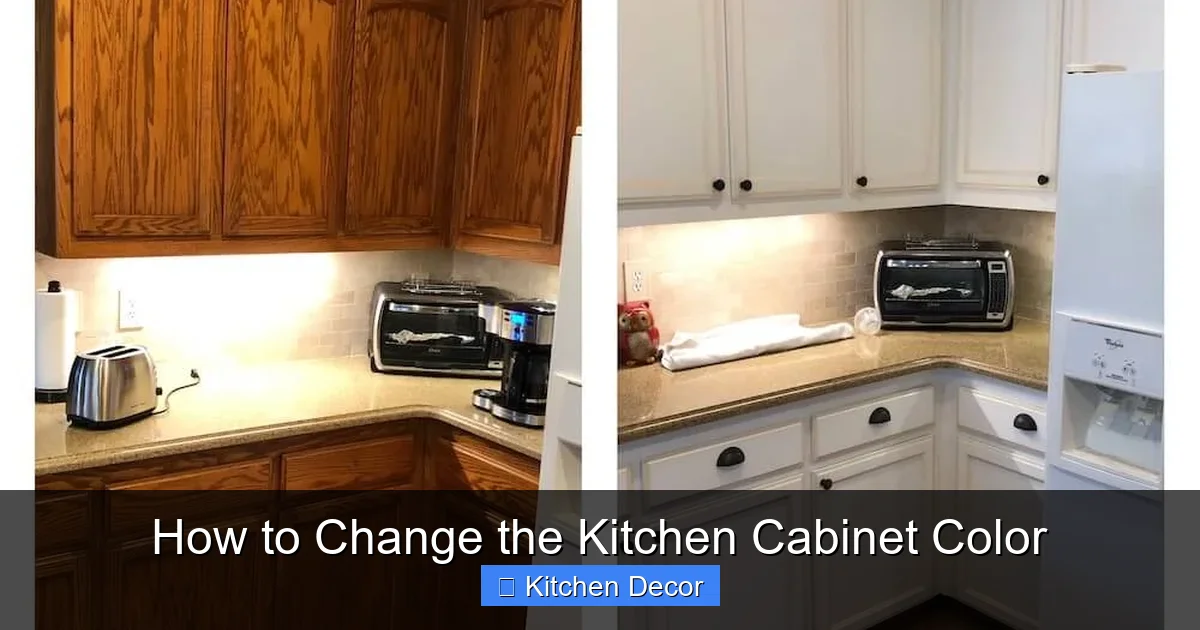
This is what most people think of. You remove the cabinet doors and drawers, sand and prime the existing finish (whether it’s stain or paint), and apply new paint. It’s the most versatile method for dramatic color changes. You can go from dark to light, or from light to dark, with the right primer. A full paint job, done correctly, can look factory-fresh and lasts 5-10 years or more. It’s the best way to achieve a completely new color palette. The downsides? It’s labor-intensive, requires significant prep (sanding, cleaning), and you lose the original wood grain. If your cabinets are in poor structural condition with warped doors or damaged veneer, painting over these flaws will only highlight them.
Method 2: Refinishing (Keeping the Wood, Changing the Stain)
Refinishing means stripping off the old stain and finish, then applying a new stain and topcoat. This method preserves and showcases the natural wood grain. It’s ideal if you have beautiful, high-quality wood cabinets (like cherry or maple) that you love, but the color is wrong. The process involves chemical strippers or aggressive sanding to remove all old finish, then sanding through progressively finer grits to a silky-smooth surface. You then apply gel or traditional stain and multiple coats of a protective finish like oil-based polyurethane or lacquer. It’s less about changing to a drastically different color family (you’re limited by the wood’s natural tone) and more about adjusting the hue (e.g., from an orange oak to a rich espresso brown). It’s often more work than painting due to the stripping process but yields a classic, high-end look.
Method 3: Refacing (The “New” Cabinets Without Replacement)
Refacing is the middle ground. You keep the existing cabinet boxes (the structure) but remove all the doors, drawer fronts, and any exposed face frames. You then install new doors and drawer fronts made from a different material (like a painted MDF, a wood veneer, or a thermofoil) and apply a new veneer to the exposed face frame to match. This allows for a total transformation—you can go from oak to sleek, Shaker-style painted cabinets. It’s more expensive than a DIY paint job but significantly cheaper than a full cabinet replacement. It’s also less disruptive, as the plumbing and electrical in the boxes remain untouched. This is best when your cabinet boxes are in excellent shape, but you want a completely new door style and color that painting or refinishing can’t provide.
The Art of Color Selection: More Than Just “What Looks Good”
Choosing a paint chip at the store is the easiest part and the most common mistake. That tiny swatch will look completely different on your cabinets in your kitchen. You need to think like a designer.
Visual guide about How to Change the Kitchen Cabinet Color
Image source: nhance.com
Consider Your Kitchen’s Physical Attributes
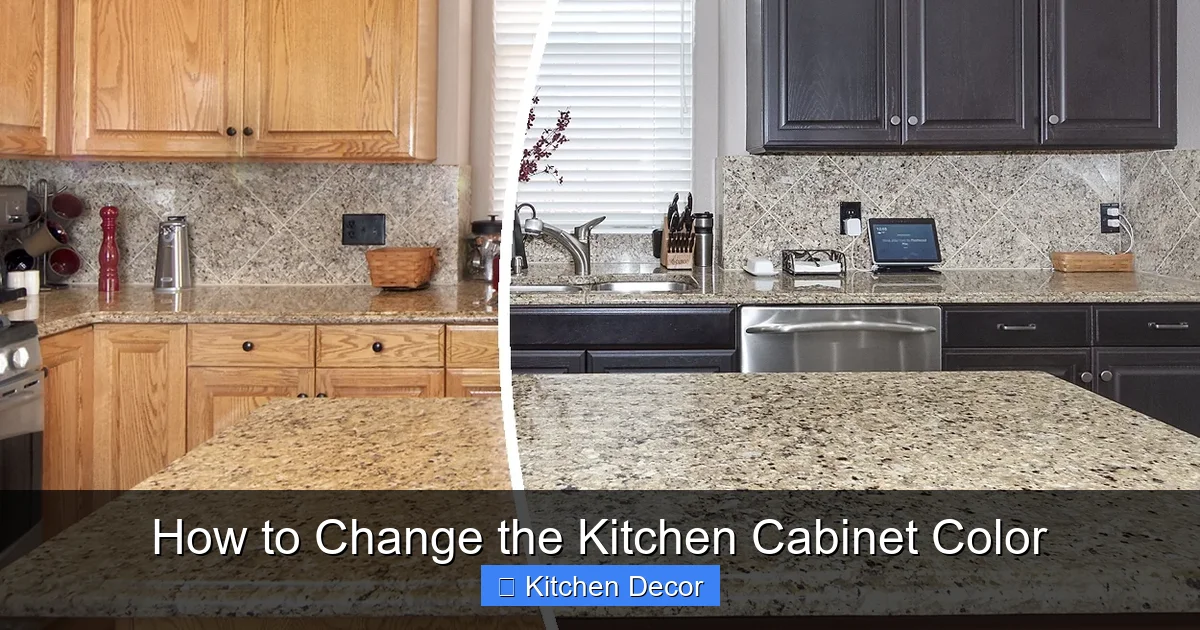
Size & Ceiling Height: Dark colors (navy, charcoal, forest green) are stunning but absorb light, making a small kitchen feel even smaller. In a compact space, lean towards light, airy colors (whites, light grays, pale blues) to create an illusion of space. In a large, open kitchen with high ceilings, dark colors can add cozy, sophisticated drama. Lighting: This is huge. North-facing light is cool and blue-ish, which can make warm colors (yellows, reds) look muddy. South-facing light is warm and golden, making cool colors feel crisp. East and west light changes dramatically throughout the day. Take your cabinet samples home and look at them in your kitchen at 10 AM, 2 PM, and 8 PM. Fixed Elements: Your countertop, backsplash, and floor are likely staying. Your cabinet color must play nicely with them. A warm granite countertop with gold/beige veins will clash with a cool, blue-gray cabinet. Create a cohesive palette. Pull a secondary color from your countertop for your cabinets, or use a neutral cabinet to let a colorful backsplash shine.
Trendy vs. Timeless: Finding Your Balance
Right now, moody blues, earthy greens, and warm whites are huge. Trends are fun, but remember you’ll live with these cabinets for 5-15 years. A good strategy is to choose a timeless neutral for the cabinets (like a classic white, a greige, or a soft gray) and bring in trendiness with easily changeable elements: the wall color, hardware, or decor. If you’re set on a trendy color, consider it for an island or a lower bank of cabinets only, creating a focal point that’s easier to repaint later than a full kitchen’s worth. White kitchens are “timeless” but can feel sterile. The current move is towards “warm whites” (with yellow/beige undertones) or “clean whites” (with gray undertones) to add depth.
The Power of Hardware and Finish
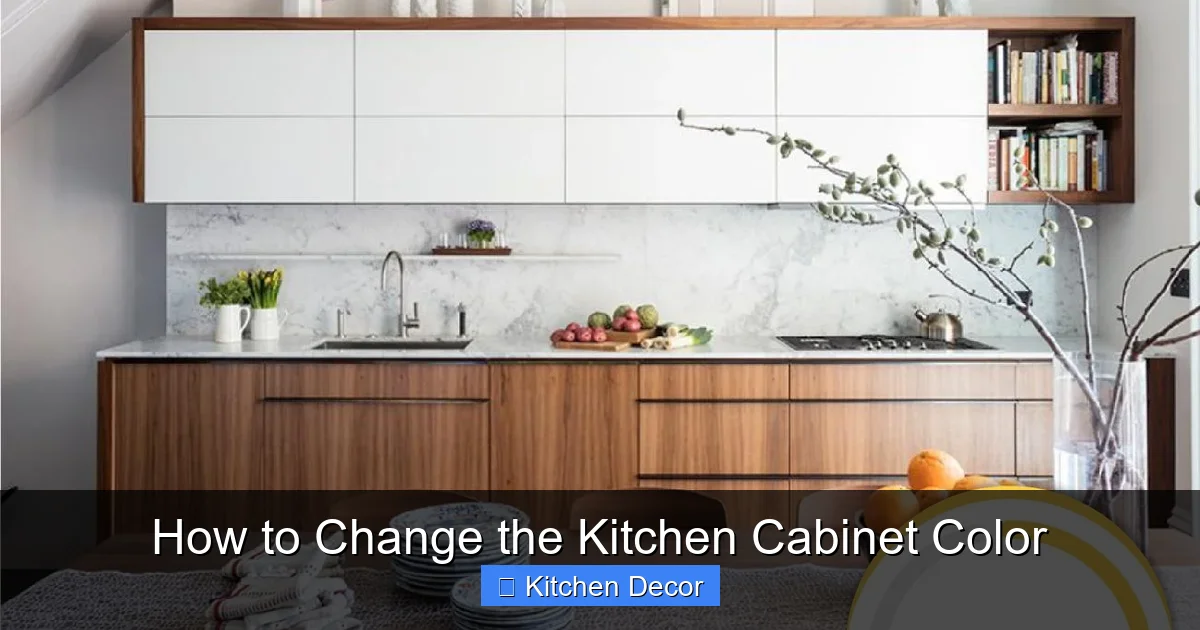
Your cabinet color isn’t just the paint. The finish matters. A flat/matte finish is ultra-modern and hides imperfections beautifully but shows fingerprints and grease easily. A satin or eggshell finish is the most popular for kitchens—it has a slight sheen, is washable, and looks sophisticated. A semi-gloss is very durable and shiny, traditional for many kitchens but can highlight surface flaws. Hardware is jewelry for your cabinets. The style (cup pulls vs. knobs, bar pulls), finish (brushed brass, matte black, polished nickel), and placement can completely change the vibe of your painted color. Dark cabinets with brass hardware feel luxurious. White shaker cabinets with black pulls feel crisp and modern. Don’t pick hardware as an afterthought.
Step-by-Step: The Painting Process (The Most Common Journey)
Alright, you’ve assessed your cabinets (they’re wood or MDF, in good shape), chosen painting as your method, and picked the perfect color with a satin finish. Now, the work. Rushing this process is the #1 cause of failure. Treat it like a science experiment with precise steps.
Visual guide about How to Change the Kitchen Cabinet Color
Image source: assets.fixr.com
Phase 1: The Great Removal & Deep Clean
Take a deep breath. You’re about to create a mess, but it’s organized chaos. Label everything. Use painter’s tape and a marker to number your cabinet doors and note their location (e.g., “1 – sink base left door,” “2 – sink base drawer”). Do the same for drawer fronts. This saves hours of guessing during reassembly. Remove all hardware (hinges, pulls, knobs) and store them in labeled bags by location. Next, the most important step you might skip: degreasing. Kitchen cabinets are coated in years of cooking grease and film. Use a strong degreaser like TSP substitute or a dedicated cabinet cleaner. Scrub every surface, inside and out, with a non-abrasive scrub pad. Rinse with clean water and let dry completely. This step ensures your primer and paint will actually stick.
Phase 2: Sanding, Repair, and Priming
Now, sanding. The goal is not to remove the finish entirely, but to de-gloss it and create a mechanical bond for the primer. Use 120-150 grit sandpaper (or a sanding sponge) and sand all surfaces thoroughly. You should see a dull, powdery surface. Wipe away all dust with a tack cloth or a damp rag. For laminate or thermofoil, you must use a liquid sander/deglosser (like liquid sandpaper) instead of sanding, as sanding can damage the surface. Inspect for dings, scratches, or gouges. Fill them with a water-based wood filler that sands easily. Sand the filler smooth. Now, prime. This is the most critical coat. For previously painted or stained wood/MDF, use a high-quality water-based bonding primer. For laminates, you must use a specific primer labeled for slick surfaces (like Zinsser B-I or Bulls Eye 1-2-3). Apply a thin, even coat with a brush (for edges) and a high-density foam roller (for flat surfaces). Let it dry completely per manufacturer instructions. Lightly sand with 220 grit sandpaper to knock down any dust nibs or brush strokes, then wipe clean.
Phase 3: Painting – Technique is Everything
Choose your weapon: brush, roller, or sprayer. Brush & Roller: Use a high-quality synthetic bristle brush (like a Purdy or Wooster) for edges and details. Use a low-nap (1/4″) foam roller for flat panels. The key is thin, even coats. Don’t overload the brush or roller. Apply the paint in long, smooth strokes, maintaining a “wet edge” to avoid lap lines. Always paint with the grain of the wood. Paint Sprayer: This is the holy grail for a perfectly smooth, factory-like finish. An airless or HVLP sprayer is ideal. It requires more setup (masking off everything in your kitchen with plastic and drop cloths) and practice on scrap wood first, but the result is flawless. Apply 2-3 thin coats of your cabinet paint (semi-gloss or satin), allowing proper flash-off (drying time between coats as per the paint can) and sanding lightly with 320 grit sandpaper between coats for a glass-smooth finish. Patience here is everything.
Refinishing or Refacing: The Alternative Paths
If painting isn’t your chosen path, here’s what the other journeys look like.
The Refinishing Route: Stripping and Staining
This is messy, chemical-heavy work. Wear gloves, goggles, and a respirator. Apply a thick, even coat of a chemical stripper (gel formulas are easier to control) to a cabinet door. Let it bubble and soften the old finish (follow product time). Use a plastic scraper (metal can gouge wood) to remove the gunk. You’ll need repeat applications. Once the finish is off, wash the door with mineral spirits to neutralize the stripper. Let dry. Now, the sanding marathon begins. Start with 100 grit to remove stripper residue, then move to 150, then 220. The goal is a perfectly smooth, dust-free surface. Apply your chosen wood stain with a brush or cloth, let it penetrate, and wipe off excess. Let dry. Apply 2-3 coats of a protective finish—oil-based polyurethane is very durable but yellow over time; water-based poly stays clear. Sand lightly between coats. This method retains the character of wood grain but is a true labor of love.
The Refacing Route: Outsourcing the Big Work
This is a hybrid DIY/professional project. You hire a company that comes, takes precise measurements, and manufactures new cabinet doors and drawer fronts to your exact specifications. They also provide matching wood veneer to cover the exposed face frame (the vertical/horizontal trim between cabinets). The process: You remove all doors, drawers, and hardware. The refacing team installs the new veneer on the face frame (a precise, adhesive process), then you or they install the new doors and drawers with new hinges (often soft-close). You then paint or finish the new doors yourself if they’re unfinished, or they arrive pre-finished. The major advantage is getting a whole new door style (like going from a raised panel to a flat Shaker) and color without the cost and mess of total cabinet replacement. The coordination and timing with the refacing company are key.
Common Costly Mistakes (And How to Avoid Them)
We’ve seen it all. Here are the pitfalls that turn a dream project into a nightmare.
Mistake 1: Skipping or Rushing the Prep
This cannot be overstated. 90% of paint failures are due to poor prep. Greasy surfaces, unsanded glossy finishes, and unprimed substrates will cause paint to peel or chip in months. Dedicate 50% of your total project time to prep and priming. It’s the least glamorous part, but it’s everything.
Mistake 2: Using the Wrong Paint
Do not use wall paint. It’s not formulated for the abrasion, heat, and moisture of a kitchen. Use paint specifically labeled for “cabinets,” “trim,” or “doors.” These are typically 100% acrylic or acrylic-urethane hybrids with superior hardness and cleanability. They are worth the extra $10-$15 per gallon.
Mistake 3: Applying Thick Coats
More paint is not better. Thick coats will sag on vertical surfaces, take forever to dry, and will likely crack and peel as they cure. Thin, multiple coats are the professional secret. It takes longer, but the result is infinitely smoother and more durable.
Mistake 4: Ignoring the Environment
Don’t paint in a humid, dusty, or cold (below 50°F/10°C) environment. Humidity extends drying time and attracts dust. Dust from the air will settle into wet paint, creating a gritty texture. Paint in the driest, cleanest part of your home (garage, basement, or a well-controlled room). Keep doors and windows closed to the rest of the house to contain dust.
Mistake 5: Forgetting the Inside
You’ve painted the front of your cabinet doors, but what about when you open them? The inside of the cabinet box and the back of the doors are often a contrasting, dated color. For a truly finished, high-end look, paint the interior of the cabinets a lighter color (or the same color) and the back of the doors to match. It’s an extra step that shows incredible attention to detail.
Conclusion: Your Kitchen, Your Masterpiece
Changing your kitchen cabinet color is more than a paint job; it’s a creative project that reshapes the heart of your home. Whether you choose the dramatic transformation of a new paint color, the organic warmth of refinishing beautiful wood, or the comprehensive change of refacing, the principles are the same: know your surface, respect the process, and choose a color that sings in your unique space. It requires patience, precision, and a willingness to get your hands dirty. But the reward—walking into a kitchen that feels entirely new, that reflects your personal style, and that you built with your own two hands—is priceless. So roll up your sleeves, invest in the right prep and materials, and get ready to fall in love with your kitchen all over again.
Frequently Asked Questions
Can I just paint over my existing cabinet paint without sanding?
No, you cannot skip sanding. You must always de-gloss the existing finish with light sanding (120-150 grit) or a liquid sander/deglosser. This creates a “tooth” for the new primer and paint to grip. Painting over a glossy surface will almost certainly lead to peeling.
How long will a painted kitchen cabinet finish last?
A properly prepped and primed cabinet painted with quality cabinet paint and sealed with a durable topcoat can last 5-10 years or more in a standard household kitchen. Heavy-use kitchens (lots of cooking, kids) may see wear sooner, but a good topcoat will protect against moisture, grease, and scratches.
What is the best paint finish for kitchen cabinets?
Satin or semi-gloss are the standard for kitchens. Satin offers a soft sheen, is washable, and hides surface imperfections well. Semi-gloss is shinier, more durable, and easier to clean, but it highlights any flaws in the surface. For a modern, ultra-smooth look, a professional spray finish in satin is ideal.
Should I remove the cabinets from the kitchen to paint them?
Yes, absolutely. Painting cabinets in-place is a guarantee of a messy, imperfect job with paint drips on floors and countertops, and it’s impossible to get all edges and corners. Removing doors and drawers allows you to work on a flat, stable surface in a controlled environment (garage, basement) for a far superior finish.
Is it worth it to use a paint sprayer for cabinets?
For a first-time DIYer, a brush and roller with good technique can yield excellent results. However, if you want a truly professional, flawless, “factory-painted” look with no brush strokes, a sprayer is worth the rental cost and learning curve. It’s especially beneficial for cabinets with ornate details or raised panels.
Can I change my cabinet color without painting if they are laminate?
Painting laminate is possible but is the least durable method due to adhesion challenges. It requires a very specific high-adhesion primer and is prone to chipping over time. For laminates, refacing (installing new doors/veneer) is a more reliable and long-lasting way to achieve a color change without full cabinet replacement.