Reinstalling drawers in your Whirlpool refrigerator is a simple DIY task that restores organization and food freshness. The key is identifying your specific drawer type—crisper, meat, or deli—and aligning the rails properly before sliding it back. Always ensure the refrigerator is unplugged and the area is clean to prevent damage or contamination. Follow the precise steps for your model to guarantee smooth operation and proper humidity sealing.
Key Takeaways
- Safety First: Always unplug your refrigerator or turn off the circuit breaker before starting to avoid accidental injury or damage.
- Identify Your Drawer Type: Whirlpool uses crisper (high humidity), meat (low humidity), and deli drawers. Each has a unique rail system and purpose.
- Rail Alignment is Critical: Ensure both left and right rails are fully extended and perfectly aligned before inserting the drawer to prevent jamming.
- Check for Obstructions: Verify the drawer cavity and rails are free of food debris, packaging, or broken plastic pieces before reinstallation.
- Humidity Controls Must Match: Reinstall crisper drawers with their corresponding humidity control sliders or vents to maintain proper fruit and vegetable freshness.
- Listen and Feel for a “Click”: A properly seated drawer will slide smoothly and often audibly click into its fully closed, sealed position.
- Consult Your Specific Model’s Manual: While this guide is universal, your model’s manual provides the exact diagram and any unique steps for your refrigerator.
📑 Table of Contents
- The Frustration of a Missing Fridge Drawer (And The Simple Fix)
- Know Your Drawers: Crisper, Meat, and Deli – What’s the Difference?
- Essential Pre-Installation Checklist: Prep Work for Success
- The Main Event: Step-by-Step Reinstallation for Any Drawer Type
- Troubleshooting: When the Drawer Won’t Seat or Slides Poorly
- Beyond Reinstallation: Maintenance for Lifetime Smooth Operation
- When to Call a Pro: Signs of a Bigger Problem
- Conclusion: Your Restored Order
The Frustration of a Missing Fridge Drawer (And The Simple Fix)
You open your Whirlpool refrigerator for a quick snack or to prep dinner, and something feels… off. The space where your crisp lettuce and fresh berries usually sit is just a hollow, empty shelf. That familiar, convenient drawer is gone, likely pulled out for a deep clean and never quite made it back in. Or perhaps it was accidentally dislodged during a frantic search for leftover spaghetti. Whatever the reason, that empty cavity is a minor but persistent annoyance. It disrupts your kitchen’s flow and, more importantly, your food storage strategy. The good news? Putting that drawer back is almost always a straightforward, no-tools-required process. It’s less about complex mechanics and more about understanding the simple, clever design Whirlpool engineers built into your fridge. This guide will walk you through it with the patience of a friend showing you a simple trick, turning that moment of frustration into a two-minute victory of restored order.
Before we dive in, take a breath. This isn’t a repair; it’s a reassembly. The components are designed to fit together intuitively. The most common hurdles are simple: misaligned rails, a forgotten plastic stop, or debris in the track. We’ll cover how to diagnose and overcome each one. Whether you’re dealing with a high-humidity crisper drawer for your greens, a low-humidity meat drawer, or a convenient deli drawer with a divider, the principles are the same. By the end of this article, you’ll not only have your drawer back in place but also understand why it fits that way, which will save you future headaches. Let’s get that organizational cornerstone back where it belongs.
Know Your Drawers: Crisper, Meat, and Deli – What’s the Difference?
Whirlpool, like most major appliance brands, optimizes refrigerator storage by designing specialized drawers for different food types. Using the wrong drawer for the wrong food can lead to premature spoilage. Understanding which drawer you’re handling is the first step to correct reinstallation and optimal food preservation.
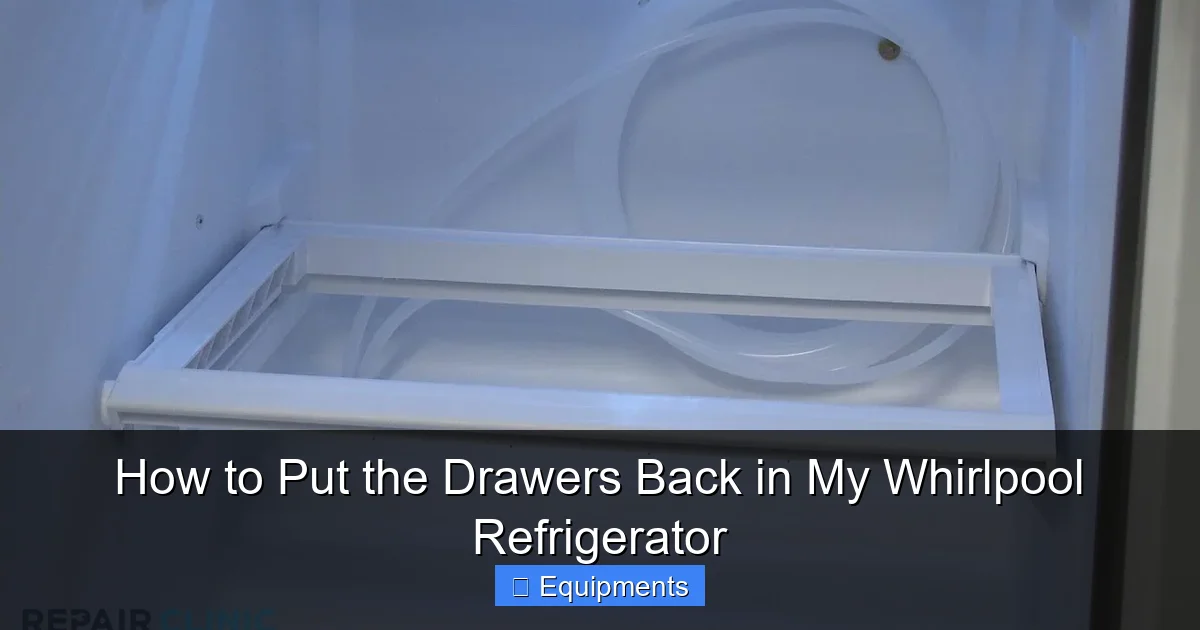
Visual guide about How to Put the Drawers Back in My Whirlpool Refrigerator
Image source: refrigeratorsolutions.com
The High-Humidity Crisper Drawer
This is typically the widest drawer, often located at the bottom of the fresh food compartment. Its primary job is to trap moisture, creating a high-humidity environment perfect for vegetables and fruits that wilt easily—think lettuce, spinach, broccoli, and berries. It usually has a sliding plastic humidity control on the front. When the slider is closed (often marked with a fruit or vegetable icon), it seals the drawer vents, trapping ethylene gas and moisture. When open, it allows for more airflow. When reinstalling, ensure this humidity slider is in the position you prefer (usually closed for most veggies) before sliding the drawer fully in, as the rail mechanism can sometimes obstruct the slider if the drawer is only partially inserted.
The Low-Humidity Meat/Deli Drawer
Often situated next to or below the crisper, this drawer is designed for foods that benefit from drier, more circulated air—like meats, cheeses, and cold cuts. It may have a slightly different rail system, sometimes with a fixed front panel instead of a full-width drawer front. Some models feature a “Meat” drawer with a sealed lid or a specific temperature zone. Its humidity control, if present, is set to “open” to allow moisture to escape, preventing condensation that can accelerate bacterial growth on meats. Key tip: This drawer might have a plastic “stop” or “bump” on its back interior wall that must align with a corresponding tab in the cabinet. Forcing it in without alignment can break this delicate plastic piece.
The Dedicated Deli Drawer with Divider
Many newer Whirlpool models, especially French door styles, feature a full-width drawer at the bottom with a built-in adjustable divider. This is your go-to for party platters, large deli purchases, or organizing bulky items. The divider slides on tracks inside the drawer. When reinstalling the main drawer body, ensure the divider is pushed fully to one side or removed entirely to avoid it catching on the cabinet frame as you slide the drawer in.
Pro Identification Trick: If the labels have worn off, feel the front. The crisper often has a textured or ribbed plastic front panel. The meat/deli drawer may have a smoother front or a distinct “Meat” icon. When in doubt, consult your user manual—it will have an exploded parts diagram that is worth its weight in gold.
Essential Pre-Installation Checklist: Prep Work for Success
Rushing to slide a drawer back in without a quick check-up is the #1 cause of repeat problems—drawers that stick, don’t seal, or fall off again. Spend 60 seconds on this prep checklist.
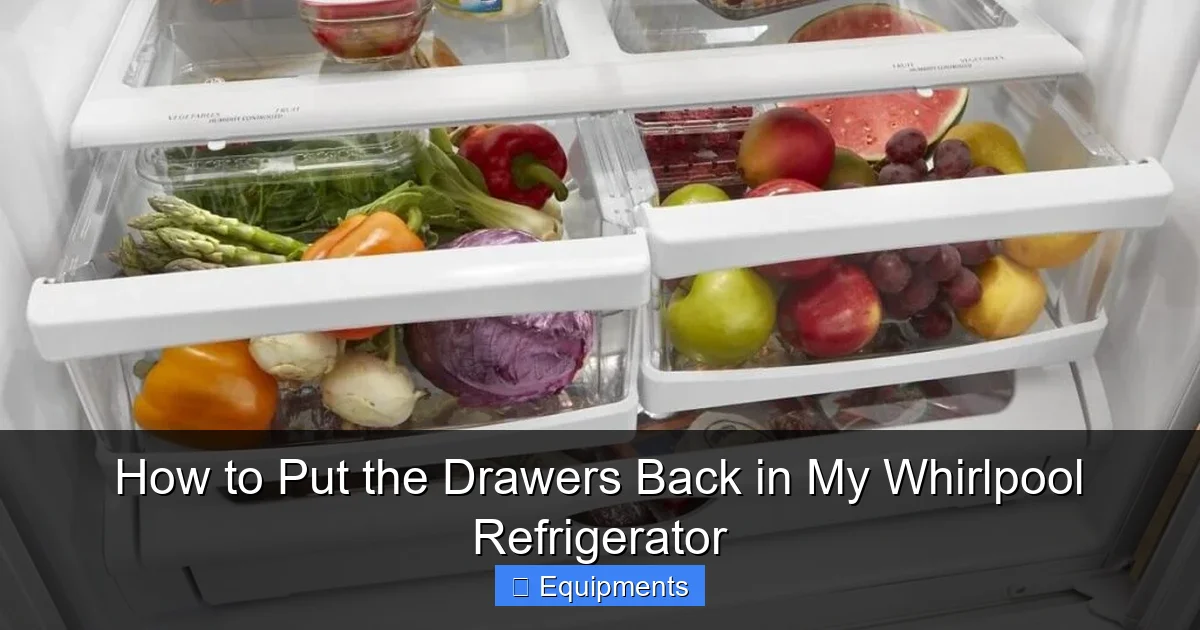
Visual guide about How to Put the Drawers Back in My Whirlpool Refrigerator
Image source: refrigeratorsolutions.com
Step 1: Power Down for Peace of Mind
This is non-negotiable for safety and to prevent accidental activation of any electronic features (like an in-drawer light or temperature sensor). Unplug the refrigerator from the wall outlet. If the plug is inaccessible, switch off the dedicated refrigerator circuit breaker in your home’s electrical panel. Wait 30 seconds. This ensures any residual power is drained and protects you and the appliance’s electronics.
Step 2: The Great Clean-Up (Inside the Cavity)
With the drawer out, you have a perfect, rare opportunity to clean the drawer cavity—the space where the drawer lives. Use a damp cloth with a mild solution of dish soap and water. Pay special attention to the rail tracks on both the left and right sides. Food particles, sticky spills, or ice crystals (in very cold settings) can build up here, creating a bump that stops the drawer from seating fully. A clean, dry track is a smooth track. While you’re there, check for any broken plastic pieces. Sometimes a small tab or clip on the drawer itself or inside the cabinet can snap off. If you find a broken piece, the drawer may not lock in place correctly, and you may need to order a replacement part.
Step 3: Inspect the Drawer Itself
Turn the drawer over and examine the rear. You’ll see the plastic rails or wheels that engage with the cabinet tracks. Ensure they are not cracked, warped, or missing. Wipe them down as well. Check the back interior wall for that potential “stop” tab mentioned earlier. Also, if your crisper drawer has a separate, small plastic humidity control piece (a little flap that slides), make sure it’s attached and moves freely. Sometimes this small piece gets dislodged during removal and needs to be snapped back into its housing on the drawer front before installation.
Step 4: Gather Your Tools (You Probably Don’t Need Any!)
For most Whirlpool models, this is a bare-handed job. However, have a flashlight handy to see deep into the dark cavity. A small mirror can help you check rail alignment from the side. If you suspect a broken part, you’ll need your model number (usually on a sticker inside the fridge on a side wall) to order replacements online or through Whirlpool.
The Main Event: Step-by-Step Reinstallation for Any Drawer Type
Now, the core procedure. The universal rule: Angle matters, alignment is everything. Most refrigerator drawers are not meant to be pushed in perfectly flat from the get-go. They require a slight upward tilt at the front.

Visual guide about How to Put the Drawers Back in My Whirlpool Refrigerator
Image source: thekitchenix.com
Universal Step 1: The Tilt and Hook
Grab the drawer by its front handle or sides. Lift the front of the drawer slightly, creating a 10-15 degree angle (the front is higher than the back). Your goal is to get the rear wheels or rails at the back of the drawer onto the corresponding tracks inside the refrigerator. You should feel a slight “hook” or “drop” as the rear components engage with the tracks. Do not force it. If it doesn’t drop into place easily, lower the angle slightly and try again. This angle allows the rear mechanism to clear the front edge of the cabinet opening and find its home on the rails.
Universal Step 2: The Gentle Descent and Slide
Once you feel that solid engagement at the back, slowly and gently lower the front of the drawer until it is parallel with the floor. You should now be able to slide the drawer forward into the cabinet. Push it in smoothly until it meets resistance. Do not slam it. The resistance you feel is the front of the drawer encountering the cabinet’s front wall or a built-in stop.
Universal Step 3: The Final Seat and the “Click”
Apply firm, even pressure on the front of the drawer to push it fully closed. You should hear and feel a distinct solid “CLUNK” or “CLICK”. This is the drawer’s front panel engaging with the refrigerator’s inner door gasket or a latch mechanism, creating the seal that keeps the cold air in and the humidity in (for the crisper). If it doesn’t click, pull the drawer out about an inch and try pushing it in again with a bit more force. Sometimes the rails need to be jiggled slightly to align perfectly for that final seat. The drawer should now be flush with the surrounding shelf or wall of the fridge. Give it a gentle tug forward; it should not come out easily. This confirms it’s locked in.
Model-Specific Nuances: What to Watch For
While the tilt-and-hook method works for 90% of Whirlpool top-freezer and side-by-side models, French door and some newer bottom-freezer styles have variations.
- Full-Width Deli Drawers (French Door): These are heavy. The tilt is even more critical. Sometimes you need to insert the drawer at a 30-degree angle, get the rear wheels on, then lower it. The divider inside must be fully retracted.
- Drawers with a “Soft-Close” Damper: Some high-end models have a hydraulic or pneumatic damper at the back that slows the closing. When reinstalling, ensure the damper arm (a small plastic piece on the drawer’s rear) is properly hooked into its socket on the cabinet wall before lowering the drawer. If you skip this, the drawer will slam shut or not stay closed.
- Drawers that Pull Out Completely: A few models have drawers that remove by lifting straight up. Reinstalling is the reverse: angle the front up, insert the rear hooks into the slots, then lower the front. There is no sliding on side rails.
Troubleshooting: When the Drawer Won’t Seat or Slides Poorly
Even with careful alignment, issues can arise. Here’s your diagnostic guide for the most common post-reinstall problems.
Symptom: The Drawer Slides, But It’s Wobbly or Comes Off the Track
Diagnosis: The rear wheels/rails are not fully engaged on both the left and right tracks. One side may be on, the other off.
Fix: Pull the drawer out completely. Re-engage the universal “tilt and hook” method. As you lower the drawer, watch (or feel) to ensure both sides drop into their tracks simultaneously. You may need to gently wiggle the drawer side-to-side as you lower it to get both sides to catch.
Symptom: The Drawer Hits the Wall or Shelf Before It’s Fully In
Diagnosis: The humidity control slider (on crisper drawers) or an internal divider (on deli drawers) is protruding and catching on the cabinet frame.
Fix: Pull the drawer out halfway. Check the front of the drawer interior. If it’s a crisper, slide the humidity control all the way to one side (usually the “open” position). If it’s a deli drawer, push the internal divider all the way to the left or right, or remove it temporarily. Then try sliding the drawer in again.
Symptom: The Drawer Slides In, But It Doesn’t Seal/Click, and Cold Air Escapes
Diagnosis: The front of the drawer is not flush with the cabinet wall. This is often due to a misaligned rail on one side, or a broken plastic stop/latch at the front of the cabinet that the drawer is supposed to engage.
Fix: Pull the drawer out and inspect the very front edge of the drawer and the corresponding area inside the fridge. Look for a small plastic tab or hook on the drawer that should latch into a hole or on a bracket in the cabinet. Align these and push firmly. If the plastic piece is broken, you’ve identified the problem—you’ll need a replacement part.
Symptom: The Drawer is Incredibly Stiff to Open and Close
Diagnosis: Debris in the rail tracks is the prime suspect. Also, over time, plastic rails can become slightly warped from heat or weight.
Fix: Remove the drawer. Clean the cabinet rails and the drawer’s wheels/rails thoroughly with a damp cloth. Dry completely. For stiffness, a tiny dab of food-safe silicone grease (available at hardware stores) on the plastic rails can work wonders. Never use WD-40 or petroleum-based lubricants near food storage areas. If warping is severe, the rail may need replacing.
Beyond Reinstallation: Maintenance for Lifetime Smooth Operation
Getting the drawer back in is one thing; keeping it working perfectly for years is another. A little proactive care prevents 95% of future drawer issues.
Regular Cleaning: The 30-Second Habit
Every time you do a deep fridge clean (monthly or bimonthly), take the drawers out. Wash them with warm, soapy water. This is crucial for crisper drawers, where moisture and organic matter from vegetables can promote mold and mildew on the drawer’s underside and the cavity floor. Rinse and dry thoroughly before reinserting. This cleaning ritual also lets you inspect the rails and seals for wear.
Mind the Weight Limits
These drawers are designed for food, not for standing on or using as a step stool. Overloading them with heavy items (like multiple gallon jugs of milk or large, dense bags of potatoes) can warp the plastic rails and drawer bottom over time. Distribute weight evenly. The deli drawer is often the strongest due to its full-width design, but even it has limits.
Check the Humidity Control Mechanism
For crisper drawers, periodically slide the humidity control back and forth. It should move smoothly and not stick. If it sticks, it’s likely due to dried-on gunk. Remove the drawer and clean the slider track with a cotton swab dipped in white vinegar, then rinse. A sticking slider defeats the purpose of the crisper and can cause the drawer to not seal if it’s in the wrong position.
Listen to Your Fridge
When you close the drawer, it should make a soft, solid sound as it seals. If you hear a rattle, a high-pitched squeak, or feel grinding, it’s an early warning sign. Remove the drawer and investigate immediately. Catching a misalignment or debris issue early prevents a plastic tab from snapping off under pressure.
When to Call a Pro: Signs of a Bigger Problem
While drawer reinstallation is a classic DIY win, some symptoms point to a larger appliance issue that requires a technician.
- Repeated Drawer Failure: If you’ve reinstalled a drawer correctly, but it falls off or won’t stay seated within a week, the rail mounting brackets inside the cabinet wall may be cracked or broken. This is a more involved repair.
- Accompanying Temperature Issues: If your newly reinstalled crisper drawer isn’t keeping food fresh, or the fridge/freezer temperatures are fluctuating, the problem may be a faulty damper vent (which controls air flow to the drawer) or a failing temperature sensor, not the drawer itself.
- Visible Cracked or Broken Rails: If the plastic rail on the drawer or the track inside the fridge is snapped, you’ll likely need a replacement part. A technician can source the correct part and install it, or you can order it using your model number and install it yourself if you’re comfortable.
- Ice Buildup in the Drawer Cavity: If, after reinstalling, you notice ice forming on the rails or the back wall of the drawer space, you have a defrost drain issue or a compromised door seal. This is beyond drawer scope and needs professional diagnosis.
For any of these, have your Whirlpool refrigerator’s exact model number ready. You can find it on a sticker inside the fresh food compartment on a side wall or on the ceiling. This number is the key to getting the right parts and accurate advice.
Conclusion: Your Restored Order
There’s a peculiar satisfaction in solving a small, nagging household problem with your own two hands. That empty space in your Whirlpool refrigerator is no longer a symbol of minor defeat but a testament to your practical know-how. You’ve moved beyond frustration to understanding—you know the difference between a crisper and a meat drawer, you’ve felt the satisfying “click” of a properly sealed slide, and you’ve armed yourself with troubleshooting steps for the future. This simple act of reengagement with your appliances fosters a mindset of maintenance and care that extends to the whole home. So, take a moment to admire your work. Slide that drawer in and out a few times. Enjoy the smooth glide and the perfect seal. Then, fill it with something wonderful—maybe those fresh berries you almost forgot about. Your kitchen is back in order, one perfectly placed drawer at a time.
Frequently Asked Questions
Why does my Whirlpool refrigerator drawer keep falling off the track?
This is almost always due to one of the rear wheels or rails not being fully seated on its corresponding track inside the cabinet. Ensure you lift the front of the drawer to engage the back mechanism first, and that both sides catch evenly. Also, inspect for any broken plastic clips on the drawer or cabinet.
Can I put my crisper drawer back in with the humidity control closed?
Yes, and for most vegetables, you should. The closed position traps humidity. However, if the drawer won’t slide in, the humidity slider may be protruding. Pull the drawer out slightly, slide the control to the fully open position, finish inserting the drawer, then close the slider once the drawer is seated.
What if the plastic rail on my drawer is broken? Can I still use it?
Technically, you might be able to, but it’s not advisable. A broken rail means the drawer is unsupported and will likely jam, fall, or damage the cabinet rails further. You should order a replacement drawer rail or the entire drawer bottom from Whirlpool using your model number.
Is it okay to use a lubricant like WD-40 on the drawer rails?
Absolutely not. WD-40 is a solvent and degreaser, not a long-term lubricant, and it is toxic. It can degrade the plastic rails and contaminate your food storage area. For stiff drawers, use a tiny amount of food-safe silicone grease after thoroughly cleaning the rails with soapy water.
My drawer goes in but doesn’t pull out smoothly—what’s wrong?
>The most common cause is food debris or sticky spills caked in the cabinet rail tracks. Remove the drawer and clean both the tracks on the fridge and the wheels/rails on the drawer with a damp cloth. Dry completely. Also, check that no item inside the drawer (like a heavy bag) is pressing against the back wall, preventing smooth retraction.
Should I unplug the refrigerator before taking out or putting in drawers?
Yes, it’s a critical safety step. Unplugging eliminates any risk of an electronic component (like an in-drawer light or temperature sensor) shorting out if you accidentally pinch a wire. It also prevents the refrigerator from trying to run its cooling cycle while the interior is open and unsealed, which can cause frost buildup.