Cutting a hole in a stainless steel sink requires careful planning, the right tools, and strict safety measures. You must securely clamp the sink, use a center punch and pilot hole, and cut slowly with abundant lubricant to prevent warping and burrs. Always wear heavy-duty gloves and eye protection, and finish by thoroughly deburring the sharp edges. Patience and the correct technique are non-negotiable for a professional result.
So, you need to cut a hole in your stainless steel sink. Maybe you’re installing a new faucet, a soap dispenser, or a filtered water system. Whatever the reason, the thought of cutting into that sleek, tough metal can be intimidating. You might picture sparks, warped metal, and a ruined sink. But here’s the good news: with the right approach, you can cut a clean, precise hole in a stainless steel sink safely and successfully as a DIY project. It’s less about brute force and more about finesse, patience, and respecting the material. This guide will walk you through every single step, from gathering your tools to the final smooth finish, ensuring you avoid the common pitfalls that turn this job into a disaster.
Stainless steel is fantastic for sinks because it’s durable, hygienic, and corrosion-resistant. However, its hardness and tendency to work-harden mean it demands a specific cutting strategy. Rushing, using the wrong blade, or skipping lubrication will lead to a ragged hole, a warped sink basin, or a broken tool—and potentially an injury. We’re going to demystify the process. Think of it as a conversation with a seasoned tradesperson who’s going to tell you exactly what works, what doesn’t, and why. By the end, you’ll have the confidence and knowledge to pick up your tools and get the job done right the first time.
Key Takeaways
- Safety First: Always wear cut-resistant gloves, safety goggles, and long sleeves. Secure the sink immovably to a stable work surface before cutting.
- Tool Choice is Critical: A bi-metal hole saw with a pilot hole is ideal for large holes. For smaller or irregular shapes, a jigsaw with a fine-tooth metal blade is effective.
- Measure Twice, Cut Once: Double-check all measurements and markings from the sink’s underside. Use a center punch to create a definitive starting point for your drill bit.
- Lubricate Relentlessly: Use cutting oil or WD-40 constantly during the cutting process to reduce heat, prevent blade dulling, and minimize the risk of warping the thin metal.
- Pilot Hole is Mandatory: Never start a hole saw directly on the surface. Drill a 1/4″ pilot hole inside your marked circle to guide the hole saw’s center bit and prevent walking.
- Go Slow and Steady: Apply minimal, steady pressure. Let the tool do the work. High speed creates heat, which warps stainless steel and ruins blades.
- Deburr Immediately: The cut edge will be dangerously sharp. Use a deburring tool, file, or sandpaper to smooth all edges inside and out right after cutting.
📑 Table of Contents
- Essential Preparation: The Foundation of a Successful Cut
- Tool Selection: Hole Saw vs. Jigsaw
- The Step-by-Step Cutting Process
- Dealing with Challenges and Troubleshooting
- Finishing Touches: From Rough Cut to Professional Result
- Common Mistakes to Absolutely Avoid
- Conclusion: Confidence Through Careful Execution
Essential Preparation: The Foundation of a Successful Cut
You cannot skip preparation. Jumping straight to cutting is the number one cause of project failure. This phase is about creating a stable, safe, and precisely marked workspace. A few minutes of forethought saves hours of frustration and a costly sink replacement.
Gathering Your Tools and Materials
Having everything within arm’s reach is key to a smooth workflow. You’ll need:
- Safety Gear: Heavy-duty cut-resistant gloves (not just leather, but specifically rated for metal), ANSI-approved safety goggles, and long sleeves. Hearing protection is also wise if using power tools for extended periods.
- Measuring & Marking: A reliable tape measure, a fine-tip permanent marker, a center punch, and a hammer. A combination square or level can help ensure your mark is perfectly aligned.
- Drilling & Cutting Tools: For holes 1-1/4″ to 2-1/2″ in diameter (common for faucets), a bi-metal hole saw kit is your best friend. Ensure it’s rated for stainless steel. For smaller holes (like for a dispenser) or rectangular openings, a jigsaw with a fine-tooth (24 TPI or higher) metal-cutting blade is essential. You’ll also need a standard drill with a 1/4″ drill bit for the pilot hole.
- Lubrication: Cutting oil or a multipurpose lubricant like WD-40. Have a brush or drip bottle handy.
- Clamping & Support: At least two heavy-duty C-clamps or bar clamps. You’ll also need a sacrificial work surface—a sturdy piece of 3/4″ plywood or a thick piece of MDF that’s larger than your sink.
- Deburring & Finishing: A metal deburring tool (a handheld tool with a rotating blade), a small half-round file, and 120-grit sandpaper or a Scotch-Brite pad.
Creating a Secure, Stable Workstation
The biggest mistake is trying to cut the sink while it’s installed in the countertop. You must remove the sink from the counter. Even if it’s a drop-in model, the lip and the countertop’s edge create an unstable, unsafe cutting platform and can damage your countertop from heat and vibration.
Place your sink upside down on the sacrificial plywood board. The underside is where you’ll do all your work. Now, clamp it down aggressively. Position the clamps so they hold the sink firmly against the wood without distorting the sink’s rim. You should not be able to shift the sink at all when you push on it. This clamping is absolutely critical—any movement while the hole saw or jigsaw is engaged is dangerous and will ruin your cut.
Precise Marking: Where to Cut and How
Accuracy starts with a perfect mark. Use the template that came with your faucet or accessory. If you don’t have one, carefully measure from the sink’s centerline or existing holes to determine the exact location. Place the template on the underside of the sink and trace the hole with your fine-tip marker.
For a circular hole, your traced circle is your guide. Now, use your center punch and hammer to make a distinct dimple right in the center of that circle. This dimple is your pilot hole’s anchor. It prevents the drill bit from wandering when you start. Take your time here; a misplaced punch mark means a misplaced hole.
Tool Selection: Hole Saw vs. Jigsaw
Choosing the right tool for the shape and size of your hole is half the battle. Both have their place, but they operate very differently on stainless steel.
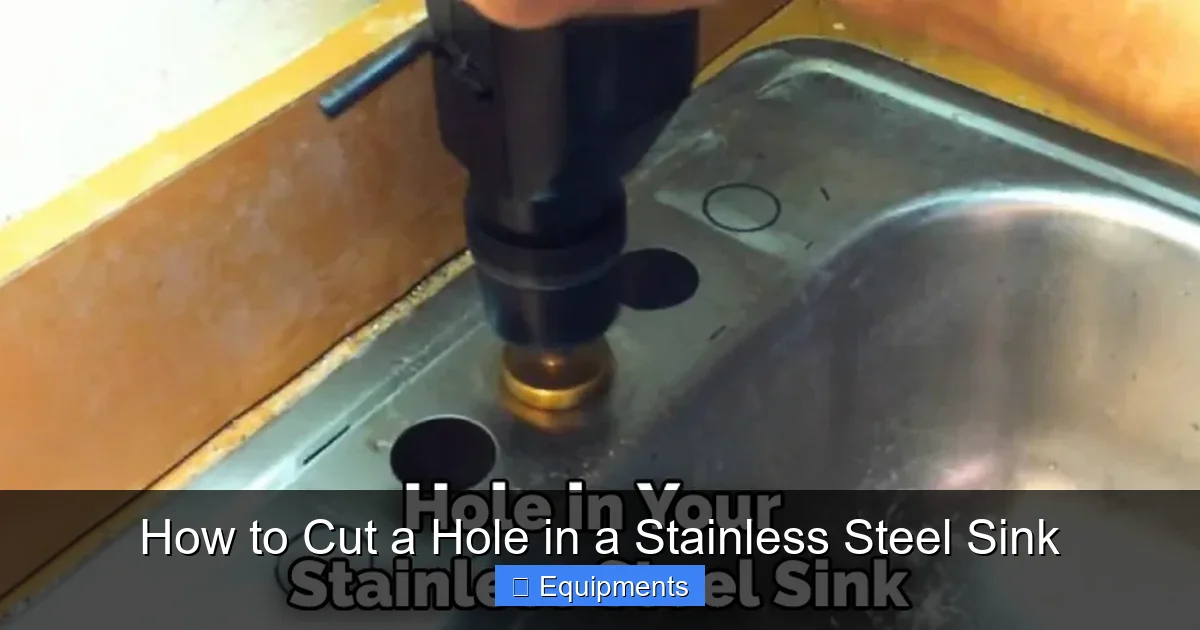
Visual guide about How to Cut a Hole in a Stainless Steel Sink
Image source: theplumbero.com
The Bi-Metal Hole Saw: Best for Perfect Circles
A hole saw is a cylindrical saw blade with teeth on the edge, mounted on an arbor with a pilot bit. The pilot bit centers the saw and guides it. For standard round faucet holes (usually 1-1/4″ or 1-3/8″), a hole saw is the fastest, cleanest method if used correctly.
Key Selection Tips:
- Look for a “bi-metal” construction. The high-speed steel teeth are welded to a flexible carbon steel body, allowing it to handle the stress of cutting hard metal without breaking.
- A “deep-cut” or “two-piece” design can be helpful, as the pilot bit is separate from the cup, allowing you to remove the cup without the entire arbor getting stuck.
- Size: Buy a set. Having a range (1″ to 2-1/2″) covers almost every household sink accessory.
Critical Technique: The hole saw’s weakness is binding and overheating. This is where constant lubrication and slow speed are paramount. A cordless drill on a low gear setting is often better than a high-speed corded drill.
The Jigsaw: Best for Squares, Rectangles, and Irregular Shapes
Need to cut a rectangular hole for an under-sink filtration system, or a custom shape? The jigsaw is your tool. Its reciprocating blade allows for intricate cuts.
Key Selection Tips:
- Blade is everything. You need a blade specifically for metal, with a high TPI (Teeth Per Inch). 24 TPI or higher is recommended for stainless steel. Look for blades labeled “bi-metal” or “for stainless steel.”
- Blade length matters. For a sink’s thin material (usually 16-20 gauge), a shorter blade (2-3″) gives more control and less flex than a long 4″ blade.
Critical Technique: The jigsaw blade can easily grab and bend or warp the thin stainless steel. You must support the metal around your cut line with a solid backer (your plywood board does this) and use a very slow, controlled stroke. Let the blade do the work; forcing it causes vibration and ragged edges.
The Step-by-Step Cutting Process
Now, with your sink clamped, your mark punched, and your tool selected, it’s time to cut. The process has distinct phases for both tools, but the principles of slow speed and heavy lubrication are universal.
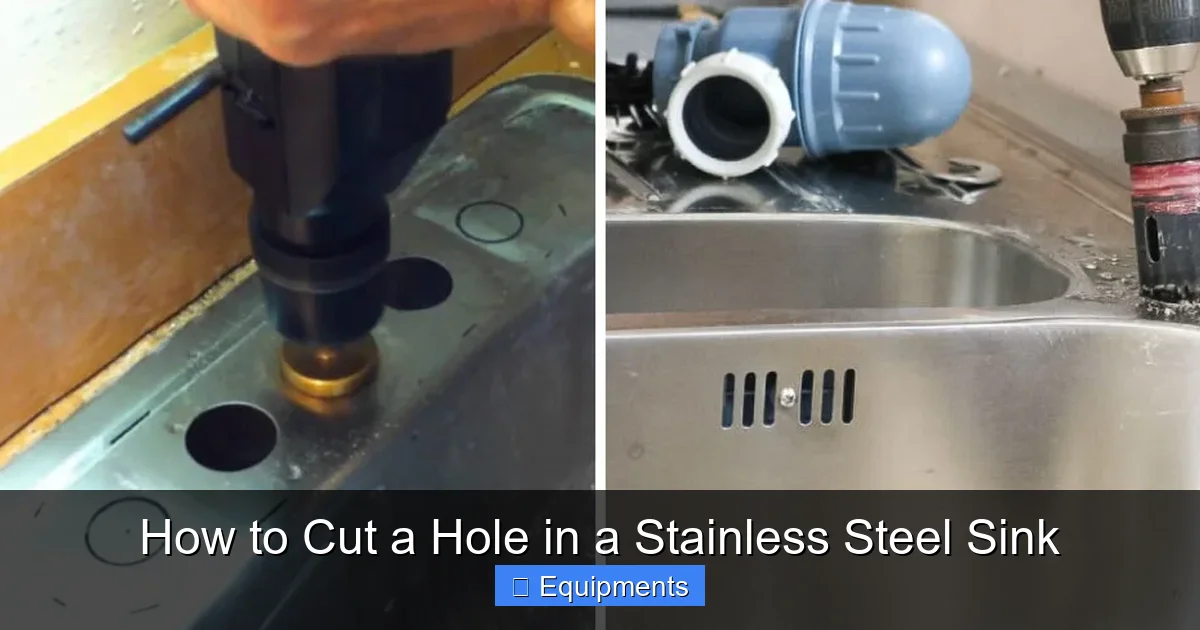
Visual guide about How to Cut a Hole in a Stainless Steel Sink
Image source: thekitchenix.com
Phase 1: The Pilot Hole (For Hole Saws)
This is non-negotiable. Do not, under any circumstances, place the hole saw’s cup directly on the metal and start the drill. The pilot bit is too short to start a cut on a curved surface; it will skitter across the metal, scratching it and destroying your alignment.
- Insert a standard 1/4″ drill bit into your drill.
- Place the drill bit tip directly into the center punch dimple you created.
- Apply a drop of cutting oil to the spot.
- Drill straight down at a moderate speed until you penetrate the metal. You only need a hole deep enough for the hole saw’s pilot bit to engage—about 1/2″ is sufficient.
- Remove the drill bit. You now have a perfect guide hole.
Phase 2: The Main Cut
For the Hole Saw:
- Remove the drill bit and install the hole saw arbor (the shaft with the pilot bit) into your drill.
- Place the hole saw’s pilot bit into the guide hole you just drilled. Ensure the saw’s cup is flat against the sink’s underside.
- Apply a generous amount of cutting oil to the area where the teeth will contact the metal.
- Set your drill to a low-to-medium speed (500-800 RPM max). High speed generates immense heat.
- Hold the drill firmly with both hands. Apply steady, moderate pressure straight down. Do not lean on it.
- As you cut, you’ll feel the drill struggle slightly. Keep constant, even pressure. Stop frequently to brush away metal shavings and reapply lubricant.
- Once the pilot bit pokes through the other side, you’re almost done. Continue cutting until the cup breaks through completely. You may feel a slight drop in resistance.
- To remove the hole saw, keep the drill running in reverse for a second while gently pulling it out. This prevents the teeth from grabbing the thin edge of the cut.
For the Jigsaw:
- Install your fine-tooth metal blade, ensuring it’s tight and not bent.
- Place the jigsaw’s base plate flat on the sink, with the blade positioned just outside your marked line. It’s best to cut outside the line for a cleaner edge, then file to the exact line if needed.
- Apply cutting oil along the starting point of your cut.
- Set the jigsaw to a low speed if it has variable speed control.
- Start the saw and let it reach full speed before gently easing the blade into the metal at the start of your line. Use the saw’s base plate as a guide against your straight edge if cutting a rectangle.
- Move the saw at a pace that allows the teeth to cut, not grind. You should see clean, continuous chips, not a shower of sparks.
- Support the cut-out piece as it becomes free. It can fall and dent the sink if you’re not ready.
- Do not force the saw around corners; let the blade’s small stroke handle the turn.
Dealing with Challenges and Troubleshooting
Even with preparation, you might encounter issues. Knowing how to handle them is key.
Visual guide about How to Cut a Hole in a Stainless Steel Sink
Image source: shop.kitchenequipmentaustralia.com.au
Preventing and Identifying Warping
Stainless steel sinks are thin. The #1 cause of warping is heat buildup from cutting too fast or with inadequate lubrication. If you feel the metal getting hot to the touch (stop and check carefully), you are warping it. Stop immediately. Let the sink cool completely. You may need to re-clamp it, as cooling can cause slight movement. For severely warped areas, you might need to gently work them flat with a rubber mallet and a wooden block, but prevention is infinitely better.
Managing a Stuck Hole Saw
This happens when the saw binds due to heat, lack of lube, or dull teeth. If the drill starts to labor excessively or stall:
- Stop the drill immediately.
- Do not force it. This is how arbor shafts break.
- Gently wiggle the hole saw side-to-side while pulling up slightly to break the bond.
- Clear all metal shavings from the kerf (the cut).
- Reapply a heavy coat of cutting oil.
- Resume cutting with even less pressure and more frequent pauses.
Fixing a Ragged or Uneven Edge
If your cut isn’t perfectly smooth, don’t panic. The finishing stage is designed to fix this. A ragged edge from a hole saw often means the blade was dull or binding. For a jigsaw, it means the blade was bent or speed was too high. You will clean this up with files and sandpaper. For minor burrs, a deburring tool alone may suffice. For significant roughness, use a half-round metal file, always pushing the file away from the sink’s interior (so you don’t scratch the finished surface).
Finishing Touches: From Rough Cut to Professional Result
The cut is done, but the job isn’t. The edge left behind is a razor-sharp, dangerous lip that can cut skin and catch debris. Finishing is a safety and aesthetics requirement.
Deburring: The Non-Negotiable Final Step
Take your metal deburring tool. This is a handheld tool with a rotating, multi-fluted blade that shaves a microscopic layer of metal, removing the sharp burr. Run it carefully around the entire circumference of the hole on both the top and bottom sides of the sink. You’ll feel the burr disappear and the edge become smooth to the touch. For the interior side (the side that will be visible when the sink is installed), take extra care. Follow up with 120-grit sandpaper or a Scotch-Brite pad to achieve a uniformly brushed finish that matches the sink’s grain.
Pro Tip: After deburring, run your finger (carefully!) along the edge. It should feel smooth, not catch on your skin. Check both sides.
Cleaning and Final Inspection
Wipe the entire sink down with a clean rag and a mild degreaser or mineral spirits to remove all cutting oil and fine metal particles. These particles can cause rust spots if left. Inspect the hole under good light. It should be the correct size, free of warps, and have smooth, safe edges. Test-fit your faucet or accessory. If it’s tight, you can carefully file the hole a tiny bit larger, but it’s better to be slightly undersized and file than oversized and unusable.
Common Mistakes to Absolutely Avoid
Let’s review the fatal errors that separate a successful cut from a ruined sink.
- Cutting the sink while installed: This risks damaging countertops, provides no support, and is unsafe. Always remove it.
- Skipping the pilot hole: Guarantees a wandering hole saw and a ruined sink surface.
- Using the wrong blade: A wood-cutting hole saw or jigsaw blade will dull instantly, overheat, and create a terrible cut. Use bi-metal or carbide-tipped blades for metal.
- Cutting dry or too fast: Heat is the enemy. It warps metal and destroys tool teeth. Lubricate constantly and cut slowly.
- Using insufficient clamping: A shifting sink is a major safety hazard and will cause the tool to bind and jump.
- Neglecting deburring: Leaves a hazardous sharp edge that can cause serious injury during installation or use.
- Wearing improper safety gear: Thin metal shards and sparks fly. Protect your eyes and hands.
Conclusion: Confidence Through Careful Execution
Cutting a hole in a stainless steel sink is a perfectly manageable DIY task that comes down to three core principles: immobilization, lubrication, and patience. You’ve now got the roadmap. From the crucial initial steps of removing the sink and creating a rock-solid work setup, to the deliberate, oil-fed motion of the hole saw or jigsaw, and finally to the meticulous deburring that ensures a safe, professional finish—each phase builds on the last.
Remember, this isn’t a race. The material demands respect. If you feel the tool heating up or the sink resisting, stop. Reassess your lubrication and speed. By embracing a methodical pace, you protect your investment in your sink and your own safety. The satisfaction of installing that new faucet or appliance yourself, knowing you created a perfect, clean hole, is immense. You’ve transformed a daunting task into a series of simple, controllable steps. Now, take a deep breath, gather your gear, and get to work. You’ve got this.
Frequently Asked Questions
Can I use a regular wood hole saw on stainless steel?
No. A standard wood hole saw has high-carbon steel teeth that will dull almost instantly on stainless steel. You must use a bi-metal hole saw specifically designed for metal, which has harder, more flexible teeth welded to a steel body.
How do I prevent the stainless steel from warping while cutting?
Prevent warping by using constant cutting oil for lubrication, cutting at a very slow drill/jigsaw speed (under 800 RPM), and applying only steady, moderate pressure. The goal is to cut, not grind, to minimize heat buildup. Stop frequently to let the metal cool if it feels warm.
What if I accidentally drill the hole in the wrong place?
For a small misalignment, you may be able to use the new hole if your fixture’s escutcheon (decorative plate) is large enough to cover both holes. Otherwise, the sink is likely ruined. Stainless steel is very difficult to patch. For a large rectangular mistake, you may need to cut the entire section out and weld in a new patch, which is a professional job.
Is it better to cut from the top or bottom of the sink?
Always cut from the underside (bottom) of the sink. The interior surface of the sink has a brushed finish that you want to preserve without scratches. Cutting from the bottom protects the visible interior surface. Any minor scratches on the exterior underside will be hidden.
My hole saw is stuck and won’t come out. What do I do?
Do not panic or yank on the drill. Stop the drill. Gently wiggle the hole saw side-to-side while pulling up to break the friction bond. Clear all metal shavings from the cut’s edge. Apply more cutting oil. Try running the drill in reverse for a second while pulling up. If it remains stuck, you may need to carefully finish the cut from the other side (if accessible) or use a small chisel to break the remaining “web” of metal.
Can I use a grinder with a cut-off wheel to cut the hole?
We strongly advise against it. A grinder is extremely aggressive, generates massive localized heat (guaranteeing warping), is very difficult to control for a precise round hole, and is highly dangerous on a small, thin, curved surface like a sink. It is not the right tool for this job and greatly increases the risk of injury and material damage.