Organizing a small kitchen without a pantry is all about maximizing vertical space, utilizing every cabinet and drawer efficiently, and adopting a “everything in its place” philosophy. By using clear containers, drawer organizers, wall-mounted racks, and implementing a one-in-one-out rule, you can create a highly functional and clutter-free cooking area. The key is to be intentional with every storage decision and regularly purge unused items.
Let’s be real: a small kitchen without a pantry can feel like a Tetris game where you’re constantly losing. The dream of a walk-in closet for all your dry goods, small appliances, and bulk items vanishes, replaced by the reality of cramped cabinets and crowded countertops. But here’s the empowering truth: a lack of a dedicated pantry doesn’t have to mean a lack of organization or functionality. In fact, organizing a small kitchen without a pantry forces you to become incredibly creative, intentional, and efficient with every single square inch. It’s not about having less; it’s about using what you have smarter. This comprehensive guide will walk you through a complete transformation, turning your cramped cooking quarters into a model of streamlined efficiency and calm.
Key Takeaways
- Think Vertically: Use wall space, cabinet doors, and the sides of cabinets with racks, hooks, and magnetic strips to free up precious shelf and counter space.
- Contain and Label Everything: Uniform, clear bins and containers in cabinets and drawers create instant order and make items easy to find, preventing “black hole” syndrome.
- Optimize Cabinet Interiors: Install adjustable shelves, pull-out organizers, and tiered racks to utilize deep cabinet space and eliminate the “back of the cabinet” abyss.
- Declutter Ruthlessly: Regularly audit your kitchen items. If you haven’t used it in a year (except for special occasion items), consider letting it go to make room for essentials.
- Create Designated Zones: Group items by use (baking, cooking, prep) even if they are in different cabinets. This streamlines workflow and ensures related tools are together.
- Use Multi-Functional Furniture: Choose an island or cart with storage, a table with drawers, and furniture that serves dual purposes to gain extra storage without a dedicated pantry.
- Maintain the System: A small kitchen requires daily mindfulness. Spend 5-10 minutes each evening returning items to their designated homes to prevent clutter from returning.
📑 Table of Contents
- Step 1: The Great Kitchen Audit – Know What You’re Working With
- Step 2: Master the Art of Vertical Storage – Your Walls Are Prime Real Estate
- Step 3: Cabinet & Drawer Optimization – No More “Black Holes”
- Step 4: Creative Storage Solutions & Unconventional Spaces
- Step 5: The “Zone” System – Designate Homes by Function
- Step 6: The Daily Maintenance Mindset – Staying Organized
- Conclusion: Your Small Kitchen Is Your Superpower
Step 1: The Great Kitchen Audit – Know What You’re Working With
Before you buy a single bin or install a hook, you have to face the music. This is the most critical step. You can’t organize clutter; you can only contain it temporarily. The goal here is to empty, assess, and purge.
Empty Everything Out
Yes, really. Take every single item from every cabinet, drawer, and shelf. This is non-negotiable. Seeing the sheer volume of your possessions in one overwhelming pile on your kitchen table is a powerful motivator. As you empty, create temporary piles: Keep, Donate/Sell, Trash/Recycle, and Maybe.
The Brutal Honesty Test
Now, go through each item in your “Keep” pile with a critical eye. Ask yourself:
- Have I used this in the last 12 months? Be honest. That specialty apron from a conference? The second (or third) set of measuring cups? The bread machine you used twice? If it’s not a seasonal or sentimental item used annually, it’s a candidate for the “Donate” pile.
- Is it broken, expired, or incomplete? Expired spices, canned goods with dents, plastic containers without lids, chipped glasses—these go straight to Trash.
- Does it have a designated, logical home? If you can’t immediately think of where it will live in your new system, it’s a sign it might not be essential.
- Do I love it or is it just “okay”? Your kitchen tools should inspire you to cook. Keep items that are functional and bring you joy.
The “Maybe” pile is a trap. Set a deadline. If you haven’t needed anything from it in 30 days, it goes. This purge will likely free up 20-30% of your current storage volume, which is a massive win before you even start organizing.
Categorize with Purpose
Once purged, group your remaining items into logical categories. Don’t just think “kitchen stuff.” Think:
- Daily Use: Plates, bowls, glasses, everyday pots/pans, utensils.
- Cooking & Baking: Spices, oils, vinegars, baking sheets, mixing bowls, spatulas.
- Food Storage: Containers with lids, foil, plastic wrap, bags.
- Small Appliances: Toaster, blender, coffee maker (only if used daily/weekly).
- Special Occasion: Serving platters, holiday dish sets, fondue pot.
This categorization will directly inform your storage zones later. You now have a clear inventory of what you need to store and how often you access it.
Step 2: Master the Art of Vertical Storage – Your Walls Are Prime Real Estate
In a pantry-less kitchen, you must look up. The space above your counters, the sides of your cabinets, and even the underside of your upper cabinets is a goldmine of storage potential. This is where you reclaim your surfaces.
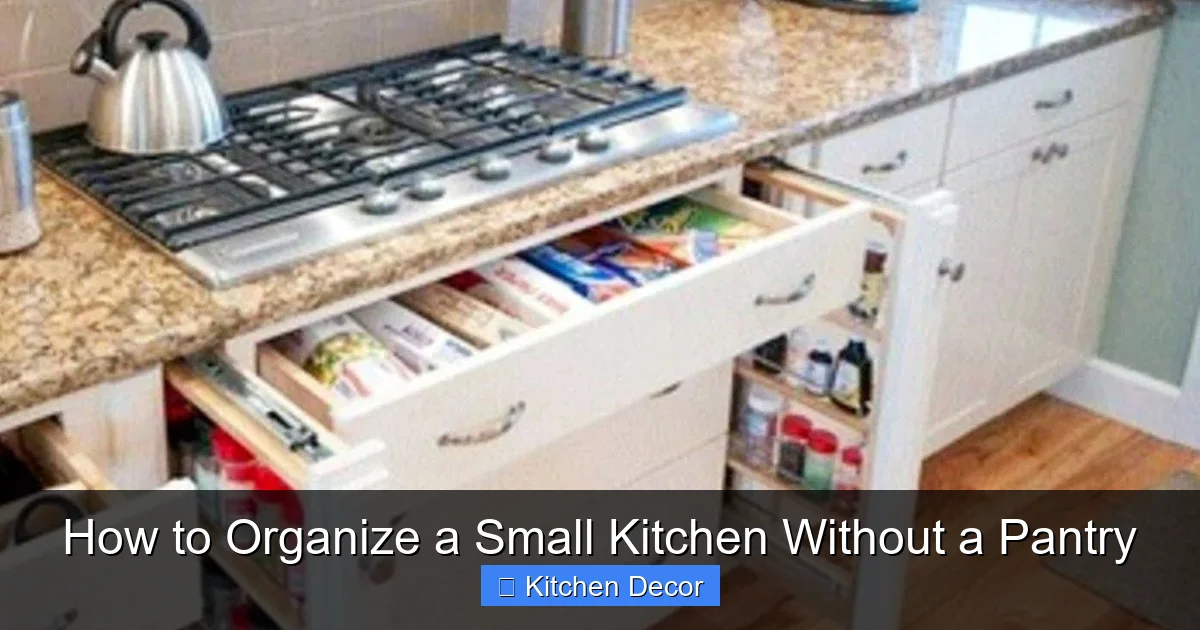
Visual guide about How to Organize a Small Kitchen Without a Pantry
Image source: i.pinimg.com
The Magnetic Magic on Your Cabinet Sides
Install strong magnetic strips on the sides of your upper cabinets (the ones that face into the room). They are perfect for holding:
- Metal spice tins
- Knives (with a magnetic knife strip)
- Metal canisters for utensils
- Small metal bowls or measuring cups
- Scissors and kitchen shears
This gets frequently used metal items off the counter and within easy reach. It’s a sleek, industrial look that maximizes otherwise wasted space.
Racks, Hooks, and Rails Galore
The space between your upper cabinets and countertops is precious. Use it.
- Hanging Pot Racks: If you have high ceilings, a ceiling-mounted pot rack is a fantastic solution for your heaviest cookware. It clears cabinet space and adds a decorative element.
- Wall-Mounted Pot Racks & Rails: A rail (like a pot rail or a narrow towel rail) mounted on the wall or under your upper cabinets can hold pans with S-hooks. This is ideal for your 2-3 most-used pots and skillets.
- Command Hooks & Hanging Baskets: Use adhesive hooks to hang mugs, small baskets for onions/potatoes, or even a colander. A wall-mounted basket is perfect for fruit that doesn’t need refrigeration.
- Tension Rods: Inside a lower cabinet, a tension rod placed just under the lip can be a great spot to hang spray bottles or lids.
Don’t Forget the Cabinet Doors
The inside of cabinet doors is a classic, underused spot. Attach:
- Adhesive spice racks for small jars.
- Small bins for tea bags, packets, or baking supplies.
- A chalkboard or whiteboard for a grocery list or meal plan.
- Hooks for measuring cups, lightweight utensils, or a roll of paper towels.
Be mindful of weight. Cabinet doors aren’t meant for heavy items. Keep it light and frequently accessed.
Step 3: Cabinet & Drawer Optimization – No More “Black Holes”
Now we tackle the primary storage: your cabinets and drawers. The goal here is to eliminate the frustrating “back of the cabinet” where things go to die. You need to see and access everything without a deep excavation.
Visual guide about How to Organize a Small Kitchen Without a Pantry
Image source: i.pinimg.com
Install Adjustable Shelving
If your cabinets have fixed shelves, consider investing in adjustable shelf inserts. These plastic or metal platforms sit on top of an existing shelf, creating a second, higher level. This is perfect for doubling your cabinet space for shorter items like spices, cans, or mugs. You can often find these at home organization stores or online.
Embrace Pull-Out Organizers
This is the single best investment for deep base cabinets. Pull-out shelves (also called slide-out shelves or lazy susans for deep corners) turn a dark, deep cabinet into a shallow, accessible closet. You can see everything at a glance and pull the entire contents toward you.
- For pots & pans: A deep pull-out with dividers keeps lids and pans separated and easy to grab.
- For dry goods: A shallow pull-out on a counter-height cabinet is perfect for storing flour, sugar, and other baking staples in canisters. You can pull it out to your workspace.
- For cleaning supplies: A pull-out in the cabinet under the sink keeps bottles upright and contained, preventing spills.
Drawer Systems Are Your Best Friend
Drawers are superior to deep cabinets for most items because everything is visible and accessible. The key is to divide and conquer.
- Utensil Trays: Use a customizable, adjustable utensil organizer. Not just for forks and knives! Use sections for peelers, whisks, zesters, and kitchen shears.
- Knife Blocks & In-Drawer Knife Trays: Keep knives safely stored and visible. An in-drawer block is safer than a countertop block in a tight space.
- Dividers for Baking Tools: A long, shallow drawer near your oven is prime real estate for rolling pins, cookie cutters, pastry bags, and spatulas.
- The “Junk Drawer” Transformation: Every kitchen has one. Use a small divider tray with sections for batteries, tape, scissors, pens, and a notepad. Give it a purpose, and it stops being a black hole.
Tiered Shelving & Risers
For upper cabinets, use shelf risers to create two levels of storage. The items in the back are elevated and visible. This is excellent for mugs, bowls, or canned goods. You can also use a canister riser (a stepped platform) on your counter to store coffee, tea, or sugar canisters without taking up too much footprint.
Step 4: Creative Storage Solutions & Unconventional Spaces
When you’ve exhausted cabinets and drawers, you have to get creative. This is where you solve specific problems with clever, often inexpensive, hacks.
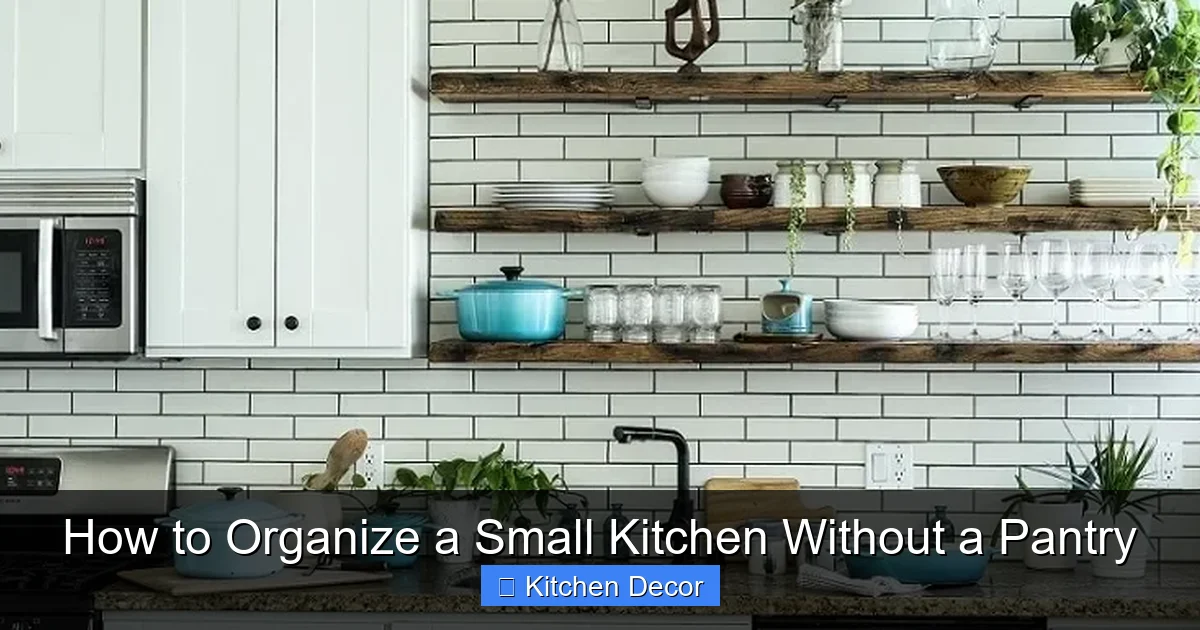
Visual guide about How to Organize a Small Kitchen Without a Pantry
Image source: i0.wp.com
The Space Under the Sink
This is often a disaster zone. Use a stackable, waterproof organizing caddy to hold cleaning supplies. Group by type (all-purpose, glass, etc.). Use a tension rod to hang spray bottles from the cabinet door. Keep a small step-stool inside if you need to reach back, so you don’t have to pull everything out.
Over-the-Door Organizers
Don’t neglect the back of your pantry-less kitchen door! An over-the-door organizer with clear pockets can hold:
- Spices (if your cabinet space is full)
- Snack packets
- Tea bags and coffee pods
- Cutlery for a picnic set
- Small packets of seasoning
Choose one with pockets of varying sizes to accommodate different items.
Inside Cabinet Doors & Under-Cabinet Space
We touched on this, but it deserves its own section. Use adhesive hooks on the inside of a cabinet door to hang a small cutting board or a bag of plastic wrap. Mount a narrow paper towel holder under your upper cabinet to get that roll off the counter. A small magnetic spice rack on the underside of a cabinet holds frequently used spices for immediate access while cooking.
Multi-Functional Furniture
If your layout allows, a small kitchen cart or island with drawers and shelves is a game-changer. It provides mobile prep space and critical additional storage. Look for one with a butcher-block top for extra workspace and storage underneath. A small, narrow table with a drawer can serve as a dining spot and a storage unit for placemats, napkins, and utensils.
The Oven & Fridge Tops
These are often dusty, unused spaces. If you *must* use them, store items you use very infrequently in sealed containers—like a holiday baking set or a large roasting pan you only use twice a year. A basket or decorative box can contain them and make the area look tidier. But be rigorous: if you’re using the oven for storage, you must clear it completely before cooking.
Step 5: The “Zone” System – Designate Homes by Function
With your items categorized and your storage hardware in place, it’s time to assign homes. The golden rule: store items as close as possible to where you use them. This creates zones.
The Prep Zone
This should be on the counter or in a drawer immediately surrounding your main prep area (usually near the sink). Store your go-to knives, a cutting board, a colander, peeler, and grater here. A knife block on the counter or a magnetic strip on the wall is ideal. A small drawer with dividers for these tools is even better.
The Cooking Zone
This is near your stove. Store your most-used pots and pans, spatulas, wooden spoons, tongs, and cooking oils/vinegars here. A wall-mounted pot rack or rail for pans is perfect. A small container on the counter or a drawer front holding your daily-use oils and spices is essential.
The Baking Zone
Gather all baking items together, even if they are in different cabinets. A single base cabinet should hold your mixing bowls, measuring cups/spoons, baking sheets, and rolling pin. Use a pull-out organizer for your flour and sugar canisters. Store sprinkles, extracts, and baking powder in a clear bin within this cabinet.
The Cleaning Zone
This is under the sink. Everything for cleaning counters, floors, and dishes lives here—sponges, dish soap, all-purpose spray, and dishwasher detergent. Use a caddy to keep bottles from sliding around and to contain any potential leaks.
The “Open” Pantry Zone
Since you don’t have a pantry, create one. Choose a tall, narrow cabinet or a section of upper/lower cabinets to be your “dry goods hub.” Use uniform, clear, airtight canisters for pasta, rice, cereal, flour, sugar, and snacks. Label each one. Use a shelf riser to double the space. This cabinet becomes your visual pantry—everything is visible, accessible, and contained.
Step 6: The Daily Maintenance Mindset – Staying Organized
Organizing a small kitchen is a project. Staying organized is a habit. Without a pantry to hide things in, clutter becomes obvious quickly. Here’s how to maintain your new system.
The One-In, One-Out Rule
This is non-negotiable in a small space. If you buy a new kitchen gadget, a new set of mugs, or a new container, something similar must go. This prevents slow, steady creep back to clutter. Ask yourself: “What will this replace?” before purchasing.
The 5-Minute Evening Reset
Spend 5-10 minutes every night after dinner putting everything back in its designated home. Wipe down counters. Load the dishwasher or hand-wash and put away. This nightly ritual prevents a single day of mess from snowballing into a week of chaos. It also means you start every morning with a clean, organized kitchen.
Regular System Audits
Every 3-4 months, do a quick audit of your zones. Are containers filling up? Is a particular cabinet becoming a dumping ground? Is a zone not working? Tweak your systems. Maybe you need an extra divider or a different bin. Your kitchen’s needs change with seasons and habits—your organization should adapt.
Embrace “Good Enough”
Perfection is the enemy of progress in a small space. A drawer might not be Instagram-perfect every single day. That’s okay. The goal is function and calm, not a sterile showroom. If the system works for you and makes your life easier, it’s successful.
Conclusion: Your Small Kitchen Is Your Superpower
Organizing a small kitchen without a pantry is not a compromise; it’s an exercise in intentional living. You are forced to curate your belongings, value every tool you own, and design a space that works perfectly for your specific needs and routines. The strategies—vertical storage, cabinet optimization, creative hacks, and zoned systems—are your toolkit. By following the audit-first approach, investing in a few key organizers like clear bins and pull-out shelves, and committing to daily maintenance, you will transform your kitchen from a source of stress into a zone of efficiency and joy. You’ll cook more, clean less, and find a profound sense of control in your compact domain. Start with that first purge. You’ll be amazed at the space—both physical and mental—you can create.
Frequently Asked Questions
Can I really make a dent without spending a lot of money on organizers?
Absolutely. Start with the purge—it costs nothing. Use what you have: clean glass jars for storage, shoe boxes for drawer dividers (cover with contact paper), and tension rods for hanging items. Invest gradually in key pieces like a few clear bins or a single pull-out shelf as your budget allows.
What’s the best way to store spices in a tiny kitchen?
For maximum space efficiency, use a magnetic spice rack on the side of your fridge or cabinet. Alternatively, a slim, tiered drawer insert or a door-mounted rack inside a cabinet door works well. The key is to get them out of a deep, dark cabinet and into a single, visible layer.
How do I handle bulky items like a stand mixer or large pots?
Store them on the counter only if you use them weekly. Otherwise, dedicate a specific lower cabinet or deep shelf to them. Use a heavy-duty pull-out organizer if possible. For a mixer, a countertop lift stand that tucks under the cabinet when not in use is a great space-saver. Store large pots with their nesting lids inside the pot to save space.
My lower cabinets are so deep—how do I reach the back?
Pull-out organizers are the ultimate solution here. If that’s not feasible, use front-to-back dividers (like simple wooden slats or purchased dividers) to create a “file” system. You pull the front item out, and the one behind it slides forward. For pots, stack them with a protective liner between, and commit to only storing items you truly need in that deep space.
What if I rent and can’t drill holes or install permanent shelves?
No problem! Focus on freestanding solutions: tension rods, over-the-door organizers, adhesive hooks (like Command strips), freestanding shelf units that don’t require tools, and stackable bins. Use the top of the refrigerator or a sturdy bookshelf as a “pantry.” Get creative with placement without making permanent alterations.
How do I keep my family from messing up the new system?
Involve them in the process! Show them where things live and why. Label bins and drawers clearly with words or pictures for kids. Make it easy for them—if the coffee mugs are hard to put away, they’ll end up on the counter. Place a small, designated “family drop zone” (like a single basket) for items that need to be put away later, and make clearing it a part of the nightly reset routine.