Filling a large gap between your cabinet and wall is a common kitchen issue caused by settling or imperfect installation. The solution involves assessing the gap size, selecting the right materials like backer rod and flexible caulk, and applying them correctly for a durable, paint-ready finish. Proper preparation and technique prevent cracks and ensure the repair blends seamlessly with your cabinetry.
Key Takeaways
- Assess the Gap: Measure the width and depth accurately. Gaps wider than 1/4 inch typically require a backer rod before caulking to provide a solid base and prevent caulk failure.
- Material Selection is Critical: Use a high-quality, paintable silicone or acrylic latex caulk for flexibility. For very wide gaps, combine with foam backer rod to fill depth and save on expensive caulk.
- Preparation is Half the Battle: Thoroughly clean the gap of dust, debris, and old caulk. Use painter’s tape on adjacent surfaces for a clean, professional line.
- Application Technique Matters: For deep gaps, press backer rod in first, then apply a continuous bead of caulk. Smooth it with a tool or finger dipped in water for a concave, neat finish.
- Consider Decorative Trim: For gaps over 1 inch, installing simple wood or PVC trim (cove molding) can be a more attractive and permanent solution than filling.
- Allow Proper Curing: Follow the caulk manufacturer’s instructions for drying time before painting or exposing to moisture. Rushing this step leads to cracks and poor adhesion.
- Address the Root Cause: If gaps reappear, investigate for structural settling, water damage, or improper cabinet installation. Persistent issues may require professional assessment.
📑 Table of Contents
- Why That Unsightly Gap Appears and Why You Should Fix It
- Assessing the Gap: Your First Step to the Right Solution
- Choosing Your Arsenal: Materials for Gap Filling
- Tool Kit and Preparation: Setting Up for Success
- Step-by-Step: Filling the Gap Like a Pro
- The Finale: Painting and Achieving a Seamless Look
- Prevention and Long-Term Care
- Conclusion: From Eyesore to Invisible Integration
Why That Unsightly Gap Appears and Why You Should Fix It
You’re cleaning your kitchen, and your eye catches it again: that noticeable, often dusty gap where the cabinet meets the wall. It’s a universal kitchen woe. This space isn’t just an eyesore; it’s a magnet for crumbs, dust bunnies, and even moisture, which can lead to stains on your cabinet edge or, worse, damage to the wall surface behind it. Filling this gap is a crucial step in achieving a polished, built-in look that makes your kitchen feel custom-finished and well-cared-for.
The gap exists for a few primary reasons. Houses settle over time, causing slight shifts between the rigid cabinet box and the wall framing. During installation, cabinets might not be pressed perfectly flush against uneven walls. Sometimes, the cabinet itself may have been built with a slight “reveal” or gap intentionally for installation ease. Whatever the cause, the solution is the same: a strategic fill that accommodates future movement without cracking. This guide will walk you through every step, from diagnosis to a flawless finish, ensuring your cabinets look securely anchored and beautifully integrated into your kitchen’s design.
Assessing the Gap: Your First Step to the Right Solution
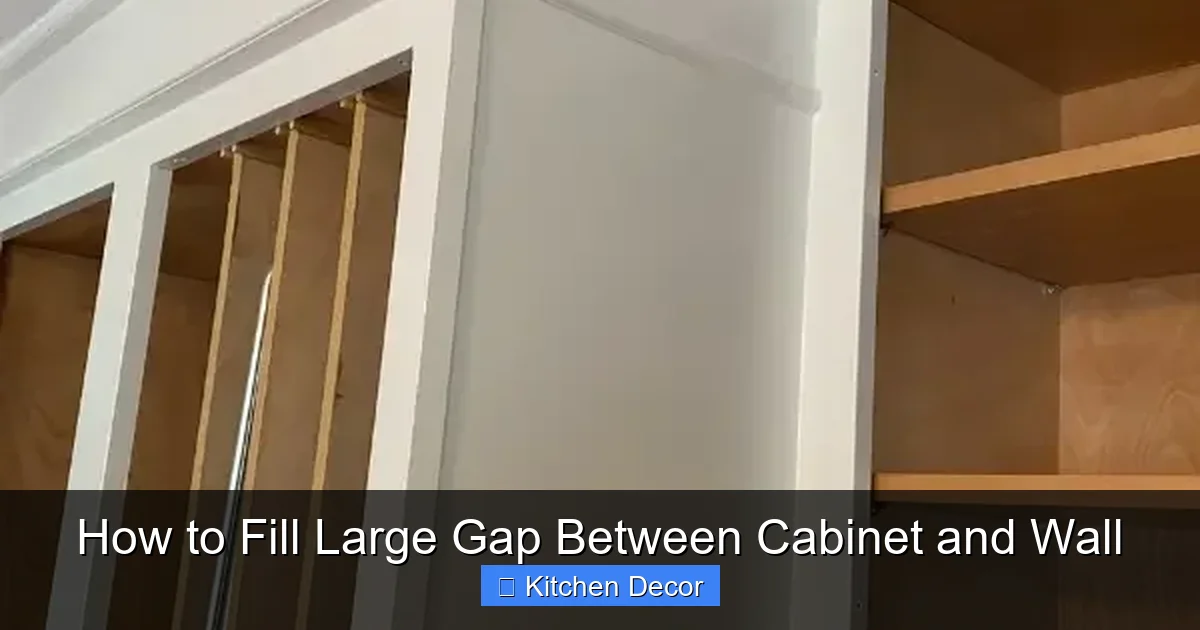
Before you buy a single tube of caulk, you need to play detective. Not all gaps are created equal, and your repair method depends entirely on the gap’s characteristics. Grab a tape measure and a flashlight. Examine the gap at multiple points along the cabinet run, as it may vary in width.
Visual guide about How to Fill Large Gap Between Cabinet and Wall
Image source: lizzydesignsblog.com
Measuring Width and Depth
Width is the horizontal space you see. Depth is how far back the gap goes from the cabinet face to the wall. Use a putty knife or a depth gauge to check this. Is it a narrow hairline crack (less than 1/4 inch) or a wide chasm (over 1/2 inch)? This distinction is your most important factor. A narrow gap is a straightforward caulking job. A wide, deep gap needs a filler material first to create a “backstop” for the caulk, preventing it from sinking in or adhering to three surfaces (cabinet side, wall, and the back of the gap), which almost always leads to failure.
Checking for Movement and Cause
Gently try to wiggle the cabinet side panel. Is there any give? If the cabinet itself is loose against the wall, filling the gap is a temporary cosmetic fix. You may need to re-secure the cabinet to the wall studs first. Also, look for signs of water damage or rot on the wall or cabinet base. If you spot discoloration, soft spots, or mold, you must address the moisture source before attempting any cosmetic repair. For persistent gaps that reappear after filling, consult a contractor to rule out significant structural settling.
Choosing Your Arsenal: Materials for Gap Filling
Walking into the hardware store can be overwhelming. The caulk aisle is a maze of tubes. Here’s your simplified guide to what you actually need.

Visual guide about How to Fill Large Gap Between Cabinet and Wall
Image source: kitchenseer.com
Caulk: The Finishing Touch
For this job, you need a flexible, paintable sealant.
- Acrylic Latex Caulk: The all-around champion for interior gaps. It’s easy to apply, cleans up with water, sands smoothly, and takes paint exceptionally well. It remains flexible enough for minor movement but is not ideal for high-moisture areas like inside a sink backsplash.
- Silicone Caulk: The durability king. It’s 100% waterproof, mold-resistant, and incredibly flexible, lasting for decades. However, standard silicone is NOT paintable. You must use a “paintable silicone” or “siliconized acrylic” hybrid. These offer the best of both worlds: silicone’s flexibility with acrylic’s paintability.
- Polyurethane Caulk: Extremely tough and adhesive, but has a strong odor and requires mineral spirits for cleanup. Overkill for most cabinet-to-wall gaps unless in a commercial kitchen.
Recommendation: For most homeowners, a high-quality paintable silicone-acrylic hybrid caulk is the optimal choice for kitchen cabinets.
Backer Rod: The Gap’s Best Friend
This is a soft, squishy foam rope. For gaps deeper than 1/4 inch or wider than 1/2 inch, it’s non-negotiable. You press it into the gap to within 1/4 inch of the surface. It acts as a filler, so your expensive caulk only needs to form a thin, flexible skin on the surface. It drastically improves adhesion, reduces shrinkage, and saves you money on caulk. Choose a diameter slightly larger than your gap’s width; it compresses to fit snugly.
Decorative Trim: The Architectural Solution
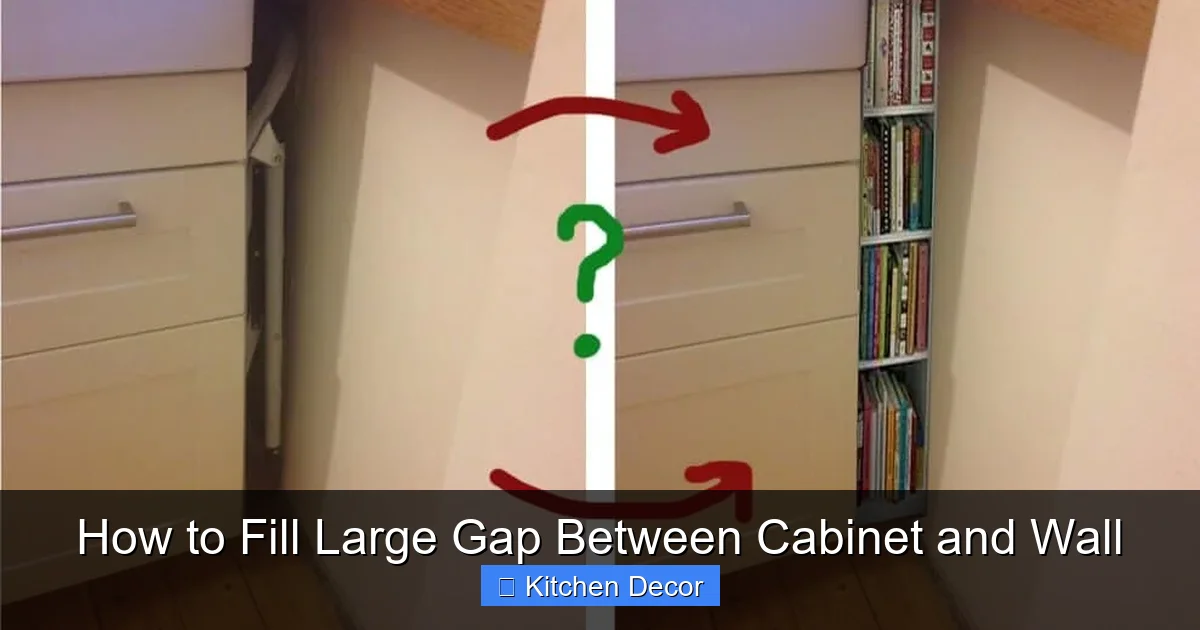
For very large gaps (over 1 inch), or if you want to add a design element, consider using a simple wood or PVC cove molding or quarter-round. You attach it to the cabinet side, covering the gap entirely. This turns a defect into a decorative feature. It’s a more permanent and often more attractive solution than a thick bead of caulk.
Tool Kit and Preparation: Setting Up for Success
Having the right tools makes this a 30-minute job instead of a messy two-hour ordeal. Gather your supplies before you start.
Visual guide about How to Fill Large Gap Between Cabinet and Wall
Image source: ikeahackers.net
Essential Tools
- Caulking Gun: A smooth-action, dripless gun is worth the extra few dollars. For small jobs, a squeeze-tube caulk works, but a gun gives you better control.
- Utility Knife or Caulk Removal Tool: For scraping out old, failed caulk.
- Putty Knife or Plastic Scraper: For pressing backer rod and smoothing caulk.
- Bucket of Warm, Soapy Water & Rags: For cleanup and smoothing acrylic/latex caulk.
- Painter’s Tape: The secret to a perfectly straight, clean line on both the cabinet and wall.
- Gloves: Disposable nitrile gloves keep your hands clean.
- Finger or Caulk Finishing Tool: A dedicated convex tool gives the best concave finish, but a wet finger works in a pinch.
The Critical Preparation Phase
This step cannot be overstated. Poor prep guarantees a failed repair.
1. Remove Old Caulk: Use your utility knife to slice through the old bead and peel it out. Go back with the scraper to get every bit. Any residue will prevent new caulk from sticking.
2. Clean the Joint: Vacuum or brush out all dust and debris. Wipe the surfaces with a dry cloth, then a slightly damp cloth. Let it dry completely. Any moisture under the caulk will cause mold and adhesion failure.
3. Tape the Edges: Apply painter’s tape to the cabinet side and the wall, leaving a gap exactly the width you want your finished caulk line to be. This creates a sharp, professional edge and protects surfaces from smears.
Step-by-Step: Filling the Gap Like a Pro
Now for the main event. The process differs based on your gap size.
Method A: For Narrow Gaps (Less than 1/4 inch)
This is the simplest scenario. You don’t need backer rod.
- Load your caulk gun and cut the nozzle at a 45-degree angle to a hole size slightly smaller than your gap. Puncture the inner seal.
- Apply a continuous, steady bead of caulk into the gap. Don’t overfill; you want to slightly underfill it.
- Smooth the bead immediately. Wet your finger or finishing tool. Apply gentle, even pressure and pull it along the joint in one smooth motion. The tool/finger will press the caulk into the gap and create a concave “scoop” shape, which is the most flexible and least likely to trap dirt.
- Remove the tape carefully while the caulk is still wet. Pull it away at a 45-degree angle from the joint.
- Clean up any smears with a damp rag. Don’t over-wipe, or you’ll remove caulk from the joint.
Method B: For Medium to Large Gaps (1/4 inch to 1 inch)
Here, backer rod is your essential first layer.
- Select the correct backer rod diameter. It should be slightly larger than the gap. Use a blunt tool (like the end of your putty knife) to press the foam rope deep into the gap until it’s firmly packed. The top of the rod should be about 1/4 inch below the surface.
- Apply the caulk. Now, apply your bead of caulk over the backer rod, filling the remaining 1/4-inch channel to the surface.
- Smooth and finish exactly as in Method A. The backer rod provides a firm backing, so the caulk forms a perfect, consistent skin without sinking in.
Method C: For Very Large Gaps (Over 1 inch) – The Trim Solution
For gaps this wide, a thick bead of caulk is prone to failure and looks bulky. Trim is the elegant answer.
- Measure and cut your cove molding or quarter-round to length. A miter saw gives clean cuts.
- Dry-fit the pieces to ensure they sit flush against both the cabinet and the wall.
- Apply a thin bead of construction adhesive to the back of the trim, or use small finishing nails. Adhesive is often sufficient and avoids nail holes.
- Press the trim firmly into place over the gap. Wipe away any adhesive squeeze-out immediately with a damp cloth.
- Fill any nail holes with wood filler, sand smooth once dry, and prime/paint the trim to match your cabinet.
The Finale: Painting and Achieving a Seamless Look
Your gap is filled, smoothed, and the tape is off. It’s not time to admire your work just yet—there’s one final, crucial step to true invisibility.
Curing Time: Patience Pays Off
Do not paint over wet caulk! Check the specific instructions on your caulk tube. Most acrylic latex caulks need 2-4 hours to skin over and 24 hours for full cure before painting. Silicone hybrids can take 3-6 hours. Humidity and temperature affect this. Touch it lightly; if it feels tacky, wait longer. Painting too soon traps solvents, causing the paint to crack and peel later.
Painting for Perfection
Once fully cured, you may notice the caulk bead is slightly recessed or has a different texture than the surrounding surfaces. This is normal.
- Light Sanding: If the caulk is slightly proud or has a texture, gently sand it with 220-grit sandpaper. Use a light touch to avoid cutting into the caulk.
- Priming: If your wall or cabinet is unpainted, or you’re using a new type of caulk (like silicone), apply a thin coat of primer to the caulk line. This ensures even paint absorption.
- Final Paint: Use a high-quality synthetic brush or a small foam roller to apply your final paint color. Use the same paint and finish (e.g., semi-gloss) as the surrounding cabinet or wall. The goal is to make the line disappear. A second coat may be necessary for full coverage.
Prevention and Long-Term Care
You’ve fixed the current gap. How do you keep it from coming back?
Understanding Seasonal Movement
Wood cabinets and framing expand and contract with humidity. Your flexible caulk is designed to accommodate this. However, if you see the gap significantly widen in the dry winter and close in the humid summer, it’s normal seasonal movement. A high-quality, flexible caulk will handle this cycle for years.
Routine Inspection and Maintenance
Twice a year, do a quick visual check along cabinet-to-wall seams. Look for cracks, gaps, or caulk that has lost its seal. Small, hairline cracks can be touched up with a bead of fresh caulk before they become large problems. Keep the area clean to prevent abrasive debris from working into the joint.
When to Call a Pro
If you fill a gap and it reappears in the same spot within a few months, or if you notice other gaps opening in multiple places, it may indicate a deeper issue with cabinet attachment or structural settling. In this case, a cabinet installer or general contractor should evaluate the cabinet’s anchoring to the wall studs.
Conclusion: From Eyesore to Invisible Integration
Filling that large gap between your cabinet and wall is more than a quick cosmetic fix; it’s about understanding the materials and techniques that create a lasting, professional result. By assessing your specific gap, choosing the right combination of backer rod and flexible caulk (or decorative trim for extreme cases), and mastering the art of preparation and smoothing, you transform a kitchen flaw into a seamless element of your home’s design. Remember, the key is a flexible fill that moves with your home, not against it. With a little patience and the right approach, you can achieve that built-in, custom look that makes your kitchen feel complete and meticulously maintained. For more detailed guides on kitchen maintenance and repair, be sure to review our comprehensive terms and conditions for product use guidelines and safety information.
Frequently Asked Questions
What is the best caulk for large gaps between cabinet and wall?
For gaps wider than 1/4 inch, the best practice is to use a backer rod topped with a high-quality, paintable silicone-acrylic hybrid caulk. The backer rod provides a foundation, while the hybrid caulk offers the necessary flexibility and paintability for a durable, invisible finish.
Can I use expanding foam to fill the gap?
While spray foam can fill large volumes, it’s generally not recommended for this visible, finished joint. It expands unpredictably, can bow walls or cabinets, is very difficult to sand smooth, and is not paintable without a coating. It’s better suited for insulation behind walls, not cosmetic gap filling.
How long should I wait before painting over the caulk?
>Always follow the specific cure time on your caulk’s label. As a general rule, wait at least 24 hours for acrylic latex caulk to fully cure before painting. Paintable silicone hybrids may require 3-6 hours to skin over but 24 hours for a full cure. Painting too early will cause the paint to fail.
Why does my caulk keep cracking and pulling away?
This is usually due to one of three reasons: using a rigid, non-flexible caulk; not using a backer rod in a deep gap (causing the caulk to adhere to three sides and tear); or the cabinet/wall moving significantly due to settling or poor installation. Ensure you use flexible caulk and backer rod for deep gaps.
Should I use wood filler instead of caulk?
No. Wood filler is rigid and designed to be sanded and stained. It will crack with any movement. Caulk is specifically formulated to remain flexible and adhere to two different materials (cabinet and wall). For this joint, always use a flexible sealant.
What if the gap is caused by a loose cabinet?
Filling the gap is only a cosmetic solution. First, you must secure the cabinet to the wall studs. Locate the studs with a stud finder and drive long screws (like 3-inch wood screws) through the cabinet’s back or interior support brackets into the studs. Once the cabinet is firmly anchored, then you can fill the remaining stable gap.