Yes, you can achieve the luxurious, speckled appearance of granite using concrete countertops! This cost-effective, highly customizable alternative involves a meticulous, multi-step process of coloring, texturing, and sealing. By mastering techniques like acid staining, pigment application, and creating realistic veins, you can craft a durable, unique surface that rivals natural stone. Proper preparation and a high-quality sealant are non-negotiable for longevity and stain resistance. It’s a rewarding DIY project for those willing to invest time and care.
Key Takeaways
- Concrete is a versatile canvas: Its neutral base allows for infinite color and pattern customization to mimic any granite variety, from absolute black to intricate speckles.
- The process is multi-layered and sequential: Success depends on strict adherence to a step-by-step workflow: proper prep, base coloring, veining, and final sealing—skipping or rushing any stage compromises the result.
- Acid stains and pigments are your primary tools: Acid stains chemically react with concrete for variegated, stone-like hues, while dry-shake or integral pigments provide consistent base color. They are used in tandem.
- Creating realistic veins is an art: Achieved through techniques like using templates, resin inlays, or grinding after curing. Practice on sample boards is essential to master this skill.
- Sealing is the critical final defense: A high-quality penetrating sealer protects against stains, etching, and moisture. Without it, the beautiful finish will degrade quickly in a kitchen environment.
- It’s DIY-possible but demanding: While a skilled homeowner can succeed, it requires patience, attention to detail, and comfort with materials. Professional installation guarantees a flawless, warrantied finish.
- The result is uniquely yours: Unlike slab granite, your concrete countertop will be a one-of-a-kind piece, tailored to your exact color, pattern, and edge specifications.
📑 Table of Contents
- Introduction: The Allure of Granite, Without the Price Tag
- Why Choose Concrete to Mimic Granite? The Strategic Advantages
- Phase One: Essential Preparation and Mixing
- Phase Two: Coloring the Concrete – The Base for Granite
- Phase Three: Creating the Signature Granite Veins
- Phase Four: Finishing and the Critical Seal
- Maintenance and Care: Keeping the Granite Illusion Alive
- Conclusion: Your Masterpiece Awaits
Introduction: The Allure of Granite, Without the Price Tag
There’s something undeniably captivating about the deep, rich look of granite countertops. The way light plays across its crystalline surface, the sense of solid permanence it brings to a kitchen—it’s a hallmark of luxury. But that luxury comes with a significant price tag, not to mention the environmental cost of quarrying and transporting heavy slabs. What if you could capture that same dramatic, high-end aesthetic for a fraction of the cost, with complete creative control? Enter the world of decorative concrete.
Making concrete countertops look like granite isn’t about a simple paint job. It’s a transformative art form that leverages concrete’s innate malleability. Through a sophisticated process of coloring, texturing, and sealing, a simple gray slab can be reborn as a surface indistinguishable from its natural stone counterpart. This guide will walk you through every single step, from the initial planning phase to the final polish, demystifying the process and empowering you to achieve a stunning, professional-grade result. We’ll explore the materials, the techniques for creating those signature granite speckles and veins, and the absolute necessity of proper sealing. Whether you’re a brave DIY enthusiast or simply want to understand what goes into this craft before hiring a pro, this is your complete roadmap.
Why Choose Concrete to Mimic Granite? The Strategic Advantages
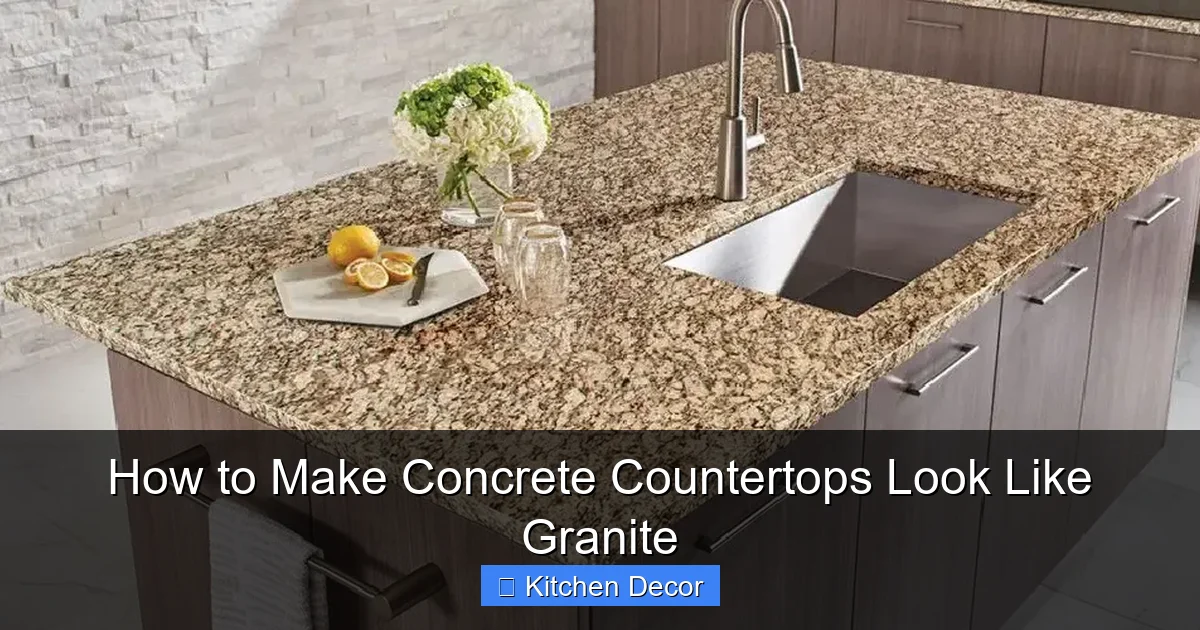
Before diving into the “how,” it’s crucial to understand the “why.” Concrete offers a compelling set of advantages over both real granite and other engineered stone alternatives when your goal is a granite look.
Visual guide about How to Make Concrete Countertops Look Like Granite
Image source: furnifixes.com
Unmatched Customization and Design Freedom
With granite, you are limited to what nature produced and what the quarry has in stock. Your color palette, speckle size, and vein pattern are predetermined. Concrete turns this on its head. You are the artist. Want a pure black granite with subtle silver flecks? You can create it. Want a vibrant red or a soft, creamy white with gold veins? Absolutely possible. You control the pigment ratios, the application technique, and the vein pattern. This means your countertop can be perfectly color-matched to your cabinetry, backsplash, or flooring. The edge profile is also entirely up to you—from a simple eased edge to an elaborate ogee—without the constraints of a massive, inflexible slab.
Cost-Effectiveness and Value
The financial argument is strong. High-end granite can easily cost $100-$200+ per square foot installed. A professionally installed concrete countertop that mimics granite typically ranges from $65-$120 per square foot, depending on complexity. For the DIYer, material costs can be as low as $20-$40 per square foot, though this doesn’t account for your time, tools, and the value of a flawless finish. This price gap makes the granite look accessible for a wider range of remodels.
Durability and Repairability
Properly cured and sealed concrete countertops are incredibly tough. They are resistant to scratches (though not scratch-proof—use cutting boards), heat (hot pans won’t damage it like they can laminate, but prolonged extreme heat can affect the sealer), and impact. A significant advantage over granite is repairability. If a deep chip or stain occurs, a skilled artisan can often patch the area seamlessly. With granite, especially a polished slab, a repair is usually visible. Concrete can also be re-honed and re-sealed in the future to restore its like-new appearance, something not possible with most natural stone finishes.
Environmental Considerations
While cement production has a carbon footprint, the overall environmental impact can be lower than quarrying and shipping thousands of miles of granite. Using local materials (sand, aggregate), incorporating supplementary cementitious materials like fly ash or slag, and the long lifespan of the product contribute to a more sustainable choice for many eco-conscious homeowners.
Phase One: Essential Preparation and Mixing
The foundation of any successful concrete countertop project is preparation. This phase is 80% of the battle. Rushing here leads to cracks, poor adhesion, and a finish that won’t last. The goal is to create a strong, stable, and perfectly clean substrate for your decorative overlay.
Visual guide about How to Make Concrete Countertops Look Like Granite
Image source: thekitchenix.com
Building a Rock-Solid Form and Substrate
Concrete countertops are typically cast in place over a sturdy substrate, which is often ¾” plywood or, for larger spans, a steel-reinforced concrete mud bed. The formwork must be impeccably built, as the concrete will take the exact shape of its mold. Use smooth, sealed plywood (coated with a release agent or a thin layer of bond breaker) or melamine board for the most flawless surface. All seams in the form must be caulked to prevent paste leakage. Reinforcement is non-negotiable for spans over 3-4 feet. This usually means a grid of 1/4” or 3/8” rebar or, more commonly for DIY, a mesh of 1/8” glass fiber reinforced concrete (GFRC) or even expanded metal lath. The reinforcement should be suspended in the middle of the pour thickness, not resting on the bottom.
The Mix: Achieving the Right Recipe for Countertops
You cannot use regular bagged concrete mix from the home center. It’s too sandy and contains large aggregate that will weaken the surface and make finishing impossible. You need a dedicated countertop mix. You have two main paths:
- Pre-blended Countertop Mix: Products like SureCrete, GG Mix, or Quikrete Countertop Mix are designed for this purpose. They contain a blend of Portland cement, fine sand, and acrylic or other polymers for enhanced strength, reduced shrinkage, and better adhesion. This is the easiest, most reliable path for DIY.
- Custom Mix: For ultimate control, you can mix your own. A common ratio is 1 part Portland cement to 2-2.5 parts fine, washed sand (play sand is often too dusty). To this, you add a polymer admixture (like a latex or acrylic additive) to increase flexibility and bond strength. This method requires more knowledge but can be more cost-effective for large projects.
Pro Tip: The mix should have a consistency like thick cake batter or peanut butter—workable but not soupy. Too much water is the enemy of strength and causes excessive shrinkage and cracking. Always add water sparingly.
Phase Two: Coloring the Concrete – The Base for Granite
This is where you establish the primary color of your “granite.” You have two primary methods, often used together, to achieve depth and variation that mimics natural stone.
Visual guide about How to Make Concrete Countertops Look Like Granite
Image source: directcolors.com
Integral Color: Coloring the Entire Mix
Integral pigments are dry, powdered colorants (usually iron oxides for earth tones, carbon black for blacks, titanium dioxide for whites) mixed directly into the dry concrete mix before adding water. This colors the entire slab uniformly from the surface to the core. To mimic granite, you typically choose a mid-tone base color—a medium gray, tan, or brown. The advantage is a consistent, homogenous color that won’t wear away. The downside is it can look flat if used alone. For a granite look, integral color is your canvas, not your final picture. Use it to set the overall tone.
Dry-Shake Color Hardener: A Surface-Intense Top Layer
For a more durable, intensely colored surface that mimics the depth of polished stone, a dry-shake color hardener is key. This is a dry, powdered compound (pigment + cement + finely graded aggregate) broadcast onto the surface of the fresh concrete after the initial bleed water has evaporated but before final finishing. As you trowel it in, the top 1/16” to 1/8” of the slab becomes densely packed with color and hardener. This creates a surface that is more resistant to abrasion and staining. For a granite look, you might use a dry-shake color slightly darker or lighter than your integral base to create subtle tonal variation. The technique involves broadcasting about half the material, letting it sit to absorb moisture, then troweling it in, and repeating with the remainder.
Acid Staining: The Chemical Reaction for Authentic Variation
This is the secret weapon for achieving the complex, mottled, and variegated look of natural granite. Acid stains are not paints; they are a solution of water, hydrochloric acid, and metallic salts. The acid lightly etches the concrete surface, allowing the metallic salts to penetrate and chemically react with the free lime in the cement. This reaction creates permanent, translucent color that is unique to each pour. No two applications will ever be exactly alike—just like no two granite slabs are identical.
The process for a granite look:
- Apply after the concrete has fully cured (usually 7-28 days, depending on mix and conditions). The surface must be clean and free of sealers.
- Use a sprayer to apply the stain in a random, mottled pattern. For granite, you might use a primary color (e.g., a dark gray or brown) and then follow with a secondary color (e.g., a copper or rust tone) to create warm, complex speckles.
- Neutralize the acid with a baking soda solution after the reaction is complete (color stops changing).
- Clean and let dry thoroughly.
Key Insight: Acid staining is where your granite mimicry comes to life. Practice on a sample board first! Experiment with different color combinations (e.g., a base of dark gray stain with accents of mahogany or gold) to see how they react on your specific concrete mix. The results are beautiful, permanent, and impossible to achieve with paint.
Phase Three: Creating the Signature Granite Veins
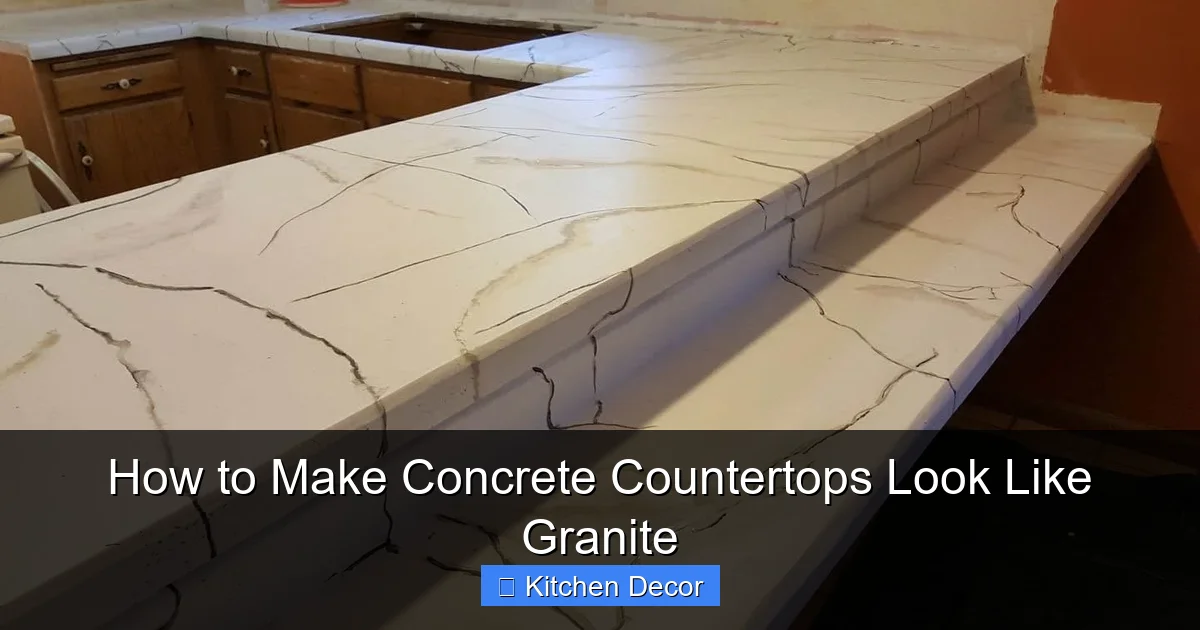
The speckled, crystalline pattern is granite’s signature. But for many granite varieties—think Calacatta Gold, Blue Pearl, or Verde Ubatuba—the defining characteristic is its dramatic veins. Replicating these on concrete is the most challenging and artistic part of the process. There are three primary techniques, ranging from simple to complex.
The Template & Grinding Method (Most Common DIY)
This method creates veins by selectively removing the colored concrete surface. It’s done after the concrete has cured and often after acid staining.
- Design the Vein Pattern: Study photos of your target granite. Sketch the vein pattern onto your cured countertop surface with a pencil. Veins are rarely straight; they have organic, branching, feathery shapes.
- Apply a Resist: Paint a thin line of a chemical resist (like a wax-based resist used for concrete stamping or even a thick layer of petroleum jelly) along your sketched lines. This protects the concrete underneath from the next step.
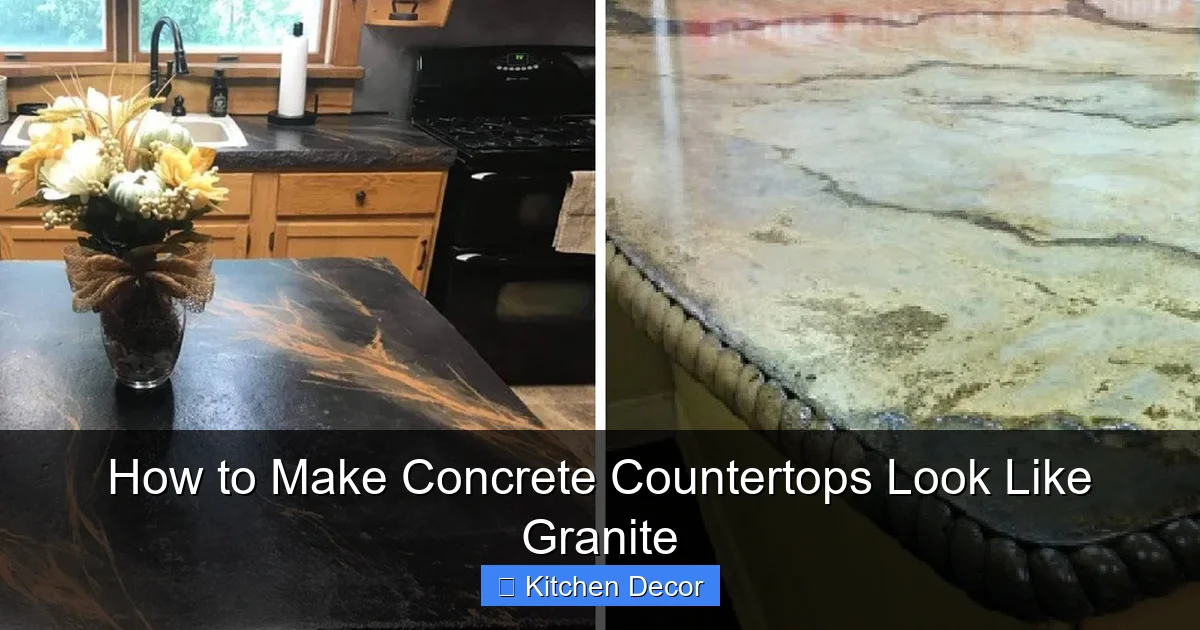
- Etch or Grind: Using a hand grinder with a diamond cup wheel or a concrete grinder, carefully grind away the unprotected concrete surface around your resist lines. You grind down to expose a lighter layer of concrete underneath (if you used an integral color) or to a bare, raw concrete layer. The depth of grind controls the vein’s width and intensity.
- Clean and Re-color: Remove the resist, clean the dust, and now you have a light-colored vein on a darker background. You can then acid stain the newly exposed vein a different, often lighter or contrasting color (e.g., a white or cream vein on a dark green background). Finally, seal everything.
Resin Inlay Method (For Sharp, Crisp Veins)
For a more precise, glossy vein that looks like quartz or crystal, a two-part epoxy or polyurethane resin is used.
- After the concrete is cast and cured, carve out very fine, shallow channels in the vein pattern using a router with a small bit or a sharp chisel.
- Mix a tinted resin (often white, cream, or a metallic color) and carefully pour or inject it into the channels.
- Once cured, the resin is ground and polished flush with the concrete surface, leaving a perfectly smooth, glassy vein embedded in the stone.
This method is more advanced and requires skill to avoid mess and ensure adhesion.
Pre-cast Vein Inserts
For the most ambitious projects, thin, pre-colored and veined concrete or resin “tiles” can be set into the formwork before the main pour. The main concrete is then cast around them, locking them in place. This creates a seamless, integral vein that goes through the entire slab thickness. This is a complex, pro-level technique.
Practical Tip: Whichever method you choose, practice is paramount. Create several sample boards with your exact mix, pigments, and staining technique. Practice your vein-cutting, grinding, or inlay skills on these. Your final countertop will only be as good as your practice piece.
Phase Four: Finishing and the Critical Seal
All the artistry in the world is lost without a perfect, protected finish. This phase transforms your textured, colored slab into the smooth, glossy, non-porous surface you expect from granite.
The Grinding and Polishing Process
After the concrete has fully cured (at least 28 days for best results), the surface is systematically ground with progressively finer diamond abrasives. This is typically done with a floor grinder equipped with a vacuum for dust control.
- Coarse Grind (30-50 grit): Removes the initial form marks, major imperfections, and any surface laitance. This stage reveals the true color and aggregate.
- Medium Grind (100-150 grit): Removes coarse scratches and begins to smooth the surface.
- Fine Grind (300-400 grit): Preps the surface for polishing by removing medium scratches.
- Polishing (800-1500+ grit): Using diamond polishing pads, this stage brings out the shine. The final grit used determines the level of sheen—1500 grit will give a satin/matte finish, while going to 3000+ grit with a final cream polish can achieve a high-gloss, glass-like reflection similar to polished granite.
Important: During grinding, you will see the true colors and patterns emerge. The acid stains and pigments will look different once the surface is polished. This is normal and part of the reveal.
Sealing: The Non-Negotiable Final Step
Concrete is naturally porous. Without a sealer, any spilled oil, wine, coffee, or juice will soak in and stain permanently. The sealer is what makes your countertop functional and durable. There are two main types:
- Penetrating Sealers (Impregnators): These are the gold standard for granite-look concrete countertops. They are silane/siloxane or lithium-based solutions that soak into the concrete, lining the pores without forming a surface film. They allow the concrete to “breathe” (vapor transmit), won’t peel or yellow, and provide excellent protection against water-based and oil-based stains. They maintain the natural matte to satin look of the stone. A high-quality penetrating sealer must be applied according to manufacturer instructions, often requiring multiple coats until the concrete is saturated.
- Topical Sealers (Coats): These are film-forming sealers like epoxy, polyurethane, or acrylics. They sit on top of the concrete, creating a glossy, plastic-like surface. While they offer a high-gloss “wet look” and good chemical resistance, they can scratch, peel, and show wear over time, especially in high-traffic areas. They are less common for a true granite mimicry, which usually aims for a natural stone sheen.
Pro Protocol: After the final polishing step and thorough cleaning/drying, apply the penetrating sealer. Test on a small, inconspicuous area first. Apply with a roller, brush, or sprayer, allowing it to penetrate fully before wiping off any excess. Apply 2-3 coats, waiting the specified time between coats (often 1-2 hours). Allow the final coat to cure fully (24-72 hours) before placing any items on the counter. For a granite look, a satin-natural finish sealer is most authentic.
Maintenance and Care: Keeping the Granite Illusion Alive
Your concrete countertop is an investment of time and artistry. Proper maintenance ensures it looks like granite for years to come.
Daily and Weekly Care
For day-to-day cleaning, use a soft cloth or sponge with warm water and a mild, pH-neutral dish soap. Avoid harsh cleaners, vinegar, ammonia, or abrasive scrubbers (like Comet or steel wool), as they can dull the sealer and potentially etch the concrete over time. Rinse thoroughly and dry with a soft towel to prevent water spots. The sealed surface should be non-porous, so spills should be wiped up promptly, but they won’t immediately stain if attended to.
Re-Sealing: The Long-Term Commitment
Even the best penetrating sealers will gradually wear down due to daily cleaning, abrasion, and acid exposure. How often you need to re-seal depends on use, but a general guideline is every 3-5 years for a kitchen countertop. How do you know it’s time? Sprinkle a few drops of water on the surface. If the water beads up nicely, the sealer is effective. If it darkens the concrete within a minute or two, it’s time to re-seal. The re-sealing process is the same as the initial application: clean the surface thoroughly, let it dry completely, and apply 1-2 fresh coats of the same penetrating sealer.
Dealing with Damage
- Stains: If a stain occurs despite sealing, try a poultice (a paste of baking soda and water or a commercial stain remover) applied to the stain, covered, and left to draw the stain out.
- Etching: Acidic substances (lemon juice, vinegar, harsh cleaners) can etch the surface, leaving a dull, spotted appearance. Light etching can often be removed by re-polishing the affected area.
- Chips: Small chips can be repaired with a polymer-modified concrete patch product, color-matched to your countertop. This requires skill to blend invisibly.
Remember: Use cutting boards and trivets. While concrete is scratch and heat resistant, a direct cut from a knife will damage your sealer and potentially the concrete. A scorching hot pan left on the surface can discolor or damage the sealer. Treat it like a fine natural stone surface.
Conclusion: Your Masterpiece Awaits
Making concrete countertops look like granite is not a weekend project; it’s a journey of craftsmanship. It’s a process that rewards patience, meticulous preparation, and a willingness to learn and practice. The steps—from building a flawless form, mastering the interplay of integral pigments and acid stains, painstakingly carving veins, to the rhythmic dance of grinding and the final, protective seal—each one is a crucial brushstroke on your canvas.
The result, however, is nothing short of spectacular. You end up with a surface that possesses the gravitas and beauty of natural stone, but with a story uniquely your own. It’s a testament to the idea that with the right knowledge and dedication, you can achieve high-end design without the high-end price tag. Whether you decide to embark on this adventure yourself or collaborate with a skilled concrete artisan, you now understand the magic behind the transformation. You know that the “granite” you see is, in fact, a product of science, art, and careful execution—a durable, customizable, and stunning centerpiece for your kitchen that you helped create.
Frequently Asked Questions
Is a concrete countertop that looks like granite as durable as real granite?
Yes, a properly installed and sealed concrete countertop is extremely durable and comparable to granite in terms of scratch and heat resistance. However, granite is a naturally harder material. The key to concrete’s longevity is the quality of the mix, reinforcement, and, most critically, the maintenance of the sealant. Without a good seal, concrete is vulnerable to stains.
Can I realistically do this myself, or should I hire a professional?
It is a challenging but possible DIY project for someone with strong handyman skills, patience, and experience with materials. The most difficult parts are creating flawless forms, the multi-step finishing/grinding process, and mastering vein techniques. If you are uncertain about any step, hiring a professional is highly recommended to avoid a costly, irreversible mistake.
How long does the entire process take from start to finish?
> For a DIY project, from building forms to final sealing, expect 1-2 weeks of active work spread over 4-6 weeks. This accounts for the critical concrete curing time (7-28 days before staining/grinding can begin), drying times between steps, and the sequential nature of staining, veining, and sealing. Professional installation timelines are similar but often more compressed due to experience and controlled conditions.
How often do I need to reseal my concrete countertop?
With a high-quality penetrating sealer and normal kitchen use, you should plan to reseal every 3 to 5 years. Perform a simple water bead test twice a year. If water no longer beads and instead darkens the surface quickly, re-sealing is needed. This maintenance is crucial to preserve the stain resistance and granite-like appearance.
Will hot pots or knives damage my concrete countertop?
Concrete is heat resistant, so placing a hot pan directly on it will not cause melting or scorching like laminate. However, extreme, prolonged heat can potentially damage or discolor the sealant layer. Always use trivets. For knives, concrete is scratch-resistant but not scratch-proof. A sharp knife will dull your knives and can potentially scratch through the sealant to the concrete underneath, creating a vulnerable spot. Always use a cutting board.
Can I repair a chip or stain on my concrete countertop myself?
Minor surface scratches can often be buffed out during a re-polish. Small chips or cracks can be repaired with a polymer-modified concrete patch product, but color-matching is very difficult and the repair may be visible. Deep stains that penetrate the sealant are often permanent. For significant damage, consulting the original installer or a concrete repair specialist is your best bet for a seamless fix.