Decorating your kitchen counter for Christmas is all about blending festive charm with practical functionality. You can create a magical holiday focal point by selecting a cohesive theme, layering textures, and incorporating safe lighting. Prioritize safety around appliances and water sources while maximizing every inch of counter space with clever styling. This guide provides step-by-step ideas to make your kitchen merry, bright, and perfectly prepared for holiday cooking and gathering.
Key Takeaways
- Theme First, Decor Second: Choose a clear color scheme or style (e.g., rustic, modern, traditional) to guide all your decor choices for a cohesive look.
- Safety is Non-Negotiable: Keep all decorations away from stove burners, outlets, and sinks. Use battery-operated lights near water and ensure nothing blocks appliance vents.
- Layer for Depth: Combine different heights, textures, and shapes (e.g., a runner, a tall vase, a low tray) to create visual interest and a professional design.
- Function Over Frills: Ensure your decor doesn’t impede cooking tasks. Leave ample prep space and use trays to corral small items for easy movement.
- Lighting Sets the Mood: Use warm, soft lighting like fairy lights or LED candles to add ambiance without the fire risk of traditional candles near kitchen hazards.
- Incorporate Natural & Scented Elements: Use pinecones, cinnamon sticks, fresh herbs, or citrus slices for an authentic, aromatic holiday feel that looks and smells wonderful.
- Plan for Storage: Choose decor that can be easily moved to a pantry or dining table during big cooking days, and have a dedicated storage solution for off-season.
📑 Table of Contents
- Why Your Kitchen Counter Deserves the Christmas Spotlight
- Step 1: Choose Your Festive Theme and Color Palette
- Step 2: Build Your Foundation with Linens and Runners
- Step 3: Curate Your Decor Elements with Purpose
- Step 4: Master the Art of Safe and Strategic Lighting
- Step 5: Style with Height, Grouping, and Negative Space
- Step 6: Practical Tips for a Busy Holiday Kitchen
- Conclusion: Your Merry, Functional Kitchen Awaits
Why Your Kitchen Counter Deserves the Christmas Spotlight
When we think of Christmas decorating, our minds often jump to the towering tree in the living room or the twinkling lights on the mantel. But there’s one space that works harder during the holidays and arguably sees more festive activity than any other: the kitchen counter. This is your holiday command center—the spot where cookie dough is rolled, eggnog is poured, and last-minute appetizers are assembled. It’s where the magic of Christmas meals gets made. So, why not give it a proper seasonal celebration? Learning how to decorate a kitchen counter for Christmas isn’t about cluttering your workspace; it’s about injecting joy into your daily routines, impressing guests as they grab a snack, and creating a cohesive holiday atmosphere that flows from your living space right into the heart of your home. A beautifully decorated kitchen counter sets the tone for the entire season, promising warmth, delicious smells, and heartfelt gatherings. It tells a story of preparation, love, and celebration. Let’s turn that practical surface into a pillar of your holiday decor.
Step 1: Choose Your Festive Theme and Color Palette
Before you buy a single ornament, decide on the vibe you want. A themed approach prevents your decor from looking like a random holiday explosion. Your theme should complement your existing kitchen style. A modern kitchen with stainless steel might shine with a monochromatic white and silver scheme. A cozy, farmhouse-style kitchen calls for rustic reds, greens, and natural wood. How to decorate a kitchen counter for Christmas starts with this foundational decision.
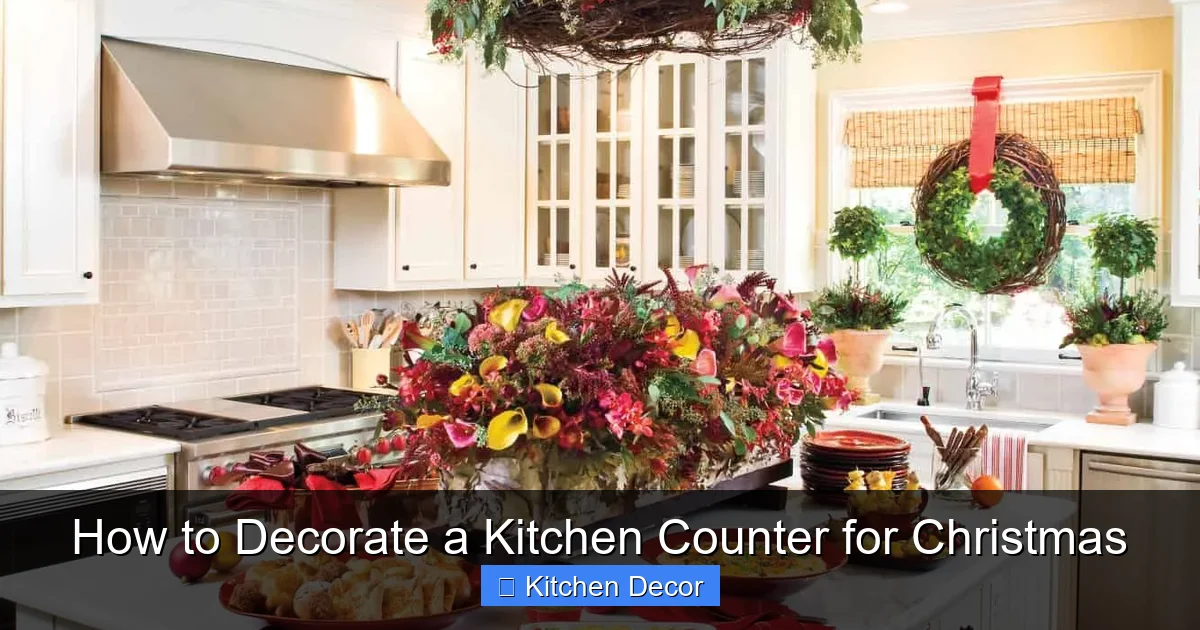
Visual guide about How to Decorate a Kitchen Counter for Christmas
Image source: cdn.trendir.com
Popular Kitchen Counter Christmas Themes
- Classic Red & Green: Timeless and cheerful. Use plaid ribbons, solid green pine garlands, and shiny red ornaments. Pair with burlap for a rustic touch or mercury glass for elegance.
- Elegant Winter White: Sophisticated and serene. Think white faux fur, silver and mercury glass ornaments, flocked greenery, and clear or white lights. Perfect for a sleek kitchen.
- Rustic Farmhouse: Warm and inviting. Incorporate untreated wood slices, galvanized metal, linen, dried oranges, cinnamon sticks, and simple red berries. Mason jars are your friend here.
- Modern Metallic: Chic and bold. Mix gold, copper, or black with greenery. Use geometric shapes, matte-finish ornaments, and minimalist garlands.
- Cozy Cabin: Think Nordic knits, woodsy elements, antlers (faux, of course!), and deep reds or forest greens. Add cozy texture with wool and felt.
Stick to 2-3 main colors plus metallic accents. This keeps the look intentional and not overwhelming on a surface you use constantly.
Step 2: Build Your Foundation with Linens and Runners
The easiest way to anchor your counter decor is with fabric. A runner or a set of placemats instantly adds color, texture, and a soft barrier between your decor and the counter surface. This is your first layer in how to decorate a kitchen counter for Christmas.
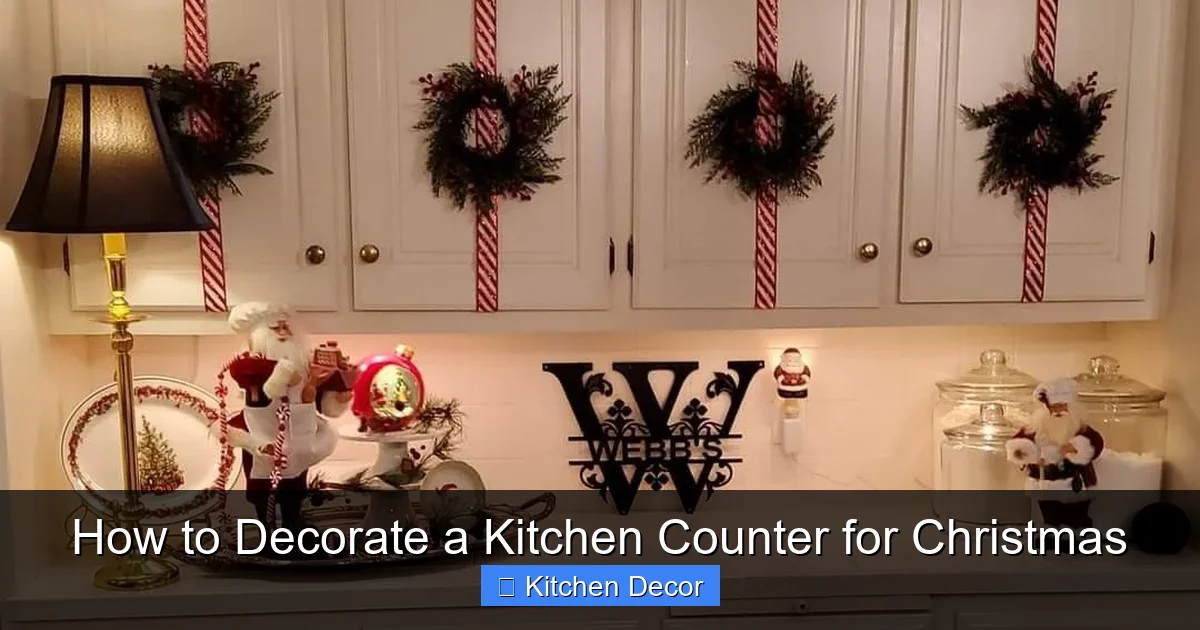
Visual guide about How to Decorate a Kitchen Counter for Christmas
Image source: i.pinimg.com
Choosing the Right Textile
Opt for materials that can withstand potential spills. Quilted cotton, linen, or burlap are excellent, durable choices. A lace-trimmed runner adds a vintage feel, while a chunky knit adds cozy texture. Consider the length: a long runner that drapes slightly over the edges can hide counter clutter like sponges or utensil holders. For a more defined look, use two complementary placemats side-by-side. You can even layer a smaller themed runner over a larger solid one for added depth. Ensure the fabric is secured with a few discreet pieces of double-sided tape or a non-slip rug pad underneath so it doesn’t slide around when you’re busy cooking.
Step 3: Curate Your Decor Elements with Purpose
Now for the fun part: selecting the actual ornaments and objects. The key is variety in height and shape, but unity in theme. Think in groups of three or five for visual balance. Here’s your decor shopping list, broken down by category.
The Holy Trinity: Greenery, Light, and Sparkle
Every stunning counter display needs these three elements.
- Greenery: This is your base. Use a small, loose sprig of pine or eucalyptus tucked into a vase, a short length of garland (pine, cedar, or even faux), or a cluster of potted herbs like rosemary or thyme (which you can also cook with!). Fresh greenery smells incredible but will dry out; faux is reusable. For a unique touch, consider a small, tabletop Norfolk pine or a rosemary topiary.
- Light: Battery-operated fairy lights are a counter decor must-have. Drape them through your greenery, wind them around a vase, or nestle them in a clear jar filled with ornaments. They provide a warm, magical glow without any fire risk near your oven or sink. Look for lights with a warm white bulb, not blue or harsh white.
- Sparkle: This adds the festive “wow” factor. Think mercury glass ornaments, glitter-dipped pinecones, shiny beads, or metallic beads. Scatter a few individually or cluster them in a bowl. They catch the light from your fairy lights and make the whole display shimmer.
Incorporate Functional Festivity
Why choose between decor and utility? Merge them! A beautiful ceramic or wooden bowl filled with holiday candy canes or fresh mandarin oranges is both pretty and edible. A set of festive tea towels rolled and placed in a vintage wooden crate is decorative and ready for use. A decorative cutting board propped against the backsplash can hold a few small ornaments or a vase. A festive soap dispenser at the sink is a tiny, daily dose of cheer. This approach is perfect for how to decorate a kitchen counter for Christmas without losing precious workspace.
Add Personal and Sentimental Touches
Make it yours. Swap out a few generic ornaments for ones that represent your family: a DIY salt dough ornament from a child’s first Christmas, a tiny souvenir from a favorite holiday trip, or a small framed photo from a past festive season. A few handwritten recipe cards on a stand (for your famous cookies) add personal charm. These elements tell a story and make your kitchen feel uniquely festive.
Step 4: Master the Art of Safe and Strategic Lighting
Lighting is the soul of Christmas decor, but the kitchen is a room with specific hazards: water from the sink, heat from the stove, and plenty of electrical outlets. Safety must come first when deciding how to decorate a kitchen counter for Christmas.
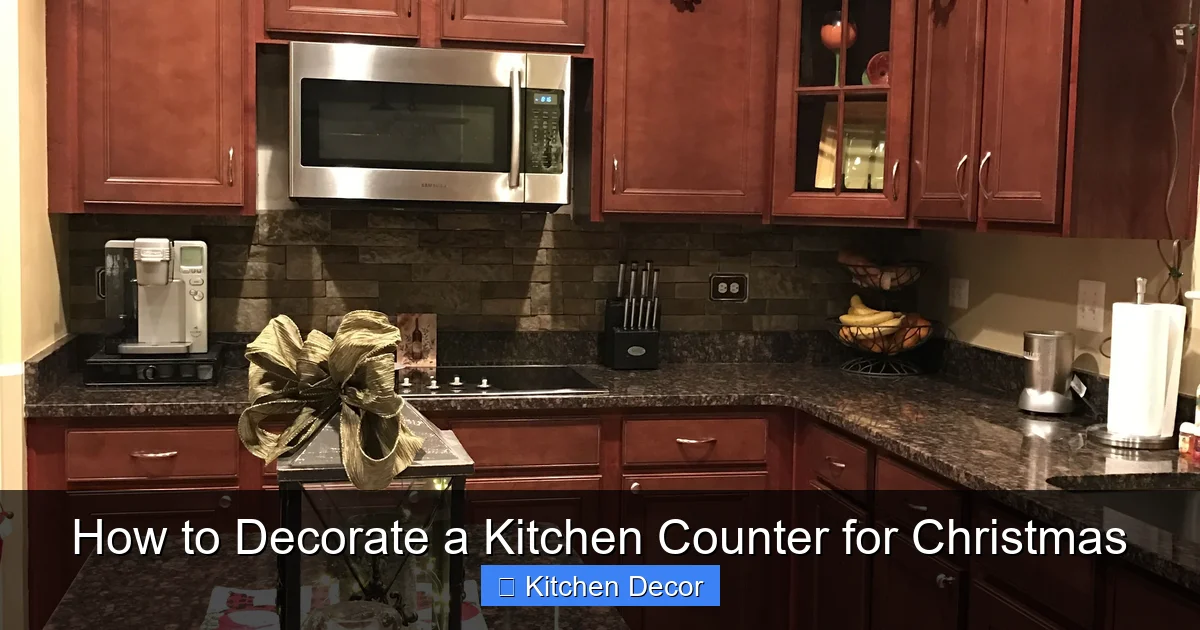
Visual guide about How to Decorate a Kitchen Counter for Christmas
Image source: i.pinimg.com
The Battery-Operated Rule
This is your golden rule. For any lights placed on the counter, especially near the sink, stove, or refrigerator, use ONLY battery-operated LED lights. There is no scenario where plug-in string lights should be draped across a counter where water or cooking splashes might occur. The risk of electric shock or fire is too high. Modern battery-operated lights are incredibly bright, have long run times, and often come with timers, making them utterly convenient and safe.
Placement is Everything
Position your light sources strategically. Nestle a string of fairy lights inside a glass cloche or a jar filled with ornaments. This protects the bulbs and creates a beautiful, contained glow. Wrap them around the base of a vase or the handles of a decorative pitcher. Drape them loosely through a garland, ensuring they don’t create a tripping hazard if the runner is pulled. Keep all light strands and battery packs away from direct heat sources like toasters, kettles, or oven vents. UseCommand hooks or small adhesive clips to secure light strings to the back of the counter or the underside of upper cabinets if you want them to appear floating.
Step 5: Style with Height, Grouping, and Negative Space
This is where your design skills come into play. A flat, one-level display looks bargain-bin. A professional-looking counter display has dimension. Here’s how to achieve it.
Create Levels and Layers
Your goal is to avoid a “flat” look. Start with your tallest element in the back or center—this could be a tall, slender vase holding a few evergreen branches, a stacked pile of festive books, or a tall candlestick. In front of that, place your medium-height items: a medium bowl of ornaments, a small potted plant, or a stack of decorative boxes. In the very front, place your shortest items: scattered pinecones, a few individual ornaments, or a small figurine. This tiered approach guides the eye and looks curated.
The Power of Grouping
Instead of scattering single items, group like items together. A collection of 3-5 similar ornaments (e.g., all wooden, all red) looks more intentional than five different pieces placed randomly. Group candles of varying heights together. Cluster a few sprigs of greenery with a ribbon and a pinecone. These “clusters” become your decorative building blocks. Vary the shapes within the group: round (ornament), tall (candle), organic (pinecone).
Embrace Negative Space
Not every inch needs to be covered. Leave some counter bare! This is especially important near your main cooking area. Negative space is functional; it gives you room to chop vegetables or set down a hot pan. It also makes your decorative elements stand out more. Aim to decorate only 50-60% of your visible counter length, leaving ample clear workspace at one end or in the center.
Step 6: Practical Tips for a Busy Holiday Kitchen
Your kitchen is a workspace first. Your decor must be a good sport. Here’s how to make your Christmas counter beautiful AND practical.
Secure Everything
Use museum putty, also called quake putty, to secure heavier items like vases or ceramic figures to the counter. This prevents them from being knocked over by a enthusiastic elbow or a curious pet. For lighter items like ornaments or pinecones, a small dab of hot glue on the bottom can keep them in place on a runner. Ensure any fabric runners are non-slip.
Design for Easy Movement
Place decor on one side of the counter, leaving the other side (or the center) completely clear for active prep work. If your counter is small, consider a “decor zone” at one end only. Use trays! A large decorative tray or a wooden cutting board can hold your entire vignette. When you need the space, you simply lift the entire tray and set it aside on a nearby table or the fridge. This is the single best trick for how to decorate a kitchen counter for Christmas in a functional kitchen.
Choose Washable and Durable
Kitchens get messy. Avoid delicate materials that can’t handle a stray splash of water or a bit of flour dust. Choose metal, glass, ceramic, sealed wood, and washable fabrics. If you use fresh greenery, be aware it will shed needles and may need daily vacuuming. Have a small hand broom and dustpan nearby for quick clean-ups.
Conclusion: Your Merry, Functional Kitchen Awaits
Decorating your kitchen counter for Christmas is about more than just aesthetics; it’s about weaving the spirit of the season into the very place where holiday memories are made. By starting with a clear theme, prioritizing safety, layering textures, and always keeping function in mind, you can create a space that is both breathtakingly festive and wonderfully practical. Remember, the goal isn’t a museum-perfect display that you’re afraid to touch. The goal is a joyful, welcoming counter that makes you smile while you stir the gravy, that delights guests as they pour their coffee, and that feels like a natural, beautiful part of your holiday home. So gather your garland, light those safe battery-operated lights, and let your kitchen counter become a sparkling testament to the season of warmth, generosity, and delicious creation. After all, the heart of Christmas truly beats in the kitchen.
Frequently Asked Questions
Is it safe to use real candles on my kitchen counter during Christmas?
It is generally not recommended. Kitchen counters are high-traffic areas near potential hazards like stove flames, electrical appliances, and water sources. For safety, always use flameless LED candles, especially on a surface where cooking splatters or water might occur.
My kitchen counters are very small and cluttered. How can I still add Christmas decor?
Focus on a single, impactful element. Use a long, narrow runner with a few sprigs of greenery and a small string of lights. Or, place one beautiful, tall vase with a single type of greenery on a corner. A decorative tray that can be easily moved when you need workspace is also a perfect solution for small spaces.
What are the best types of greenery to use for a kitchen counter display?
For low-maintenance and reusability, high-quality faux greenery garlands or sprays are ideal. If you love the scent and look of real, choose hardy, less-sheddy varieties like rosemary, cedar, or pine. Place them in a water source (like a small vase) if they are fresh, and be prepared for some needle drop. Herbs like rosemary also serve a dual purpose for cooking.
How do I decorate around major appliances like my stand mixer or coffee maker?
Don’t try to cover them. Instead, incorporate them into your design. Place a festive runner under the appliance. Add a small garland around the base. Put a themed ornament or a small vase of greenery on top of the appliance if it’s not in use. The appliance becomes part of the scenery rather than an obstacle.
Can I use my regular kitchen items (like canisters or bowls) as part of the Christmas decor?
Absolutely! This is a smart, budget-friendly approach. Swap out your everyday dish towels for Christmas ones rolled in a basket. Fill your glass canisters with holiday-themed items like cinnamon sticks, star anise, or red and white mints. Use your festive serving platters as backdrops for smaller decor items. Blending decor with function is key.
What’s the best way to store counter Christmas decor when the season is over?
Store items in labeled, stackable plastic bins. Wrap fragile glass or ceramic items in bubble wrap or tissue paper. Coil light strings around a piece of cardboard or a dedicated light storage reel to prevent tangling. Keep all items for a specific theme together in one bin for easy setup next year. Store in a cool, dry place like a basement or closet.
Pingback: Whow to Wrap a Christmas Pudding for Steaming - kitchenandhouseware.com