Brewing coffee in a stovetop percolator is a rewarding, hands-on process that yields a robust, flavorful cup. By understanding your percolator’s parts, using the correct coffee-to-water ratio and grind, and controlling the heat, you can avoid bitterness and achieve a clean, aromatic brew. This timeless method connects you to coffee’s history and offers unparalleled control over your morning ritual.
Key Takeaways
- Understand Your Percolator: Know the function of the stem, basket, and lid to assemble and use it correctly.
- Grind Matters: Use a medium-coarse grind, similar to raw sugar, to prevent fine particles from slipping through and causing over-extraction and sediment.
- Ratio is Key: A standard starting point is 1 tablespoon of coffee per 6 ounces of water, but adjust to your taste preference.
- Heat Control is Crucial: Start with medium-low heat and adjust to maintain a gentle, steady perk (1 perk every 2-3 seconds). Vigorous boiling ruins the coffee.
- Timing is Everything: Once perking begins, brew for 5-7 minutes for a full-bodied cup, then immediately remove from heat.
- Rinse & Repeat: Always rinse the percolator parts with hot water after use; avoid soap on the interior to preserve seasoning and flavor.
- It’s a Ritual: Embrace the audible perking and visual steam—this method is about the process as much as the result.
📑 Table of Contents
- The Enduring Charm of the Stovetop Percolator
- Anatomy of a Stovetop Percolator: Know Your Tools
- Step-by-Step: Brewing the Perfect Pot
- Troubleshooting: Why Is My Percolator Coffee Bitter/Weak/Sedimenty?
- Pro-Tips for Percolator Perfection
- Percolator vs. Other Methods: What’s the Difference?
- Conclusion: The Reward of the Ritual
The Enduring Charm of the Stovetop Percolator
Before electric drip machines and intricate espresso systems, there was the humble, trusty stovetop percolator. It’s a device of beautiful simplicity: a pot, a stem, a basket, and a lid. Yet, within this straightforward design lies the power to produce a cup of coffee that is uniquely rich, aromatic, and full-bodied. If you’ve ever been intimidated by this classic brewing method, fear not. Making coffee in a stove top percolator is a skill anyone can master with a few key principles. It’s not just about making a beverage; it’s about participating in a ritual that has fueled generations. The sound of water perking, the sight of steam rising, and the deep, satisfying aroma that fills your kitchen create an experience that automated machines simply can’t replicate. This guide will walk you through every step, from disassembly to the final pour, ensuring your first—and every—cup is spectacular.
Anatomy of a Stovetop Percolator: Know Your Tools
Before you brew, you must understand your instrument. A typical stovetop percolator consists of a few critical parts, each with a specific job. Familiarizing yourself with these components will make the process intuitive and help you troubleshoot any issues.

Visual guide about How to Make Coffee in a Stove Top Percolator
Image source: images.saymedia-content.com
The Pot (Body)
This is the main vessel, usually made of aluminum, stainless steel, or enameled metal. It holds the brewing water and has a well at the bottom to receive the stem. The pot’s material affects heat distribution; aluminum heats quickly but can develop hot spots, while stainless steel offers more even heating but takes longer to come to temperature.
The Stem (Tube or Pipe)
This hollow metal tube stands upright in the center of the pot. Its job is to carry boiling water vapor up from the bottom of the pot to the top, where it condenses and drips back down as hot water. It’s the percolator’s circulatory system.
The Coffee Basket (Filter Basket)
This perforated basket sits on top of the stem. You place your ground coffee here. The holes allow the hot water from the stem to spray over the grounds, extracting flavor as it drips back down into the pot below. The basket’s design is key—it must allow water to flow freely while containing the grounds.
The Lid (With Knob & viewing window)
The lid seals the pot, trapping heat and steam. Most percolator lids have a glass or metal knob that also serves as a viewing window. You’ll watch the coffee’s color change from clear to amber to deep brown through this window, which is your primary visual cue for doneness.
The Spout
For safe pouring. Ensure it’s clean and not clogged with old coffee grounds.
Step-by-Step: Brewing the Perfect Pot
Now, let’s get into the heart of the matter. Follow these steps precisely for a consistent, excellent brew. Remember, patience and attention are your best tools.

Visual guide about How to Make Coffee in a Stove Top Percolator
Image source: images.squarespace-cdn.com
Step 1: Disassemble & Clean
Take your percolator completely apart. You should have the pot, stem, basket, and lid. Rinse all parts thoroughly with warm water. Do not use soap on the interior of the pot or stem if they are seasoned (common with aluminum), as soap can strip away the patina that develops and affect flavor. A simple rinse and a quick scrub with a soft brush is sufficient. For stainless steel, a mild soap is fine. Ensure all parts are completely dry before storing or reassembling.
Step 2: Prepare the Water
Always use fresh, cold water. Filtered water is highly recommended, as impurities in tap water can subtly affect taste. Fill the percolator pot with the exact amount of water you plan to brew. A good rule of thumb is to fill to just below the bottom of the coffee basket when it’s seated on the stem. This prevents the basket from sitting in water, which would cause the coffee at the bottom to over-extract and become bitter while the top remains under-extracted.
Step 3: Measure & Add Coffee
This is where personal preference comes in. For a standard, robust percolator coffee, use a medium-coarse grind. A grind too fine will slip through the basket holes, ending up in your cup as sludge and causing over-extraction (bitterness). A grind too coarse (like for French press) will extract weakly. Aim for a texture similar to raw sugar or coarse sea salt. Use fresh beans ground just before brewing for maximum flavor.
Ratio: Start with 1 tablespoon of coffee per 6 ounces of water. For a 12-cup pot (60 oz), that’s about 10 tablespoons. You can adjust this later. Spoon the grounds into the basket, giving it a gentle shake to level them. Do not pack or tamp the grounds. They need room for water to flow through.
Step 4: Assemble & Place on Heat
Carefully place the coffee basket onto the stem, ensuring it sits flush and level. Insert the stem into the well at the bottom of the pot. Place the lid on top, securing it if your model has a twist-lock. Set the percolator on your stove burner. Use a burner that matches the pot’s base size for efficient heating.
Step 5: Heat & the First Perk
This is the most critical phase. Start with medium-low to medium heat. You want the water to come to a boil gently and steadily. You will hear a distinct “glug-glug-glug” or “perking” sound once the water boils and the cycle begins. The first perk or two will be clear water. Do not let it perk vigorously or boil rapidly. A rolling boil agitates the coffee grounds too much, scalding them and pulling out bitter, undesirable compounds. Your goal is a steady, rhythmic perk—approximately one perk every 2-3 seconds. You may need to adjust the heat down as it gets going.
Step 6: Brew Time & Monitoring
Once the perking rhythm is established, let it brew. The coffee will begin to appear in the pot, visible through the lid’s window, starting as a light golden color and deepening to a rich brown. For a full-bodied, flavorful cup, brew for 5 to 7 minutes after the first significant perk. For a lighter brew, 3-4 minutes may suffice. Resist the urge to lift the lid frequently, as this releases heat and steam. Use the viewing window to judge color. If it’s too dark for your taste, remove it sooner next time.
Step 7: The Final Act: Remove & Serve
As soon as your brew time is up, immediately remove the percolator from the heat. The residual heat in the pot and the hot coffee will continue to percolate for a few moments, which can quickly turn a perfect brew bitter. Use a potholder. Carefully lift the lid and set it aside. You can now either serve directly from the pot or pour into a carafe or cups. Pour slowly to avoid disturbing the grounds that have settled at the bottom. Your coffee is ready to enjoy black or with your preferred additions.
Troubleshooting: Why Is My Percolator Coffee Bitter/Weak/Sedimenty?
Even with careful steps, things can go awry. Here’s how to diagnose and fix common percolator problems.
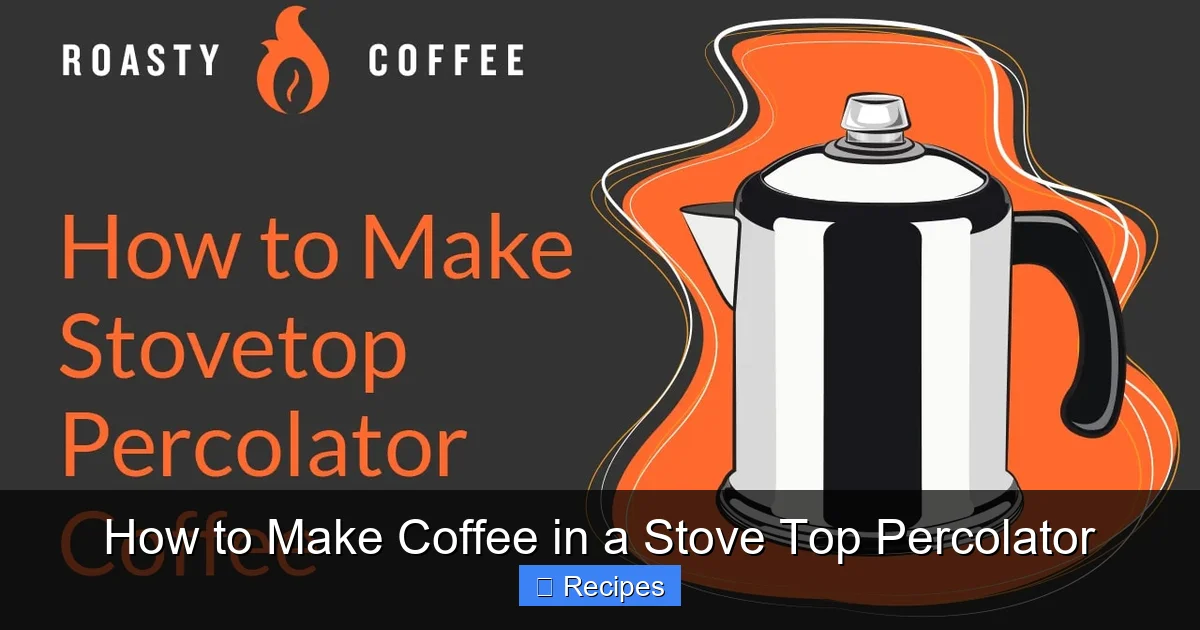
Visual guide about How to Make Coffee in a Stove Top Percolator
Image source: roastycoffee.com
Problem: Bitter, Acrid, or Ashy Taste
Likely Causes: This is almost always a heat and time issue.
- Boiling Too Hard: A rapid, violent perk is the #1 cause of bitterness. The grounds are being scalded.
- Brewing Too Long: Leaving it on the heat after the desired strength is reached continues extraction into bitterness.
- Old, Stale Coffee: Stale beans taste flat and can develop off-flavors that bitterness masks.
- Dirty Equipment: Old coffee oils and residue in the pot or on the stem can impart rancid, bitter flavors.
Solution: Lower your heat to achieve a gentle perk. Set a timer. Use fresh beans. Clean your percolator thoroughly with hot water and a non-abrasive brush after every use.
Problem: Weak, Watery, or Sour Taste
Likely Causes:
- Insufficient Brew Time: The coffee hasn’t had enough contact with water to extract fully.
- Grind Too Coarse: Large particles have less surface area, leading to under-extraction, which tastes sour or weak.
- Not Enough Coffee: Your ratio is too low.
- Water Not Hot Enough: If the heat is too low from the start, the water may never reach a proper perking temperature, leading to a cold, sour brew.
Solution: Increase brew time by 1-2 minutes. Switch to a slightly finer grind. Add an extra half-tablespoon of coffee per cup. Ensure you start with enough heat to initiate the perk.
Problem: Lots of Grounds or “Mud” in the Cup
Likely Causes:
- Grind Too Fine: Fine particles slip through the basket holes.
- Damaged Basket: The perforations may be worn or clogged.
- Overfilling the Basket: Too much coffee can block the holes, causing water to back up and force grounds through.
Solution: Use a coarser grind. Never fill the basket more than ¾ full. Inspect and clean the basket holes regularly with a thin brush or pipe cleaner. Consider using a paper filter disc cut to size and placed in the basket as a filter liner—this catches fines but may slightly reduce body.
Pro-Tips for Percolator Perfection
Once you have the basics down, these advanced tips will elevate your coffee from good to unforgettable.
The “Pre-Perk” Rinse
Before adding your coffee grounds, fill the pot with water, assemble, and place it on the heat just long enough for the first perk or two of plain hot water to shoot up the stem and back down. Discard this water. This pre-heats the entire apparatus, ensuring a more stable brewing temperature from the first moment you add the coffee, which leads to more even extraction.
Embrace the “Bloom” (Modified)
While percolators don’t bloom like pour-overs, you can mimic the effect. After the first perk of hot water sprays over the grounds, immediately remove the percolator from the heat for 30 seconds. This allows the grounds to saturate and release initial gases. Then return it to the heat to continue the full brew. This can reduce sourness and improve clarity.
Cold Water Start vs. Hot Water Start
There’s debate here. The classic method starts with cold water. However, starting with hot (not boiling) tap water can reduce the time to first perk, giving you slightly more control and potentially reducing the chance of scorching the initial grounds. Experiment with both to see which you prefer.
Seasoning Your Aluminum Percolator
If you have a traditional aluminum percolator (like a vintage Presto), it develops a natural, non-stick patina over time that prevents metallic tastes and improves heat conduction. To build this, brew several pots of coffee using the same method, rinsing only with hot water (no soap). The patina will darken. This is a good thing—it’s your percolator’s seasoning.
Altitude Adjustment
At high altitudes (above 3,000 feet), water boils at a lower temperature. This means your perking action may be more vigorous at the same heat setting, and extraction can be quicker. You may need to use slightly more coffee and monitor the brew even more closely to avoid bitterness.
Percolator vs. Other Methods: What’s the Difference?
Understanding how percolation differs from other brewing methods helps you appreciate its unique result.
- vs. Drip Coffee: Drip coffee uses a paper or metal filter and gravity; hot water passes through grounds once. It produces a cleaner, brighter cup with less body. Percolation repeatedly cycles the same water through the grounds, creating a much more intense, full-bodied, and sometimes heavier cup with more oils.
- vs. French Press: Both are immersion-style with full contact. French press uses a metal mesh filter, allowing fine oils and some sediment through, resulting in a rich, textured cup. Percolator’s repeated cycling can sometimes over-extract if not careful, but when done right, it yields a remarkably clear yet bold cup with a unique, “cooked” flavor profile that many find nostalgic and satisfying.
- vs. Moka Pot: Often confused, but they are different. A Moka pot uses steam pressure to force water up through a chamber of grounds, producing a strong, espresso-like concentrate. A percolator uses boiling and dripping, not pressure, and brews a full pot of finished, ready-to-drink coffee, not a concentrate.
Conclusion: The Reward of the Ritual
Learning how to make coffee in a stove top percolator connects you to a simple, enduring technology. It requires your attention, rewards your patience, and produces a cup of coffee with a character all its own—bold, aromatic, and satisfyingly substantial. The key is respect for the process: use good coffee, mind your grind, control your heat, and time your brew. Don’t be discouraged by a bitter first attempt; adjust one variable at a time. Soon, the sound of the perk will be a welcomed morning symphony, and the rich steam rising from your pot will signal the start of a perfect day. This isn’t just coffee; it’s a craft, a ritual, and a deeply personal way to start your morning. Now, go perk yourself a perfect cup.
Frequently Asked Questions
What grind size is best for a stovetop percolator?
Use a medium-coarse grind, similar to raw sugar or coarse sea salt. A grind that is too fine will cause over-extraction and sediment in your cup, while a grind too coarse will result in weak, sour coffee.
How long should I let my percolator coffee brew?
Once you achieve a steady perk (one every 2-3 seconds), brew for 5 to 7 minutes for a full-bodied, robust cup. For a lighter brew, aim for 3-4 minutes. Always remove from heat immediately after your desired brew time.
Can I use pre-ground coffee in a percolator?
Yes, but be cautious. Most pre-ground coffee is a fine drip grind, which is too fine for percolators and will likely lead to bitter, sediment-filled coffee. If using pre-ground, look for a “coarse” or “French press” grind, or be prepared to experiment with less coffee and shorter brew times.
Why is my percolator coffee bitter even with a short brew time?
The most common cause is heat. If your heat is too high, the water boils too vigorously, scalding the coffee grounds and causing intense bitterness. The solution is to lower your burner to achieve a gentle, steady perk rather than a violent, rolling boil.
How do I clean a stovetop percolator?
After each use, disassemble and rinse all parts thoroughly with hot water. For aluminum percolators, avoid soap on the interior to preserve the seasoning patina. Use a soft brush to clean the stem and basket holes. For stainless steel, a mild dish soap is acceptable. Periodically, descale with a vinegar-water solution if you have hard water.
Is percolator coffee stronger than drip coffee?
Yes, typically. Because the same water cycles through the grounds multiple times, percolator coffee extracts more solubles, resulting in a brew that is bolder, heavier, and has a higher caffeine content per ounce than standard drip coffee. It’s often described as having more “body” or “mouthfeel.”