Silicone molds are a baker’s secret weapon for easy release and creative shapes. Always check your mold’s max temperature (usually 425°F/220°C), place it on a sturdy baking sheet, and never use under the broiler. With proper care, these flexible tools are dishwasher-safe and oven-ready for everything from cupcakes to chocolates.
Have you ever stared at a beautiful, intricate silicone mold and wondered, “Can I really just put this in the oven?” The answer is a resounding yes, but with a few crucial caveats that make the difference between a perfect release and a sticky, melted mess. Silicone molds have revolutionized home baking and candy making, offering non-stick convenience and endless creative shapes. But using them correctly is key. Think of this guide as your friendly, detailed handbook to becoming a confident silicone mold baker. We’ll walk through everything from that first nervous moment of putting it in the oven to cleaning it up with ease.
Key Takeaways
- Know Your Mold’s Limits: Most silicone molds are safe up to 425°F (220°C), but always check the manufacturer’s instructions first.
- Always Use a Support: Place flexible silicone molds on a rigid baking sheet or pan for stability and easy transport in and out of the oven.
- No Broiler, No Direct Flame: Silicone is not designed for direct heat sources like broilers or open flames.
- Prep is Simple: Unlike metal, silicone rarely needs greasing, but a light spray can help with very sticky batters or for chocolate work.
- Cool Before Unmolding: Let baked goods cool in the mold for 5-10 minutes to set, then gently flex the mold to release.
- Cleaning is Easy: Most silicone molds are dishwasher safe (top rack), but hand washing with mild soap preserves them longest.
- Storage Matters: Store molds flat or loosely rolled to prevent permanent creases and warping.
📑 Table of Contents
Why Silicone Molds Are a Game-Changer for Bakers
Before we dive into the “how,” let’s talk about the “why.” Silicone molds are popular for very good reasons. They are flexible, allowing you to pop out even the most delicate creations without a hitch. They are non-porous and non-reactive, meaning they won’t absorb flavors or odors and won’t interact with acidic ingredients. They come in every shape imaginable—from mini dinosaurs for kids’ cupcakes to elegant floral designs for special occasions. And perhaps best of all, they are incredibly durable and can go from freezer to oven to dishwasher, making them a versatile workhorse in the kitchen. But this versatility comes with a responsibility to understand the material’s limits.
The Science of Silicone: It’s Not Plastic
Silicone used in bakeware is a synthetic rubber made from silicon, oxygen, carbon, and hydrogen. It’s prized for its heat resistance and flexibility. However, not all silicone is created equal. Food-grade, platinum-cured silicone is the gold standard for bakeware. It’s more heat-stable and less likely to leach any substances than lower-quality alternatives. When you buy a reputable brand, you’re getting a tool designed to withstand typical baking temperatures. The key takeaway here is that while it’s heat-resistant, it is not indestructible or heat-proof to any extreme.
Essential Safety First: Temperature is Everything
This is the single most important section. The number one rule of using silicone molds in the oven is temperature control. Exceeding a mold’s rated temperature can cause it to melt, warp, or release unpleasant fumes. Here’s what you need to know.

Visual guide about How Do You Use Silicone Mould in the Oven
Image source: i0.wp.com
Finding the Maximum Safe Temperature
Most high-quality, food-grade silicone molds are rated for continuous use up to 425°F (220°C). Some may go higher, up to 450°F (230°C), but you must find this information. It’s almost always printed on the packaging, the back of the mold, or on the manufacturer’s website. If you can’t find it, assume a conservative 400°F (200°C) limit. Never guess. Pro Tip: Keep the packaging or a note with your baking supplies that lists the max temp for each of your specialty molds.
Why You Should Avoid the Broiler
The broiler is an intense, direct, radiant heat source from the top of your oven. Even if your oven’s broiler setting is “low,” it can easily exceed 500°F (260°C) and points directly at the mold. This concentrated heat can easily melt the edges of a silicone mold or cause it to warp. Always use silicone molds in the oven’s conventional bake setting, never under the broiler.
Oven Rack Placement: The Middle is Your Friend
For even, consistent baking, place your silicone mold (on its baking sheet) on the center rack of your oven. This ensures heat circulates evenly around your creation. Avoid the very top rack, which can be closer to the oven’s heating element and hotter. Also, ensure there’s enough space above the mold for air to circulate—don’t crowd it with other pans.
Prepping Your Silicone Mold: Grease or No Grease?
One of the biggest perks of silicone is its natural non-stick properties. But is greasing always necessary? The answer is: it depends.
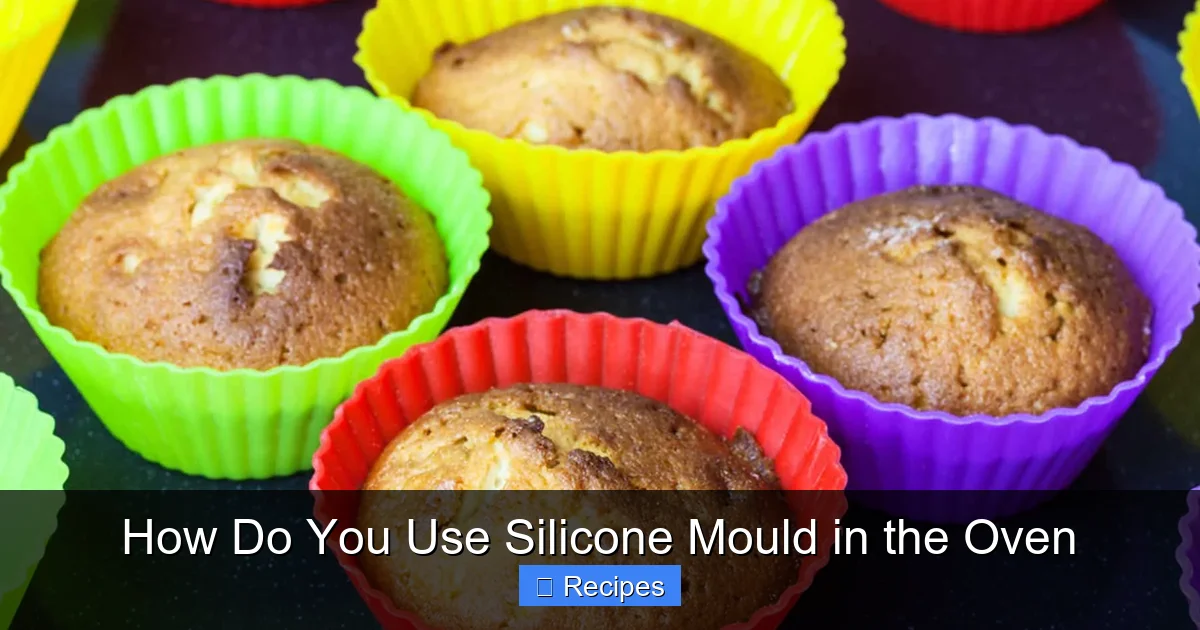
Visual guide about How Do You Use Silicone Mould in the Oven
Image source: siliconemouldaddicts.com
The General Rule: No Grease Needed
For most standard baked goods like cakes, muffins, brownies, and cookies, a clean, dry silicone mold requires no added fat. The baked item will release effortlessly once it’s properly cooled. This makes for a healthier final product and easier cleanup. Simply pour or spoon your batter directly into the mold.
When to Use a Light Coating
There are specific scenarios where a light mist of non-stick cooking spray or a very thin brush of oil can be beneficial:
- Extremely Sticky Batters: Batters with a very high sugar or honey content can sometimes caramelize and stick.
- Chocolate & Candy: When making chocolates or hard candies, a quick spray ensures a perfect, glossy release and prevents sugar bloom.
- New or Very Detailed Molds: Brand new molds or molds with ultra-fine, intricate details sometimes benefit from a tiny bit of lubrication for the first few uses.
If you do grease, use sparingly. Too much oil can cause the batter to pool and create an uneven bake.
The Baking Process: From Oven to Counter
With your mold prepped and your oven preheated, it’s showtime. The process is similar to using any other bakeware, but with a few silicone-specific considerations.

Visual guide about How Do You Use Silicone Mould in the Oven
Image source: e5d9p8u3.rocketcdn.me
Always Use a Supportive Baking Sheet or Pan
This is non-negotiable. A silicone mold, especially a large or full-sized one, is flexible and floppy. Trying to carry a filled, hot mold from the oven is a recipe for disaster—spilled batter and potential burns. Always place your silicone mold on a rigid, flat baking sheet or a metal pan before filling and baking. This provides crucial stability for:
- Easy, safe transport in and out of the oven.
- Even heat distribution from the bottom.
- A solid surface to set the hot mold on after baking.
Think of the baking sheet as the mold’s “hard hat.”
Monitoring Your Bake
Silicone is a poor conductor of heat compared to metal. This means it heats up more slowly but also retains heat well. Your baking times may be very similar to metal pans, but always rely on visual cues and a toothpick test rather than the clock. The baked good should pull away slightly from the edges of the mold and a toothpick inserted should come out clean. Because silicone doesn’t conduct heat as aggressively, the edges of your cake or muffin may brown more slowly than in a metal pan.
The Critical Cooling Step
Patience is a virtue, especially with silicone. Do not try to unmold your creation while it’s piping hot. The material will be very soft and pliable, and your baked good will likely be too fragile and sticky. Let the mold cool on the baking sheet for at least 5-10 minutes. For larger cakes, 15-20 minutes is better. This allows the structure to set fully. You’ll know it’s ready when the mold feels just warm to the touch and the item has shrunk slightly from the sides.
Unmolding and Cleaning: The Easy Part
This is where silicone truly shines. The release should be effortless if you’ve followed the cooling step.
The Art of the Release
To unmold, simply turn the mold upside down over a plate or cooling rack. Gently press on the back of the mold, starting from the center and working outward, or flex the sides of the mold inward. The baked item should pop right out. If it sticks, it likely needs a few more minutes of cooling. For extremely detailed molds, you can place the mold in the freezer for 5-10 minutes after cooling to help everything contract further for a perfect release.
Cleaning: Dishwasher or Hand Wash?
Most food-grade silicone molds are dishwasher safe (place them on the top rack to avoid the intense heat of the bottom). However, for longevity, gentle hand washing is recommended. Use warm, soapy water and a soft sponge or cloth. Avoid abrasive scrubbers like steel wool, which can scratch the surface. For stubborn residue from sticky candies or caramel, soak the mold in warm soapy water for 30 minutes before washing. Stubborn stains (like from turmeric or tomato sauces) can be soaked in a solution of baking soda and water or white vinegar. Never use harsh chemicals or bleach.
Advanced Tips and Troubleshooting
Now that you have the basics down, let’s elevate your silicone mold game with pro tips and solutions to common problems.
Going Beyond Baking: Freezer and Microwave
Your silicone molds are multi-taskers. They are perfectly safe for the freezer—ideal for making ice cubes, homemade candy bars, or freezing portioned soups and sauces. They are also microwave-safe, making them great for quick microwave cakes, melting butter or chocolate, or even cooking single-serve egg bites or oatmeal. The same temperature caution applies: don’t microwave an empty mold, and be mindful of very hot, molten contents.
Problem: My baked good has a weird, oily sheen or taste.
This is a sign of poor-quality silicone that may be leaching plasticizers, especially at high temperatures. Discard the mold immediately. This is why investing in reputable, platinum-cured silicone brands from trusted kitchenware companies is crucial for food safety.
Problem: My mold has a lingering smell or stain.
For odors, soak the mold in a solution of white vinegar and water (1:1) for several hours, then wash thoroughly. For stains, a paste of baking soda and water applied and left for an hour can work. Persistent stains are usually just cosmetic and don’t affect function, but if they bother you, it might be time to replace that particular mold.
Problem: My mold warped or melted.
This almost always means the oven temperature exceeded the mold’s rating. Check your oven’s accuracy with an oven thermometer. Never use a silicone mold at a temperature higher than specified, and absolutely never under the broiler. A warped mold is unsafe and should be retired.
Conclusion: Embrace the Flexibility
Using a silicone mold in the oven is wonderfully simple once you understand its strengths and limits. By respecting its temperature thresholds, always using a supportive baking sheet, and allowing proper cooling time, you unlock a world of creative baking with minimal fuss. These molds are an investment in hassle-free fun—from perfect portioned muffins to stunning chocolate creations. They take the stress out of release and cleanup, letting you focus on the joy of creating. So go ahead, pick that fun-shaped mold, and bake with confidence. Your future, perfectly unmolded self is thanking you already.
Frequently Asked Questions
Can I put a silicone mold directly on the oven rack?
No, you should always place a silicone mold on a rigid baking sheet or pan first. The flexible mold is unstable and dangerous to handle when hot, and the baking sheet ensures even heat distribution from the bottom.
What happens if I exceed the silicone mold’s temperature rating?
Exceeding the max temperature (usually 425°F/220°C) can cause the silicone to melt, warp permanently, or emit fumes. A damaged mold is unsafe and must be discarded.
Do silicone molds need to be greased for cakes?
Generally, no. High-quality silicone molds are naturally non-stick. Greasing is only recommended for very sticky batters, for chocolate work, or with brand new, highly detailed molds.
Can I wash silicone molds in the dishwasher?
Most are dishwasher safe on the top rack, but hand washing with mild soap and a soft sponge is recommended to preserve the surface and prevent long-term damage from harsh detergents and high heat.
Why did my silicone mold melt in the oven?
This is almost always due to an oven temperature that exceeded the mold’s rating, or from using it under the broiler. Always verify your oven’s actual temperature with a thermometer and never use silicone under direct heat.
How do I store silicone molds to prevent damage?
Store molds flat or loosely rolled. Avoid stacking heavy items on them or folding them tightly, as this can cause permanent creases and warping that may affect future bakes.