Animals are irresistibly drawn to the food residue and shelter of your grill. Keeping them out is critical to prevent costly damage, fire hazards, and health risks from droppings. The most effective strategy is a multi-layered approach centered on immediate, thorough cleaning after every use, combined with a high-quality, secure grill cover and smart storage of accessories. Consistent habits are far more successful than any single deterrent.
Key Takeaways
- Clean Immediately and Thoroughly: The single most important step is to burn off residue and scrub the grates and interior after each cooking session to remove all attractants.
- Invest in a Heavy-Duty, Snug-Fitting Cover: A cheap, flimsy cover is useless. Use a Weber-brand or equivalent heavy cover with secure straps or a drawstring to withstand wind and curious paws.
- Store Grilling Tools and Accessories Separately: Never leave propane tanks, utensils, or foil pans inside the grill basin. These are separate shelters and food sources for pests.
- Inspect and Seal Potential Entry Points: Regularly check the grill’s underside, vents, and seams for gaps or damage that small rodents could exploit, and seal them with high-temperature silicone.
- Create an Uninviting Perimeter: Keep the area around the grill clean of debris, tall grass, and food scraps. Consider motion-activated lights or humane repellents.
- Practice Seasonal Vigilance: Animals seek shelter more aggressively in fall/winter. Be extra diligent with covering and consider moving the grill to a more exposed location temporarily.
- Never Use Toxic Repellents Inside: Avoid mothballs, rat poison, or harsh chemicals inside the grill, as fumes can contaminate food and pose serious risks to pets and children.
[FEATURED_IMAGE_PLACEHOLDER]
📑 Table of Contents
- How to Keep Animals Out of Weber Grill
- The Golden Hour: Your Immediate Post-Grilling Routine
- Covering Your Weber: The First Line of Defense
- Smart Storage: Don’t Invite Them In With Your Accessories
- Beyond the Cover: Additional Deterrents and Perimeter Defense
- Seasonal Strategies and Long-Term Maintenance
- What To Do If You Suspect an Infestation
- Conclusion: Consistency is Your Ultimate Weapon
How to Keep Animals Out of Weber Grill
You just fired up your beautiful Weber grill for a perfect backyard barbecue. The steaks are sizzling, the neighbors are envious, and life is good. Then, you lift the lid for the first time in a few days and find… evidence. A chewed corner of the grates. Droppings on the flavorizer bars. Tiny footprints in the ash. A sinking feeling hits. Your prized cooking appliance has become a five-star hotel and buffet for the local wildlife. Squirrels, raccoons, mice, rats, and even stray cats view your covered grill as the ultimate real estate: it’s warm, it’s sheltered from rain and wind, and it smells heavenly of roasted meat and grease. Keeping animals out of your Weber grill isn’t just about aesthetics; it’s about protecting a significant investment from costly damage, preventing potential fire hazards from chewed wires or blocked burners, and safeguarding your family’s health from pathogens like Salmonella and Leptospirosis found in pest droppings. This guide will walk you through a complete, actionable system to wildlife-proof your grill, combining immediate habits, the right equipment, and long-term landscape management.
Understanding the Enemy: Why Your Weber is a Pest Magnet
To win the battle, you must understand why your grill is such a target. It’s not personal; it’s survival. Your Weber offers three irresistible things:
- Food: Even after you think you’ve cleaned it, microscopic grease and food particles remain in the grates, on the flavorizer bars, and in the bottom of the basin. This is a constant, powerful scent attractant.
- Shelter: The closed lid creates a dark, enclosed space protected from the elements. For a small rodent or a raccoon family, it’s a ready-made den, especially during cold or wet weather.
- Safety: The height of a standard grill can be out of reach for some predators, and the confined space offers a sense of security for nesting.
Squirrels are notorious for chewing on anything to grind their ever-growing teeth, and plastic or rubber components on your grill (like wiring sheaths or knob seals) are perfect for this. Raccoons have dexterous paws and can lift lighter lids or manipulate covers. Mice and rats can squeeze through astonishingly small gaps and will shred any soft material for nesting. Once they move in, they’ll urinate and defecate inside, corroding metal parts and contaminating surfaces. Their nesting material (shredded paper, leaves, insulation) can also block critical airflow to the burners, creating a dangerous fire risk. The goal, therefore, is to systematically remove these three attractants: food smell, accessible shelter, and perceived safety.
The Golden Hour: Your Immediate Post-Grilling Routine
The most critical window of opportunity is the first 30-60 minutes after you finish cooking. While the grill is still warm (but off), you have a chance to undo the entire appeal for pests. This routine is non-negotiable if you want to keep animals out of your Weber grill consistently.

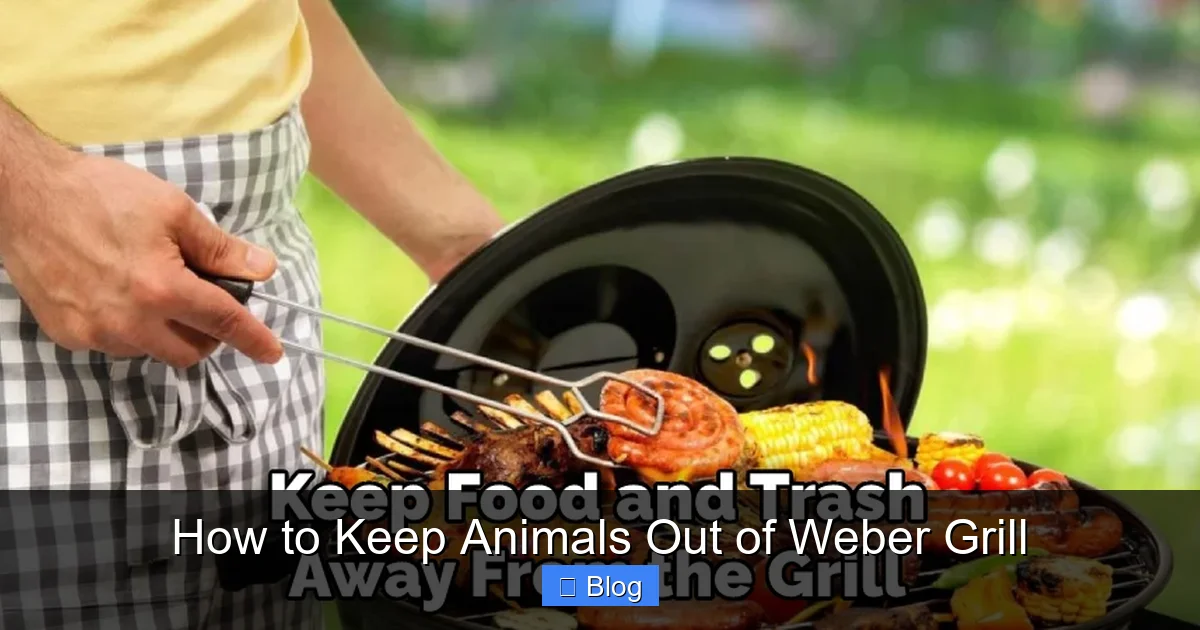
Visual guide about How to Keep Animals Out of Weber Grill
Image source: shungrill.com
Step 1: The Burn-Off (While Still Warm)
Before you even touch a cleaning tool, turn all burners to high for 10-15 minutes with the lid closed. This is not just for cleaning; it’s a pest control tactic. The intense heat will:
- Carbonize and burn off any remaining food particles and grease on the grates and flavorizer bars, eliminating the scent trail.
- Sterilize the interior surfaces, killing any bacteria or parasites that might have been introduced by a previous pest visit.
- Make the interior temporarily inhospitable. The residual heat and lack of odor signal to any watching animal that this “buffet” is closed and dangerous.
Pro Tip: Do this even if you plan to do a deeper clean later. The burn-off is your first and fastest chemical-free defense.
Step 2: Physical Removal of Attractants
Once the grill is cool enough to handle safely (wear gloves!), you must physically remove every last bit of organic material.
- Scrape the Grates: Use a high-quality, sturdy grill brush (brass or stainless steel, depending on your grate type). Scrape every inch of the grates, top and bottom. Pay special attention to the corners and edges where bits of charred food hide.
- Empty the Ash Catcher/ Basin: This is a prime target. Weber’s one-touch cleaning system is great, but you must empty the ash catcher completely after every few uses, and definitely after a major cook. Dump the ash into a metal container with a lid (never a plastic bag or bin, as hot ash can melt it or start a fire). Wipe out the bottom of the grill basin with a grill-safe scraper or paper towels. Any lingering ash or grease puddle is a scent beacon.
- Clean the Flavorizer Bars: These V-shaped bars under the grates catch drippings. They get gross. Use a putty knife or grill scraper to remove the caked-on, hardened grease and food bits. If they are extremely soiled, remove them (consult your manual) and soak in warm, soapy water.
- Don’t Forget the Lid and Inside Walls: Wipe down the underside of the lid with a damp cloth and mild soap. Grease splatter here is a major attractant. Wipe the interior walls as best you can.
Practical Example: Keep a dedicated “grill cleanup kit” right by your back door: a sturdy brush, a metal putty knife, a pack of heavy-duty paper towels, and a small dustpan. This removes the friction of having to go get tools, making it more likely you’ll do the full routine.
Step 3: Cool, Then Cover – The Right Way
After the physical cleaning, allow the grill to cool completely. A warm grill under a cover creates condensation, which leads to rust—and a damp, rusting interior is even more appealing to some pests looking for moisture. Only when it is completely cold to the touch should you apply the cover. But not just any cover will do. This leads us to the next critical layer of defense.
Covering Your Weber: The First Line of Defense
A cover is your primary physical barrier. But a poorly chosen or improperly used cover is worse than no cover at all, as it can trap moisture and debris, creating a perfect habitat. The goal is a cover that is durable, fits like a glove, and stays put.
Visual guide about How to Keep Animals Out of Weber Grill
Image source: thekitchenix.com
What Makes a “Good” Grill Cover?
Weber sells covers for all their models for a reason—they’re engineered for the job. If you’re looking at third-party options, use this checklist:
- Material: Look for heavy-duty, marine-grade polyester or vinyl with a polyurethane coating. It should be UV-resistant to prevent sun degradation and waterproof. Cheap nylon will tear and become brittle.
- Fit: It must be specific to your exact Weber model (e.g., Genesis E-310, Q-2200). A baggy cover flaps in the wind, collects leaves and water, and provides loose fabric that small animals can tug and chew to create an entry point.
- Closure System: This is the #1 feature. You need a cover with either:
- Heavy-duty straps with buckles that hook around the grill legs or base.
- A strong drawstring with a lock that cinches tightly around the base.
- Magnetic or Velcro tabs that hold the sides together (less effective in high wind).
The closure must be robust enough that a determined raccoon cannot pull it loose.
- Ventilation: Some covers have small, protected vents to allow airflow and reduce moisture buildup. This is good, but the vents should be small mesh screens, not large holes.
Real-World Comparison: A $20 generic “one-size-fits-all” cover from a big-box store will likely be shredded by wind or pests within a season. A $50-$80 Weber-specific cover with straps is a direct investment in protecting your $500-$2000 grill.
Proper Cover Installation and Maintenance
How you put the cover on matters. Always ensure the grill is completely cool and clean. Drape the cover over the top, letting it fall evenly over the sides. Then, systematically tighten all straps or the drawstring. Go around the entire base and pull it snug. The cover should be taut, not sagging. A sagging pocket at the bottom is an invitation for leaves to collect and for small animals to nest underneath.
Twice a year, inspect the cover itself for wear, tears, or broken straps. A small hole is a major vulnerability. Repair it with heavy-duty vinyl repair tape or replace the cover immediately. Also, periodically brush off leaves, snow, and debris from the top of the cover. A heavy snow load or a pile of damp leaves against the cover can press it against the grill lid, potentially allowing moisture in or making it easier for an animal to find a weak spot.
Smart Storage: Don’t Invite Them In With Your Accessories
Here’s a critical mistake many people make: they store their grilling tools, spare propane tanks, foil pans, and bags of charcoal inside the grill basin when not in use. You are essentially providing a separate, fully furnished apartment and pantry inside the main structure! This is a guaranteed way to attract and retain animals.
The “Nothing Inside” Rule
Your Weber grill’s cooking chamber is for cooking only. When the grill is not in use, it should be completely empty. This includes:
- Propane Tanks: Always store your propane tank separately in an upright, well-ventilated area away from direct sunlight and heat sources. Never store it inside the grill basin, even if it’s disconnected. The tank itself is a heavy, metallic object that can shift and damage the grill interior, and its valve is an intriguing object for chewers.
- Grilling Tools: Tongs, spatulas, brushes, etc., should be stored in a dedicated tool hook or cabinet outside the grill.
- Disposable Pans/Foil: Used foil pans with grease residue are a gourmet treat for raccoons. Dispose of them properly in a sealed outdoor trash bin immediately after use.
- Charcoal: If you use a charcoal Weber, store your charcoal in a sealed, metal container. Never leave a bag or bucket inside the grill.
- Smoker Boxes, Pizza Stones, etc.: Any accessory that goes inside should be removed, cleaned, and stored elsewhere.
An empty, clean, and covered grill is a potential shelter. A grill that smells like food and contains soft, chewable items is an occupied home. Make yours unoccupiable by removing all secondary attractants.
Beyond the Cover: Additional Deterrents and Perimeter Defense
A good cover and clean grill are your foundation. For persistent pest pressure or as a supplement, you need to make the immediate area around your grill unappealing. This is about creating a “pest-free zone” in your backyard.

Visual guide about How to Keep Animals Out of Weber Grill
Image source: dinewithdrinks.com
Landscape and Site Management
Look at your grill’s location. Is it tucked under a low-hanging tree or deck? Is it surrounded by tall shrubs, wood piles, or compost bins? These are wildlife highways and hideouts. Where possible, move your grill to a more open, exposed location. Animals prefer darkness and cover. A spot that gets some sun and has clear sight lines is less attractive. Keep the area within a 3-foot radius meticulously clean:
- Sweep up any grass clippings, leaves, or debris weekly.
- Never sweep food scraps or grease into this area.
- If you have a patio, pressure wash it periodically to remove any organic film or scent trails.
- Store firewood at least 20 feet away from your house and grill, and stack it off the ground.
Humane Repellents and Scare Tactics
You can add sensory deterrents to the perimeter. These are most effective when rotated, as animals can become habituated.
- Odor Repellents: Soak rags in ammonia or use commercial predator urine (coyote, fox) and place them in perforated containers (like old plastic bottles with holes poked in them) around the grill legs. Reapply after rain. Never apply these liquids directly to your grill or cover, as the smell can linger and transfer to food.
- Taste Repellents: For the lower parts of the grill stand or the ground around it, you can use a non-toxic, bitter-tasting spray designed for rodents (like a hot pepper or bitter apple solution). Again, avoid the cooking surfaces.
- Physical Barriers: Place a ring of prickly or sharp objects around the base. A 12-inch wide border of pine cones, holly branches, or even a plastic mesh fencing (secured to the ground) can deter climbing or digging.
- Motion-Activated Devices: A motion-activated sprinkler or a bright light can startle nocturnal visitors like raccoons and opossums. A ultrasonic pest repeller is an option, though its effectiveness is debated and varies by species.
Important: If you have pets, ensure any repellent you use is non-toxic to them. Always check local regulations regarding wildlife harassment.
Seasonal Strategies and Long-Term Maintenance
Your strategy needs to adapt with the seasons, as animal behavior changes dramatically.
Spring/Summer: The Active Foraging Season
During warm months, animals are actively foraging for food. Your main focus is on the immediate post-grilling routine. The scent of your cook is a dinner bell for miles. Being religious about the burn-off and cleanup is your best defense. Also, ensure your cover is securely fastened, as summer thunderstorms can blow covers off, exposing a freshly used (and smelly) grill.
Fall/Winter: The Shelter-Seeking Season
This is the most dangerous time for grill infestations. As temperatures drop, the need for warm, dry shelter becomes a matter of survival for rodents and other creatures. A grill under a deep snow cover is an ideal insulated den. Your actions:
- Increase Inspection Frequency: Check under and around the cover weekly, even if you haven’t grilled. Look for tracks, chewed material, or nesting debris.
- Consider Strategic Relocation: If your grill is normally tucked against the house or under a deck, consider moving it to a more open, central part of the patio for the winter. Exposed locations are less attractive for nesting.
- Double-Check Seals: Before the first freeze, do a full inspection of your grill’s body. Look for any gaps where the legs attach, around the gas valves (for gas grills), or in the vent hoods. Small gaps can be sealed with a high-temperature silicone caulk (ensure it’s safe for the application).
- Cover with Care: Ensure the grill is 100% bone-dry before covering for the long winter. Any trapped moisture will cause rust and create a damp environment pests love.
Annual Deep Inspection and Grill TLC
At least once a year, typically in early spring before grilling season, perform a full inspection and deep clean of your entire Weber.
- Fully disassemble removable parts: grates, flavorizer bars, ash catcher, burner protectors.
- Inspect every component for chew marks, holes, rust pits, or corrosion. Pay special attention to the gas tubes and manifolds on a gas grill. If you find damage, contact Weber customer service for replacement parts. Do not operate a damaged grill.
- Give every part a thorough wash with grill-specific degreaser or warm soapy water. Rinse and dry completely.
- Check the condition of your cover and replace if needed.
- This deep clean removes a full season of scent accumulation, resetting the “uninhabitable” status of your grill.
What To Do If You Suspect an Infestation
Despite your best efforts, you might find evidence of a tenant. Here’s the safe, step-by-step protocol:
- Do NOT Use the Grill: Do not attempt to light it or cook on it. Droppings can contain viruses, and nesting material is a major fire hazard inside the burner area.
- Remove the Cover Carefully: Wear gloves and a mask (N95 is ideal). Lift the cover slowly. You may see the animal(s) scatter. If they are trapped inside, do not handle them.
- Evacuate and Assess: Once the area is clear, use a flashlight to inspect the entire interior. Look for nests (usually in the back corners, under the burners, or in the ash catcher), droppings, and chew damage. Take photos for insurance or to show a professional.
- Cleaning and Disinfection: This is a hazardous material cleanup. You will need:
- Heavy-duty gloves, mask, and eye protection.
- A plastic scraper to remove nests and solid debris. Bag it immediately in a heavy-duty trash bag, seal, and dispose of in an outdoor bin.
- A solution of 1 part bleach to 10 parts water, or a commercial disinfectant labeled for viruses/bacteria (like those for pet accidents).
- Spray all interior surfaces (grates, walls, burner tubes, flavorizer bars) thoroughly with the disinfectant. Let it sit for the recommended time (usually 5-10 minutes).
- Rinse everything with a hose if possible, then allow to dry completely in the sun.
For severe contamination, consider hiring a professional cleaning service that handles biohazards.
- Repair and Prevent: After cleaning, repair any damage. Then, re-evaluate your prevention system. Where did they get in? Was the cover compromised? Was there a gap? Reinforce your defenses before considering using the grill again.
- For Live Animals: If an animal is actively nesting and you cannot safely encourage it to leave (with bright lights, loud noises from a safe distance), you may need to contact a local wildlife removal service. Never try to handle a wild animal, especially raccoons (which can be aggressive and carry rabies).
Conclusion: Consistency is Your Ultimate Weapon
Keeping animals out of your Weber grill is not a one-time fix; it’s a habit. It’s the discipline of the post-cook cleanup ritual. It’s the wisdom of investing in a proper cover and using it correctly every single time. It’s the refusal to use your expensive grill as storage. By combining these daily and weekly habits with smart landscape choices and seasonal adjustments, you create an environment that is simply not worth the trouble for wildlife. You protect your investment from thousands of dollars in potential damage. You eliminate fire risks from blocked burners and chewed wiring. You safeguard your family’s health. Your Weber grill is a centerpiece of hospitality and great food. Don’t surrender it to the squirrels and raccoons. Take back control with these proven, practical methods, and enjoy many more years of pest-free, delicious grilling.
Frequently Asked Questions
What is the absolute best way to keep animals out of my Weber grill?
The single most effective method is a two-part system: immediately burning off and thoroughly cleaning the grill after every single use to eliminate all food scent, combined with using a heavy-duty, model-specific cover that has secure straps or a drawstring to prevent it from being pulled off by determined animals.
Are there any safe repellents I can use inside or around my grill?
Yes, but with strict limits. Never use toxic chemicals like mothballs or rat poison inside or near your grill, as fumes can contaminate food and poison pets/children. Safe options include placing ammonia-soaked rags or commercial predator urine in perforated containers *around the base* of the grill (not on it), or using a motion-activated sprinkler in the surrounding area.
I have a persistent raccoon problem. What extra steps can I take?
For raccoons, focus on eliminating all potential food sources and securing your cover beyond doubt. Ensure your cover straps are extremely tight. Consider adding a secondary physical barrier, like a bungee cord hooked to the grill legs and a stake in the ground. Also, remove any other food attractants from your yard, like unsecured trash cans, pet food, or fallen fruit from trees.
Can I store my propane tank in the bottom of my Weber grill when not in use?
Absolutely not. Storing a propane tank inside the grill basin is a major fire hazard and a huge attractant for pests. The tank should always be stored upright in a well-ventilated, outdoor area away from direct sunlight, heat sources, and your grill. The grill basin must remain empty.
What should I do if I find a nest (like mice or squirrels) inside my grill?
Do not use the grill. Wear gloves and a mask, carefully remove the nest material, and bag it immediately. Then, disinfect the entire interior with a 1:10 bleach-water solution or a commercial disinfectant, let it sit, and rinse if possible. After it’s completely dry, inspect for and repair any entry points. For severe infestations, consult a wildlife removal professional.
How often should I really clean my grill to prevent animals?
The “burn-off” after every single cooking session is mandatory. A deeper scrape and ash emptying should happen every 1-3 uses, depending on how heavily you cook. A full disassembly and deep clean with degreaser should be done at least once a year, typically in early spring before peak grilling season.