Installing a PUR filter on a pull-out faucet is a simple DIY project that typically takes under 10 minutes. The process involves identifying your faucet’s connector type, attaching the adapter kit included with your PUR filter, and clicking the filter into place. Most installations require no tools, though having adjustable pliers and plumber’s tape handy can help with stubborn connections. Once installed, you’ll instantly have access to clean, great-tasting filtered water at the twist of a lever, while your unfiltered water continues to flow from the main spout.
Imagine turning your kitchen faucet and instantly getting crisp, clean, great-tasting water for drinking and cooking. No more bulky pitchers cluttering your fridge, no more endless cases of plastic bottles. It’s a dream for many homeowners, and with a PUR water filter designed for a pull-out faucet, that dream is not only possible—it’s a 10-minute DIY project you can do yourself. But what if your faucet isn’t a standard spout? What if it’s a modern pull-out or pull-down model with a separate spray head? You might think a filter won’t fit. Think again.
PUR has engineered most of its under-sink and faucet-mount systems to be incredibly versatile, specifically to tackle the challenge of modern pull-out faucets. The key is in the adapter kit—a small bag of plastic pieces that holds the magic. This guide will walk you through every single step, from identifying your faucet type to troubleshooting a minor drip. We’ll demystify the process, so you can confidently install your PUR filter and start enjoying purified water from your very own pull-out sprayer. Let’s get started.
Key Takeaways
- Compatibility is Key: PUR filters are designed for standard pull-out/pull-down faucets with a removable aerator. Confirm your faucet has a “pull-out” spray head connected by a flexible hose.
- Use the Included Adapter Kit: PUR filters come with multiple adapter inserts and O-rings to fit most common faucet connector sizes (typically ½” or ⅜”).
- No Tools Usually Needed: The system is designed for hand-tightening. Tools are only for stubborn aerators or to ensure a leak-free seal with plumber’s tape.
- Test for Leaks Thoroughly: After installation, check both the filter connection and the original faucet connection for drips before fully securing under the sink.
- Filter Activation is Crucial: Always run the new filter with cold water for 5-10 minutes to flush carbon fines and activate the filter media before drinking.
- Know Your Filter Model: PUR FM-2000B (basic), FM-3333B (advanced), and FM-9700B (3-stage) have slightly different adapter configurations but the same core installation principle.
- Maintenance is Simple: Replace the filter cartridge every 2-3 months (or 100 gallons) for optimal performance and taste.
📑 Table of Contents
- Understanding Your Pull-Out Faucet: The First Critical Step
- Gathering Your Tools and Unpacking the PUR Kit
- Step-by-Step Installation: From Under the Sink to the Countertop
- Testing, Activation, and Troubleshooting Common Hiccups
- Maintaining Your PUR Filter for Long-Term Performance
- Conclusion: Your Journey to Cleaner, Tastier Water is Complete
Understanding Your Pull-Out Faucet: The First Critical Step
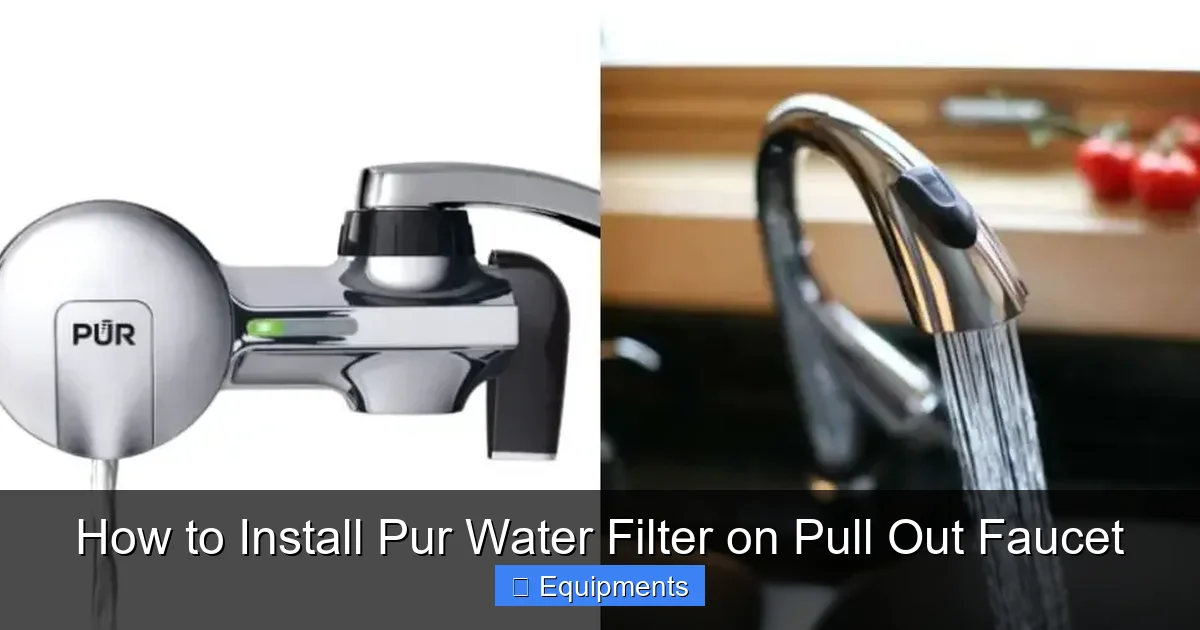
Before you even open the PUR box, you need to understand exactly what kind of faucet you have. A “pull-out” faucet is distinct from a standard fixed spout. It features a flexible hose housed within the faucet body. When you pull the spout toward you, it extends, usually about 12-24 inches, and the water switches from the main spout to the spray head at the end of the hose. This is the most common style in modern kitchens. A “pull-down” faucet operates the same way but the spout pivots downward from a tall, arched neck. For PUR filter installation, these two types are treated identically.
Identifying the Connection Point
Your goal is to find where the flexible hose connects to the water supply lines under your sink. This connection point is what you’ll be attaching the PUR filter to. To do this, you need to get under your sink. Clear out any cleaning supplies or storage boxes. You’ll see two flexible supply lines (hot and cold) running from your valves up into the faucet body. Follow the cold water line (usually on the right if valves are facing you). It will connect to a small plastic or metal fitting on the bottom of the faucet. That fitting is the connector that also feeds the pull-out hose. This is your target.
The Aerator vs. The Connector: Don’t Confuse Them!
This is the most common point of confusion. The aerator is the small mesh screen at the very tip of your faucet spout. You can unscrew it by hand or with pliers. Some older faucet-mount filters install here. PUR’s pull-out faucet systems do NOT install at the aerator. They install at the supply line connector under the sink. The aerator is for simple, non-pull-out faucets. If you try to install your PUR filter at the tip of your pull-out spout, it will not work and will likely block the hose’s ability to retract. Always locate the connection point under the sink.
Gathering Your Tools and Unpacking the PUR Kit
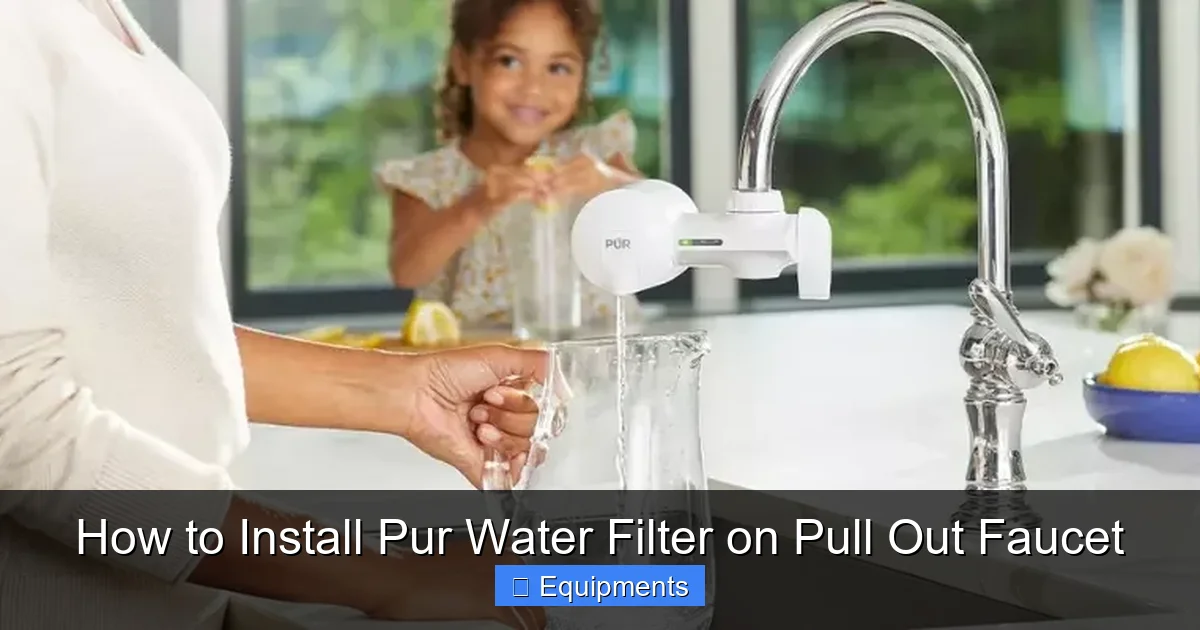
With your faucet identified, it’s time for the fun part: unpacking. A typical PUR system for pull-out faucets, like the popular PUR FM-2000B or FM-3333B, comes with several components. Knowing what each piece is for will save you a lot of head-scratching.
Visual guide about How to Install Pur Water Filter on Pull Out Faucet
Image source: faucetsavvy.com
The Essential Components of Your PUR Box
Inside, you’ll find: 1) The main filter housing (a plastic cylinder), 2) A new filter cartridge (wrapped in plastic), 3) A bag of adapter parts. This adapter bag is your best friend. It usually contains: several plastic adapter sleeves of different diameters (like ½” and ⅜”), corresponding rubber O-rings, and sometimes a small plastic tool to help push O-rings into place. There will also be a mounting bracket with a suction cup or a small screw for countertop mounting. Do not throw away the plastic bag the adapters came in. Use it to keep the small parts organized and prevent them from washing down the drain.
Tools You Might Need (Usually Optional)
The beauty of this system is that it’s designed for hand tightening. However, have these items nearby just in case: a) An adjustable wrench or channel-lock pliers—use these *only* if the existing aerator or connector under the sink is corroded and won’t budge by hand. Always wrap the jaws with a cloth to protect the faucet’s finish. b) A small bowl or cup—to catch a few drops of water when you disconnect the line. c) A clean rag—for drying and cleanup. d) Plumber’s tape (Teflon tape)—this is for creating a perfect seal on threaded connections. We’ll discuss its use later. e) A flashlight—under-sink spaces are often dark.
Step-by-Step Installation: From Under the Sink to the Countertop
Now, let’s get hands-on. Follow these steps in order. The process is logical: disconnect, adapt, connect, and mount.
Visual guide about How to Install Pur Water Filter on Pull Out Faucet
Image source: indoorense.com
Step 1: Shut Off the Water and Relieve Pressure
This is non-negotiable. Locate the two shut-off valves under your sink—one for hot, one for cold. They are usually small oval or round handles. Turn the cold water valve (the one you’ll be working on) clockwise until it stops. Now, go to your faucet and turn the cold water handle on. This will relieve any built-up pressure in the line. You’ll hear a sputter and then a slow drip. Let it run until it stops completely. This prevents a mini-geyser when you disconnect the hose.
Step 2: Disconnect the Cold Water Supply Line from the Faucet
Position your bowl under the connection. You’ll see a flexible supply line (from the wall valve) connected to the bottom of your faucet with a threaded nut. This nut is usually plastic. Using only your hand, try to unscrew it counter-clockwise. It should come off easily. If it’s stuck due to mineral deposits, use your adjustable wrench *very gently*. Never use force on the faucet body itself—hold the faucet connector steady with one hand (or a second wrench) and turn the nut with the other. Once loose, finish unscrewing it by hand. The supply line will drop down, and you might get a small amount of water in your bowl. That’s okay.
Step 3: Identify the Correct Adapter and Install It
This is the heart of the installation. Look at the threaded connector on the bottom of your faucet. Measure its diameter with your fingers or compare it to the adapter sleeves. You need the adapter sleeve that fits snugly over this connector. The adapter sleeve is a small plastic tube. It will have a rubber O-ring on one end. Slide this adapter sleeve onto the faucet connector. It should fit like a glove—not too loose, not too tight. The O-ring should face toward the faucet. Now, take the other end of this adapter sleeve—it will be threaded. This is where your PUR filter will screw on. If your adapter sleeve is loose on the faucet connector, try the next size down. The goal is a tight, non-wobbly fit.
Step 4: Connect the PUR Filter Housing
Take your PUR filter housing (with the new, unwrapped filter cartridge already inside—remove it from its plastic wrap first!). The housing has a threaded inlet on one end. Screw this threaded end onto the adapter sleeve you just installed on the faucet. Turn it clockwise by hand. You’ll feel it tighten. Give it a final, firm quarter-turn. Do not overtighten. Hand-tight plus a little snug is perfect. The O-rings will create the seal. If you feel resistance that seems excessive, stop—you may have cross-threaded it. Unscrew and try again.
Step 5: Connect the Supply Line to the Filter
Now, take the flexible supply line that you disconnected in Step 2. Its threaded nut should be clean. Wrap a few turns of plumber’s tape clockwise around the threads. This is a crucial step for a leak-proof seal. Now, screw this nut onto the *outlet* port of the PUR filter housing (the other threaded end). Hand-tighten it, then use your wrench for a final half-turn. Be gentle; the filter housing is plastic. Ensure the supply line is pointing generally downward and isn’t kinked.
Step 6: Mount the Filter and Test for Leaks
At this point, your filter is plumbed in. But it’s dangling. Use the mounting bracket from your kit. The suction cup version works on smooth, non-porous surfaces like tile or stainless steel. Clean the spot with rubbing alcohol, press the suction cup firmly, and lock it. The screw-mount version goes into a cabinet wall or side. Position the filter housing in the bracket so it’s secure and not bearing the weight of the connections. Now, slowly turn the cold water shut-off valve back on. Go to the faucet and turn the cold water on. Check both connections—the adapter-to-faucet joint and the supply-line-to-filter joint—for any drips. A tiny seepage is normal at first and often stops as the O-rings seat. If a drip persists, tighten that specific connection a quarter-turn more. Do not overtighten the plastic threads.
Step 7: Install the Sprayer Head Adapter (If Applicable)
Some newer PUR models (like the FM-3333B) include a special adapter that installs between the pull-out spray head and the hose. If your kit has this small, usually white plastic piece with O-rings, you need to install it. To do this, pull the spray head out fully. At the base of the spray head, where it connects to the hose, you’ll see a collar or ring. Unscrew the spray head from the hose (you may need pliers). Insert the PUR adapter sleeve into the hose end, ensuring the O-ring is in place. Screw the spray head back onto the hose, now threading onto the PUR adapter. Hand-tighten. This step ensures the filter’s flow doesn’t interfere with the sprayer’s retraction.
Testing, Activation, and Troubleshooting Common Hiccups
Your filter is installed and not leaking. Congratulations! But before you pour that first glass, there’s one vital final step, and we need to address a couple of potential issues.
Visual guide about How to Install Pur Water Filter on Pull Out Faucet
Image source: indoorense.com
The Mandatory Flush: Activating Your Filter
Brand new filter cartridges contain fine carbon particles and manufacturing residue. You must flush these out. With the filter securely installed, turn your cold water on full blast. Let it run through the filter for at least 5-10 minutes. You’ll see the water start cloudy and then clear up. Do this into your sink. After flushing, your filtered water is ready to drink. The hot water line remains unfiltered, as PUR filters are designed for cold water only.
Troubleshooting: “My Filter is Leaking!”
A leak usually means one of three things: 1) A loose connection. Go back and hand-tighten, then use a wrench for a quarter-turn on the leaking joint. 2) Wrong adapter size. The adapter sleeve must fit the faucet connector perfectly. If it’s too big, it won’t seal; too small, it won’t stay on. Re-test the fit. 3) Damaged or missing O-ring. Check every O-ring in your adapter kit. They should be seated in their grooves perfectly, without twists or tears. A tiny bit of plumber’s grease can help seat them.
Troubleshooting: “The Water Flow is Very Slow!”
This is common with new filters until they are fully saturated. After your initial 5-10 minute flush, the flow should normalize to a strong, steady stream. If it’s still sluggish after 24 hours of use, check: 1) Is the filter cartridge installed correctly? It must click fully into the housing. 2) Is the filter past its lifespan? A clogged filter needs replacing. 3) Is your home’s water pressure unusually low? This is a pre-existing condition the filter may be exacerbating.
Troubleshooting: “The Sprayer Won’t Retract or Pull Out Smoothly”
This points to the sprayer head adapter not being installed correctly (if your model uses one). The adapter must be the correct size and threaded on straight. A cross-threaded adapter can bind the hose. Also, check that the weight that retracts the hose is still properly attached under the sink. The filter’s added weight at the connector end is usually negligible, but a binding adapter can create drag.
Maintaining Your PUR Filter for Long-Term Performance
Installation is a one-time task, but maintenance is an ongoing commitment to ensure your water stays pure and your system works efficiently.
Understanding Filter Lifespan and Replacement Indicators
PUR filters are rated for approximately 100 gallons or 2-3 months, depending on your water quality and usage. Most models have a simple electronic indicator light on the filter housing that changes color (green to yellow to red) or a manual timer you twist. Never exceed the recommended lifespan. A saturated filter not only delivers poor-tasting water but can also reduce flow and potentially allow contaminants to break through.
The Simple Filter Change Process
Replacing the cartridge is even easier than the initial install. 1) Turn off the cold water shut-off valve. 2) Unscrew the filter housing from the adapter (the part connected to your faucet). Do this over the sink. 3) Unscrew the old filter from the housing (it will be inside). 4) Unwrap the new filter and screw it into the empty housing. 5) Re-screw the full housing back onto the adapter. 6) Turn the water on and flush the new filter for 5 minutes. The entire process takes 2 minutes. Always keep a spare filter on hand!
Cleaning the Filter Housing and Sprayer Head
Once a month, wipe down the filter housing and the spray head with a soft, damp cloth. For mineral deposits, use a 50/50 solution of white vinegar and water, then rinse thoroughly. Never use abrasive cleaners. You can also remove the aerator from the spray head (the little mesh screen) and soak it in vinegar to clear any debris, rinsing well before reattaching.
Conclusion: Your Journey to Cleaner, Tastier Water is Complete
You did it. By following this guide, you’ve successfully navigated the world of faucet adapters, O-rings, and threaded connections. You’ve transformed your pull-out faucet from a simple source of tap water into a dedicated station for clean, PUR-filtered hydration. The initial investment of 15 minutes pays for itself every single day in better-tasting coffee, safer cooking water, and the peace of mind that comes from reducing over 70 contaminants, including lead and mercury. Remember the core principles: identify your connector correctly, use the right adapter from the kit, hand-tighten everything, and always flush a new filter. With a simple filter swap every few months, this system will serve you and your family for years. Now, go fill that glass and celebrate your handy work.
Frequently Asked Questions
Can I install a PUR filter on any pull-out faucet?
Almost all. PUR systems are designed for standard pull-out/pull-down faucets with a removable aerator and a ½” or ⅜” threaded connector under the sink. The included adapter kit covers most brands like Moen, Delta, Kohler, and Glacier Bay. The exception is very old or non-standard commercial-style faucets.
What if I lose one of the small adapter pieces or O-rings?
Contact PUR customer service. They are excellent about sending replacement adapter kits for free. Have your filter model number (on the housing) ready. In the meantime, you can often find generic replacement kits online by searching for “faucet adapter kit 1/2 inch.”
Will the filter reduce my water pressure?
There is a minor pressure drop, as with any filter, but it’s designed to be minimal. You should notice a strong, steady stream. If the flow is a weak trickle, you likely have the wrong adapter size causing a restriction, a clogged filter, or very low incoming water pressure.
Can I use the filtered water from the hot side?
No. PUR faucet filters are certified for cold water only. Hot water can damage the filter media and housing, and it’s not an effective way to purify water as contaminants behave differently at high temperatures. Always use the cold water handle for filtered water.
Why does my filtered water still taste like chlorine?
Your filter may be exhausted and needs replacing. A new filter removes up to 99% of chlorine taste and odor. If a new filter still tastes like chlorine, your water has an extremely high chlorine content. You may need a whole-house carbon filter or a more advanced system.
Is professional installation necessary?
For the vast majority of standard pull-out faucets, professional installation is not necessary. The system is a true DIY project. You might consider a plumber only if your shut-off valves are corroded and won’t turn, your connections are non-standard, or you are simply uncomfortable working under the sink.