Installing a kitchen cabinet toe kick is a straightforward DIY project that dramatically upgrades your kitchen’s look and ergonomics. The process involves precise measurement, cutting your chosen material to length, and securely attaching it to the cabinet base using adhesive and/or fasteners. Proper preparation is key, including ensuring a clean, level surface and accounting for corners and obstructions. Finishing the toe kick—whether painting, staining, or applying a veneer—creates a seamless transition from floor to cabinet, hiding the under-cabinet space and protecting the base from kicks and spills.
Key Takeaways
- Measure Twice, Cut Once: Accurate measurements of your cabinet runs, including corners and obstacles, are the absolute foundation of a successful toe kick installation.
- Material Choice Matters: Select a toe kick material (solid wood, MDF, PVC, or veneered plywood) that matches your cabinet style, budget, and kitchen’s moisture conditions.
- Adhesive is Primary, Fasteners Secondary: Use a high-quality construction adhesive as the main bond to the cabinet base, with finishing nails or brads only for initial support during drying.
- Level is Non-Negotiable: The toe kick must be perfectly level across its entire run. Shim behind it as needed to compensate for an uneven floor or cabinet base.
- Finish Before or After: You can finish (paint/stain) the toe kick material before installation for a cleaner job, or after for easier touch-ups; both methods have pros and cons.
- Corners Require Special Attention: Inside and outside corners need precise mitered or coped joints to create a professional, seamless appearance without gaps.
📑 Table of Contents
- Why Bother with a Toe Kick? Understanding Its Purpose
- Gathering Your Tools and Materials
- Phase One: Precision Measurement and Layout
- Phase Two: Cutting and Preparing Your Toe Kick Pieces
- Phase Three: The Installation Process
- Phase Four: Finishing Touches and Caulking
- Troubleshooting Common Problems
- Conclusion: The Satisfaction of a Seamless Finish
Why Bother with a Toe Kick? Understanding Its Purpose
If you’ve ever stood at a kitchen counter, you’ve likely experienced the subtle, almost invisible benefit of a toe kick. That little recessed area—typically 3.5 to 4 inches high and 3 to 4 inches deep—at the base of your cabinets isn’t just a design flourish. It’s a critical ergonomic feature born from centuries of cabinetry. Without it, your toes would be pressed uncomfortably against the cabinet base, forcing you to stand further away from the counter, straining your back and shoulders. The toe kick allows you to pull your body closer to the work surface, promoting better posture during food prep and cleanup. Beyond comfort, it serves a vital protective role. It shields the cabinet’s toe board and the seam between the cabinet and floor from daily bumps, scuffs, shoe dirt, and moisture. Aesthetically, it creates a visual “lift,” making the cabinet run appear more integrated and less bulky, while providing a clean line that ties the cabinetry to the flooring. Skipping this step leaves your kitchen looking unfinished and functional. Learning how to install kitchen cabinet toe kick properly is a small effort that pays massive dividends in your space’s professional appearance and daily usability.
The Anatomy of a Toe Kick
Before you buy materials, understand the components. The toe kick itself is the finished panel you see. It’s attached to a separate, often thinner, piece of wood called the toe board or kick board, which is secured to the cabinet’s base frame. Sometimes, especially with modern frameless cabinets, the toe kick is applied directly to the cabinet’s bottom edge. The reveal is the small, visible gap (usually 1/8″ to 1/4″) between the toe kick and the cabinet’s side panel or door front. A tight, consistent reveal is a hallmark of expert installation. The return is the finished face of the toe kick on the side of a cabinet run, especially noticeable at corners. Understanding these terms will help you follow instructions and troubleshoot.
Gathering Your Tools and Materials
A successful project starts with the right gear. Rushing to the hardware store mid-job is frustrating. Here’s your comprehensive checklist, broken down by necessity.
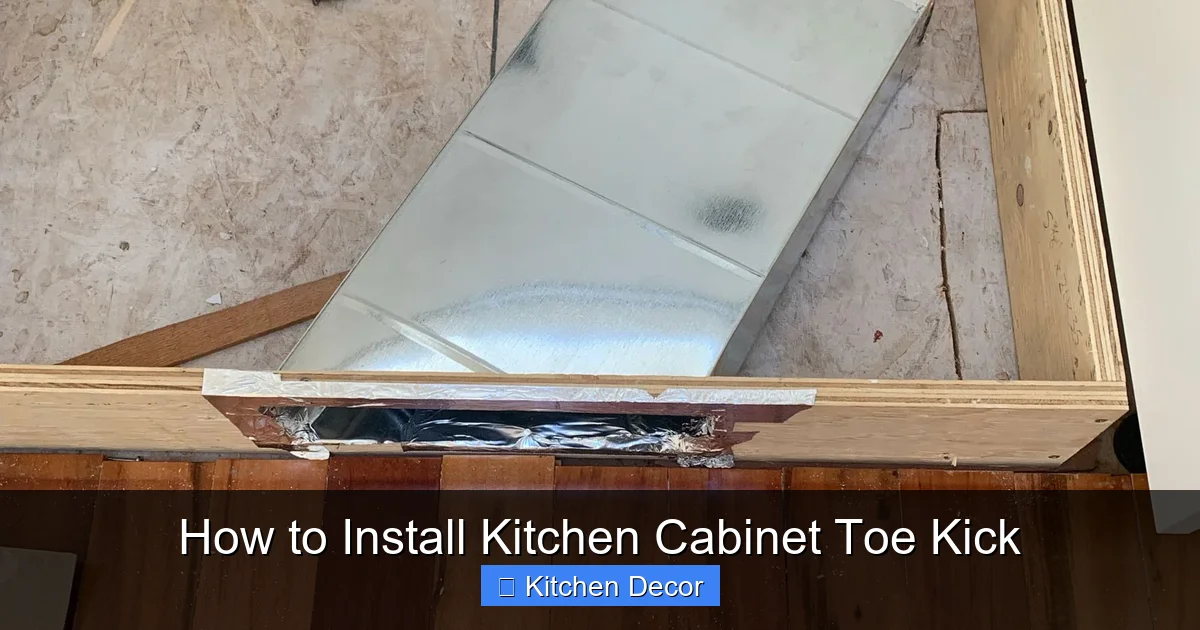
Visual guide about How to Install Kitchen Cabinet Toe Kick
Image source: erinzubotdesign.com
Essential Tools
- Measuring Tools: A 25-foot steel tape measure, a framing square (speed square), and a pencil are non-negotiable. For complex layouts, a chalk line helps mark long, straight lines.
- Cutting Tools: A circular saw with a fine-tooth blade (for plywood/MDF) or a miter saw (for precise angled cuts at corners) is ideal. A jigsaw works for small cuts or notches. Have a utility knife on hand for scoring.
- Fastening & Adhesive Tools: A caulk gun for construction adhesive, a hammer, and a pneumatic or electric brad nailer (highly recommended) or a drill/driver for screws. Finishing nails and a nail set are alternatives.
- Leveling & Spacing: A 4-foot level is crucial. A set of plastic shims of various thicknesses is indispensable for leveling on uneven floors.
- Safety Gear: Safety glasses, hearing protection, and a dust mask (especially when cutting MDF).
Choosing Your Toe Kick Material
This choice defines the look, cost, and durability.
- Solid Wood (Maple, Oak, Cherry): The premium choice. Can be stained to match cabinet faces. Excellent for traditional styles. Requires sealing all edges to prevent moisture absorption.
- Veneered Plywood (Baltic Birch): The professional’s sweet spot. Stable, resistant to warping, with a real wood veneer face that stains beautifully. Edges need veneer tape or iron-on edge banding for a flawless look.
- MDF (Medium-Density Fibreboard): The budget-friendly, paint-friendly champion. It’s smooth, void-free, and takes paint flawlessly. Do not use it in high-moisture areas (like near a dishwasher) without sealing all edges and the face. It’s heavy and can sag if unsupported over long spans.
- PVC or Vinyl Toe Kicks: Common in commercial settings and some residential remodels. Waterproof, very durable, and often come with a self-adhesive backing. Limited to painted or solid-color finishes; can’t be stained.
- Pre-finished Panels: Some suppliers offer pre-finished MDF or plywood toe kicks in various colors, saving you the finishing step.
Pro Tip: For a truly integrated look, use the same material as your cabinet’s face frame or side panels. If your cabinets have a 1/2″ thick face frame, your toe kick material should match that thickness for a flush reveal.
Phase One: Precision Measurement and Layout
This phase makes or breaks the project. Rushing here guarantees gaps, uneven lines, and frustration.
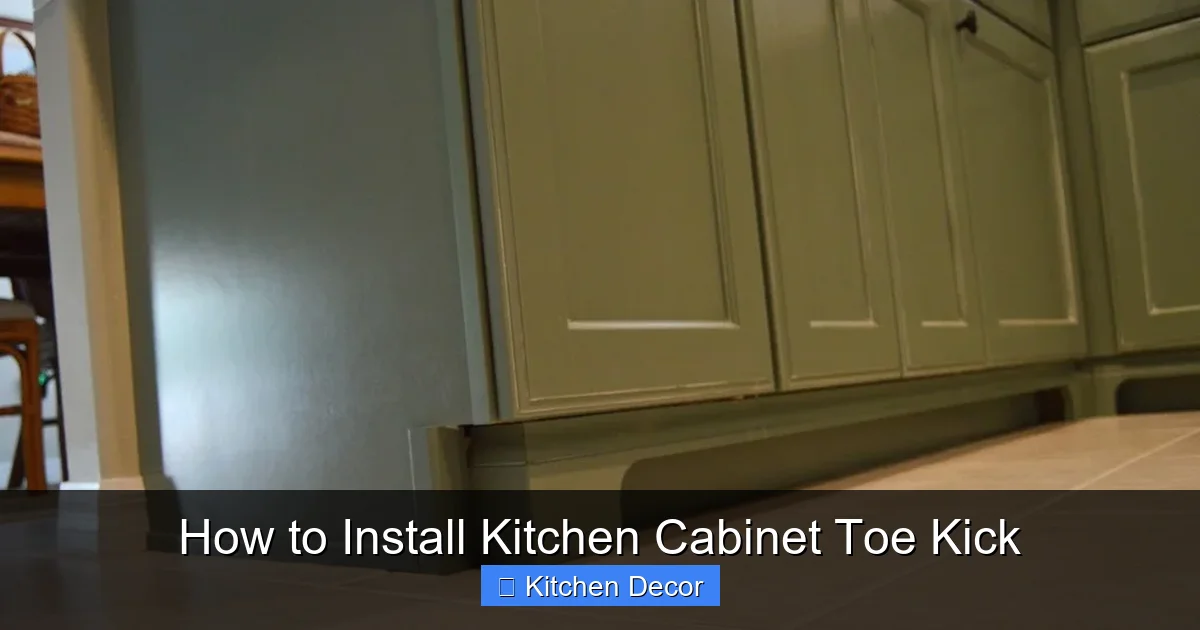
Visual guide about How to Install Kitchen Cabinet Toe Kick
Image source: claryfl.com
Mapping Your Cabinet Run
Begin by creating a simple diagram of your cabinet layout from a top-down view. Note the exact dimensions of each cabinet base (the toe kick will run the full length of the base, not just the visible front). Mark the locations of any obstructions: plumbing access panels, HVAC vents, electrical outlets, or dishwasher lines. These will require notches in your toe kick material.
Measuring for Length
For a straight run of cabinets, measure the total length from the outside edge of the first cabinet’s stile (side panel) to the outside edge of the last cabinet’s stile. Do not measure the floor, as walls and floors are rarely perfectly square. Your toe kick material must be cut to fit the cabinet base exactly. For inside corners, you’ll need two separate pieces, each ending at the corner’s vertex. For outside corners, you’ll typically use a single piece wrapped around the corner with a miter joint, or two pieces with a butt joint and a decorative corner block.
Determining Height and Depth
Height: The standard is 3.5″ to 4″. Measure from the finished floor (your new flooring, if installing) up to the bottom edge of the cabinet door or drawer front. This is your toe kick height. Consistency is key—measure at several points along the run. If your floor is severely uneven, you may need to adjust the height slightly, but aim for the standard.
Depth: This is the “kick” part. Standard is 3″ to 4″. It’s determined by how far the cabinet’s base frame extends past the door/drawer front. Measure from the cabinet’s face (the door when closed) back to the back edge of the cabinet base. Your toe kick should match this depth, or be 1/4″ less to ensure it doesn’t interfere with the door/drawer operation. Never let the toe kick protrude past the cabinet face.
Phase Two: Cutting and Preparing Your Toe Kick Pieces
With measurements in hand, it’s time to transform your raw material into perfectly sized panels.
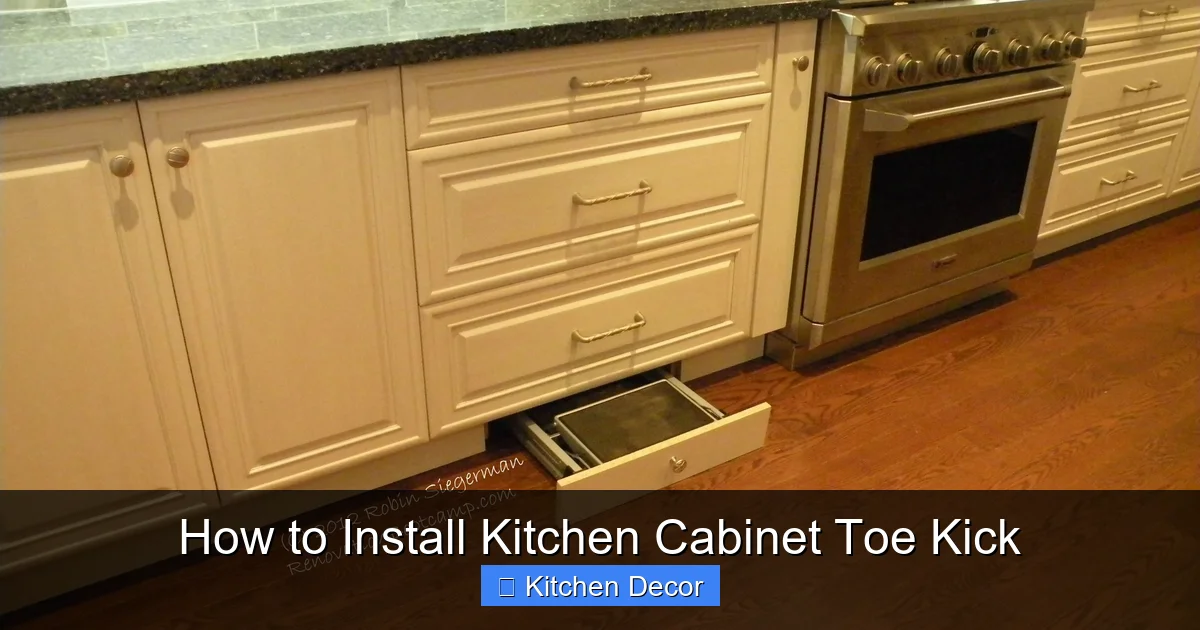
Visual guide about How to Install Kitchen Cabinet Toe Kick
Image source: i.pinimg.com
Making the Cuts
Lay out your material on a stable pair of sawhorses or a workbench. Using your diagram, mark each cut line clearly with a pencil and a straightedge. For long, straight cuts, a circular saw guided by a straight edge or a table saw is best. For angled cuts at corners, a miter saw is essential for a tight joint. Set your saw blade to cut just outside the line for a cleaner edge. If using MDF, wear your dust mask—the dust is fine and pervasive.
Notching for Obstructions
This is where careful diagramming pays off. For a plumbing access panel, measure the exact location from the end of your toe kick piece and the height from the floor. Mark the rectangle and cut it out with a jigsaw. For a dishwasher vent or electrical outlet, you’ll typically notch the top of the toe kick piece. Always cut the notch before installing the piece. It’s easier to cut on the bench than in place under the cabinet.
Pre-Finishing: The Cleaner Route
It is highly recommended to sand, prime, and paint or stain your toe kick pieces before installation. This allows you to work on a horizontal surface, get a perfectly smooth finish without worrying about drips on your floor or cabinets, and easily cover all edges. Sand progressively from 120-grit to 220-grit. Apply a primer (especially crucial for MDF or raw wood). Then apply your finish. For painted finishes, two coats of quality trim paint with sanding between coats yields a furniture-like result. For stained finishes, apply a wood conditioner first, then stain, and seal with at least two coats of clear polyurethane. Let the finish cure fully (check manufacturer’s instructions) before handling and installing.
Phase Three: The Installation Process
Now, the moment of truth. This is a two-person job for ease, but definitely doable solo with patience.
Step 1: Dry Fit Everything
Before any adhesive, carry each piece into position under the cabinet. Place it and check for fit. Does it sit flush against the cabinet base? Are the reveals (gaps to the cabinet sides/doors) consistent? Are the corners tight? Do any notches align with obstructions? This is your last chance to trim a piece that’s too long. It’s normal to need minor trims at this stage.
Step 2: Apply Adhesive
Using a caulk gun, apply a generous, continuous bead of high-quality construction adhesive (like Liquid Nails or PL Premium) to the back of the toe kick piece (the side that faces the cabinet base). Zig-zag the bead for maximum coverage. Also, apply a thin bead along the top edge where it meets the cabinet base. Do not apply adhesive to the visible face or front edge.
Step 3: Position and Shim
With adhesive applied, carefully lift the piece into position. Press it firmly against the cabinet base, sliding it into place to spread the adhesive. Immediately check for level along the top front edge using your 4-foot level. This is where shims become your best friend. Slide thin plastic shims behind the toe kick (between it and the cabinet base) at any point where it sags or gaps. The goal is to have the top front edge of the toe kick perfectly level and aligned with your layout line. The back can be slightly away from the wall or floor; the adhesive will fill that gap. Pay special attention at corners—both pieces must meet cleanly and be level with each other.
Step 4: Secure and Support
Once level and positioned, you must mechanically fasten the toe kick to hold it while the adhesive cures (usually 24 hours). For painted finishes or when using a brad nailer, drive 1″ to 1.5″ brad nails or finishing nails through the toe kick’s top edge and into the cabinet’s base frame. Space nails every 12-16 inches. The nail heads will be barely visible on the top edge (which is hidden by the cabinet). If you cannot nail into the frame (e.g., on a cabinet back), you can nail through the side reveal into the cabinet side panel—be extremely careful to avoid splitting the cabinet wood. For a completely hidden fastener method, you can use small 1″ brads driven up through the bottom of the toe kick into the floor’s subfloor (only if the floor is solid and you don’t mind tiny holes in the bottom). After nailing, use a nail set to sink the heads slightly below the surface.
Step 5: Wipe Excess Adhesive
Immediately wipe away any adhesive that squeezes out from the edges with a damp cloth. Once it skins over, it’s much harder to remove and can mar your finish. Be careful not to smear it on the finished surface.
Phase Four: Finishing Touches and Caulking
The installation is physically complete, but the professional finish is in the details.
The Critical Caulk Joint
There are two critical joints to caulk: 1) The joint where the top of the toe kick meets the cabinet base. This joint will always have a slight gap due to manufacturing tolerances and floor irregularities. Use a high-quality, paint-and-waterproof silicone or acrylic latex caulk (like DAP Alex Plus) in a color that matches your toe kick or cabinet. Cut the caulk tube tip small for a neat line. Run a continuous, smooth bead. This joint protects the interior from dust and moisture and creates a seamless visual transition. 2) The joint where the toe kick meets the floor. If your floor is perfectly level and the toe kick sits flush, you may not need caulk here. However, a small bead of clear or matching silicone can seal out moisture and hide minor gaps. Use your finger or a caulk-smoothing tool to press and shape the bead for a concave, professional look.
Touch-Ups and Final Inspection
Inspect every nail hole and any minor scuffs from installation. Use a tiny amount of wood filler (for stained wood) or touch-up paint (for painted) to repair. Step back and look down the entire run. The reveal (gap to cabinet sides) should be consistent—typically 1/8″. Use a spacer (like a few business cards) during installation to ensure this. The top edge should be a perfectly straight, level line. Corners should be tight with no light visible through the joint. If you see a gap, you may need to add a small shim behind one piece and re-nail, or use a color-matched wood filler in the joint.
Troubleshooting Common Problems
Even with careful work, issues arise. Here’s how to solve them.
Gaps at the Top Edge
Cause: Uneven floor or cabinet base. Solution: This is why shimming is vital. You must shim behind the low spot to push the toe kick up until the top front edge is level. The adhesive will compensate for the resulting gap at the back.
Gaps at Inside Corners
Cause: Walls are not perfectly square (they never are). Solution: Do not force a tight miter joint. Instead, “cope” the joint. Cut one piece to length with a square cut. Install it. For the adjoining piece, cut a tight miter, then use a coping saw to back-cut the profile so it overlaps the first piece’s profile. This creates a much tighter, more forgiving joint for out-of-square corners.
Toe Kick Pulling Away from Cabinet
Cause: Insufficient adhesive or fasteners, or the adhesive failed to bond (surface was dirty or oily). Solution: Clean the cabinet base with a degreaser. Reapply adhesive liberally. Use more fasteners. Ensure the toe kick is held firmly against the base until the adhesive sets. In severe cases, you may need to remove the piece, clean all old adhesive, and start over.
Splitting Cabinet Sides When Nailing
Cause: Nailing too close to the edge of the cabinet’s side panel, especially on older or brittle wood. Solution: Pre-drill tiny pilot holes (1/16″) for your brads. Or, adjust your nailing strategy to target the cabinet’s base frame or stretchers instead of the side panel.
Conclusion: The Satisfaction of a Seamless Finish
Installing your own kitchen cabinet toe kick is more than a cost-saving measure; it’s a mastery of a fundamental cabinetry detail. The process teaches patience, precision, and an eye for the subtle lines that define professional work. By following this guide—from meticulous measurement and material selection through careful adhesive application and strategic shimming—you transform a simple wooden strip into a functional, protective, and aesthetically integral part of your kitchen. The final result, a perfectly level, gapless toe kick that seems to grow from the floor into your cabinets, is a quiet testament to your skill. It’s the detail you’ll notice every time you cook or clean, the subtle comfort that comes from a job done right. So gather your tools, measure with confidence, and enjoy the profound satisfaction of completing one of the kitchen’s most essential finishing touches with your own two hands.
Frequently Asked Questions
Can I install a toe kick over my existing one?
Yes, but only if the existing toe kick is in perfect condition, securely attached, and perfectly level. You must thoroughly clean and degrease the old surface. The new adhesive will bond to the old toe kick, not the cabinet, which is less ideal. It’s usually better to remove the old one first to ensure a solid bond to the cabinet base.
What if my floor is very uneven?
Shimming is your primary solution. You will need to shim behind the toe kick at every low spot to bring the top front edge into a level line. Use composite shims that won’t compress over time. The adhesive will fill the gaps created by the shims at the back of the toe kick.
Do I really need construction adhesive, or are nails enough?
For a permanent, professional installation, yes, you need adhesive. Nails alone can work, but they rely on the cabinet’s base wood holding the nail. Over time, with vibration and humidity changes, nailed-only toe kicks can pop or creak. Adhesive creates a continuous, strong bond to the entire cabinet base, preventing movement and squeaks.
How do I handle the toe kick at an inside corner?
For an inside corner, you will cut two separate pieces. Each piece should be cut with a 45-degree miter on the end that meets at the corner. However, because walls are rarely square, a tight miter will often leave a gap. The better technique is “coping”: cut one piece with a square end. Install it. For the second piece, cut a 45-degree miter, then use a coping saw to carefully remove the back of the mitered edge, copying the profile of the first piece so it overlaps slightly for a tight fit.
Can I use regular wood glue instead of construction adhesive?
No. Wood glue (like Titebond) is designed for bonding wood to wood in a tight, clamped joint. It has a very thin viscosity and is not gap-filling. Construction adhesive is thick, gap-filling, and has a much longer open time, allowing you to position the heavy toe kick piece. It also has superior flexibility and bond strength for vertical applications like this.
What’s the best way to get a perfectly straight, level line along the top?
Use a laser level or a chalk line snapped at the exact height you want (e.g., 3.75″ from the finished floor) as a reference guide. As you install each piece, constantly check the top edge against this line with your 4-foot level. The shims go behind the piece to push it up to this line. Don’t trust your eye; use the tools.