Installing a pot filler in an existing wall is a feasible DIY project that adds significant kitchen convenience. The process involves carefully locating water supply lines, cutting a precise opening in the wall, mounting the fixture, and running new water connections—all while avoiding electrical wiring and structural elements. Success hinges on meticulous planning, the right tools, and a methodical approach to minimize damage and ensure leak-free operation. While achievable for a confident DIYer, complex situations may require a professional plumber.
Key Takeaways
- Plan Meticulously: The most critical step is accurately locating existing water supply lines and electrical wiring behind the wall before any cutting begins.
- Turn Off Water & Power: Always shut off the main water supply and verify with a voltage detector that no live wires are in your work area for safety.
- Choose Your Path: Decide whether to run new water lines through the wall cavity or surface-mount them for easier installation, depending on wall type and finish.
- Reinforce the Mount: The pot filler’s valve body requires solid backing, typically a wood blocking piece securely screwed to wall studs, to support its weight and torque.
- Test Before You Finish: Perform a thorough pressure test with the wall open and all connections accessible to catch and fix any leaks before patching and painting.
- Know When to Call a Pro: If you cannot locate pipes, encounter unexpected obstructions, or are uncomfortable with soldering (for copper), hire a licensed plumber.
📑 Table of Contents
- How to Install a Pot Filler in an Existing Wall: A Complete DIY Guide
- Phase 1: The Planning & Preparation Stage (Where Most Success Is Determined)
- Phase 2: Locating Pipes and Wires – The Detective Work
- Phase 3: Cutting the Opening and Installing Solid Backing
- Phase 4: Mounting the Valve Body and Making Water Connections
- Phase 5: Attaching the Spout and Finishing the Wall
- Phase 6: The Critical Final Test and Troubleshooting
- Conclusion: The Reward of a Job Well Done
How to Install a Pot Filler in an Existing Wall: A Complete DIY Guide
Let’s face it: hauling heavy pots of water from the sink to the stove is a kitchen chore we’d all love to eliminate. A pot filler, that elegant articulated faucet mounted directly above your cooktop, is the ultimate luxury for any home cook. It brings water exactly where you need it, saving time, reducing mess, and protecting your back. While installing one during a full kitchen remodel is straightforward, many homeowners wonder, “Can I install a pot filler in an existing wall?” The answer is a resounding yes, but it requires a careful, informed approach. This guide will walk you through every step of retrofitting a pot filler into a finished wall, from initial planning to the final tighten, ensuring a clean, professional, and functional result.
The prospect of cutting into a beautiful, finished wall can be daunting. The key is to treat this not as a simple fixture swap, but as a minor plumbing project that involves opening your wall, making new water connections, and then seamlessly repairing the finish. We’ll break down the process into manageable phases, emphasizing safety, precision, and problem-solving. By the end, you’ll have the knowledge and confidence to tackle this upgrade and enjoy the unparalleled convenience it provides.
Phase 1: The Planning & Preparation Stage (Where Most Success Is Determined)
Rushing to cut a hole in your wall is the fastest route to disaster, frustration, and costly repairs. This phase is about gathering intelligence and the right tools. A well-thought-out plan will save you hours of headache and ensure your project stays on track.
Visual guide about How to Install a Pot Filler in an Existing Wall
Image source: ebyj3mae76e.exactdn.com
Choosing the Perfect Spot: More Than Just “Above the Stove”
Location is everything. While the ideal spot is centered above your cooktop, you must consider the infrastructure behind the wall. The primary rule is: Your pot filler’s water supply line must connect to an existing cold water pipe, ideally within the wall cavity. Common sources are the pipes feeding your kitchen sink or a nearby refrigerator water line. Use a stud finder with pipe detection capabilities to map out the general area. You’re looking for a spot where a water pipe runs vertically or horizontally within the wall, typically between studs. Avoid areas with known electrical outlets or switches on the opposite side of the wall. The center of the pot filler’s mounting plate should align with the pipe’s location. If the nearest pipe is far away, your project complexity (and cost) increases as you’ll need to run a new line a longer distance.
Understanding Your Wall Construction
Is your wall drywall, plaster, or tile? Each material dictates your tools and technique.
- Drywall: The easiest to work with. You’ll cut the opening with a drywall saw or utility knife.
- Plaster & Lath: More brittle. Use a utility knife to score the plaster, then a cold chisel and hammer to break away the material between the wooden lath strips. Go slowly to avoid cracking a larger area.
- Tile Backsplash: This adds significant complexity. You’ll need a diamond-tipped hole saw or an angle grinder with a diamond blade to cut through the tile cleanly before addressing the wall behind it. It’s often easier to remove a few tiles, do the drywall work, and then re-tile around the new fixture’s backing board.
Essential Tools & Materials Checklist
Having everything on hand before you start prevents mid-project trips to the hardware store. Gather these items:
- Detection & Measurement: Stud finder with AC wire and pipe detection, multi-tool or voltage detector, tape measure, pencil, level, small inspection camera (optional but extremely helpful).
- Cutting & Demolition: Drywall saw or keyhole saw, utility knife, reciprocating saw (for tough spots), cold chisel and hammer (for plaster), safety glasses, dust mask, work gloves.
- Plumbing Components: Your chosen pot filler valve and spout assembly, 1/2″ copper or PEX tubing (length as needed), appropriate shut-off valves (angle stops), Teflon tape, pipe joint compound, pipe straps or clamps, solder and torch (if using copper), or push-fit/press-fit connectors (for PEX or copper).
- Mounting & Finishing: 1×4 or 2×4 lumber for blocking, wood screws, drywall repair supplies (drywall, joint compound, tape, sandpaper), paint to match existing wall, escutcheon plate (if your pot filler kit doesn’t include a wall flange that covers the hole).
Phase 2: Locating Pipes and Wires – The Detective Work
This is the most critical step. Cutting into a wall without knowing what’s behind it risks severing a water pipe (causing a flood), damaging electrical wiring (causing a short or fire), or compromising a structural element.
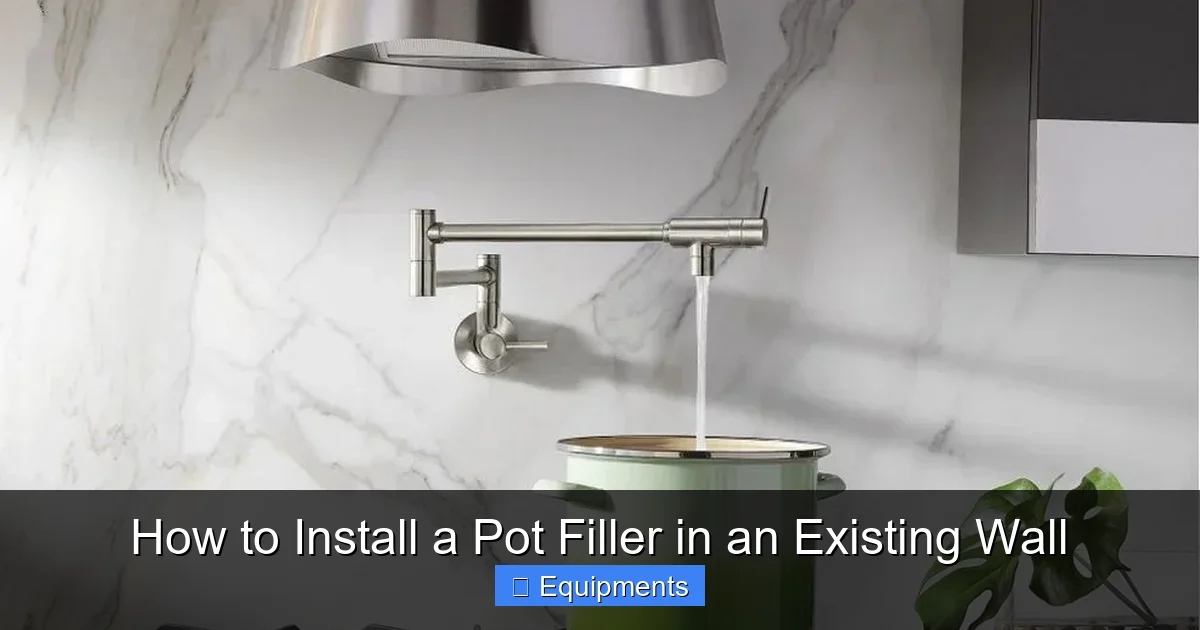
Visual guide about How to Install a Pot Filler in an Existing Wall
Image source: residencestyle.com
Using Your Tools to “See” Inside the Wall
Begin by using your stud finder to locate the studs. Mark their edges. Your water supply pipe will almost always be attached to a stud or run through a bored hole in a stud. Use the pipe detection mode on your stud finder to sweep the area between studs where you suspect pipes run. Mark all detections. Now, switch to AC wire detection mode and thoroughly scan the entire proposed opening area. Mark any wire detections in red. Remember: wires often run up or down from outlets and switches on the other side of the wall. If your planned opening overlaps a wire detection, you must adjust your location.
Verifying with a Small Inspection Hole
For absolute certainty, drill a small (1/4″) exploratory hole at the very center of your proposed pot filler location. Use a flexible inspection camera (often available for rent) or simply a bent wire coat hanger to feel around inside the cavity. Your goals are to confirm:
- The presence and exact location of a cold water pipe.
- The absence of electrical wires or cables crossing the space.
- The presence of insulation (which will affect your work) and the general cavity layout.
If you find a pipe, excellent. If not, you may need to adjust your location or plan to run a new line from a more distant source. If you find wires, patch the small hole and move your entire opening at least 2-3 inches away from that area.
Phase 3: Cutting the Opening and Installing Solid Backing
With your location verified and marked, it’s time to open the wall and prepare a rock-solid mounting surface. The valve body of a pot filler is heavy and experiences torque every time it’s used. It cannot be mounted directly to drywall or plaster alone.
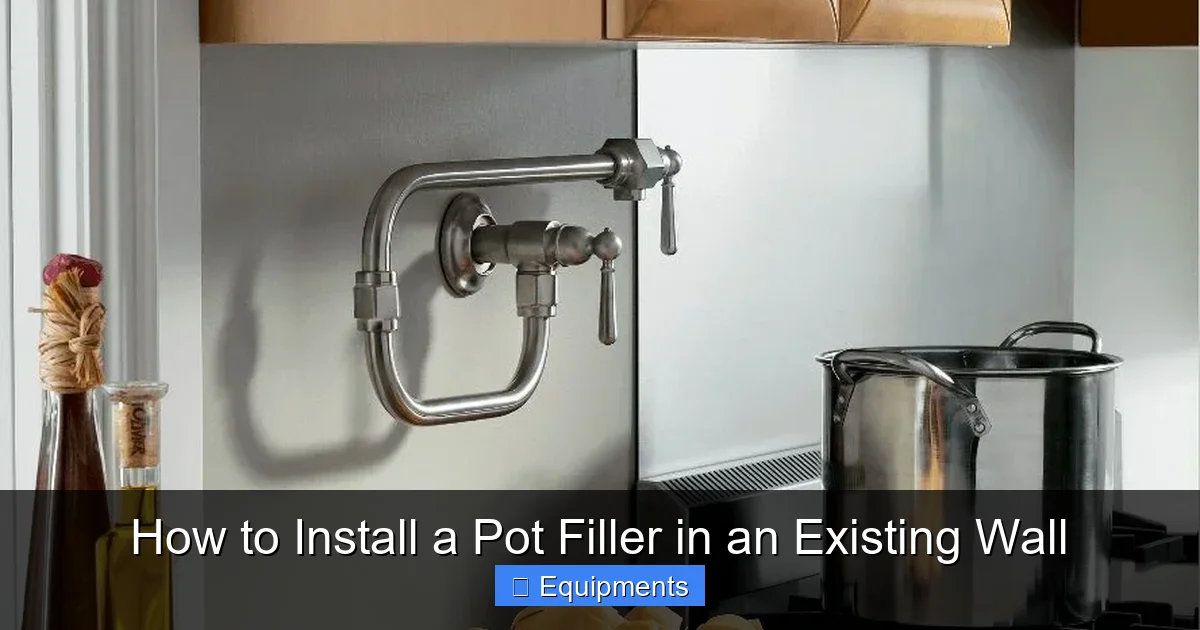
Visual guide about How to Install a Pot Filler in an Existing Wall
Image source: residencestyle.com
Marking and Cutting the Precise Opening
Place your pot filler’s mounting plate (or the template that came with it) on the wall at your verified location. Use a level to ensure it’s perfectly plumb and centered. Trace the outline carefully. For a clean cut, especially in drywall, use a drywall saw to cut along your traced lines. For plaster, score deeply with a utility knife and chisel out the material. If cutting through tile, score the tile first with a glass cutter or use your grinder to make a controlled cut. Remove the wall section carefully to avoid damaging surrounding material. You now have a view into the wall cavity.
Installing the Wooden Backing Block
This is non-negotiable for a secure installation. Measure the width between the studs at your opening. Cut a piece of 1×4 or 2×4 lumber to fit snugly between them. You will need to install this block behind the existing wall surface.
- From inside the wall cavity, position the block horizontally between the studs, directly behind where the pot filler’s valve will mount.
- Using long wood screws (2.5″ – 3″), drive screws through the existing drywall/plaster and into the sides of the adjacent studs, securing the block firmly in place. You may need to pre-drill pilot holes in the studs.
- For added security, you can also screw through the block itself into the back of the mounting flange once the valve is in place (in the next phase).
The front face of this blocking should be flush with or slightly proud of the finished wall surface. If it’s recessed, add shims. If it’s proud, you can trim it later. This block is your fixture’s anchor point.
Phase 4: Mounting the Valve Body and Making Water Connections
With the wall open and backing secure, you can now install the core of the pot filler: the valve assembly. This is the plumbing heart of the project.
Feeding the Water Supply Lines Through the Wall
Before mounting the valve, you need to get your water supply lines into position. There are two primary methods:
- Option A: Using Existing Pipes (Ideal): If you located a cold water pipe in the cavity, you will need to tap into it. This typically involves shutting off the main water, cutting the pipe, and installing a T-fitting to branch off a new 1/2″ line to your pot filler location. This requires soldering (for copper) or using appropriate push-fit/press-fit connectors and is the most invasive but cleanest method.
- Option B: Running New Surface Lines (Easier DIY): If tapping into the wall pipe is too complex, you can run new PEX or flexible braided stainless lines from the nearest accessible shut-off valve (e.g., under the sink) up the wall surface, inside a decorative conduit or behind a baseboard, and then into the top of the wall cavity to the pot filler. This is more visible but far simpler and reversible.
Feed your chosen water supply line (copper or PEX) through the wall cavity so that it ends just behind the mounting hole, with enough slack to make the connection to the valve.
Installing and Connecting the Valve
Most pot fillers come as a two-part unit: a valve body that mounts to the wall and the articulating spout that attaches to it.
- Apply a bead of plumber’s putty or silicone caulk to the back of the valve body’s mounting flange (check manufacturer instructions).
- Position the valve body against the wall, threading the water supply line through its center. Align it with your wooden blocking.
- Secure the valve body to the wall and blocking using the long screws provided or appropriate deck screws. The flange should compress the caulk, creating a watertight seal against the wall surface.
- Now, make the water connection. For a copper supply line, this means soldering a 1/2″ female adapter onto the valve’s inlet. For PEX, use a push-fit connector or a crimp/ clamp ring to attach the PEX tube directly to the valve’s threaded inlet. Wrap Teflon tape clockwise on all threaded connections.
- Connect the other end of your supply line to your water source (the T-fitting or the under-sink valve).
Phase 5: Attaching the Spout and Finishing the Wall
With the water connected and the valve secure, it’s time to complete the visible installation and repair the wall.
Mounting the Articulating Spout
This is usually the simplest part. The spout slides or screws onto the valve body’s outlet. Follow the manufacturer’s instructions precisely. Many models have a locking nut underneath the mounting flange that you tighten to secure the spout and control its movement range. Ensure the spout moves smoothly over the cooktop and locks in place as designed. Adjust the tension if necessary.
Patching and Finishing the Wall
Now, conceal all your hard work.
- For Drywall: Cut a new piece of drywall to fit your opening. Screw it to the studs and your blocking. Use drywall tape and joint compound to create a seamless finish over the seams and screw heads. Sand smooth, prime, and paint to match.
- For Plaster: You may need to apply a metal lath or drywall patch over the opening before applying a plaster skim coat. This is a skilled job; consider hiring a plasterer for a perfect match if the wall is historic.
- For Tile: This is the trickiest. Your goal is to have the valve’s flange cover the raw edge of the tile cut. You may need to carefully remove and re-cut surrounding tiles to create a neat reveal. Use tile caulk, not grout, where the metal flange meets the tile to allow for movement and prevent cracking.
- Escutcheon Plate: If your pot filler’s flange doesn’t completely cover the hole or you want a finished look, install a decorative escutcheon plate (available at hardware stores) around the valve base.
Phase 6: The Critical Final Test and Troubleshooting
Do not patch the wall completely until you’ve verified a perfect, leak-free installation. This is your last chance to fix a problem without destroying new drywall or plaster.
Performing the Pressure Test
1. Ensure the valve is closed. Turn the pot filler handle to the off position.
2. Turn the main water supply back on.
3. Open the nearest shut-off valve that feeds your new line (the one under the sink or the main branch).
4. Open the pot filler valve fully. Let water run for a minute to flush any debris from the lines.
5. Inspect every connection meticulously. Check the solder joints (look for weeping), the threaded connections on the valve, and where your supply line taps into the existing pipe. Use a dry paper towel to feel for moisture. Look for drops or sprays.
6. Close the valve and check again. Sometimes a tiny leak only appears under pressure and then stops when pressure is off. Re-check all joints after closing.
7. If a leak is found: Tighten the connection slightly. If that doesn’t work, disassemble, re-tape with Teflon tape, and reassemble. For a solder joint that leaks, you will need to reheat it and add more solder—this requires draining the line and may be best left to a pro if you’re inexperienced.
Final Wall Closure and Cleanup
Once you have a pristine, leak-free test that lasts 15-20 minutes, you can proceed with final wall patching. Complete your drywall/plaster/tile work, sand, and paint. Install the spout’s handle if it’s separate. Wipe all surfaces clean. Turn the water on one last time and give your new pot filler a celebratory spin. The convenience is now yours to enjoy.
Conclusion: The Reward of a Job Well Done
Installing a pot filler in an existing wall is a moderately challenging but incredibly rewarding DIY project. It bridges the gap between a simple fixture change and a full plumbing remodel. The process demands patience, careful planning, and a respect for what lies behind your walls. By following this guide—starting with thorough detection, creating a solid mounting foundation, making sound plumbing connections, and rigorously testing—you can achieve a professional-looking, fully functional result that will transform your cooking experience for years to come. Remember, there is no shame in calling a licensed plumber for the tricky pipe-tapping portion if you encounter uncertainty. The goal is a beautiful, safe, and leak-free installation. Now, go fill that stockpot with ease and enjoy the fruits of your labor.
Frequently Asked Questions
Can I install a pot filler myself if I have no plumbing experience?
While a confident DIYer with good research skills can complete this project, it’s not ideal for a complete beginner. The most challenging parts are safely locating pipes/wires and making watertight connections, especially if soldering copper. If you’re uncomfortable with these steps, hire a plumber for those specific tasks while you handle the wall work.
What if there is no cold water pipe conveniently located in the wall?
You have two main options. First, you can run a new water line from a more distant source, like under the sink, which often means surface-mounting the line for easier access. Second, you can install an additional shut-off valve and T-fitting at a convenient location (like under the sink) to create a dedicated line that runs through the cabinet and up into the wall to your pot filler.
How long does a typical pot filler installation in an existing wall take?
For an experienced DIYer with all tools and materials ready, expect to spend 4-8 hours, often spread over two days. The planning and detection phase can take an hour or two. The physical work of cutting, mounting, and connecting might take 2-4 hours. Final patching, painting, and drying time will extend the project. First-timers should plan for a full weekend.
Do I need a permit to install a pot filler?
Permit requirements vary by municipality. Since you are adding a new plumbing fixture and altering water lines, many jurisdictions require a permit and an inspection to ensure the work meets code. It is your responsibility to check with your local building department before starting. Even if a permit isn’t required, following plumbing codes (like using approved materials and providing shut-off valves) is essential for safety and insurance.
What type of water line is best for this application: copper or PEX?
Both are acceptable. Copper is traditional, durable, and has a high heat tolerance, but it requires soldering skills and tools. PEX is flexible, easier to install (using push-fit or clamp connections), resistant to freezing, and often cheaper for DIY. For a retrofit through an existing wall, PEX is generally the more DIY-friendly choice due to its flexibility and simpler connections. Ensure any fittings are approved for use with your pot filler’s valve connections.
How can I ensure the finished wall looks seamless and not like a patch job?
The key is in the mounting flange. Choose a pot filler model with a wide, decorative flange that covers the rough opening. When patching, feather your drywall compound or plaster well beyond the flange’s edge. For painted walls, prime the patched area before painting the entire wall section to ensure even color and sheen. For tile, the flange should overlap the cut tile edges, and you should use a high-quality, flexible silicone caulk in a color that blends with your grout for a clean transition.