Hiding outlets in your kitchen island is essential for achieving a sleek, clutter-free aesthetic while maintaining crucial functionality. This guide explores various methods, from pop-up receptacles to cleverly disguised drawer outlets, ensuring safety and code compliance. You’ll learn practical planning tips, material choices, and installation considerations to seamlessly integrate power into your island’s design.
You’ve dreamed of that perfect kitchen island—a beautiful, expansive central hub for cooking, socializing, and dining. But then reality hits: the necessary electrical outlets. Standard, wall-plate receptacles on the side or end of your stunning island can feel like visual clutter, breaking the clean lines you worked so hard to achieve. The good news? Hiding outlets in your kitchen island isn’t just a design fantasy; it’s a smart, achievable goal that blends necessity with aesthetics. This comprehensive guide will walk you through every consideration, method, and tip to keep your island looking sharp while staying fully powered and perfectly safe.
The desire to hide outlets stems from a common design dilemma: the need for functional power sources versus the yearning for minimalist, uninterrupted surfaces. Whether your island is a workstation for meal prep, a charging station for devices, or a casual dining spot, visible cords and plates can disrupt the visual flow. By integrating power discreetly, you honor the island’s role as a design centerpiece. We’ll explore solutions ranging from high-tech pop-ups to simple, clever disguises, all grounded in the non-negotiable rules of electrical safety. Let’s transform that necessary evil into an invisible asset.
Key Takeaways
- Plan Early: Decide on your outlet hiding strategy during the initial design phase to ensure proper wiring and spacing within the island’s structure.
- Code is King: All electrical work must comply with the National Electrical Code (NEC) and local regulations, requiring GFCI protection and specific placement rules.
- Multiple Solutions: Options include pop-up receptacles, retractable cord systems, drawer-integrated outlets, and decorative blanking plates with hidden access.
- Accessibility Matters: Hidden outlets must remain accessible without tools for everyday use, balancing aesthetics with practicality and safety.
- Professional Installation: Hire a licensed electrician for any wiring changes to ensure safety, validity of insurance, and adherence to code.
📑 Table of Contents
- The Essential First Step: Planning and Code Compliance
- Popular Methods to Hide Outlets in Your Kitchen Island
- Safety and Functionality: Non-Negotiable Priorities
- Material and Design Considerations for a Flawless Finish
- Installation: Why a Pro is Non-Negotiable
- Maintenance and Long-Term Care
- Conclusion: The Island, Perfected
The Essential First Step: Planning and Code Compliance
Before you even think about which hardware to buy, you must address the foundational elements: planning and electrical code. Rushing into a solution without this groundwork can lead to unsafe installations, failed inspections, or a non-functional setup. This phase is about collaboration between your design vision and the hard rules of electrical safety.
Understanding the National Electrical Code (NEC) for Islands
The National Electrical Code isn’t a suggestion; it’s the law for electrical installations in the United States. For kitchen islands, the rules are specific. At least one receptacle must be installed at the island, and it cannot be more than 24 inches from the edge of the countertop. This ensures that no point along the counter is more than 24 inches from a power source. Crucially, all kitchen receptacles must be GFCI (Ground Fault Circuit Interrupter) protected. This safety feature cuts power if it detects a current imbalance, protecting you from electric shock, especially important in a wet environment like a kitchen. Any solution you choose must either be a GFCI receptacle or be downstream of one.
The Critical Timing of Your Decision
If you are building or renovating, the time to decide on hiding outlets is during the framing and rough-in electrical stage. This is when your electrician will run the wires to the island’s location. Telling them you want a pop-up receptacle or a drawer outlet dictates *where* the wires terminate inside the island’s cabinetry. If you wait until after the island is installed and finished, the options become severely limited, expensive, and invasive, often requiring surface-mounted raceways or external boxes that defeat the purpose of hiding. For existing kitchens without a pre-wired island, adding power involves running new wiring from a nearby circuit, which is a job for a professional and may require opening floors or walls.
Consulting Your Team
Bring your designer, cabinetmaker, and electrician together early. Show them your desired island design—the overhang, the cabinetry style, the intended use. Ask pointed questions: “Can we run power to this specific corner for a pop-up?” “Will a drawer outlet interfere with the drawer’s slide mechanism?” “What’s the load capacity for this circuit?” This collaborative planning prevents costly change orders and ensures the final product is both beautiful and code-compliant.
Popular Methods to Hide Outlets in Your Kitchen Island
With the planning and code box checked, we move to the fun part: the methods. Each approach offers a different balance of invisibility, convenience, cost, and complexity. Here are the most effective and popular solutions, from nearly invisible to cleverly disguised.
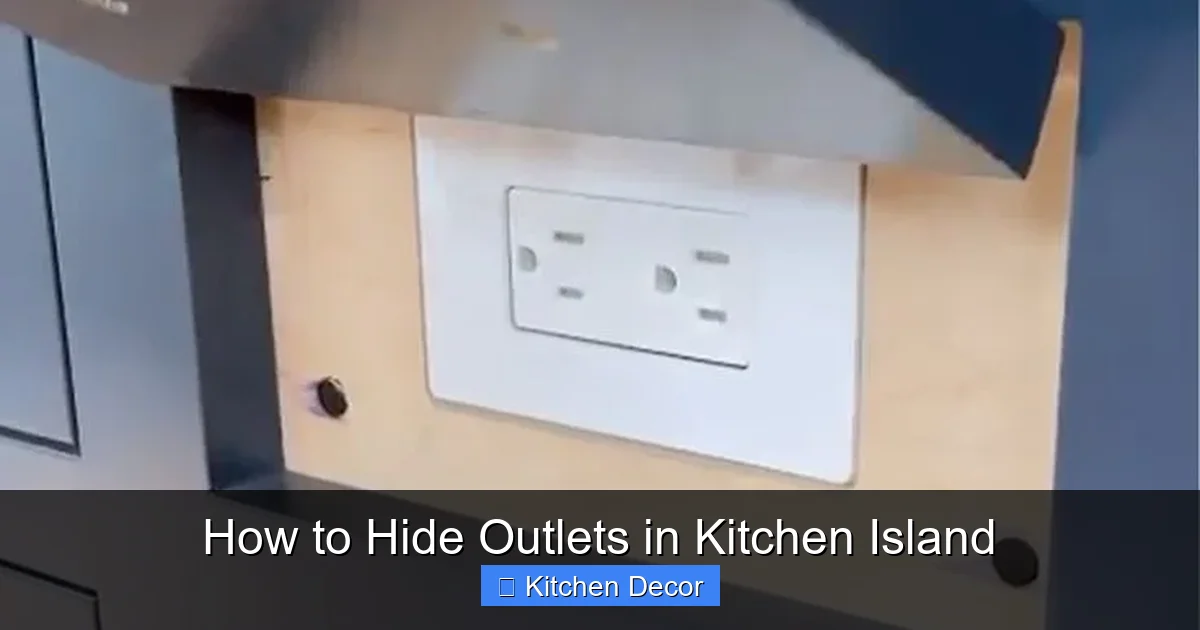
Visual guide about How to Hide Outlets in Kitchen Island
Image source: i.pinimg.com
1. Pop-Up Receptacles: The Seamless Solution
Pop-up receptacles are the gold standard for a truly hidden look. The entire unit is installed *within* the countertop material—whether granite, quartz, marble, or a solid surface like Corian. When not in use, it sits flush with the countertop, completely invisible. You press a button or the top plate, and the whole assembly rises, revealing one or more outlets (often two or more). It’s the magic trick of kitchen islands.
- How it Works: A steel or heavy-duty plastic housing is mounted into a precise hole cut in the countertop. Wiring is run from below into this housing. A spring or pneumatic mechanism allows the unit to pop up and down.
- Best For: Stone countertops, solid surface materials, and any island where a completely flat, uninterrupted surface is the priority. Excellent for islands with a seating overhang on one side, where you don’t want an outlet on the end or side.
- Considerations: Requires a precise cut in the countertop, best done by the countertop fabricator. The mechanism has moving parts and may require occasional cleaning to prevent debris jamming. Ensure your island’s apron or cabinet face provides enough vertical clearance for the unit to fully extend. These are typically the most expensive hardware option.
2. Retractable Cord Reels / Power Strips: For Chargers and Small Appliances
This method hides the *cords* rather than the outlet itself. A power strip or a single outlet is mounted inside a drawer or cabinet door, and a retractable cord reel (like those for vacuums or ironing boards) is attached. Pull the cord out to plug in, and it retracts neatly when done. Some systems use a small, discrete port on the drawer front where you plug in a USB cable or standard plug.
- How it Works: A standard GFCI outlet is installed inside a drawer or a dedicated cabinet nook. A retractable cord reel is mounted adjacent to it. The cord from the reel plugs into the fixed outlet. You pull the cord out through a small hole in the drawer front or cabinet side panel to reach your device.
- Best For: Charging phones, tablets, and laptops; powering small countertop appliances like blenders or mixers that you use and then store. Ideal for islands with deep drawers or a dedicated “tech drawer.”
- Considerations: The cord length is limited. Not suitable for high-amp appliances like toasters or stand mixers that run for longer periods. The hole in the drawer front must be sized correctly to avoid cord damage. Creates a small, visible hole, though it can be positioned discreetly on the drawer’s side or back panel.
3. Drawer-Integrated Outlets: Power Within Your Storage
This is a sleek, built-in approach where a standard or GFCI receptacle is installed directly into the *back wall of a deep drawer*. The drawer front remains perfectly plain. You simply open the drawer, and the outlets are there, ready for use. Some modern designs include integrated USB ports as well.
- How it Works: During cabinet construction, a special drawer front or back panel is prepared with a cutout for a standard outlet or a purpose-built drawer outlet kit. The wiring is run to the back of the drawer cavity. When the drawer is installed, the outlet is mounted securely to the drawer’s back wall.
- Best For:Islands with deep, full-extension drawers meant for storing appliances, mixers, or baking sheets. It keeps power exactly where your tools are stored.
- Considerations: You must remember to open the drawer to access power. The outlet is inside the drawer, so if you plug something in and close the drawer, you must ensure the cord is routed safely to avoid pinching or damage. This method uses valuable drawer depth for the outlet housing.
4. Cabinet Side or End Panel Outlets with a Decorative Cover
This is a more traditional approach but can be made nearly invisible with the right hardware. Instead of a standard duplex receptacle, you use a single outlet or a small power strip mounted inside the island’s cabinet side or end panel, covered by a small, discreet door or flap that blends with the cabinet finish.
- How it Works: A standard outlet is installed inside the cabinet, with its faceplate screwed to the *inside* of the cabinet side. A small, custom-finished door (matching your cabinet door style) or a simple magnetic-flap cover is mounted over the opening on the exterior of the cabinet side panel. You open the flap to access the outlets.
- Best For:Traditional or shaker-style islands where a small, painted or stained door would not look out of place. Also good for islands where a pop-up isn’t feasible due to countertop material (like butcher block).
- Considerations: The cover is still a visible element, though designed to blend in. It requires a small amount of clearance on the cabinet side, so it won’t work on islands with zero overhang. The door or flap must be easy to open without tools.
5. The Simple Blanking Plate with a “Secret” Access Panel
For islands that are purely for seating and prep, with no need for frequent plugging/unplugging, you can hide the outlet’s *presence* entirely. Run the wiring to the island and install a standard outlet on the *inside* of a cabinet panel. Then, create a small, hidden access panel in the side of the island apron or in the toe-kick area. This panel, perhaps held with magnetic catches or a discreet latch, can be removed to access the outlets for occasional use (like plugging in a slow cooker or holiday lights).
- How it Works: The outlet is mounted on the interior of the island’s cabinet, typically on a side wall. A small section of the cabinet side panel or the solid wood apron is made to be removable, concealing the outlet completely when closed.
- Best For:Islands used mostly for casual dining and light prep where permanent small appliances aren’t used. Perfect for hiding “set it and forget it” device power.
- Considerations: The least convenient for frequent use. Access requires bending down and opening a panel. Must ensure the hidden area has enough clearance to plug/unplug without strain. The access panel must be crafted perfectly to look like part of the cabinet or apron.
Safety and Functionality: Non-Negotiable Priorities
A hidden outlet that creates a fire hazard or is a nuisance to use is a failed solution. This section dives deep into the safety protocols and functional realities you must respect.

Visual guide about How to Hide Outlets in Kitchen Island
Image source: i.pinimg.com
GFCI Protection: The Absolute Requirement
We cannot stress this enough. Every single outlet in your kitchen, including those hidden in an island, must be GFCI protected. This can be achieved in three ways:
- Using a GFCI Receptacle: The outlet itself is a GFCI, with “TEST” and “RESET” buttons. This is common for pop-ups and drawer outlets.
- Feeding from a GFCI Breaker: The circuit breaker in your electrical panel is a GFCI type, protecting all outlets on that circuit.
- Feeding from a GFCI Outlet Upstream: A standard GFCI outlet is installed in a more accessible location (like under the sink or on a wall), and the island outlet is “downstream” of it, protected by that first GFCI.
Your electrician will determine the best method. For hidden outlets, having the GFCI *on the hidden outlet itself* (a pop-up or drawer GFCI) can be problematic because you need to access the “RESET” button if it trips. If the outlet is inside a closed drawer or under a counter, you can’t reset it. Therefore, many designers prefer to protect the island circuit with a GFCI breaker or an upstream GFCI outlet in an accessible location. The hidden outlet then remains a standard receptacle, but the entire circuit is safe.
Accessibility for Use and Maintenance
The NEC requires receptacles to be “readily accessible.” This means you shouldn’t need to move furniture or use tools to reach them. A pop-up is readily accessible. A drawer outlet is readily accessible (you open the drawer). An outlet behind a small, easily-opened decorative flap likely qualifies. However, an outlet behind a screwed-in panel or one that requires dismantling part of the island does not. Consider who will use the kitchen. If it’s a family with young children, a pop-up offers a slightly more tamper-resistant surface than a permanently accessible outlet at toddler height. Think about the user experience: reaching into a deep drawer to plug in a heavy stand mixer might be awkward and strain the cord.
Load Calculation and Circuit Dedication
Kitchen countertop circuits have specific load requirements. The NEC requires at least two 20-amp small appliance circuits for kitchen countertop outlets. Your island outlets will feed off one or both of these circuits. You must calculate the “load” (wattage) of the devices you plan to plug into the island. A toaster (800W), coffee maker (1000W), and stand mixer (600W) used simultaneously draw over 2,400 watts, which is near the continuous limit of a 20-amp circuit (2,400W at 120V is 20 amps). If you anticipate heavy use of multiple high-wattage appliances, you may need to dedicate a separate 20-amp circuit just for the island. Your electrician will perform this calculation based on your intended appliance use. Never daisy-chain the island off a circuit already loaded with other kitchen appliances.
Material and Design Considerations for a Flawless Finish
The hardware you choose must harmonize with your island’s construction and design style. This is where aesthetics meet engineering.

Visual guide about How to Hide Outlets in Kitchen Island
Image source: i.ytimg.com
Countertop Compatibility
This is the first filter. Pop-up receptacles are primarily for solid, machinable materials: stone (granite, quartz, marble), solid surface (Corian, Hi-Macs), and even some dense woods. They are not suitable for laminate countertops, as the cut-out would expose the particleboard edge and the mechanism wouldn’t be secure. For laminate, your options narrow to side-panel outlets or drawer outlets. If you have a beautiful butcher block top, you can install a pop-up, but the cut must be perfectly sealed to prevent moisture ingress into the wood, which could warp it.
Cabinet Construction and Clearance
Your island’s cabinet must have the internal volume and structure to accommodate your chosen method. A pop-up requires a deep enough “well” below the countertop for the mechanism to retract into—typically 3.5 to 4 inches of depth from the bottom of the countertop. A drawer outlet requires a drawer with a sturdy back wall to mount the outlet to and enough depth behind the drawer front for the outlet’s box. If your island has a finished apron (the decorative panel between the countertop and the floor), ensure there is no obstruction where a pop-up or side outlet would be located. Measure twice, consult your cabinetmaker’s drawings.
Finishing Touches: Flanges, Plates, and Colors
For pop-ups, the visible top plate (the part that’s flush) comes in various finishes: stainless steel, black, white, and often in colors to match specific faucet or hardware finishes (oil-rubbed bronze, polished nickel). Choose one that complements your faucet, cabinet hardware, or sink. Some manufacturers offer custom paint or powder-coating to match an exact cabinet color perfectly. For drawer outlets or side-panel outlets, you can sometimes purchase blank outlet plates in different colors or even have your cabinetmaker create a custom door that perfectly matches the surrounding cabinet style, making the access point virtually invisible.
Installation: Why a Pro is Non-Negotiable
We’ve touched on this, but it bears its own section. The temptation to DIY electrical work is strong, especially for a seemingly simple outlet swap. For hiding an island outlet, DIY is a recipe for danger and failure.
The Risks of DIY Electrical Work
Improper wiring can cause arcing, overheating, and fires. An incorrectly installed GFCI might not trip when it should. A loose connection can lead to a fatal shock. If your DIY work causes an electrical fire, your homeowner’s insurance may deny the claim. Furthermore, if you ever sell your home, unpermitted or non-code electrical work will be flagged in an inspection, potentially killing the sale or requiring expensive remediation. The tools, knowledge of wire gauges, box fill calculations, and grounding requirements are not learned from a YouTube video.
The Professional Installation Process
A licensed electrician will:
- Verify the Plan: Review your chosen method with the cabinet plans to confirm feasibility and location.
- Run the Wiring: During rough-in, run the correct gauge (typically 12-gauge for 20-amp circuits) cable from the panel or an existing accessible junction box to the island’s future location, leaving a service loop inside the island base.
- Install the Box/Mechanism: For a pop-up, they or the countertop installer will secure the housing. For a drawer outlet, they will mount the box to the drawer back or cabinet side, ensuring it is square and secure.
- Make Connections: They will connect the wires to the outlet (or pop-up mechanism) with proper wire nuts, ensuring ground connections are solid. They will install the GFCI device in the correct location per code.
- Test and Inspect: They will test the outlet with a GFCI tester, verify polarity and grounding, and ensure the mechanism operates smoothly. The work will be done to code and will be permitted and inspected if required by your locality.
Investing in a professional electrician is an investment in safety, legality, and peace of mind. It is the single most important step in this entire process.
Maintenance and Long-Term Care
Your hidden outlet system isn’t “install and forget.” A little maintenance ensures years of reliable, invisible service.
Caring for Pop-Up Mechanisms
Dust, kitchen grease, and crumbs can find their way into the pop-up mechanism. Every 6-12 months, pop the unit up and gently vacuum the recessed area with a brush attachment. Wipe the moving parts with a dry cloth. Occasionally, check the smoothness of the action. If it starts to stick, a tiny amount of silicone-based lubricant (not WD-40, which can attract dust) can be applied to the guide rods. Check that the seal around the pop-up flange is intact to prevent liquid from seeping into the mechanism below.
Managing Cords and Drawer Outlets
For drawer or retractable systems, avoid yanking cords. Ensure the cord exit hole in the drawer front has a smooth grommet or bushing to prevent abrasion. Periodically check the cord for nicks or wear. When plugging in heavy appliances from a drawer outlet, support the appliance’s weight to avoid putting strain on the outlet and cord connection.
Periodic Electrical Checks
Test your GFCI protection monthly. Press the “TEST” button; it should trip and cut power. Press “RESET” to restore it. This simple habit ensures the life-saving feature is working. Visually inspect accessible outlets and their covers for any signs of cracking, discoloration, or heat damage. Listen for any buzzing or crackling sounds when a device is plugged in—this is a sign of a bad connection that requires an electrician’s attention immediately.
Conclusion: The Island, Perfected
Hiding outlets in your kitchen island is more than a cosmetic trick; it’s the final act in crafting a kitchen that works beautifully for your life. It’s about respecting the design intent of your central workspace while rigorously adhering to the safety protocols that protect your home and family. By planning early with your design and electrical team, choosing a method that aligns with your countertop material and lifestyle, and committing to professional installation, you achieve that elusive goal: a stunning, uncluttered island that is also a powerhouse of functionality.
The methods we’ve explored—from the magical pop-up to the cleverly disguised drawer outlet—offer a spectrum of solutions to match any aesthetic and need. Remember, the best solution is the one that is safe, code-compliant, accessible when you need it, and invisible when you don’t. Your dream kitchen island, free of visual clutter and fully prepared for modern living, is not only possible but entirely within reach. Start the conversation with your professionals today, and watch your vision come to life, seamlessly integrated and perfectly powered.
Frequently Asked Questions
Can I install a pop-up outlet in a laminate countertop?
No, pop-up receptacles require a solid, machinable material like stone or solid surface. Laminate is too thin and would expose the particleboard core, creating a moisture and fire hazard. For laminate islands, consider a drawer outlet or a discreet side-panel outlet with a custom cover.
Will a hidden outlet require its own dedicated electrical circuit?
Not necessarily. Kitchen countertop outlets, including those on an island, can be on one of the two required 20-amp small appliance circuits. However, if you plan to use multiple high-wattage appliances (like a toaster, coffee maker, and stand mixer) simultaneously on the island, your electrician may recommend dedicating a separate circuit to handle the load safely.
Are pop-up outlets safe for families with young children?
Yes, when installed correctly and with the unit in the down position, the outlet is completely concealed, offering a tamper-resistant surface. However, when popped up, they function like any standard outlet. For added safety, ensure the pop-up unit has a “tamper-resistant” (TR) mechanism, which has internal shutters that prevent objects from being inserted. The GFCI protection is the primary safety layer against shock.
What is the biggest mistake homeowners make when hiding island outlets?
The biggest mistake is deciding on the solution too late, after the island is built and finished. This forces reactive, often ugly, solutions like surface-mounted raceways. The second biggest mistake is attempting DIY installation without proper licensing and knowledge, violating code and creating serious safety risks. Always plan with your electrician during the design phase.
How much does it typically cost to install a hidden island outlet?
Costs vary widely by location, method, and complexity. A simple drawer outlet might add $150-$300 in parts and labor over a standard outlet. A high-quality pop-up receptacle in stone can cost $300-$700+ for the unit and installation, as it requires precise countertop cutting and professional electrical work. Always get a detailed quote from your electrician that includes parts and labor.
Can I hide the outlet but still have USB charging ports?
Absolutely. Many pop-up receptacles and drawer-integrated outlets are available with built-in USB-A and/or USB-C ports alongside standard outlets. This is an excellent way to provide modern charging without visible adapters cluttering your countertop. Just ensure the combined load of USB ports and outlets doesn’t exceed the circuit’s capacity.