That awkward gap above your kitchen cabinets is a design challenge many face. Leaving it empty often creates a dusty, unfinished look, but filling it poorly can lead to clutter and visual chaos. The solution lies in a strategic blend of function and style, using that vertical space for smart storage, curated displays, or integrated design elements. By assessing your cabinet height, kitchen style, and personal needs, you can turn this neglected area into a purposeful and beautiful part of your kitchen’s aesthetic.
That space. You know the one. It’s that mysterious, often awkward, vertical expanse that sits silently above your kitchen cabinets. For many homeowners, it’s a source of quiet frustration—a design puzzle with no obvious solution. It’s too high for everyday storage, yet too prominent to ignore. Leaving it vacant usually results in a dusty shelf that collects forgotten appliances and serves no real purpose. But what if we told you that this so-called “dead space” could be one of the most impactful areas in your kitchen to design? Filling the space above your kitchen cabinets isn’t just about hiding an awkward gap; it’s an opportunity to add storage, inject personality, enhance lighting, and ultimately, create a more cohesive and functional kitchen. This guide will walk you through every consideration, idea, and implementation tip to help you master how to fill that space with confidence and style.
Key Takeaways
- Assess the gap: Precisely measure the height, depth, and surrounding environment to determine feasible and safe options for your specific space.
- Balance function and form: Decide if the primary goal is additional storage, decorative display, or seamless integration to guide your design choices.
- Popular solutions include: Open shelving, decorative baskets, integrated lighting, artwork, and greenery—each serving a different purpose.
- Avoid creating clutter: Curate items intentionally; less is more. Avoid using the space as a dumping ground for rarely-used items.
- Consider proportions and scale: Ensure whatever you install or place is appropriately sized for the gap and doesn’t overwhelm the cabinetry below.
- Prioritize safety and accessibility: Secure heavy items properly, and only store items you can safely reach without unstable stools or chairs.
- Lighting is transformative: Adding under-cabinet or in-cabinet lighting can dramatically change the perception of the space, making it feel intentional and bright.
📑 Table of Contents
Understanding the Space: Assessment and Goals
Before you buy a single basket or hang a single picture, you must become intimately familiar with the specific dimensions and characteristics of your cabinet gap. This isn’t a one-size-fits-all situation. A 12-inch gap in a low-ceilinged apartment calls for a vastly different approach than a 24-inch gap in a spacious, modern kitchen with high ceilings.
Measuring and Evaluating the Gap
Grab a tape measure. You need three key numbers: the vertical height from the top of the cabinet to the ceiling or soffit, the depth of the cabinet (how far it sticks out from the wall), and the width of the cabinet run. The depth is especially critical. A shallow gap (less than 12 inches deep) severely limits what you can place there without it looking ridiculous or being unsafe. A deeper gap (18-24 inches) opens up a world of possibilities, from full-depth shelving to substantial decorative objects.
Also, look at the surrounding environment. Is there a soffit (that dropped ceiling box) or is it open to the real ceiling? A soffit creates a definitive, often lower, endpoint. An open-to-ceiling gap feels more grand but can be more daunting. Note the material of your cabinet crown molding, if any. This will influence whether you want to match, contrast, or remove it entirely. Finally, consider your kitchen’s overall style. A farmhouse kitchen with shaker cabinets welcomes rustic baskets and enamelware. A sleek, contemporary kitchen with high-gloss finishes calls for minimalist art or integrated, hidden solutions.
Defining Your Primary Objective
Ask yourself: What is the main problem I want to solve? Your answer will be your guiding principle. Common goals include:
- Adding Storage: You need more room for items you use occasionally but don’t want on your countertops (baking dishes, special occasion serveware, pantry overflow).
- Improving Aesthetics: The gap looks unfinished and you want to create a seamless, intentional look that complements your decor.
- Adding Lighting: You want to brighten the countertop area below or create ambiance with uplighting.
- Displaying Collections: You have beautiful items (vases, ceramics, art) you’d like to showcase.
- Creating Illusion: You want to make the ceilings feel higher or the cabinets feel more integrated with the room.
You might have a combination of goals, but identifying the primary one prevents you from creating a cluttered, confused space that serves no purpose well.
Functional Storage Solutions: Maximizing Utility
If your goal is practical storage, you must be ruthlessly selective. The space above cabinets is not for daily-use items. It’s for the “sometimes” things. The key is to contain and conceal as much as possible to maintain a clean look.
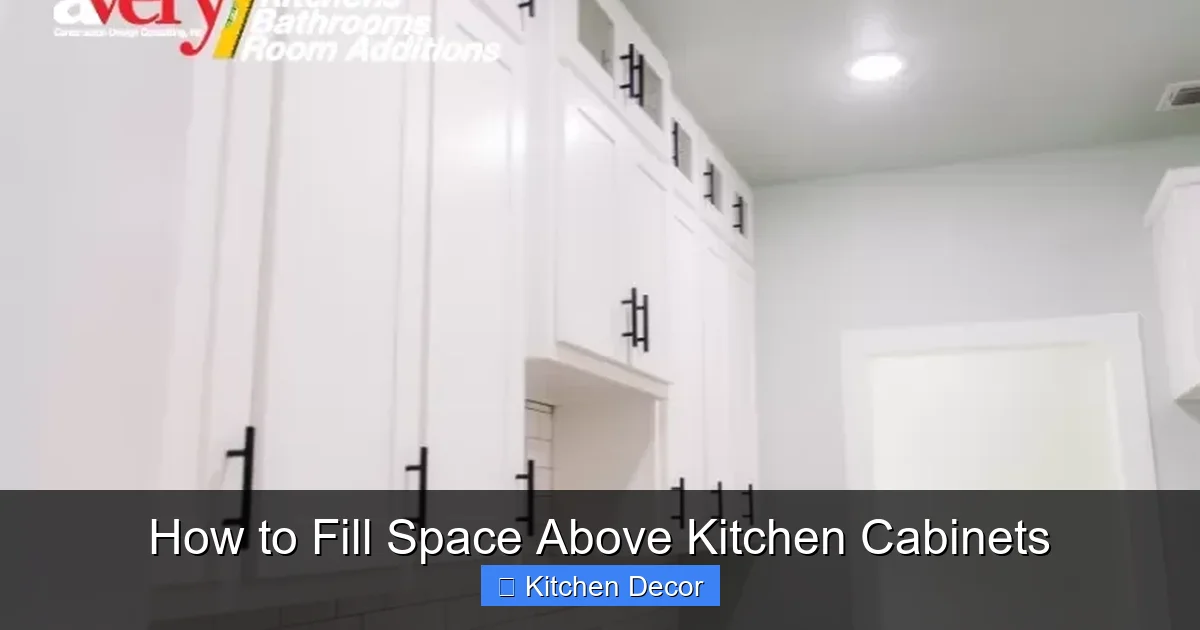
Visual guide about How to Fill Space Above Kitchen Cabinets
Image source: averyhomeremodeling.com
Open Shelving: The Classic Choice
Installing a continuous shelf or individual floating shelves is the most straightforward solution. This turns dead space into active storage. However, open shelving in this high, awkward location comes with caveats. It works best for displaying a few beautiful, infrequently used items—like a set of matching canisters, a collection of vintage pitchers, or a grouping of cookbooks. Never use it for random food boxes or disposable containers. The eye will see clutter from across the room. If you need true concealment, open shelving is not your answer.
Pro Tip: Ensure the shelf is securely anchored into studs or with robust wall anchors. The weight of items, combined with the leverage of a high shelf, can be significant. Use shelf brackets that complement your kitchen’s style—wrought iron for industrial, sleek metal for modern, painted wood for traditional.
Decorative Baskets and Bins: The Clutter-Concealers
This is arguably the best solution for pure, ugly-but-useful storage. Woven baskets, fabric bins, or lidded containers can be placed directly on top of the cabinets. They hide a multitude of sins—extra paper towels, holiday serving platters, bulk snacks—while adding texture and warmth. Use uniform baskets for a clean, collected look, or mix materials (seagrass, wire, canvas) for an eclectic, layered feel.
Consider how you’ll access them. For very high gaps, you’ll need a step stool. Choose baskets with handles for easy pulling. Wire bins are great for items you need to see quickly (like a specific baking pan). Fabric bins are softer and better for protecting delicate items from dust. Label the inside of the lid or the front of the bin to avoid a frustrating treasure hunt later.
Hanging Racks and Pots & Pans Organizers
If your gap is deep enough and you have a utilitarian goal, consider a wall-mounted pot rack or a specialty organizer that hangs from the cabinet’s underside. These are typically used for storing bulky, lightweight items like baking sheets, cutting boards, or muffin tins. They must be installed with extreme care, using heavy-duty hardware rated for the weight. This solution is less about decor and more about efficient use of space, freeing up cabinet interior room. It works well in professional-kitchen-style homes where exposed storage is part of the aesthetic.
Decorative Displays: Curating Beauty
When storage is not the priority, the space above your cabinets becomes a prime gallery wall. The rules here are about curation, scale, and cohesion. A random assortment of knick-knacks will look like a rummage sale. A thoughtfully arranged vignette tells a story.
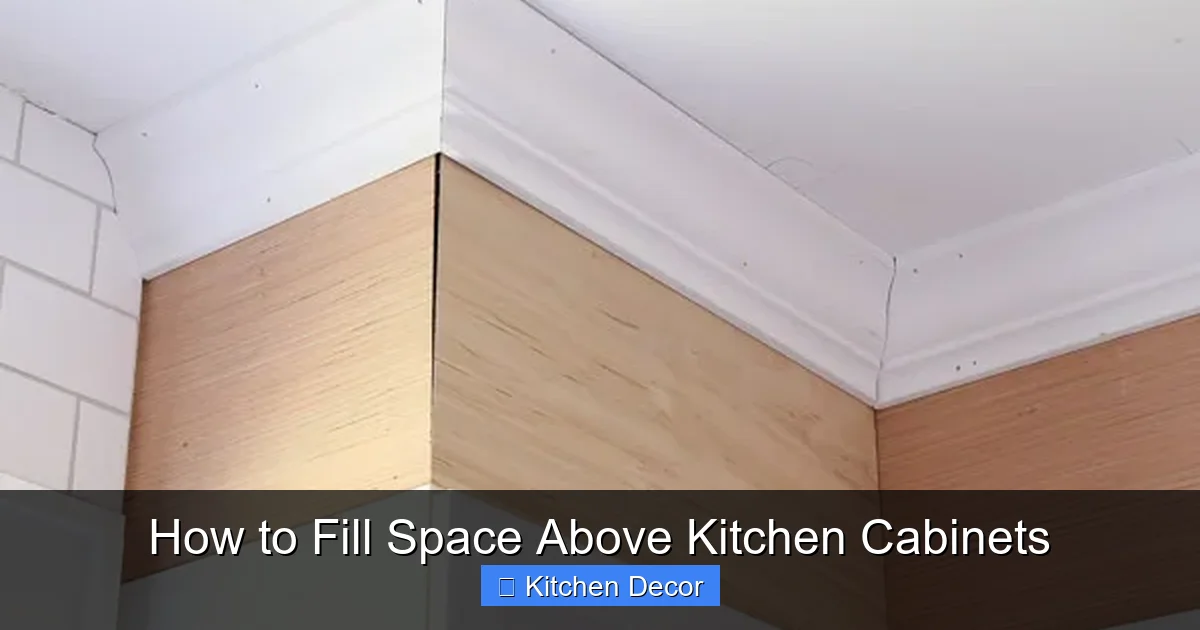
Visual guide about How to Fill Space Above Kitchen Cabinets
Image source: angelamariemade.com
The Art of the Vignette
A vignette is a small, pleasing arrangement of objects. For the cabinet top, think in groups of 3 or 5, varying heights and shapes but tying them together with a common theme, color palette, or material. A classic combination: a tall, slender vase (for dried grasses or a single stem), a medium stack of leather-bound books, and a small, textured ceramic bowl. The arrangement should have a visual triangle—tall on one side, medium in the middle, short on the other.
Another approach is a “collection display.” If you collect blue-and-white ceramics, vintage milk glass, or colorful Fiestaware, this is their moment. Group them together in a tight cluster rather than spreading them out along the entire cabinet run. Leave negative space; don’t feel compelled to fill every inch. The clean lines of the cabinet crown below will frame your collection beautifully.
Greenery and Botanicals
Plants are the ultimate decorators—they add life, color, and softness. For a high, dry spot, choose low-maintenance, trailing, or sculptural plants that can tolerate less water and possibly lower light (depending on your kitchen’s windows). Excellent choices include:
- Pothos or Philodendron: Their trailing vines can gracefully cascade down the side of the cabinet.
- Snake Plant or ZZ Plant: Nearly indestructible, with strong vertical forms that add structure.
- Faux Plants: High-quality silk or plastic plants have come a long way. They offer the look without any maintenance risk, perfect for spots with no natural light.
Use consistent, simple planters (white ceramic, concrete, or woven baskets) to maintain a unified look. Group a tall, narrow plant with a shorter, bushier one for dimension.
Artwork and Mirrors
Hanging a piece of art or a mirror on the wall *above* the cabinets (if there is wall space) can draw the eye upward and break up the monotony of a long cabinet run. The art should be proportional to the gap—not too small, which would look lost, and not so large it feels top-heavy. A landscape painting, a series of small framed prints in a grid, or a large, ornate mirror can all work. Ensure the bottom of the frame sits just a few inches above the cabinet top to create a connected “gallery.” This is a more advanced solution that requires careful measurement and secure hanging.
Integrated Design Approaches: Blending In
Sometimes, the best way to fill the space is to make it disappear or become an intentional part of the architecture. This approach focuses on treating the entire cabinet run as one cohesive unit from floor to ceiling.
Visual guide about How to Fill Space Above Kitchen Cabinets
Image source: i.pinimg.com
Paint and Color Continuity
One of the simplest and most effective tricks is to paint the wall above the cabinets the same color as the cabinets themselves. This creates a visual extension of the cabinet face, making the entire assembly look taller, more built-in, and intentional. It’s a favorite technique in modern and minimalist kitchens. If your cabinets are a bold color, this is a chance to extend that drama to the ceiling plane. For a softer look, paint the wall a shade or two lighter or darker than the cabinets for subtle definition.
Alternatively, you can paint the underside of the soffit (if you have one) or the wall area in a contrasting accent color or a moody dark hue (navy, charcoal, forest green). This creates a dramatic backdrop that makes any objects you place on top pop and feel more curated. It essentially turns the top of your cabinets into a intentional display shelf against a feature wall.
Crown Molding and Architectural Details
If your cabinets lack a finished top, adding a simple, streamlined crown molding that extends to the soffit or ceiling can beautifully cap the run. This architectural detail adds a finished, custom look. For a more elaborate traditional kitchen, you might install a full, ornate crown that fills the gap entirely. This is a permanent solution that requires carpentry skill but results in a seamless, high-end appearance. The molding can be painted to match the cabinets or the wall for different effects.
Strategic Lighting Installation
Lighting is the secret weapon for transforming awkward spaces. Installing LED strip lighting or small puck lights on the underside of the cabinet above (so it shines down on the counter) is standard. But consider lighting for the *top* of the cabinets.
- Uplighting: Small, remote-controlled LED strips placed on the top surface of the cabinet, facing upward, can wash the wall or soffit above with soft light. This creates a beautiful ambient glow and makes the space feel intentionally designed, not forgotten.
- Cove Lighting: If you install a simple, recessed “cove” or valance (a small, horizontal ledge) that extends from the cabinet top toward the wall, you can hide LED strips behind it. This creates a stunning, indirect wash of light on the ceiling or wall above.
Lighting adds a magical dimension, especially at night, and proves that the space is a considered part of the room’s atmosphere.
DIY and Budget-Friendly Ideas
You don’t need a contractor or a huge budget to make an impact. Many of the best solutions are simple, creative, and renter-friendly.
Removable adhesive hooks and shelves
For renters or the commitment-averse, heavy-duty adhesive hooks (like those from Command) can hold lightweight items—a small plant, a lightweight basket, a framed print. You can even find adhesive-backed floating shelf systems. Always check the weight limit and ensure the surface (painted wall, cabinet side) is clean and suitable for adhesion. This allows for easy removal without damage.
Creative Use of Everyday Objects
Look around your home. A beautiful, sturdy vintage suitcase placed on its side can be a charming display platform. A set of old books, glued together in a stack, can become a unique pedestal for a vase. A collection of identical wooden crates (from a craft store) can be stacked to form a modular storage and display unit. The key is to use objects that have weight and substance, so they look intentional and not like clutter.
Paint and Wallpaper Transformations
As mentioned, paint is powerful. But consider the cabinet tops themselves. If they are a raw, unfinished wood (like the back of a cabinet), painting them a bold, glossy black or a bright, cheerful yellow can turn the entire top surface into a dramatic display stage. For the wall above, a peel-and-stick wallpaper with a bold pattern can create a stunning backdrop that makes simple objects look gallery-worthy. This is a temporary, high-impact solution perfect for adding personality.
Common Mistakes to Avoid
Even with the best intentions, it’s easy to misstep with this space. Here are the pitfalls to steer clear of.
Overloading and Creating a Fire Hazard
This is the most serious mistake. Never store flammable items (paper towels, cleaning rags, oven mitts) near the stove hood or any heat source. Never pile items so high they are within inches of a light fixture or exhaust fan. Safety must come first. Ensure nothing blocks any vents. In earthquake-prone areas, ensure all items are stable and not likely to topple. Heavy items should be secured to the cabinet top with museum putty or similar non-damaging adhesives.
Ignoring Proportion and Scale
A tiny, delicate figurine on a vast, deep cabinet top will look lost. Conversely, a massive, bulky vase on a narrow, shallow gap will look top-heavy and ridiculous. Always consider the relationship between the object(s) and the “canvas” they sit on. A good rule: the arrangement should occupy about 60-70% of the available surface area, leaving breathing room on the sides and front.
Creating a “Junk Drawer” in the Sky
Resist the urge to use this space as a repository for everything you can’t find a home for. The “out of sight, out of mind” principle backfires here because it’s still partially in sight. If it’s not beautiful, useful, or meaningful, it doesn’t belong up there. This includes old appliances you never use (like that bread machine from 2003), mismatched plastic containers, and random gifts you don’t want but can’t discard. Clutter at eye-level (even high eye-level) creates visual noise and stress.
Forgetting About Dust and Maintenance
This space is a dust magnet. If you install open shelving or place objects directly on the cabinet, you are committing to regular dusting. Consider how often you’re willing to climb up with a duster. Baskets with lids, items under glass cloches, or enclosed displays can mitigate this. Also, think about cleaning the wall or soffit above—it’s now a visible surface that will need occasional wiping.
Conclusion: Your Space, Your Style
Filling the space above your kitchen cabinets is ultimately an exercise in intentional design. It’s about taking a neglected architectural quirk and transforming it into a feature that serves your unique lifestyle and aesthetic. Whether you choose the clean lines of integrated paint and molding, the practical magic of concealed baskets, the curated beauty of a vignette, or the atmospheric touch of strategic lighting, the solution should feel like it was always meant to be there. Start with a careful assessment. Define your goal. Then, choose a path that balances beauty with function. By avoiding the common traps of clutter and poor proportion, you can master this vertical space and create a kitchen that feels complete, thoughtful, and uniquely yours. That awkward gap is no longer a problem—it’s your next design opportunity.
Frequently Asked Questions
How much does it typically cost to fill the space above kitchen cabinets?
The cost varies dramatically. DIY solutions like painting, adding baskets you already own, or arranging decor can be nearly free. Installing custom open shelving or crown molding might cost $200-$800+ depending on materials and labor. The most budget-friendly approaches focus on paint, curated existing items, and affordable baskets from home goods stores.
What is the ideal depth for items placed on top of cabinets?
>Items should generally not extend beyond the depth of the cabinet itself. Placing objects that stick out creates a cluttered, unstable look and is a safety hazard. Aim for items that sit comfortably entirely on the cabinet’s surface. If your cabinet is 12 inches deep, your decor or baskets should be 12 inches deep or less.
Is it safe to store heavy items on top of cabinets?
>Exercise extreme caution. Cabinet tops are not designed for heavy, dynamic loads. Very heavy items (like large stacks of plates or cast iron cookware) can stress the cabinet’s anchoring to the wall over time, especially in seismic areas. If you must store heavier items, place them toward the back (closest to the wall) for better balance, ensure the cabinet is securely fastened to the wall studs, and never store anything so heavy it risks tipping the entire cabinet unit.
What if my kitchen has very little space (only a few inches) above the cabinets?
>For a minimal gap (1-4 inches), your best bets are: 1) Paint the wall above the cabinets to match the cabinets, creating an optical extension. 2) Install a very shallow, narrow valance or crown molding to cap it off. 3) Use the space for a very low-profile, continuous element like a slim LED strip for uplighting. Avoid trying to place any objects in such a shallow space, as it will look awkward and collect dust.
Can I change the decor seasonally if I use this space?
>Absolutely! This space is perfect for seasonal rotation. Use a simple, neutral base (like a woven basket or a painted surface) and swap out the items on top: pumpkins and gourds in fall, evergreen boughs and ornaments in winter, fresh flowers in spring, and nautical or bright summery objects in warm months. Just ensure any seasonal items are lightweight and stable.
What are the best renter-friendly solutions for this space?
>Renters should avoid permanent alterations like painting, nailing, or installing new shelves. Focus on: 1) Placing freestanding baskets, boxes, or decorative objects directly on the cabinet tops. 2) Using heavy-duty, removable adhesive hooks or shelves on the wall *above* the cabinets (if there is wall space). 3) Applying temporary, peel-and-stick wallpaper to the wall above for a dramatic backdrop. 4) Using clamp-on or tension-rod curtains to cover the gap if you want to hide it completely.