Finding roaches inside your microwave is a serious kitchen hygiene issue that requires immediate, safe action. These pests are attracted to food debris and warmth, but you can evict them without damaging the appliance. The process involves a thorough deep clean, sealing entry points, and using targeted, microwave-safe treatments. Prevention is the most critical long-term strategy to keep them from returning, focusing on overall kitchen sanitation and securing your microwave’s interior.
The sight of a cockroach scurrying across the interior of your microwave is enough to make anyone’s stomach drop. It’s more than just a “yuck” factor; it’s a direct contamination of the appliance you use to prepare your food. These resilient pests are drawn to the warmth, hidden spaces, and, most importantly, the crumbs and spills that accumulate in our often-neglected kitchen workhorses. Getting rid of roaches in a microwave oven isn’t about just swatting the one you see. It’s a systematic process of eviction, deep sanitation, and long-term prevention to reclaim your kitchen’s hygiene. This guide will walk you through every safe and effective step, from immediate action to securing your space for good.
Key Takeaways
- Unplug First: Always disconnect the microwave from power before inspecting or cleaning to eliminate any risk of electrical hazard.
- Deep Clean is Non-Negotiable: A surface wipe-down is insufficient. You must remove the turntable, roller ring, and clean every crevice with a degreaser like vinegar or baking soda paste.
- Inspect for Entry Points: Roaches enter through tiny gaps. Check and seal the door seal, vent openings, and any cracks in the microwave’s casing or surrounding countertop.
- Avoid sprays inside: Never use standard insecticide sprays inside the microwave cavity, as residues can vaporize when heated, creating toxic fumes.
- Address the Whole Kitchen: A single microwave infestation is a symptom of a larger kitchen pest problem. Treat the entire area, not just the appliance.
- Professional Help for Infestations: If you see multiple roaches or egg cases (oothecae), a severe infestation likely exists behind walls, requiring a licensed exterminator.
- Consistent Prevention is Key: Implement daily habits like wiping spills immediately, storing food in sealed containers, and never leaving the microwave door ajar to deter roaches permanently.
📑 Table of Contents
- Why Roaches Are Attracted to Your Microwave
- Step 1: Immediate Action and Initial Inspection
- Step 2: The Deep Clean Eviction Process
- Step 3: Sealing Entry Points and Fortifying Your Microwave
- Step 4: Kitchen-Wide Pest Management and Sanitation
- Step 5: When to Call a Professional Exterminator
- Step 6: Long-Term Prevention and Maintenance Routine
- Conclusion: A Roach-Free Microwave is Achievable
Why Roaches Are Attracted to Your Microwave
Understanding the “why” is the first step in winning the battle. Microwaves provide an ideal habitat for cockroaches, particularly the common German and American varieties. They are nocturnal, seeking dark, tight crevices during the day. The space behind and underneath your microwave, the vent grilles, and the gap between the door and the seal are perfect hiding spots. The appliance generates a low, residual warmth when recently used, which is attractive in cooler environments. But the primary magnet is food. Micro-crumbs from reheated meals, splatters of sauces, and oily residues create a constant, easily accessible food source. A single forgotten popcorn kernel or a sticky drip from a bowl can sustain a small population. Their presence indicates a broader sanitation issue in your kitchen, as they need water sources too, often found in sinks or leaky pipes nearby.
The Dangers of an Infested Microwave
Beyond the visceral disgust, a cockroach-infested microwave poses genuine health risks. Cockroaches are known vectors for bacteria like Salmonella and E. coli, which they pick up from crawling through garbage and sewage. They can contaminate your food and cooking surfaces with their feces, shed skins, and vomit. When you heat food, these pathogens can be aerosolized or transferred directly. Furthermore, dead roaches or egg cases (oothecae) inside the cavity can catch fire or create foul odors when heated. Allowing the infestation to continue means you are potentially cooking in a contaminated environment, which is unacceptable for food safety.
Step 1: Immediate Action and Initial Inspection
Upon discovery, your first instinct might be to grab a can of bug spray. Resist that urge inside the microwave. The immediate steps are about safe removal and assessment.
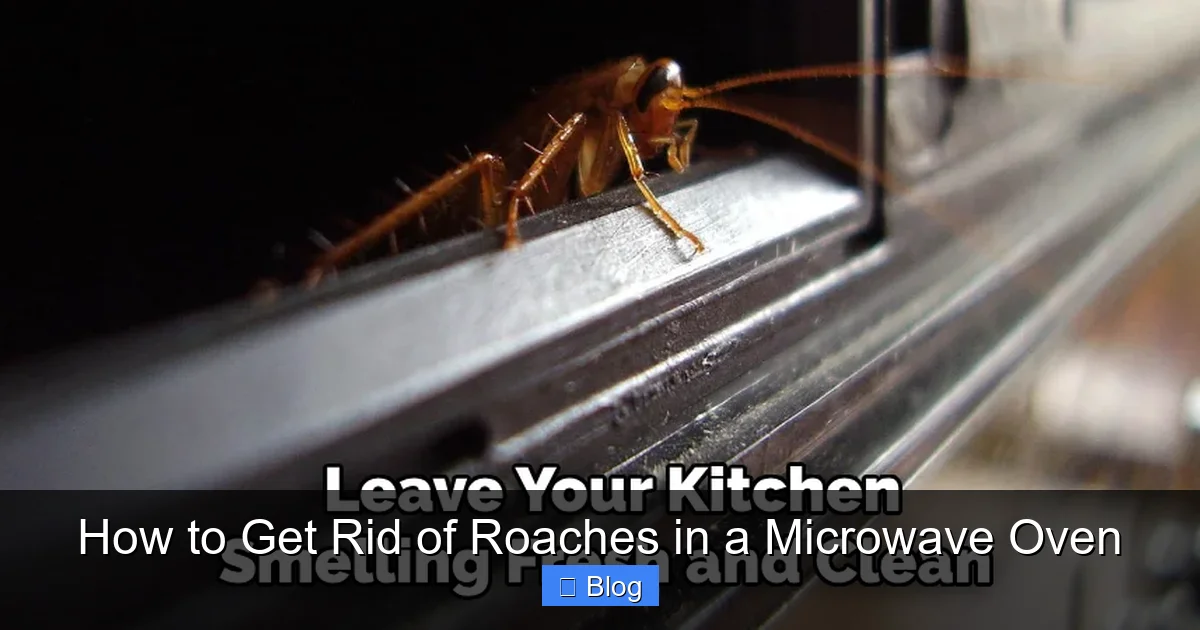
Visual guide about How to Get Rid of Roaches in a Microwave Oven
Image source: thekitchenix.com
Unplug and Isolate
The very first thing you must do is unplug the microwave from the wall outlet. This is a critical safety step that eliminates any risk of electrical shock during cleaning and prevents a roach from potentially causing a short circuit if it crawls onto internal components. Once unplugged, carefully slide the microwave away from the wall if it’s a countertop model. This gives you access to the back, sides, and underside—prime real estate for roach highways and nests. For an over-the-range model, clear everything from the stovetop and ensure you have a stable way to access the area above and behind it.
Conduct a Thorough Visual Inspection
With the microwave isolated, use a flashlight to conduct a meticulous inspection. Look not just inside the cavity, but at:
- The Door Seal: Check the rubber gasket for tears, gaps, or loosening. Roaches can squeeze through openings as small as 1/16th of an inch.
- Vent Grilles: These are common entry/exit points. Feel for any debris or nests blocking the vents on the back or top.
- Control Panel Area: Inspect the seams around the keypad and display. Roaches can live behind the control board.
- The Roller Ring and Turntable: Lift the glass turntable and the plastic roller ring (the piece with wheels underneath). These are often removed for cleaning and provide dark, hidden spaces.
- Underside and Back: Look for droppings (small, dark specks resembling pepper or coffee grounds), shed skins (translucent brown casings), and especially egg cases. Oothecae are brown, purse-shaped cases about 1/4 inch long, often glued in hidden crevices.
Documenting what you find with a phone photo can help you track progress and identify problem areas for sealing later.
Step 2: The Deep Clean Eviction Process
Now comes the labor-intensive but essential part: a complete disassembly and deep clean. You must remove all food residue to make the microwave inhospitable.
Visual guide about How to Get Rid of Roaches in a Microwave Oven
Image source: thekitchenix.com
Disassemble Removable Parts
Remove the glass turntable, the roller ring (or support ring), and the carousel motor plate if it detaches. Take these parts to your sink. You will wash them with hot, soapy water and a scrub brush. Pay special attention to the grooves and wheels of the roller ring, where crumbs love to hide. Let them soak if necessary. Set them aside to dry completely on a clean towel.
Cleaning the Interior Cavity
For the main cavity, avoid harsh chemical cleaners that could leave toxic residues. Opt for these microwave-safe, effective solutions:
- White Vinegar Steam Method: Place a microwave-safe bowl filled with 1 cup of water and 1/4 cup of white vinegar inside. Run the microwave on high for 3-5 minutes until the window steams up. Let it sit for 5-10 minutes. The steam will loosen baked-on grime. Carefully remove the bowl (it will be hot) and wipe down all interior surfaces with a damp microfiber cloth or sponge. The vinegar cuts grease and neutralizes odors.
- Baking Soda Paste: For stubborn spots, make a paste with baking soda and a tiny amount of water. Apply it to grime, let it sit for a few minutes, then scrub gently with a soft-bristled brush (an old toothbrush is perfect for corners). Baking soda is a mild abrasive and deodorizer.
- Lemon Freshness: For a final touch, rub a cut lemon on the interior walls or place lemon slices in the water/vinegar bowl. This leaves a clean scent and adds extra degreasing power from the citric acid.
After cleaning, go over the entire interior with a clean, damp cloth to remove any cleaning residue, then a dry cloth. Ensure it is completely dry before proceeding.
Cleaning the Exterior and Hidden Areas
With the interior clean, move to the outside. Unplugged, wipe down the control panel with a cloth slightly dampened with a 50/50 water and vinegar solution. Never spray liquid directly onto the control panel. Use a cotton swab dipped in the solution to clean around buttons and seams. Clean the door seal thoroughly with the same solution, pulling it back slightly to clean the groove underneath. Finally, vacuum the floor and countertop around the microwave’s original position, and the area where you moved it. Use the vacuum’s crevice tool to suction any debris, roach bodies, or egg cases from behind and underneath the appliance before you move it back.
Step 3: Sealing Entry Points and Fortifying Your Microwave
Cleaning removes the incentive (food), but sealing removes the opportunity (access). This is the most crucial prevention step.
Visual guide about How to Get Rid of Roaches in a Microwave Oven
Image source: i.pinimg.com
Inspecting and Repairing the Door Seal
The door seal is the most common weak point. After cleaning it, inspect it meticulously. Press along the entire perimeter; it should be supple and adhere evenly to the door frame. If it’s cracked, brittle, or has gaps, it must be replaced. You can often find replacement seals online by your microwave’s model number (usually on a sticker inside the door or on the back). Replacing a seal is usually a simple process of peeling off the old one and pressing the new one into the channel. A tight seal is essential.
Securing Vents and Casing Gaps
Check all vent openings. If the mesh or louver is damaged or missing, consider fitting a fine, stainless steel mesh (hardware cloth) over the opening from the outside, secured with a high-temperature silicone caulk. Look for any cracks or gaps in the plastic casing itself, especially around the handle or control panel assembly. Small gaps can be filled with a silicone-based sealant that withstands heat. Do not block any vents required for the microwave’s operation and cooling. The goal is to seal gaps where roaches enter, not to impede airflow.
Environmental Barriers
Create a “moat” around the microwave’s base. Apply a thin, continuous bead of food-grade diatomaceous earth (DE) or silica gel packets along the countertop edge where the microwave sits. These natural desiccants are harmless to humans and pets but deadly to insects by damaging their exoskeletons. Alternatively, use double-sided tape or a commercial insect barrier strip. Ensure the area under the microwave is also treated. This discourages roaches from crossing the barrier to climb up.
Step 4: Kitchen-Wide Pest Management and Sanitation
You cannot win a war on a single front. A microwave infestation is a symptom of a kitchen-wide problem. Your efforts must extend beyond the appliance.
Eliminate All Food and Water Sources
Roaches can survive on a single crumb. Conduct a kitchen audit:
- Food Storage: Transfer all dry goods (cereal, pasta, flour, pet food) from cardboard boxes and bags into hard-sided, airtight plastic or glass containers.
- Trash Management: Use a trash can with a tight-sealing lid. Take out the trash every night, especially in warm weather. Clean the outside of the bin.
- Spill Protocol: Wipe up any food or liquid spill on counters, floors, and appliances immediately, including the microwave’s exterior.
- Pet Food: Don’t leave pet food out overnight. Store it in a sealed container and feed scheduled meals, picking up bowls after pets are done.
- Water Sources: Fix leaky faucets and pipes. Wipe down the sink each night. Don’t leave pet water bowls out overnight. Roaches need water more than food.
Declutter and Deny Hiding Places
Cardboard boxes, stacks of paper, and cluttered cabinets are roach condos. Recycle cardboard promptly. Keep cabinets organized and clean. Consider using shelf liner that can be wiped down. Reduce clutter on countertops and floors to eliminate hiding spots and make monitoring easier.
Natural Deterrents and Traps
Use these as part of your monitoring and deterrence strategy:
- Bait Stations: Place commercial roach bait stations (like Combat or Advion) in strategic locations: under the sink, behind the toilet, beside the refrigerator, and not inside the microwave. The roaches carry the insecticide back to the nest, killing others. This is a core component of integrated pest management.
- Herbal Repellents: Roaches dislike strong scents like peppermint, eucalyptus, and bay leaves. Place cotton balls with a few drops of peppermint oil in cabinet corners or create sachets with dried bay leaves. This is a mild deterrent, not a solution for an infestation.
- Sticky Traps: Place these along baseboards, under appliances, and in corners. They are excellent for monitoring activity levels and identifying hot spots. Check them weekly.
Step 5: When to Call a Professional Exterminator
DIY efforts have their limits. There are clear signs that indicate a professional is necessary.
Signs of a Severe, Established Infestation
If after two weeks of rigorous cleaning and baiting, you are still seeing live roaches during the day (a sign of severe overcrowding), you likely have a large, established nest. Other red flags include finding numerous egg cases (oothecae), especially in hidden areas like behind the microwave, inside cabinets, or under appliances. A strong, musty, oily odor is also a sign of a large population. If you see roaches in multiple rooms, the infestation has spread beyond the kitchen.
What a Professional Will Do
A licensed exterminator will conduct a comprehensive inspection to identify the source, species, and extent of the infestation. They have access to professional-grade baits, insecticides, and growth regulators that are more effective and longer-lasting than consumer products. They will treat inside wall voids, under floors, and in other inaccessible areas where nests thrive. They will also provide a tailored prevention plan. This is an investment in your home’s health and can be more cost-effective than endless failed DIY attempts. Be sure to choose a company with good reviews and a guarantee for their service.
Step 6: Long-Term Prevention and Maintenance Routine
The goal is to make your microwave and kitchen so unappealing that roaches never return. This requires integrating simple habits into your routine.
The Daily and Weekly Microwave Habit
Incorporate these small actions:
- Wipe the Interior After Each Use: Keep a damp cloth or microwave-safe wipe handy. After heating food, quickly wipe down the walls, floor, and door seal to remove splatters and crumbs. This takes 15 seconds.
- Always Use a Cover: Use a microwave-safe lid or paper towel when heating food to contain splatters.
- Leave the Door Ajar: After cleaning or use, leave the microwave door open for 10-15 minutes. This allows any residual moisture or food odors to dissipate and prevents the dark, humid, enclosed space that roaches love.
- Weekly Deep Wipe: Once a week, do a more thorough interior wipe with your vinegar-water solution, even if it looks clean.
Kitchen Hygiene as a Lifestyle
The prevention of roaches is synonymous with a clean kitchen. Make these non-negotiables:
- No Food Overnight: Never leave dirty dishes, food scraps, or pet food out overnight. This is the single most important rule.
- Take Out the Trash: Make it a habit to take the kitchen trash to the outdoor bin every evening before bed.
- Clean Under Appliances: Every 2-3 months, pull out the microwave, refrigerator, and stove to clean underneath and behind them. This disrupts any potential scouting routes and removes accumulated debris.
- Monitor with Traps: Keep a few sticky traps in place year-round in key locations. They are cheap, non-toxic alarms that will alert you immediately if pest activity resumes, allowing for a swift, small-scale response before an infestation re-establishes.
Conclusion: A Roach-Free Microwave is Achievable
Discovering roaches in your microwave is a wake-up call, not a permanent sentence. By following this structured approach—starting with safe unplugging and inspection, moving through a meticulous deep clean, sealing every potential entry point, and finally, implementing a rigorous kitchen-wide sanitation and prevention plan—you can successfully evict these unwanted tenants and reclaim your cooking space. Remember, the microwave is often just a casualty in a larger kitchen pest strategy. Your focus must be holistic. Consistency is your greatest ally. The daily habit of a quick wipe-down and never leaving food out will do more to protect your microwave than any single deep cleaning session. If the problem seems overwhelming, do not hesitate to call a professional. A pest-free kitchen is a fundamental pillar of a healthy home, and your microwave should be a tool for nourishment, not a source of contamination. Take action today, and enjoy the peace of mind that comes with a truly clean and safe cooking appliance.
Frequently Asked Questions
Can I use bug spray inside my microwave to kill roaches?
No. You should never use aerosol or liquid insecticide sprays inside the microwave cavity. The chemicals can leave a toxic residue that will vaporize and contaminate your food when the microwave is next used. The heat can also potentially damage the appliance’s interior or cause a fire. Always use non-toxic cleaning methods like vinegar steam for the interior and place bait stations outside the unit.
How do I know if the roach problem is just in the microwave or a full infestation?
If you find roaches or egg cases only inside the microwave and immediately around its immediate vicinity, it might be an isolated incident. However, if you see roaches in other rooms, especially during the day, find multiple egg cases in cabinets or behind appliances, or notice a strong musty odor, you are dealing with a full-scale kitchen infestation that requires professional intervention and whole-kitchen treatment.
What is the safest and most effective way to clean a roach-infested microwave?
The safest and most effective method is a multi-step process: 1) Unplug the microwave. 2) Remove all removable parts (turntable, roller ring) and wash them in hot, soapy water. 3) Place a bowl of 1 cup water and 1/4 cup white vinegar inside and run on high for 3-5 minutes to steam-clean the interior. 4) Wipe down all surfaces with a damp cloth. 5) Use a baking soda paste and a toothbrush for stubborn grime. 6) Dry everything completely before reassembling and plugging back in.
How often should I clean my microwave to prevent roaches?
To prevent roaches, adopt a two-tiered cleaning schedule. Perform a quick wipe-down of the interior cavity with a damp cloth after every few uses to remove fresh splatters and crumbs. Then, conduct a thorough deep clean with the vinegar-steam method at least once a week. This consistent removal of food residue eliminates the primary attractant for roaches.
Will sealing the microwave door be enough to keep roaches out?
Sealing a damaged door gasket is a critical step, but it is rarely enough on its own. Roaches can also enter through vent openings, gaps in the back or bottom of the casing, and cracks in the countertop or wall behind the unit. You must conduct a full inspection of the microwave’s entire exterior and its surrounding environment, sealing all identified gaps with appropriate high-temperature silicone or mesh to create a complete barrier.
If I find one dead roach in my microwave, does that mean I have an infestation?
Finding a single dead roach could mean it wandered in and died, but it’s a significant warning sign. It indicates that roaches are active in your kitchen and see your microwave as a potential harbor. You should immediately perform the full deep clean and inspection process described above. Set up sticky traps around the microwave and kitchen to monitor for further activity. Treat one sighting as the beginning of an investigation, not an isolated event.