Pissants, commonly known as sugar ants, are a persistent kitchen nuisance drawn by food and moisture. This guide provides a step-by-step plan from immediate actions to long-term prevention. The key to success is targeting the entire colony, not just the visible scouts, and making your kitchen utterly inhospitable. Learn proven natural remedies, safe chemical options, and essential exclusion techniques to win the war for good.
Key Takeaways
- Identify the Invader: “Pissant” is a common name for small, household-invading ants, typically odorous house ants or pavement ants, that are especially attracted to sugars and starches.
- Sanitation is the First Battle: Immediately and meticulously clean all food sources, surfaces, and spills. Store all food, including pet food, in airtight containers. This removes the “welcome mat.”
- Natural Remedies Disrupt, Not Eliminate: Items like vinegar, cinnamon, and citrus repel scouts and disrupt scent trails but rarely kill the hidden colony. They are best used as part of an integrated approach.
- Baits are the Colony Killer: The only permanent solution is ant bait. Worker ants carry the insecticide-laced food back to the nest, poisoning the queen and the entire colony from the inside out.
- Seal Entry Points: After the infestation is under control, conduct a thorough inspection and seal all cracks, gaps around pipes, and window/door edges with silicone caulk to prevent re-entry.
- Outdoor Nests are the Source: The colony is almost always outside. Your indoor battle is about intercepting foragers. Managing the outdoor perimeter is crucial for long-term control.
- Patience and Consistency are Required: Baiting takes 3-7 days to show full effect. Do not spray ants near bait stations, as you must let workers carry the poison back to the nest.
📑 Table of Contents
- Understanding the Enemy: What Exactly Are “Pissants”?
- Step 1: Immediate Action – Declare War on Food and Water
- Step 2: Disruption and Repellents – Buying Time
- Step 3: The Nuclear Option – Using Ant Baits Effectively
- Step 4: Chemical Sprays – The Last Resort, Used Correctly
- Step 5: Long-Term Exclusion – Making Your Kitchen a No-Go Zone
- Step 6: When to Call the Professionals
- Conclusion: Victory is a Process, Not a Spray
Understanding the Enemy: What Exactly Are “Pissants”?
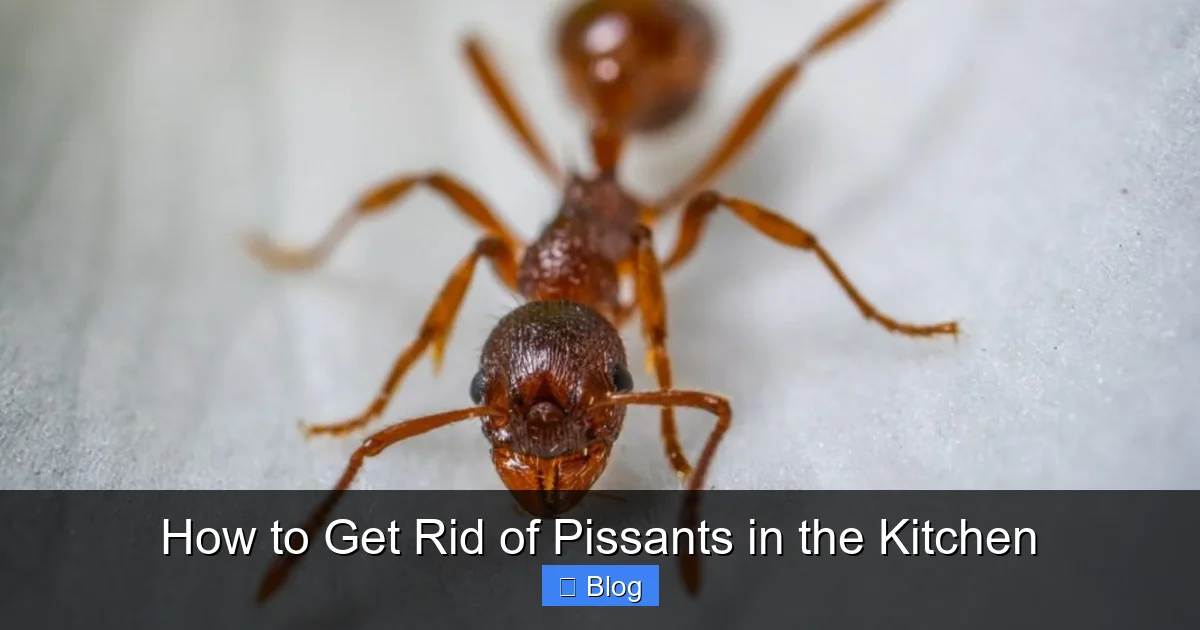
First, let’s clear up the terminology. “Pissant” isn’t a scientific name; it’s a colloquial, somewhat old-fashioned term for a small, nuisance ant. When someone says they have pissants in the kitchen, they are almost certainly referring to one of two common species: the Odorous House Ant (Tapinoma sessile) or the Pavement Ant (Tetramorium caespitum). Both are tiny, typically 1/16 to 1/8 inch long, and range from dark brown to black. The Odorous House Ant is famous for emitting a rotten coconut smell when crushed, which is a dead giveaway. Pavement ants are slightly more robust and have a two-segment “waist” (pedicel) with a stinger, though they rarely sting humans.
Why your kitchen? Your kitchen is a five-star resort for these ants. It offers the two things they crave most: carbohydrates (sugars, syrups, crumbs, pet food) and moisture (drip pans, sinks, condensation). They are foraging workers, sent out by a hidden queen whose sole job is to reproduce. The few ants you see on your counter are just the scout workers. The real problem—the nest, the queen, and the larvae—is almost always located outside your home, in the soil, under a stone, or in a wall cavity. The indoor ants are simply following pheromone highways to the buffet. Understanding this colony structure is the single most important piece of knowledge for getting rid of them for good.
The Life Cycle of a Kitchen Invasion
An infestation doesn’t happen overnight. It starts with scout ants searching for food. When one finds a reliable source, it lays down a pheromone trail on its way back to the nest. Other workers follow this scent trail, reinforcing it as they go, creating a superhighway directly from your sugar bowl to their colony. This is why you see lines of ants marching in perfect order. The more food they find, the stronger the trail becomes. The colony thrives, the queen lays more eggs, and more workers are deployed. To break the cycle, you must either eliminate the food source so the trail dies, or you must poison the trail so it leads to a dead end—specifically, a dead queen and colony.
Step 1: Immediate Action – Declare War on Food and Water
Before you even think about sprays or baits, you must conduct a full-scale kitchen sanitation operation. This is non-negotiable. Your goal is to make your kitchen so clean it provides zero attraction, forcing the ants to look elsewhere. This step alone can sometimes solve a very minor, new problem.
Visual guide about How to Get Rid of Pissants in the Kitchen
Image source: thehomeatlas.com
The Deep Clean Protocol
Grab your cleaning supplies and approach this methodically.
- Clear and Wipe: Empty all countertops. Take everything off—toasters, coffee makers, knife blocks. Wash every surface with hot, soapy water. Pay special attention to sticky spots from syrup, honey, or juice. Use a degreaser for the stovetop and backsplash.
- Inspect Appliances: The undersides and backs of refrigerators, dishwashers, and microwaves are crumb collectors. Pull them out if possible and vacuum/sweep thoroughly. Check the drip pan under your refrigerator; this is a moist, prime real estate.
- Trash and Recycling: Use bins with tight-sealing lids. Take out the trash and recycling daily, especially if it contains food waste. Wipe down the outside of the bins. Keep outdoor bins away from the house foundation.
- Pet Food Protocol: Never leave pet food out all day. Feed your pet at set times and pick up the bowl within 30 minutes. Store large bags of kibble in a sealed, airtight container, not the flimsy paper bag it comes in.
- Pantry Perfection: Go through your pantry. Transfer all open packages—cereal, pasta, cookies, sugar—into hard plastic or glass containers with locking gaskets. A single dropped noodle or grain of rice is a feast for an ant colony. Check for spills behind jars and cans.
Eliminate Water Sources
Fix any leaky faucets or pipes. Wipe down the sink basin and surrounding area every night. Don’t leave a wet sponge in the sink. Air-dry dishcloths and sponges. If you have a persistent damp area under the sink, place a dehumidifier or open the cabinet doors to improve airflow. Ants need water just as much as food.
Step 2: Disruption and Repellents – Buying Time
While you’re cleaning and preparing to bait, you can use household items to disrupt the ants’ navigation and make your kitchen less appealing. These are temporary fixes, not permanent solutions, but they are invaluable for immediate relief and to protect your bait stations from being overrun.
The Power of Scent Barriers
Ants navigate primarily by scent trails. You can temporarily blind these trails with strong-smelling, non-toxic substances.
- White Vinegar Solution: Mix a 1:1 solution of white vinegar and water in a spray bottle. Wipe down all countertops, windowsills, and known ant trails with this solution. The vinegar smell dissipates quickly for humans but completely disrupts the pheromone scent for ants. It also kills ants on contact. This is your best friend for daily disruption.
- Citrus Peels and Oils: Lemon, orange, and grapefruit peels are excellent repellents. Rub the peels on counter edges and windowsills. You can also make a spray by steeping peels in vinegar for a week, then straining and diluting. A few drops of citrus essential oil (like lemon or orange) on a cotton ball placed near entry points also works.
- Common Kitchen Spices: Cinnamon, black pepper, cayenne pepper, and coffee grounds create physical and scent barriers. Draw a line with any of these across a known ant trail. The ants will not cross it. Place bay leaves in pantry corners and inside dry goods containers (they won’t affect food flavor).
Physical Barriers
Use chalk or baby powder (talc-free) along the edges of counters and tables. The fine particles are difficult for ants to traverse. You can also use a double-sided tape strip (like for flies) along the back of countertops where they meet the wall. The sticky surface will trap scouts.
Step 3: The Nuclear Option – Using Ant Baits Effectively
This is the most critical step for permanent eradication. Remember: you must use baits. Sprays and powders that kill on contact only kill the few workers you see. They do nothing to the queen back in the nest. In fact, spraying can make the problem worse. If you spray a trail, you kill the scouts before they can lead you to the nest, and the colony may simply send out more workers from a different exit, or even split into multiple colonies. Baits work differently.
Visual guide about How to Get Rid of Pissants in the Kitchen
Image source: thehomeatlas.com
How Bait Stations Work
Commercial bait stations contain an attractant (usually a sugary or greasy substance) mixed with a slow-acting insecticide. The idea is that foraging worker ants find the bait, consume it, and carry it back to the nest. They share it with the queen, larvae, and other workers. The slow-acting poison allows the infected worker to make it back to the colony before dying, ensuring maximum distribution. Within 3-7 days, the entire colony, including the egg-laying queen, collapses. It’s a quiet, systemic victory.
Choosing and Placing Baits
You can buy gel baits in syringes or enclosed bait stations. Gel baits are more flexible for placement. For pissants/sugar ants, you need a bait that appeals to their sweet tooth. Look for active ingredients like boric acid (about 5% concentration), sulfluramid, or imidacloprid. These are effective but have low toxicity to humans and pets when used as directed.
- Placement is Everything: Do not place bait stations randomly. You must place them directly on the active trails you observed during your cleaning. Put a tiny dab of gel in the middle of a trail line. For enclosed stations, place them right next to the trail. The goal is to make the bait the easiest, most attractive option on their path.
- Multiple Locations: Set up 3-5 bait points around the kitchen: along the baseboard behind the sink, under the fridge, in the corner behind the stove, and near the pantry door. You want to intercept multiple potential trails.
- Let Them Eat: Once you place the bait, do not disturb the ants. Let them gather and carry it away. This can look unsettling, but it’s the process working. Do not spray cleaner or ant killer near the bait. Do not wipe away the trail. Your job is to be patient.
- Replenish: Check the bait every day or two. If it’s been consumed, add more. The bait must be available until you see a dramatic, permanent drop in ant activity (usually 4-7 days after the last ant is seen).
DIY Bait Recipe (For the Prepared)
If you prefer a homemade approach, you can make a boric acid bait. Warning: Keep this away from children and pets. Mix 1 part boric acid powder with 3 parts powdered sugar or maple syrup. The sugar attracts, the boric acid kills. Soak a cotton ball in the mixture and place it on a small piece of foil in an active trail area. The same principles apply: let them take it.
Step 4: Chemical Sprays – The Last Resort, Used Correctly
Residual insecticide sprays have a place, but it is a very specific and limited one. Their purpose is not to kill foraging ants (the bait does that). Their purpose is to create a chemical barrier on the exterior of your home to kill or repel ants before they get inside, and to treat known entry points from the inside to block the trail temporarily while the bait works.
Visual guide about How to Get Rid of Pissants in the Kitchen
Image source: thekitchenix.com
Indoor Perimeter Spraying
If you have a very heavy, immediate infestation and need to stop the flow while waiting for the bait to work (which takes days), you can use a residual indoor ant & cockroach spray (look for active ingredients like bifenthrin or cypermethrin). Do not spray this on your counters or food surfaces. Instead, lift the edge of the countertop and spray along the wall/floor junction. Also spray around the base of the refrigerator, stove, and dishwasher. This creates a chemical moat on the floor that ants will avoid crossing, protecting your clean surfaces. Always follow label instructions meticulously.
Exterior Barrier Treatment
This is the most effective use of spray. After your indoor infestation is gone (or ideally, at the same time you start baiting), walk the perimeter of your house. Look for ant trails, especially near the foundation, under decks, around pipes, and near utility entrances. Using an outdoor-labeled insecticide concentrate and a hose-end sprayer, create a continuous 3-4 foot wide band of treatment on the soil and foundation wall. This kills ants foraging near your house and deters new colonies from establishing too close. Reapply every 30-60 days during ant season (spring through fall).
Step 5: Long-Term Exclusion – Making Your Kitchen a No-Go Zone
Once the colony is eliminated (you see no ants for at least a week), your work shifts to prevention. You must seal your home so thoroughly that even a scout ant can’t get in. This is the most important step for ensuring they never return.
The Great Sealant Hunt
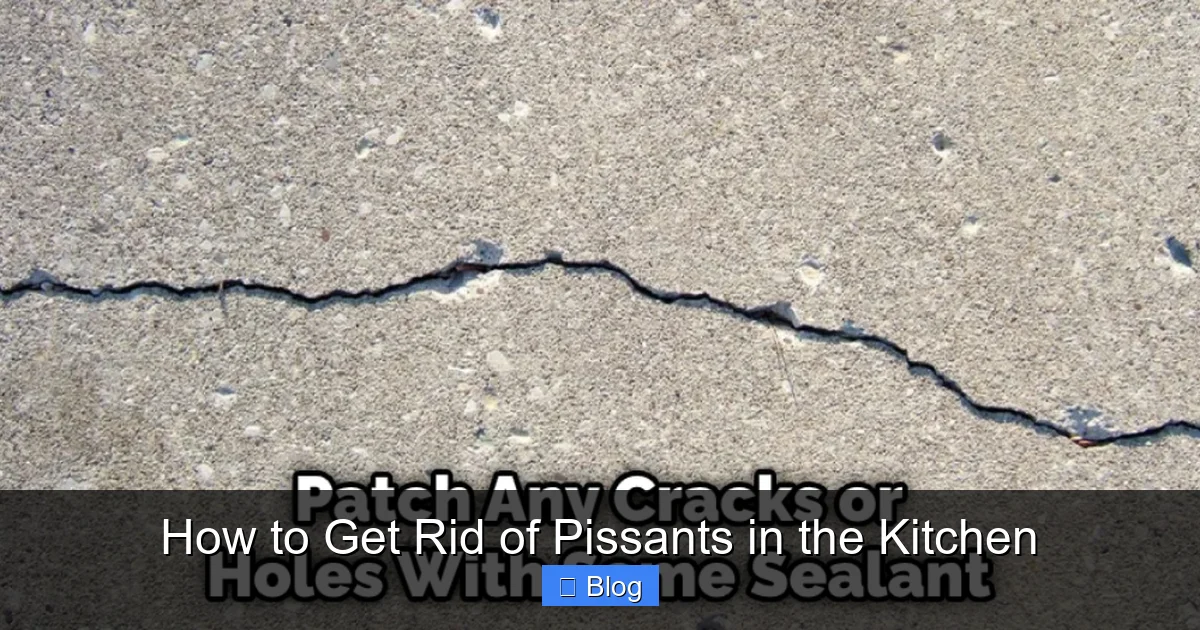
Arm yourself with a tube of high-quality, 100% silicone caulk (it lasts longer than acrylic). Take a slow, careful walk around the interior of your kitchen with a flashlight. Look for any gap, crack, or hole, no matter how small. Ants can fit through openings the size of a pinhead.
- Windows and Doors: Check the seal where the frame meets the wall. Apply caulk to any cracked or missing sealant. Ensure door sweeps on exterior doors are intact and touch the threshold. Replace weather stripping.
- Pipes and Wires: Look at where plumbing (under the sink, behind the fridge) or electrical wires enter the house. These are classic highways. Use caulk or expanding foam (for larger gaps) to seal the space around them.
- Baseboards and Cracks: Cracks in baseboards, where the baseboard meets the floor, or gaps in the wall itself need to be filled. A bead of caulk along these seams works wonders.
- Vents and Fans: Ensure screens on dryer vents, range hood vents, and foundation vents are intact and fit snugly.
Landscaping and Outdoor Habits
Your defense starts outside. Keep vegetation, mulch, and firewood at least 12-18 inches away from your foundation. Mulch against the house creates a perfect, moist nesting site. Trim tree branches and shrubbery so they don’t touch the house, creating bridges for ants. Keep outdoor trash and compost bins tightly sealed and as far from the house as possible. Fix any outdoor leaky faucets or downspouts that create constant moisture near the foundation.
Step 6: When to Call the Professionals
Most pissant/sugar ant problems can be solved with diligent DIY effort. However, there are scenarios where calling a licensed pest control professional is the smartest move.
Signs You Need a Pro
- Indoor Nests: If you suspect the colony is actually inside your walls (you see winged reproductive ants—”swarmers”—inside, or a constant, heavy trail from a single outlet or crack), this is a more complex problem. Pros can use specialized foams and dusts applied into wall voids.
- Multiple Colonies: If you see ants in multiple, disconnected areas of the house simultaneously, you may have several satellite colonies, which is overwhelming to tackle alone.
- Failure After Multiple Attempts: If you’ve conscientiously baited and sealed for 3-4 weeks with no success, the colony may be inaccessible (e.g., deep within a wall), or you may be dealing with a different, more challenging species like carpenter ants.
- You’re Overwhelmed: Sometimes, you just don’t have the time or tolerance. A professional can provide a comprehensive treatment plan, including powerful, targeted baits and a guaranteed perimeter barrier, saving you weeks of frustration.
What to Expect from a Pro
A good exterminator will start with an inspection to identify the species and locate the nest(s). They will then recommend a treatment plan, which will almost certainly involve professional-grade baits (often in tamper-resistant stations) and a thorough exterior barrier treatment. They should also point out exclusion issues you need to fix. Reputable companies offer follow-up visits to ensure the colony is eradicated.
Conclusion: Victory is a Process, Not a Spray
Getting rid of pissants in your kitchen is not about finding a single magic spray. It’s a strategic campaign based on understanding ant behavior. The sequence is everything: Sanitation to remove the lure, disruption to break their communication, baiting to assassinate the colony from within, and finally, exclusion to build a fortress. Patience is your greatest ally. The bait needs time to work its way back to the queen. Resist the urge to spray and create panic in the colony. By following this integrated pest management approach, you move from being a frustrated victim to a calm, effective commander. You will not only win the current battle but also secure a long, ant-free peace in your kitchen. Remember, a crumb-free, sealed kitchen is an ant-free kitchen. Start there, and the rest will follow.
Frequently Asked Questions
Why are they called “pissants”?
The term “pissant” is an old colloquial name for small ants, possibly because some species, like the odorous house ant, release a defensive chemical that smells vaguely of urine or coconut when crushed. It’s not a scientific term but is widely used to describe these tiny, persistent kitchen invaders.
Is it safe to use ant baits if I have kids or pets?
Yes, modern ant baits are designed to be low-toxicity when used correctly. The active ingredients (like boric acid or sulfluramid) are contained within the bait station or gel. The key is placement—put baits in areas inaccessible to children and pets, such as under appliances, inside cabinets, or behind heavy furniture. Always follow the product’s label safety instructions.
How long does it take to completely eliminate an ant colony with bait?
You should see a significant reduction in ant activity within 24-48 hours of bait placement. Full colony elimination, including the queen, typically takes 3 to 7 days. It’s crucial to leave the bait in place and replenish it until you have gone at least one full week with zero ant sightings.
Are natural remedies like vinegar or cinnamon really effective?
Natural repellents like vinegar, cinnamon, and citrus are very effective at disrupting scent trails and repelling scout ants from specific areas. They provide good temporary relief and are excellent for daily maintenance. However, they do not contain an insecticide that can be carried back to kill the hidden queen and colony. They are a supportive tactic, not a standalone elimination solution.
What if the ants are coming from an outdoor nest I can’t find?
This is the most common scenario. You don’t need to find the outdoor nest. Your strategy is to intercept the foragers inside your kitchen with bait. The worker ants will do the work of delivering the poison to the nest for you. Simultaneously, treat your home’s exterior foundation with a residual barrier spray to kill ants before they enter and to deter new colonies from nesting too close.
Why do ants keep coming back even after I clean?
If you’ve cleaned meticulously and the ants return, it means one of two things: 1) You have not eliminated the colony (the queen is still producing workers), so you need to use bait, or 2) You have not sealed all entry points, allowing new scout ants from the same or a different colony to find your kitchen again. A permanent solution requires both baiting to kill the source and sealing to block access.