Finding mice under your kitchen sink is a common but serious issue that requires immediate action. These rodents are attracted to moisture, warmth, and food sources, and can cause significant damage and health risks. The solution involves a three-step approach: first, conduct a thorough inspection to identify activity and entry points; second, implement exclusion by sealing all gaps and cracks; and third, use a combination of traps and baits to eliminate the existing population. Consistent sanitation and long-term prevention are crucial to ensure they never return.
Key Takeaways
- Mice are drawn to kitchen sinks for water, food scraps, and warm shelter. The area under the sink provides a dark, moist, and often cluttered environment perfect for nesting.
- A full inspection is the critical first step. You must look for droppings, gnaw marks, nesting materials, and, most importantly, find every potential entry point from the outside.
- Exclusion (sealing entry points) is the single most important permanent solution. Without it, trapping is just a temporary fix as new mice will continuously enter.
- Use a multi-trap strategy for effectiveness. Combine snap traps, electronic traps, or bait stations, placing them correctly along walls and in dark corners where mice travel.
- Sanitation is a powerful deterrent. Keep the area under the sink clean and dry, store all food in airtight containers, and manage trash promptly to remove attractants.
- Natural repellents like peppermint oil have limited, short-term effect. They may help deter new mice but will not solve an active infestation and should not replace trapping or exclusion.
- Persistence is key. It can take days to weeks to fully eliminate a nest. Continue setting traps and monitoring for activity even after you think the problem is solved.
📑 Table of Contents
- Why Mice Love Your Kitchen Sink (And Why You Should Panic a Little)
- Step 1: The Detective Work – Conducting a Thorough Inspection
- Step 2: Fortress Under the Sink – Sealing Entry Points (Exclusion)
- Step 3: The Elimination – Choosing and Using Traps Effectively
- Step 4: Beyond Traps – Natural and Humane Deterrents (With Realistic Expectations)
- Step 5: The Ultimate Defense – Long-Term Prevention and Sanitation
- When to Call the Professionals: Knowing Your Limits
Why Mice Love Your Kitchen Sink (And Why You Should Panic a Little)
Let’s be honest: discovering you have mice under the kitchen sink is a special kind of ick. It’s not just the thought of little feet scurrying near your dishes. It’s the realization that these unwanted tenants are feasting on your food, contaminating surfaces with their droppings and urine, and potentially chewing through wiring, pipes, and cabinetry. The area beneath your sink is a mouse paradise for several key reasons. First, it’s a source of water—any minor leak under the P-trap or from the supply lines provides a critical hydration source. Second, it often offers shelter. The dark, enclosed space, filled with cleaning supplies and pipes, creates perfect hiding spots and nesting nooks made from insulation or shredded materials. Third, it’s close to food. Crumbs, unsealed pet food, or even the scent of garbage in a nearby bin are irresistible lures.
Ignoring this problem is a risky gamble. Mice reproduce alarmingly fast; a single female can have up to 10 litters a year, with each litter containing 5-6 pups. That means a small sighting can explode into a full-blown infestation in months. Their constant gnawing isn’t just destructive to your home’s structure; it can sever electrical wires, creating fire hazards. Furthermore, they are vectors for diseases like Hantavirus, Salmonella, and Lymphocytic Choriomeningitis (LCMV), which can be transmitted through contact with their waste or saliva. So, while it’s an unpleasant task, taking decisive action to get rid of mice under the kitchen sink is non-negotiable for a safe, healthy, and intact home.
Step 1: The Detective Work – Conducting a Thorough Inspection
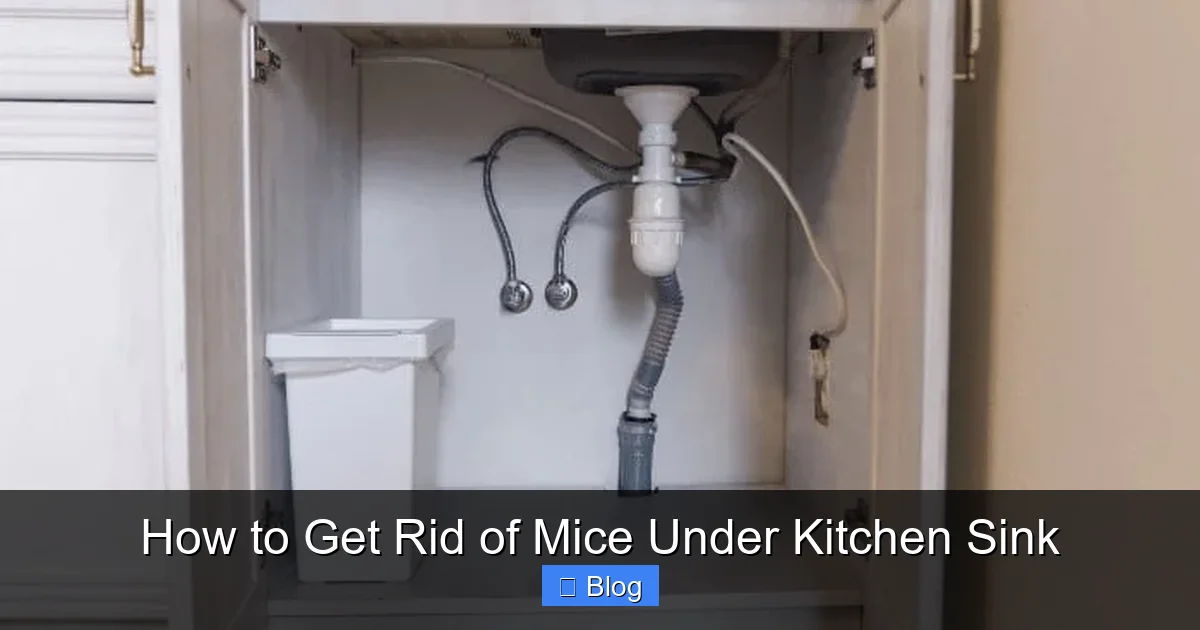
Before you buy a single trap, you need to play detective. Jumping straight to trapping without understanding the “how” and “why” is like trying to catch a fish without knowing where the fish are. Your goal is to answer two questions: How are they getting in? and Where are they living and traveling? Arm yourself with a powerful flashlight and get down on your hands and knees. The space under a standard kitchen sink is often cramped, so be prepared to move cleaning supplies and get cozy.
Visual guide about How to Get Rid of Mice Under Kitchen Sink
Image source: cookeryspace.com
What to Look For: The Tell-Tale Signs
- Droppings: These are the most obvious sign. Mouse droppings are small, about 1/4 inch long, and dark, resembling rice grains. Look for them in clusters along walls, in the back corners of the cabinet, and on top of any items stored under the sink.
- Gnaw Marks: Mice teeth leave distinct, narrow grooves. Check the base of the cabinet, the edges of the sink basin, wooden framing, and especially where pipes enter the wall. Fresh gnaw marks are lighter in color.
- Nesting Materials: Mice shred soft materials to build nests. Look for piles of shredded paper, insulation, fabric, or dried vegetation, often tucked into a corner or behind the P-trap.
- Rub Marks: As mice travel the same paths repeatedly, their oily fur can leave smudges or greasy smears along baseboards or pipework.
- Strange Noises: Listen at night with the house quiet. Scratching, scurrying, or squeaking from within the walls or cabinet is a dead giveaway.
- Chewed Packaging: If you store food items (like paper bags of onions or potatoes) under the sink, check them for bite marks.
Finding the Entry Points: The Mouse Highway Patrol
This is your most critical task. You must find every hole, crack, or gap that leads from the outside of your home to the space under your sink. Mice can squeeze through an opening the size of a dime! Start from under the sink and trace your way outward. Follow pipes where they disappear into the wall or floor. Examine the:
- Perimeter of the cabinet floor: Where the cabinet base meets the subfloor. Gaps here are common, especially in older homes.
- Wall-floor junction: The seam where the wall meets the floor, often where baseboards are installed.
- Around pipes and conduits: The openings where water lines, drain pipes, electrical wires, or vent stacks penetrate the wall or floor. These are prime highways.
- Behind the sink basin: Check the seal where the sink is mounted to the countertop. A failed seal can create a gap.
- Vent openings: Look at any vents (like for a dryer or crawl space) that might be near the sink area. Ensure they have intact, fine mesh screening.
Don’t just look in the cabinet. Go outside your home and inspect the foundation, siding, and around utility entries at the exact same height where you found interior signs. The entry point is almost always on the exterior. Finding it is the key to permanent exclusion.
Step 2: Fortress Under the Sink – Sealing Entry Points (Exclusion)
You’ve found the holes. Now, you must seal them. This process, called exclusion, is the only way to achieve a long-term solution. Trapping removes the current residents, but exclusion stops the next family from moving in. It’s the cornerstone of any effective pest management strategy. You must use the right materials; mice can chew through wood, plastic, drywall, and soft caulk.

Visual guide about How to Get Rid of Mice Under Kitchen Sink
Image source: allkitchentips.com
The Right Materials for the Job
- Steel Wool (Copper Wool is Best): The gold standard. Mice hate the taste and texture and cannot chew through it. Pack it firmly into holes and gaps. It’s flexible and perfect for stuffing around pipes. For larger holes, combine it with other materials.
- Galvanized Steel Mesh (Hardware Cloth): Use 1/4 inch or smaller mesh. Cut pieces to cover larger openings (like around a vent) and secure with screws or heavy-duty staples. This is ideal for covering vent openings or larger pipe gaps.
- Caulk/Silicone: Use this as a sealing agent *over* a more durable material like steel wool or mesh. It fills small cracks and creates an airtight seal. Do not use it alone for holes larger than 1/4 inch.
- Concrete Patch or Mortar: For significant holes in foundation walls or concrete blocks, these are your best bet. They provide a hard, chew-resistant surface.
- Sheet Metal or Aluminum: Can be cut and screwed over very large holes or damaged areas of wood.
How to Seal Common Sink-Area Entry Points
Scenario 1: The Gap Around a Pipe. A 1-inch gap where a copper water line enters the cabinet wall. Pack galvanized steel mesh tightly around the pipe, then apply a bead of silicone caulk over the mesh to seal it to the wall and pipe. For an even tighter seal, first stuff steel wool into the deepest part of the gap.
Scenario 2: The Crack in the Cabinet Base. A 1/2 inch crack where the particleboard cabinet floor meets the subfloor. Force a generous amount of steel wool deep into the crack. Then, apply a bead of silicone caulk over the top to hold it in place and seal the surface. For very wide cracks, first stuff steel wool in, then cover with a strip of galvanized mesh screwed into the cabinet base, and finally caulk over the mesh.
Scenario 3: The Hole in the Wall. A 2-inch diameter hole in the drywall behind the sink, likely from old plumbing. Cut a piece of 1/4 inch mesh hardware cloth slightly larger than the hole. Push it into the hole so it sits flush against the back of the drywall. Secure it to the drywall with several screws. Then, use joint compound or a wall repair patch to cover the mesh and blend it with the wall, or simply caulk around the edges if it’s in an inconspicuous spot.
Important: Always seal from the outside if possible. If you only seal the interior gap, you might trap mice inside your walls, where they will die and cause odor problems. The ideal sequence is: trap the mice inside, then seal the entry point from the exterior.
Step 3: The Elimination – Choosing and Using Traps Effectively
With entry points sealed (or in the process of being sealed), it’s time to remove the mice already inside. Forget the old, ineffective snap traps that just scare them. A strategic trapping campaign is efficient and humane when done correctly. The key is placement, placement, placement.

Visual guide about How to Get Rid of Mice Under Kitchen Sink
Image source: allkitchentips.com
Types of Traps: Pros and Cons
- Snap Traps (Wooden or Plastic): The classic. They are inexpensive, highly effective when placed correctly, and kill instantly. Use them for a severe infestation. Modern plastic versions are easier to set and dispose of. Downside: Can be unsettling to see. Must be placed carefully if children or pets are in the home.
- Electronic Traps: These deliver a lethal shock when the mouse completes the circuit. They are very effective, easy to use (just bait and turn on), and the mouse is contained inside for discreet disposal. They are more expensive per unit but are a top choice for many.
- Bait Stations: These are tamper-resistant boxes that hold a rodenticide block. CAUTION: Use these with extreme care, especially in a kitchen. The poison can cause secondary poisoning if a predator eats the dead mouse. They are best used in very severe cases by professionals or in locked, inaccessible areas. For most homeowners under a sink, snap or electronic traps are safer and more appropriate.
- Live-Catch Traps: These capture the mouse alive. While humane in intent, you then must release it at least 1 mile from your home, which is often illegal in many areas and simply moves the problem to someone else’s property. They also require frequent checking. Not generally recommended for a kitchen infestation.
The Art of Trap Placement
Mice are creatures of habit. They travel with their backs to the wall, following the same routes (called runways) night after night. Your traps must be on these runways.
- Place traps perpendicular to the wall with the trigger end touching the wall. Mice don’t like to venture into the open.
- Focus on corners and edges. Place traps in the back corners of the cabinet, along the wall where the cabinet meets the floor, and on either side of the P-trap.
- Set multiple traps. Don’t rely on one. Use 3-5 traps in the initial phase. Space them about 2-3 feet apart along the suspected runway.
- Bait is not always necessary. The presence of a nest and food source is enough. However, a small amount of peanut butter (the gold standard—it’s sticky and aromatic), chocolate, or a piece of bacon can increase attraction. Use just enough to cover the trigger.
- Leave traps set for at least 2 weeks. Even after you stop catching mice, keep traps in place for a full week to ensure you’ve caught any juveniles or latecomers.
Step 4: Beyond Traps – Natural and Humane Deterrents (With Realistic Expectations)
Many homeowners prefer to avoid traps or poisons, seeking natural solutions. It’s important to understand the role these play: they are deterrents, not eliminators. They may help keep new mice away after you’ve solved the problem, but they will not get rid of an active nest.
Popular Natural Options
- Peppermint Oil: Mice dislike the strong minty smell. Soak cotton balls in 100% peppermint oil and place them in corners under the sink and near suspected entry points. Replace them every few days as the scent dissipates. This is a temporary barrier and must be constantly refreshed.
- Ultrasonic Pest Repellers: These devices emit a high-frequency sound that is supposedly irritating to rodents. Scientific evidence on their effectiveness is mixed at best. They may work in a small, open room but are often ineffective in cluttered, complex spaces like under a sink where sound waves bounce and are absorbed by objects.
- Predator Urines (e.g., Fox, Coyote): These products mimic the scent of a predator. They can cause initial alarm but mice quickly habituate to them. They are not a reliable long-term solution.
- Strong-Smelling Herbs: Dried mint, lavender, or cloves in sachets can offer a mild, temporary repellent effect, similar to peppermint oil.
How to Integrate Deterrents
The best use for natural repellents is in the prevention phase. After you have trapped all mice and sealed every entry point, you can use peppermint oil-soaked cotton balls as a “scent barrier” in the corners of the cabinet. Think of it as a finishing touch, not the primary method. Relying solely on these to get rid of mice under the kitchen sink will almost certainly lead to failure and allow the infestation to grow.
Step 5: The Ultimate Defense – Long-Term Prevention and Sanitation
You’ve won the battle. The traps are empty, the signs are gone. Now, you must win the war by making your kitchen under the sink the least appealing place in the neighborhood. Prevention is an ongoing practice, not a one-time fix.
Sanitation: Remove the Welcome Mat
- Eliminate Water Sources: Fix any and all leaks immediately. A dripping pipe is an open invitation. Wipe down the sink basin and pipes regularly. Keep the cabinet floor dry. Consider placing a small tray under the P-trap to catch any minor condensation.
- Secure All Food: Never store food—not even a bag of potatoes or a box of cereal—in the cabinet under the sink unless it is in a hard plastic or glass container with a tight-sealing lid. Mice can easily chew through cardboard, plastic bags, and thin plastic bins.
- Manage Trash and Recycling: Use a trash can with a tight-fitting lid. Take out the kitchen trash regularly, especially before bedtime. Keep the recycling bin clean and free of food residue.
- Declutter: A cluttered cabinet provides endless hiding and nesting spots. Keep the area under the sink as clear as possible. Store only essential items, and keep them off the floor on shelves.
Ongoing Vigilance and Maintenance
- Seasonal Checks: Every spring and fall, do a quick inspection of the under-sink area and the exterior of your home for new gaps or signs of activity.
- Reinforce Seals: Over time, caulk can crack and mesh can work loose. Check your exclusion work annually and re-seal as needed.
- Landscaping: Keep shrubbery, firewood, and compost piles away from your home’s foundation. These create highways and shelter for rodents to approach your house.
- Pet Food: If you have pets, never leave their food out overnight. Store bulk pet food in sealed containers and only feed measured portions.
By combining immediate action with these long-term habits, you transform your kitchen from a rodent resort into a fortress. The goal is to make your home so secure and uninviting that mice simply bypass it for easier targets.
When to Call the Professionals: Knowing Your Limits
While most mice under kitchen sink problems can be solved by a diligent homeowner, there are clear times to pick up the phone and call a licensed pest control professional. Don’t view this as a failure; view it as a smart escalation.
Call a pro if:
- The infestation is massive. You are finding 10+ droppings daily, hear constant activity, or see multiple mice. This indicates a large, established population.
- You cannot find the entry point. After a thorough inspection, the source remains a mystery. Professionals have specialized tools like borescopes to look inside walls and years of experience to spot hidden access points.
- You are uncomfortable with trapping or exclusion. Handling dead rodents and climbing into tight spaces isn’t for everyone. A pro will handle the entire process safely and discreetly.
- You have a severe allergy or asthma. Disturbing mouse droppings and nesting materials can release allergens and pathogens into the air. Pros have the proper safety equipment and protocols.
- You’ve tried and failed. If you’ve implemented all steps correctly for 3-4 weeks with no reduction in activity, you likely have a secondary nest or a hidden entry you’ve missed. A professional can diagnose the failure and provide a comprehensive plan.
A reputable pest control company will not just set traps. They will perform a full inspection, provide a detailed exclusion plan, use professional-grade materials, and offer a warranty. It’s an investment in a definitive solution and peace of mind.
Frequently Asked Questions
Is it dangerous to have mice under my kitchen sink?
Yes, it is a significant health and safety hazard. Mice carry diseases like Hantavirus and Salmonella through their urine, feces, and saliva. They also constantly gnaw, which can damage electrical wiring (fire risk) and plumbing, and they contaminate food and surfaces.
How can I be sure all the mice are gone?
You’ll know the infestation is under control when you stop seeing fresh droppings, hearing noises at night, and finding new gnaw marks for at least 7-10 consecutive days. Keep traps set for an additional week after this point to catch any late juveniles or stragglers.
What’s the safest way to handle mouse droppings and nesting material?
Always wear disposable gloves and a mask (N95 is best). Never sweep or vacuum dry droppings, as this can aerosolize harmful particles. Instead, wet them with a disinfectant spray (bleach solution or commercial disinfectant) and then carefully wipe them up with a paper towel, placing everything directly into a sealed plastic bag for disposal. Dispose of the bag in an outdoor trash bin immediately.
Can I use mouse poison under my kitchen sink?
We strongly advise against using rodenticides (poison) in a kitchen area. The risk of secondary poisoning to pets or children is high. Poisoned mice often die in inaccessible wall voids, causing foul odors. For a kitchen, snap traps or electronic traps are far safer, more targeted, and allow for immediate, discreet disposal.
How long will it take to get rid of the mice?
For a small, new infestation with 1-3 mice, you may see results in 2-5 days with proper trapping. For a well-established nest of 10+ mice, it can take 2-4 weeks of consistent trapping and monitoring to fully eradicate the population, especially if young are present.
What if I keep finding new holes after I’ve sealed them?
This indicates you either have a major access point you’ve missed on the exterior, or the mice are capable of creating new holes. Re-inspect your entire home’s exterior foundation, focusing on areas near the kitchen. You may also have a secondary colony in an attic or garage that is finding its way in. In this case, a professional inspection is highly recommended.