Is your Samsung oven displaying strange codes or refusing to heat? It’s likely stuck in “test mode,” a diagnostic setting triggered accidentally. This is a common, fixable issue. You can usually exit by performing a specific button sequence or a full power reset. Never force components; if basic steps fail, a technician is needed to prevent damage.
So you’re standing in your kitchen, ready to preheat the oven for a much-anticipated dinner. You press the buttons, but instead of the familiar hum and glow, the display shows an odd combination of numbers and letters—maybe “tESt” or “dIAG.” The oven sits cold, completely unresponsive to your usual commands. Panic sets in. Did you break it? Before you imagine the cost of a replacement, take a deep breath. There’s a very high probability your Samsung oven isn’t broken at all. It’s simply trapped in “test mode,” a hidden diagnostic setting that’s surprisingly easy to accidentally engage and, more importantly, surprisingly easy to get my Samsung oven out of test mode. This guide will walk you through everything you need to know, from understanding what this sneaky mode is to executing the exact button presses that will bring your appliance back to life. We’ll cover simple resets, model-specific codes, and when it’s time to call for backup, all in plain language.
Test mode, sometimes called diagnostic mode or demo mode, is a back-end software state built into your oven’s computer board. Manufacturers like Samsung design it for service technicians. It allows them to run individual components—the bake element, convection fan, temperature sensor, door lock—in isolation to pinpoint a failure without cooking anything. The problem arises because the sequence to enter this mode often involves holding down a few seemingly random buttons simultaneously while powering on the appliance. It’s shockingly easy to trigger this during a power surge, after cleaning the control panel, or if you’re frantically pressing buttons during an error. The good news? Exiting is almost always a simple, intentional reverse procedure. This article is your definitive manual for that procedure. We’ll start with the absolute basics and move to more specific troubleshooting, ensuring you have a clear path to resolution.
Key Takeaways
- Test mode is a built-in diagnostic tool: It’s not a malfunction itself but a service setting meant for technicians, accidentally activated by users.
- Safety is the first rule: Always disconnect power (unplug or breaker) before attempting any internal procedures to avoid electric shock.
- The standard reset is the 3-5-7 method: For most Samsung models, pressing and holding 3, 5, and 7 simultaneously for 3-5 seconds is the primary exit strategy.
- Model-specific codes matter: The exact key combo can vary (e.g., 1-2-3 or 4-5-6). Your model number is key to finding the correct sequence.
- A full power cycle often works: Unplugging the oven or turning off its dedicated circuit breaker for 5-10 minutes can clear temporary memory and exit test mode.
- Do not guess or force buttons: Incorrect sequences can change other settings or cause errors. If simple resets fail, professional service is the safe choice.
- Prevention is possible: Test mode is usually triggered by pressing and holding non-cooking buttons during startup. Be mindful during power outages or after cleaning the control panel.
📑 Table of Contents
What Exactly is “Test Mode” on a Samsung Oven?
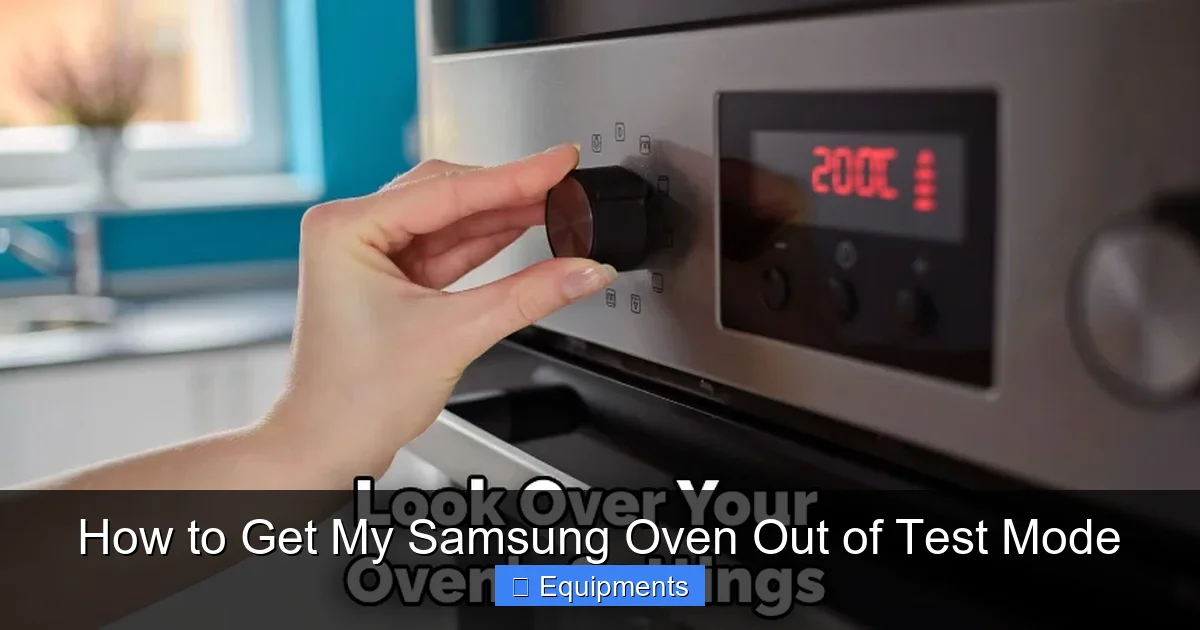
To effectively get my Samsung oven out of test mode, it helps to understand what we’re dealing with. Think of your oven’s main control board as its brain. This brain runs two primary software layers: the user interface (what you see and touch every day) and a deeper, hidden diagnostic layer—the test mode. The user interface is designed for cooking: setting timers, choosing temperatures, and managing convection. The diagnostic layer is for factory testing and field service. It bypasses the normal cooking logic and allows a technician to manually energize specific relays and sensors to see if each part works. When your oven is in this mode, the normal user program is suspended. That’s why pressing “Bake” and “Start” does nothing; the brain is listening for different, service-specific commands.
The Display Will Tell You the Story
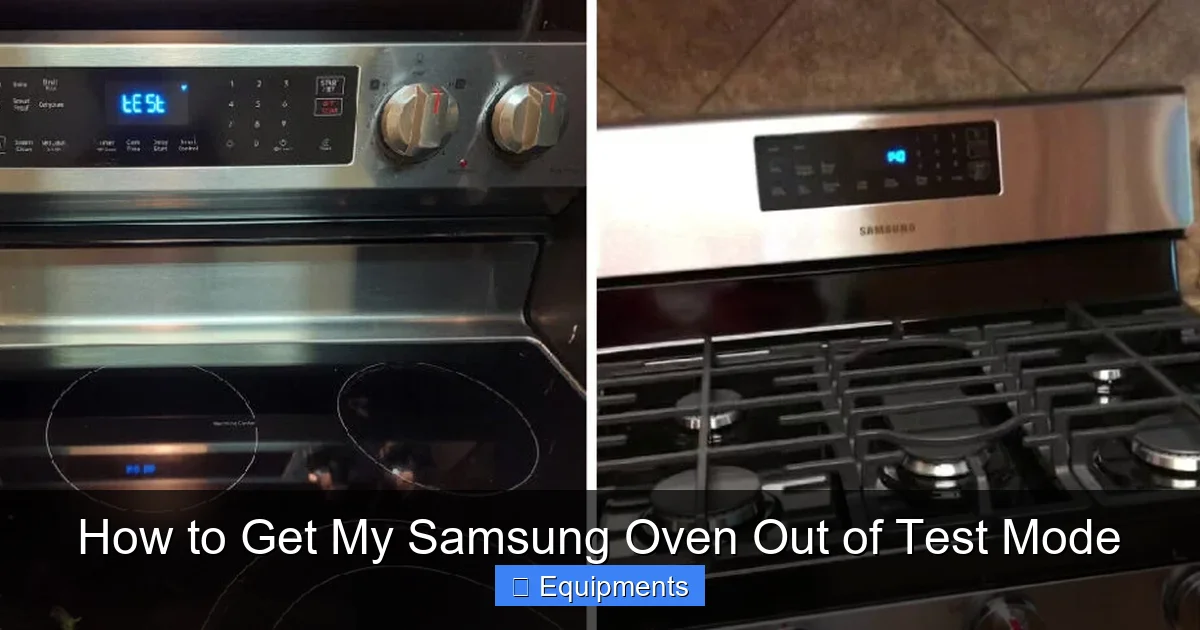
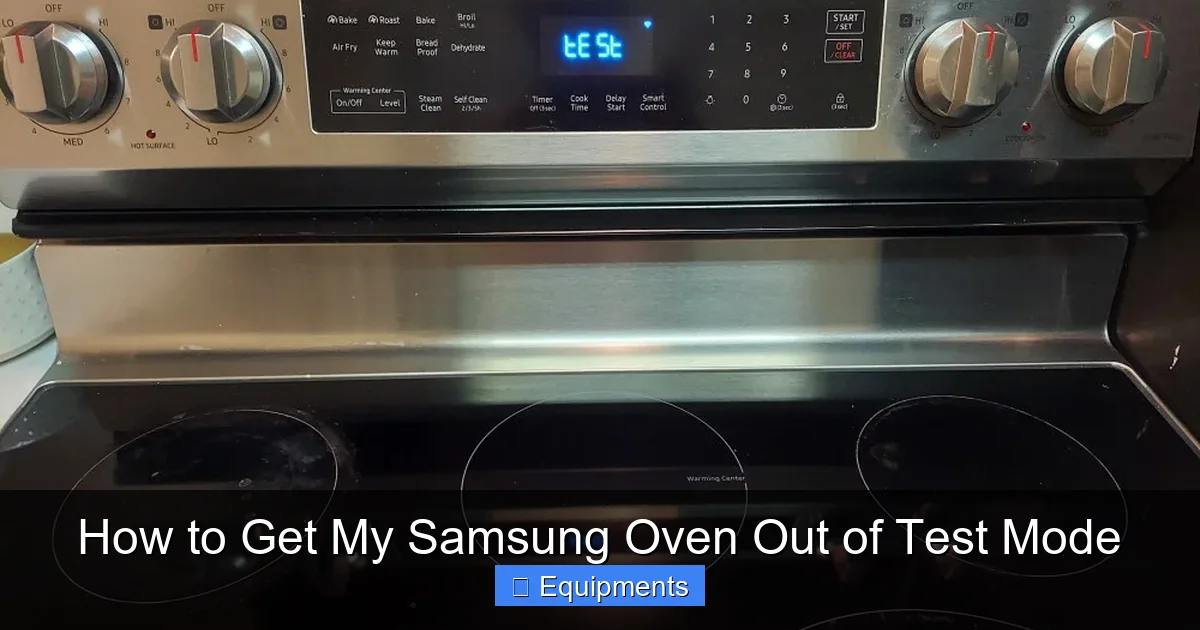
The most obvious sign of test mode is the display. It won’t show the standard clock or timer. Instead, you might see:
- Text abbreviations: “tESt,” “dIAG,” “SEt,” “UPdAtE,” or “demo.”
- Flashing numbers: A single digit or a pair of digits blinking repeatedly.
- All lights on: The entire display panel might be illuminated with no numbers.
- Alternating codes: Something like “F1” followed by “F2” in a loop.
If you see any of these, especially after a power interruption, you’re almost certainly in a diagnostic state. The oven’s internal safety locks (like the door latch for self-clean) might also be deactivated or stuck, which is another clue.
How Did I Get My Samsung Oven Stuck? Common Triggers
It’s rarely your fault. The most common pathways into test mode are:
- Accidental button hold during power-on: This is the #1 cause. If you press and hold two or more buttons (often the timer, clock, or cancel buttons) at the exact moment the oven receives power—either after a breaker trip, a power outage, or when you plug it in—it can interpret this as a service command.
- After a self-clean cycle: The intense heat can sometimes cause a temporary glitch in the control board’s memory, causing it to default to test mode on restart.
- Control panel cleaning: Spraying cleaner directly onto the panel and then pressing buttons while it’s still wet can create a short or phantom button press signal during the next power cycle.
- Faulty control board: Less commonly, a failing memory chip on the board can corrupt the startup sequence, trapping the oven in test mode permanently until reprogrammed.
Understanding the trigger isn’t always necessary to fix it, but it can help prevent a recurrence. Now, let’s move to the solutions.
Step-by-Step: How to Get My Samsung Oven Out of Test Mode
We will start with the simplest, safest, and most universal method and progress to model-specific techniques. Always begin with a full power reset. This clears volatile memory and is the digital equivalent of turning it off and on again. It solves the problem in many cases, especially if the mode was triggered by a temporary power glitch.
Visual guide about How to Get My Samsung Oven Out of Test Mode
Image source: thekitchenix.com
Method 1: The Full Power Cycle (The First and Best Try)
This is non-invasive and completely safe. It should be your very first step.
- Turn off the oven at the wall outlet. If it’s a hardwired model, locate your home’s electrical panel and switch off the dedicated breaker for the oven. Label it if you’re unsure.
- Wait. This is critical. Unplug or leave the breaker off for a full 5 to 10 minutes. This ensures all residual power drains from the capacitors on the control board. A quick 30-second unplug often isn’t enough.
- Restore power. Plug the oven back in or flip the breaker back on.
- Observe. The display should perform its normal startup sequence (perhaps showing “Samsung” or a clock) and then enter the standard idle mode. If it goes straight back to the test mode display, proceed to Method 2.
If the power cycle worked, your oven is free! You might need to reset the clock and any custom settings. If the test mode persisted, the control board has stored the diagnostic command in its non-volatile memory and requires a specific “key” to clear it.
Method 2: The Universal “3-5-7” Button Sequence
Samsung uses a surprisingly consistent secret handshake for many of its appliances. For a large portion of their oven models (especially those from roughly 2015 onward), the exit code is holding down the 3, 5, and 7 buttons simultaneously. This is the most famous and widely reported solution for how to get my Samsung oven out of test mode.
- Ensure the oven is powered on and showing the test mode display (e.g., “tESt”).
- Press and hold the three numeric buttons: 3, 5, and 7 at the same time.
- Hold for 3 to 5 seconds. You may hear a beep, or the display might change or go blank.
- Release the buttons. The oven should reboot and return to the normal clock display. If nothing happens, try holding for a full 7 seconds.
Important Note: On some models, these are the physical number keys on the keypad. On others with a smooth glass touch panel, you tap the areas where those numbers are printed. If your oven has a “Quick Boost” or “Power Boost” button, that is sometimes the “7” key in these sequences.
Method 3: Alternative Model-Specific Sequences
If “3-5-7” fails, your specific model may use a different combination. Here are the other common ones, based on technician forums and user reports. You must try these while the oven is powered on and displaying the test mode code.
- The 1-2-3 Method: Hold 1, 2, and 3 simultaneously for 5 seconds.
- The 4-5-6 Method: Hold 4, 5, and 6 simultaneously for 5 seconds.
- The Cancel + Start Method: Press and hold the Cancel (or “Off”) button and the Start button together for 5-10 seconds.
- The Clock + Timer Method: Hold the Clock (or “Set Time”) button and the Timer button together.
How to Find Your Exact Model Number: Look for a silver sticker on the oven’s frame (usually inside the door edge, on the side of the door, or on the back panel). The model number will start with letters like NE, NX, or WF (e.g., NE59M6850SS). Once you have it, search online for “[Your Model Number] test mode exit.” Samsung service manuals or appliance repair forums like ApplianceBlog or Reddit’s r/appliancerepair are goldmines for model-specific codes.
Advanced Troubleshooting: When Basic Resets Fail
You’ve power cycled for 10 minutes. You’ve held 3-5-7 until your fingers hurt. You’ve tried 1-2-3 and 4-5-6. The test mode display is mocking you. Now what? It’s time for deeper investigation, but always with caution.
Visual guide about How to Get My Samsung Oven Out of Test Mode
Image source: thekitchenix.com
Check for an Active Error Code First
Sometimes, what looks like test mode is actually a persistent fault code (like “F1,” “F2,” “F3”). The oven locks itself to prevent unsafe operation. If you see a flashing “F” code, that’s a different problem. You need to diagnose the underlying issue (faulty sensor, wiring problem, etc.) before the oven will exit its safety lock. Consult your user manual’s error code section. For example, an F1 often indicates a failed main control board or touchpad, which might require replacement.
The “Hard Reset” via Main Control Board
If you’re comfortable with minor appliance repair, you can perform a deeper reset by disconnecting power directly at the control board. THIS REQUIRES UNPLUGGING THE OVEN OR TURNING OFF THE BREAKER. DO NOT ATTEMPT WITH POWER CONNECTED.
- Remove the oven’s rear access panel (usually screws along the top edge of the back).
- Locate the large wiring harness plug connecting the keypad to the main control board (often a black rectangular plug).
- With power OFF, unplug this harness. Wait 60 seconds.
- Plug it back in firmly, ensuring the locking tab clicks.
- Restore power and check the display.
This can reset the communication between the keypad and the brain. If the keypad was faulty and sending “test mode” signals, this might break the cycle.
Look for a Dedicated “Demo” or “Service” Switch
Some commercial-style or high-end Samsung ranges have a tiny physical switch or jumper on the control board itself labeled “DEMO” or “SERVICE.” If this is accidentally flipped (sometimes during shipping or by a technician), the oven will stay in demo mode, which mimics test mode. You would need to access the control board (as described above) and flip this tiny switch back to “NORMAL” or “OFF.” This is rare in residential models but worth checking if you’re already inside the oven.
Preventing Future Test Mode Lock-Ins
Once you’ve successfully escaped, you’ll want to avoid this frustrating detour again. Prevention is mostly about mindful operation and understanding the triggers.
Visual guide about How to Get My Samsung Oven Out of Test Mode
Image source: manua.ls
Mind the Startup Sequence
The accidental button-hold during power-on is the chief culprit. Be conscious during these scenarios:
- After a power outage: When the power returns, don’t immediately start mashing buttons. Let the oven complete its startup beep and clock display before interacting.
- After tripping a breaker: Same rule. Reset the breaker, wait for the oven to power up normally, then use it.
- When cleaning: Avoid spraying liquid directly onto the control panel. Use a damp cloth. Ensure the panel is completely dry before turning the oven back on.
Secure the Control Panel
If you have children or curious pets, consider that they might be pressing and holding multiple buttons while the oven is off, setting a trap for the next power cycle. A simple control panel cover or just being aware can help.
Firmware Updates (For Connected Models)
If your Samsung oven is Wi-Fi enabled (part of the SmartThings ecosystem), ensure it has the latest firmware. Occasionally, a software bug can cause odd behaviors. Check the SmartThings app for any available updates for your appliance. While not a common fix for test mode, it’s a good general maintenance step.
When to Call a Professional: Don’t Force It
Your safety and the longevity of your expensive appliance are paramount. There are clear signs that this is no longer a DIY fix and you need to call an authorized Samsung service technician.
Signs You Need a Pro
- All reset methods fail: You’ve tried power cycles, all known button sequences (3-5-7, 1-2-3, etc.), and the hard reset at the control board harness. The test mode display persists.
- Physical damage or burning smell: If you smell ozone or burning plastic, or see signs of scorching near the control board, stop immediately. This indicates a failed component that needs replacement.
- Intermittent issues: The oven exits test mode but then randomly re-enters it days later. This points to a failing control board or a shorting keypad membrane.
- Other functions are also broken: The oven is in test mode and the interior light won’t come on, the convection fan doesn’t work, or the door lock is stuck. This suggests a broader system failure.
- You are uncomfortable working with electricity: If the thought of removing an access panel or unplugging a harness makes you uneasy, call a pro. It’s not worth the risk.
What a Technician Will Do
A certified technician has access to official Samsung service manuals, diagnostic tools, and replacement parts. They will:
- Confirm the exact model and its specific test mode exit procedure.
- Run a full diagnostic scan using a proprietary handheld tool to read all stored fault codes.
- Test voltage at the control board and at components like the bake/broil elements and fan motors.
- Inspect the touchpad/keypad membrane for shorts or worn contacts.
- Most likely, if all else fails, they will replace the main electronic control board (the “brain”). This is a common fix for persistent test mode issues caused by corrupted memory or faulty circuitry.
While this costs money, it’s far less than a new oven and ensures the repair is done correctly and safely.
Conclusion: You’ve Got This
Finding your Samsung oven in test mode can be an alarming surprise, but it’s almost always a minor, software-level hiccup, not a major hardware failure. The path to fixing it is methodical: start with the patient, complete power cycle. If that fails, move to the famous 3-5-7 button hold, then explore other model-specific combinations. Always prioritize safety by disconnecting power before touching any internal components. Remember, your model number is your best friend in this quest—a quick online search with that number can unlock the precise, manufacturer-approved exit sequence for your specific appliance. If the simpler solutions don’t work, don’t despair or keep pressing random buttons. That’s when you call in a professional. With this guide, you are now equipped with the knowledge and confidence to diagnose and resolve the “test mode” dilemma. Go ahead, power down, try the steps, and look forward to the sound of your oven finally preheating for that dinner. You’ve got this.
Frequently Asked Questions
How do I know if my Samsung oven is in test mode or just has an error code?
Test mode typically displays text like “tESt,” “dIAG,” or “demo,” or shows alternating numbers without an “F.” An error code will always start with “F” followed by a number (e.g., F1, F2). Test mode prevents all cooking functions, while an error code may allow limited use.
Will exiting test mode erase my clock or oven settings?
Yes, it often will. Test mode and a full power reset clear the oven’s volatile memory. You will likely need to reset the current time and any saved favorite cooking programs or preferences after successfully exiting the mode.
Can I break my oven by trying the wrong button combination?
It’s unlikely you’ll cause permanent damage by pressing the wrong buttons, but you might accidentally change other settings (like temperature calibration) or activate a different diagnostic mode. The main risk is frustration. Always use documented sequences for your model when possible.
My oven is in test mode and the door is locked shut. What do I do?
First, try the power cycle method (unplug/breaker off for 10 minutes). Upon power restoration, the door lock motor often receives a signal to unlock as part of the normal startup sequence. If it remains locked, the test mode itself may have disengaged the lock release. The 3-5-7 or other exit sequence should also signal the lock to disengage once you exit the mode.
Is test mode dangerous?
The mode itself isn’t dangerous; it’s just a software state. However, some test modes can bypass normal safety interlocks, like the door lock for self-cleaning. The danger lies in attempting repairs with the oven powered on. Always disconnect power before accessing any internal components.
My oven is stuck in test mode after a power outage. Is this normal?
Yes, this is one of the most common triggers. A sudden loss of power followed by restoration can cause the control board to interpret a “noisy” power signal or a held button state as a command to enter service mode. The solutions in this guide are specifically designed for this scenario.