Sealing vinyl on a wood cutting board is a critical step to create a food-safe, durable surface that resists bacteria and moisture. You must use only certified food-grade sealants like mineral oil, beeswax blends, or specific epoxy resins. Proper surface preparation, thin and even application, and full curing are non-negotiable for a barrier that lasts. Regular maintenance with gentle, soap-free cleaning and periodic reapplication ensures your board remains safe and beautiful for years.
You’ve spent hours crafting the perfect wooden cutting board, sanding it silky smooth, and applying a beautiful vinyl decal—maybe it’s a custom family name, a clever pun, or a intricate design. It looks stunning. But before you ever place a piece of raw chicken or a ripe tomato on it, there’s one absolutely vital step you cannot skip: sealing it. And sealing it properly, especially over that vinyl, is a specific process that merges woodworking with food safety science. Doing it wrong means your beautiful board could become a breeding ground for bacteria, or the vinyl could peel and flake into your food. This guide will walk you through every single step, from understanding the materials to the final cure, to ensure your vinyl-on-wood cutting board is not just beautiful, but perfectly food-safe for years of use.
Key Takeaways
- Use Only Food-Grade Sealants: Never use hardware store polyurethane or varnish. Always choose products explicitly labeled food-safe, FDA-compliant, or NSF-certified for direct food contact.
- Preparation is 80% of the Success: The wood must be perfectly clean, dry, and sanded smooth. Any existing vinyl must be firmly adhered and free of lifts or debris before sealing.
- Thin, Even Coats Trump Thick Layers: Apply multiple thin coats rather than one thick coat to prevent drips, bubbles, and a gummy finish. Sand lightly between coats for a perfectly smooth surface.
- Curing Time is Not Drying Time: The sealant must fully cure (harden chemically) to be food-safe. This can take days or even weeks, depending on the product. Do not use the board until the full cure time has passed.
- Maintenance is Part of the Seal: A sealed board requires gentle care. Avoid harsh soaps, dishwashers, and prolonged soaking. Reapply a maintenance coat of mineral oil or wax every few weeks to replenish the barrier.
- Test Your Seal: The water bead test is a simple, effective way to check if your seal is intact. Water should bead on the surface and not soak in. If it soaks, it’s time to reseal.
- Vinyl is a Wearing Surface: Understand that the vinyl decal itself will eventually wear through knife cuts. Sealing protects the *wood* underneath from moisture and bacteria, but the vinyl graphic is a consumable layer that will need eventual replacement.
📑 Table of Contents
- Understanding the Materials: Wood, Vinyl, and Sealant
- Why Sealing is Non-Negotiable for Food Safety
- Choosing the Right Food-Safe Sealant for the Job
- Preparation: The Foundation of a Perfect Seal
- Application Methods: Brush, Roller, or Wipe-On?
- Curing and Post-Application Care: The Waiting Game
- Long-Term Maintenance and Troubleshooting
- The Ultimate Test: Putting Your Board to Work
Understanding the Materials: Wood, Vinyl, and Sealant
Before we dive into the “how,” we must understand the “why” by looking at the three key players: the wood, the vinyl, and the sealant. Each has a specific job, and they must work together in harmony.
The Wood: A Porous, Organic Material
Wood, even dense hardwoods like maple or walnut, is naturally porous. It has countless microscopic tubes and channels (called capillaries) that once carried water and nutrients up from the roots. This is wood’s greatest strength and its biggest weakness in a kitchen. Those same pores will eagerly absorb water, juice, oil, and—most importantly—bacteria. A drop of carrot juice or a smear of raw poultry juice can be drawn deep into the wood fibers via capillary action, creating an invisible contamination zone that is impossible to clean with just soap and water. Sealing the wood’s surface fills and coats these pores, creating a barrier that prevents liquids and microbes from penetrating.
The Vinyl: A Surface Decoration, Not a Barrier
The vinyl decal on your board is primarily for aesthetics. It is not, by itself, a food-safe sealant. Most adhesive vinyls (like permanent vinyl from craft stores) are considered “food-safe” only when fully encapsulated and sealed over, as the adhesive can break down over time and the vinyl edge is a potential lift point for bacteria. The vinyl’s job is to stick to the wood and provide color/design. The sealant’s job is to create an impermeable, durable shell over *everything*—the wood and the vinyl—protecting both from moisture, knife cuts, and the rigors of food prep. Think of the vinyl as the wallpaper and the sealant as the tough, washable paint over it.
The Sealant: Your Invisible Shield
The sealant is the hero of this story. It’s a liquid that, when cured, transforms into a solid, inert, waterproof film. Its primary purposes are to: 1) Fill wood pores, 2) Create a hard, smooth surface, 3) Provide a barrier against liquids and bacteria, and 4) Protect the vinyl from peeling and degradation. The critical rule is that this film must be made of a material that is non-toxic, will not leach chemicals into food, and can withstand the abrasion of knives and the acidity of foods like lemon and vinegar. This limits our options dramatically.
Why Sealing is Non-Negotiable for Food Safety
Let’s be absolutely clear: an unsealed or improperly sealed cutting board is a food safety hazard. The United States Department of Agriculture (USDA) and food safety experts consistently warn against using porous, unsealed wood for raw meat, poultry, and fish. Here’s why sealing your vinyl-on-wood board is not optional.
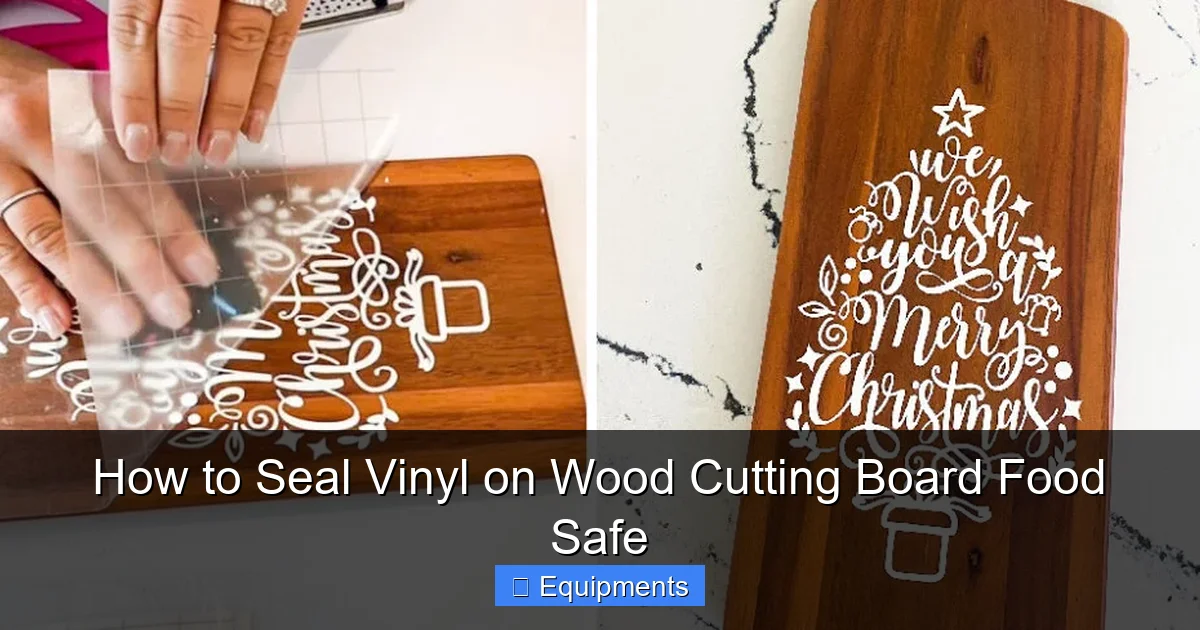
Visual guide about How to Seal Vinyl on Wood Cutting Board Food Safe
Image source: thekitchenix.com
The Bacterial Sanctuary Problem
When juices from raw meat or bacteria from produce soak into an unsealed board, they don’t just sit on top. They migrate. Studies have shown that bacteria like Salmonella and E. coli can penetrate up to 1/4 inch into the wood grain within minutes. Once inside, they are shielded from surface sanitizers. Even a vigorous scrub with soap and water only cleans the surface. Those deep-seated bacteria can later be drawn back to the surface by capillary action, especially when the board is used for another food, leading to cross-contamination. A proper sealant fills those capillaries, leaving bacteria with nowhere to hide but the surface where you can wash them away.
The Moisture Warp and Rot Cycle
Wood is hygroscopic, meaning it absorbs and releases moisture from the air. When a board is repeatedly wetted and dried, it expands and contracts. This cycle causes warping, cracking, and splitting. More insidiously, trapped moisture inside the wood from improper drying or sealing can lead to mold and rot, which are not only unsanitary but also ruin the board. A food-safe sealant creates a vapor barrier that slows moisture exchange dramatically, keeping the wood’s moisture content stable and preventing these damaging cycles.
Protecting Your Vinyl Investment
Vinyl adhesives are not designed for constant immersion in water and oil. When a vinyl decal on an unsealed board gets wet, the water can work its way under the edges, especially at the cut lines. This causes the vinyl to lift, bubble, and eventually peel off. A sealed board encapsulates the entire decal, gluing it down under a hard, waterproof shell. This dramatically extends the life of your graphic and prevents vinyl flakes from potentially getting into your food.
Choosing the Right Food-Safe Sealant for the Job
This is the most important decision you’ll make. Not all sealants are created equal, and using the wrong one can make your board toxic. Here is a breakdown of your main options, from simplest to most complex.
Visual guide about How to Seal Vinyl on Wood Cutting Board Food Safe
Image source: thekitchenix.com
1. Food-Grade Mineral Oil and Beeswax Blends (The Maintenance Standard)
This is the classic, traditional method for maintaining wooden cutting boards and utensils. Pure, food-grade mineral oil (a petroleum product, but highly refined and inert) is a liquid that penetrates deep into the wood, replenishing its natural oils and displacing water. It does not form a surface film. Beeswax or carnauba wax is often blended in to create a slightly harder, more water-resistant top layer.
- Pros: Completely food-safe, non-toxic, easy to apply, restores wood, inexpensive, revives old boards. Perfect for maintenance.
- Cons: Does not create a hard, impermeable barrier. It’s a penetrant, not a film-former. Liquids will still bead but can eventually soak if left standing. Requires frequent reapplication (monthly for heavy use). Not ideal as a primary sealant for a new board with vinyl, as it won’t fully encapsulate the decal edges against moisture.
- Best For: Regular maintenance of already-sealed boards, conditioning oil for butcher block, and a final wipe-down after using a film-forming sealant. Should it be your only sealant on a new board with vinyl? Probably not for the best long-term protection.
2. Food-Safe Finishing Oils (Tung & Linseed)
These are different from mineral oil. Pure tung oil and polymerized linseed oil (like Danish oil) are derived from plants. They penetrate the wood and then cure (oxidize) into a hard, durable, waterproof resin. They offer a harder, more water-resistant surface than mineral oil alone.
- Pros: Food-safe when fully cured, excellent water resistance, hard-wearing, enhances wood grain, natural origin.
- Cons: Application is more finicky (must be wiped on, then all excess wiped off). Curing time is longer (days to weeks). Can sometimes have a slight amber tint. Must ensure you get 100% pure, food-grade versions (some “tung oils” are actually varnish blends).
- Best For: A primary sealant on a new board. Provides a very good balance of protection and natural feel. Excellent for encapsulating vinyl. Apply 3-5 thin coats.
3. Food-Grade Epoxy Resin (The Ultimate Barrier)
This is the heavy-hitter. Specifically, you need an epoxy resin that is explicitly labeled “food-safe” or “food-grade” for direct contact once fully cured (look for FDA compliance or NSF certification). These are typically two-part systems (resin and hardener). When mixed and cured, they form an incredibly hard, perfectly smooth, glass-like, impermeable barrier.
- Pros: Creates a true, non-porous surface. Completely waterproof, chemical resistant, and extremely durable against knife cuts. Perfectly encapsulates vinyl. Gives a beautiful high-gloss or satin finish. Ideal for boards that will see heavy, wet use.
- Cons: More expensive. Application requires precision (mixing ratios, working time). Can be messy. Requires excellent ventilation and safety gear (respirator, gloves) during application. Curing can take 3-7 days for food-safe use. Can feel “plasticky” to some. If not applied perfectly, can yellow or have bubbles.
- Best For: Professional-grade boards, boards intended for heavy-duty use with raw meats, or when you need a completely impermeable, easy-to-sanitize surface. The gold standard for ultimate protection.
4. What to AVOID at All Costs
This cannot be stressed enough. Never use these on a cutting board that will contact food:
- Standard Polyurethane, Varnish, or Lacquer: These are not food-safe. They can chip, flake, and leach harmful chemicals, especially when cut into or exposed to acids/heat.
- Shellac: Not water-resistant and not durable.
- Non-Food-Specific Epoxy: Art/craft epoxy may contain non-food-safe additives. Only use products certified for food contact.
- Any Sealant with “Do not use on food contact surfaces” in the warnings: Obvious, but worth saying.
Preparation: The Foundation of a Perfect Seal
You can have the best sealant in the world, but if your surface isn’t prepped, it will fail. This stage is 80% of the battle. Rushing here guarantees peeling, bubbling, and poor adhesion.
Visual guide about How to Seal Vinyl on Wood Cutting Board Food Safe
Image source: thekitchenix.com
Step 1: The Final Sand (If you haven’t applied vinyl yet)
If you are sealing a bare wood board *before* applying vinyl, you must sand it perfectly smooth. Start with 150-grit to remove any mill marks, then move to 220-grit for a silky finish. Always sand with the grain. Wipe away ALL dust with a tack cloth or a lint-free cloth slightly dampened with mineral spirits. Let dry completely.
Step 2: Applying the Vinyl (If not already done)
Apply your vinyl decal to the *dry, clean, sanded* wood surface. Use the proper application tape technique to avoid bubbles. Press firmly, especially around the edges, with a squeegee or credit card. Pay special attention to the cut lines—these are the most vulnerable points for moisture ingress. Ensure the vinyl is perfectly adhered with no lifting corners. Let it sit for 24 hours before sealing to allow the adhesive to set fully.
Step 3: Cleaning and Degreasing (Crucial for Adhesion)
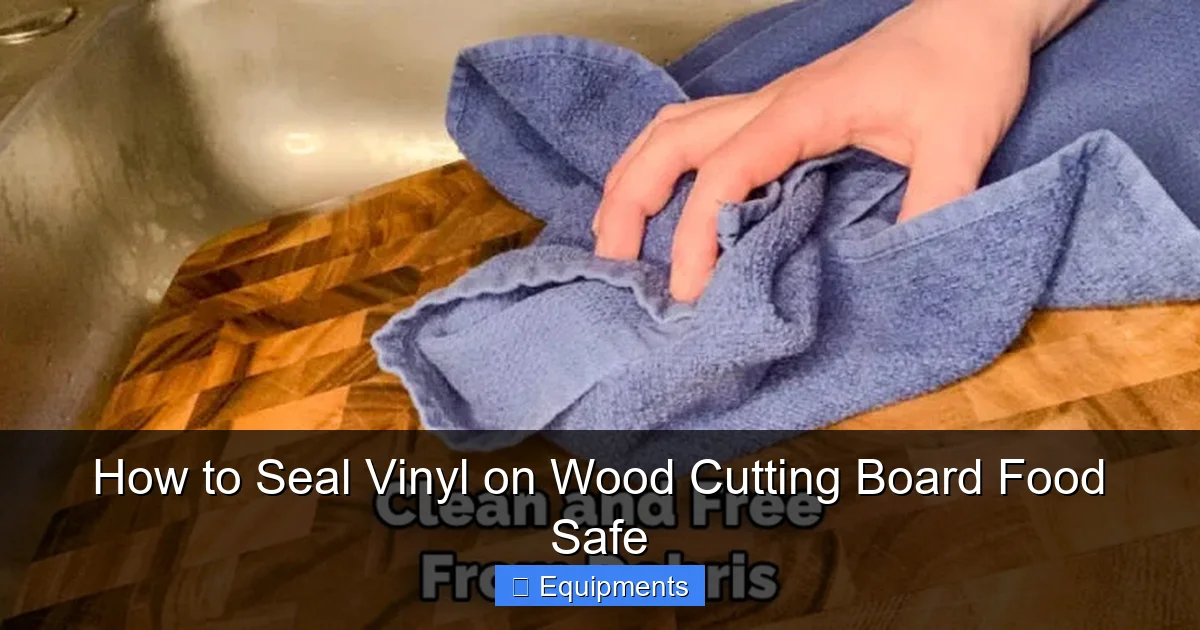
This step is vital, whether the board is bare or has vinyl. Any residue—sawdust, oils from your hands, wax from sanding—will act as a release agent and cause the sealant to fail. Mix a solution of mild dish soap and warm water. Wipe the entire board down thoroughly with a clean cloth. Rinse with a clean, damp cloth. Follow immediately with a wipe-down using a cloth dampened with 70% isopropyl alcohol. This removes any remaining soap film and oils. Let the board air dry completely for at least 2 hours. The wood should feel cool and dry to the touch.
Step 4: The Final Inspection
Under good light, run your fingers over the entire surface. Feel for any dust nibs, imperfections, or rough spots on the vinyl edges. If you find any, lightly sand with 320-grit sandpaper *only on the wood areas*, being extremely careful not to cut the vinyl. Clean the dust again with the alcohol method. Your surface must be pristine.
Application Methods: Brush, Roller, or Wipe-On?
How you apply your chosen sealant depends on the product type and your desired finish.
For Film-Forming Sealants (Epoxy, Tung Oil, Danish Oil)
Method: Use a high-quality, natural-bristle brush or a lint-free, lint-free microfiber cloth (for oils). Pour a small amount into a clean container. For oils, apply a generous amount with the cloth, rubbing it into the wood and over the vinyl. For epoxy, brush it on smoothly, working it into corners and over the vinyl decal. The key is to apply a thin, even, continuous coat. Do not over-brush. Immediately wipe away any excess, especially from the vinyl surface, to prevent pooling and a gummy finish.
Tip: Work in a dust-free environment if possible. A still room is better than a drafty one. Apply with the wood grain.
For Penetrating Oils (Mineral Oil)
Method: Pour a liberal amount onto the board. Using a clean cloth, rub it vigorously into the wood, over the entire surface, edges, and around the vinyl. Let it sit for 15-30 minutes. Then, using a clean, dry cloth, buff the surface until it no longer feels oily. Any excess left on the surface will become sticky and attract dust. For a first seal on a new board, you may need to apply 2-3 times in one session until the wood stops absorbing oil.
Sanding Between Coats: The Secret to Smoothness
This is mandatory for film-forming sealants. Once your first coat is tack-free (not sticky to the touch, but not fully cured), you must sand it. Use very fine sandpaper—320 grit or higher, or 0000 steel wool for oils. Sand lightly, just to knock down any dust nibs or imperfections and to create a “tooth” for the next coat. Sand with the grain. Wipe away ALL sanding dust with a dry cloth, then a cloth dampened with mineral spirits or alcohol. Let dry. Apply your next thin coat. Repeat for 3-5 coats, depending on the product and desired protection level. The final coat can be left unsanded for a perfectly smooth finish.
Curing and Post-Application Care: The Waiting Game
Your board is sealed and looks beautiful. Your work is not done. The curing phase is when the sealant undergoes its final chemical hardening. Using the board too early ruins everything.
Understanding Dry-to-Touch vs. Fully Cured
“Dry-to-touch” is a lie. It means the solvents have evaporated, but the resin is still soft and vulnerable. “Cure time” is when the sealant reaches its final hardness and chemical stability. For food safety, you must wait for the full cure time specified by the manufacturer. This can range from:
- Food-Grade Oils: 24-72 hours for functional use, but 7-30 days for full cure and maximum hardness.
- Epoxy: Typically 3-7 days for “hard” use, but 7-30 days for full food-safe cure and maximum chemical resistance. Do not cut food on epoxy for at least 7 days.
During this time, store the board in a clean, dust-free area at room temperature. Do not use it.
The First Wash and the “Cure-off”
After the full cure time has passed, give your board its first wash with mild soap and warm water. Rinse thoroughly and dry immediately with a towel. This first wash can sometimes remove a very slight surface waxiness or “bloom” from some oils/epoxies. It’s normal. Pat it dry and let it air-dry completely. Now it’s ready for its debut with a nice loaf of bread or a block of cheese.
Long-Term Maintenance and Troubleshooting
A sealed board is a happy board, but it needs love to stay that way.
The Daily Routine
After each use, scrape off large food particles with a bench scraper. Wash with warm water and a mild dish soap. Avoid harsh detergents, bleach, or antibacterial soaps, as they can degrade the sealant over time. Never, ever put a wooden board in the dishwasher—the heat, agitation, and prolonged water will destroy it. Always dry the board thoroughly with a towel immediately after washing. Stand it on its edge or prop it up to allow air circulation on both sides.
The Weekly/Monthly Check-Up
Perform the water bead test regularly. Sprinkle a few drops of water on the surface. On a well-sealed board, the water should form distinct beads that roll off. If the water soaks in and darkens the wood within a minute or two, the sealant is failing and it’s time to re-seal. For oil-maintained boards, this will happen faster and is normal—just reapply a coat of mineral oil or wax. For epoxy/tung oil sealed boards, this indicates the surface finish is worn through.
When to Re-Seal
Even the best sealant wears. Signs it’s time for a full re-sealing (after a light sanding):
- Water no longer beads.
- The wood looks dry, dull, or gray.
- You see fine scratches or knife marks that penetrate to the wood.
- The vinyl edges feel rough or start to lift slightly.
The process is the same: clean, lightly sand (220-320 grit), clean the dust, and apply 2-3 new thin coats of your chosen sealant.
Troubleshooting Common Problems
- Sticky or Gummy Surface: Caused by applying too thick a coat or not wiping off excess. Solution: Sand the sticky area with 320 grit, wipe clean, and let cure for another few days. May need a final thin coat.
- Bubbles in Epoxy: From applying over a wet surface, dusty surface, or from the wood releasing trapped air. Solution: Sand bubbles out after full cure, clean, and reapply a thin coat.
- Vinyl Lifting at Edges: Moisture got under the decal. This is often a prep failure. You may need to carefully heat the vinyl with a hairdryer to re-adhere it, then seal over it again. If the adhesive is failing, the vinyl may need to be replaced.
- White, Milky Haze (on epoxy/oil): Often “blush,” a wax that rises to the surface during cure, or moisture trapped. Usually sands off with fine grit sandpaper after full cure. If persistent, it may be a sign of moisture in the wood during application—the board may need to be stripped and dried out completely before restarting.
The Ultimate Test: Putting Your Board to Work
Finally, after all that care, it’s time to use your board. Start gently. Use it for bread, cheese, fruits, and vegetables first. Avoid raw meats for the first few uses to be extra cautious. Use knives with a gentle rocking motion, not stabbing. Avoid cleavers and heavy chopping, as these are the fastest way to cut through any sealant and into the wood. Your board is now a functional tool and a work of art. With proper care, it will last for decades, telling the story of every meal prepared on it, all while keeping your family safe.
Frequently Asked Questions
Can I use any polyurethane or varnish from the hardware store?
No. Standard polyurethane and varnish are not formulated for direct food contact and can leach chemicals, especially when cut into or exposed to acidic foods. You must use a sealant specifically labeled as food-safe, FDA-compliant, or NSF-certified for direct food contact.
How often do I need to re-seal my cutting board?
It depends on use and sealant type. For epoxy or tung oil, re-seal when the water bead test fails, typically every 1-2 years for a home kitchen with moderate use. For mineral oil maintenance, reapply every few weeks or whenever the wood looks dry. Heavier use with raw meats will require more frequent maintenance.
Is epoxy resin really safe for food contact?
Yes, but only specific types. You must use an epoxy resin that is explicitly manufactured and labeled as “food-safe” or “food-grade” for direct contact once fully cured. These are formulated without harmful additives. Always check the manufacturer’s specifications and cure times. Never use art/craft epoxy not intended for food contact.
Can I seal over an old, existing sealant?
Yes, but proper preparation is key. You must first clean the board thoroughly. Then, you must lightly sand the entire surface with 220-320 grit sandpaper to roughen the old finish and create a “tooth” for the new sealant to adhere to. Wipe away all sanding dust completely before applying the new thin coats.
What should I do if my vinyl starts to peel at the edges?
If it’s a slight lift, you can try carefully heating the vinyl with a hairdryer on low to reactivate the adhesive, then pressing it down firmly. After it cools, you can seal over it again. If the adhesive is failing or the lift is significant, the vinyl will need to be carefully removed, the area cleaned, and a new decal applied before resealing the entire board.
Can I use vinegar or lemon juice to clean my sealed board?
For occasional cleaning of light stains, a quick wipe with a diluted vinegar solution (1 part vinegar to 10 parts water) is fine, but you must rinse thoroughly with water and dry immediately. Acidic liquids can degrade some sealant finishes over time if left to sit. Never let lemon or vinegar sit on the board. For daily cleaning, stick to mild soap and water.