Removing melted plastic from a glass stove top requires patience and the right technique to avoid scratches. The first and most critical step is to let the stove cool completely. Never try to scrape hot plastic. Once cool, you can often gently pry it off with a plastic or wooden scraper. For stubborn bits, applying gentle, indirect heat with a hairdryer to soften the plastic is highly effective. Always finish by cleaning the area with a dedicated glass cooktop cleaner to restore shine and remove any residue. The key is to use non-abrasive tools and avoid excessive force.
Key Takeaways
- COOL COMPLETELY FIRST: Always wait for the glass surface to be completely cold to the touch before attempting any removal. Heat makes plastic malleable but also sets it hard as it cools, and scraping a hot surface is dangerous and can damage the glass.
- START GENTLE: Begin with the least aggressive method: a plastic scraper, wooden spoon, or even a credit card edge. The goal is to lift and pop the plastic, not grind it.
- HEAT SOFTENS: For plastic that has fused to the glass, use a hairdryer on a low-to-medium setting to gently warm the area. This re-softens the plastic, making it much easier to pry away.
- AVOID ABRASIVES: Never use steel wool, metal scrapers (unless a razor blade held perfectly flat), or gritty cleaners like Comet or Ajax. These will permanently scratch the glass surface.
- CLEAN AFTERWARDS: Once the plastic is removed, always clean the area with a product designed for glass cooktops or a vinegar-water solution to remove any oily film and restore clarity.
- PREVENTION IS KEY: Use the back burners for pots that might boil over, and always keep plastic utensils, bags, and containers far from the stove, even when not in use.
- PATIENCE PREVENTS DAMAGE: Rushing and using excessive force is the primary cause of scratched glass cooktops. Work slowly, in small sections, and let the methods do the work.
📑 Table of Contents
- The Dreaded Discovery: A Common Kitchen Mishap
- Understanding Your Enemy: Plastic and Glass Chemistry
- Phase One: The Immediate “Do Not Panic” Protocol
- Method 1: The Cold Pop Technique (For Fresh, Cooled Plastic)
- Method 2: The Gentle Heat Strategy (For Stubborn, Fused Plastic)
- Method 3: Solvent and Abrasive-Free Cleaning (For Final Residue)
- Method 4: The Last Resort – Razor Blades and Extreme Caution
- Prevention: The Only Guaranteed Solution
The Dreaded Discovery: A Common Kitchen Mishap
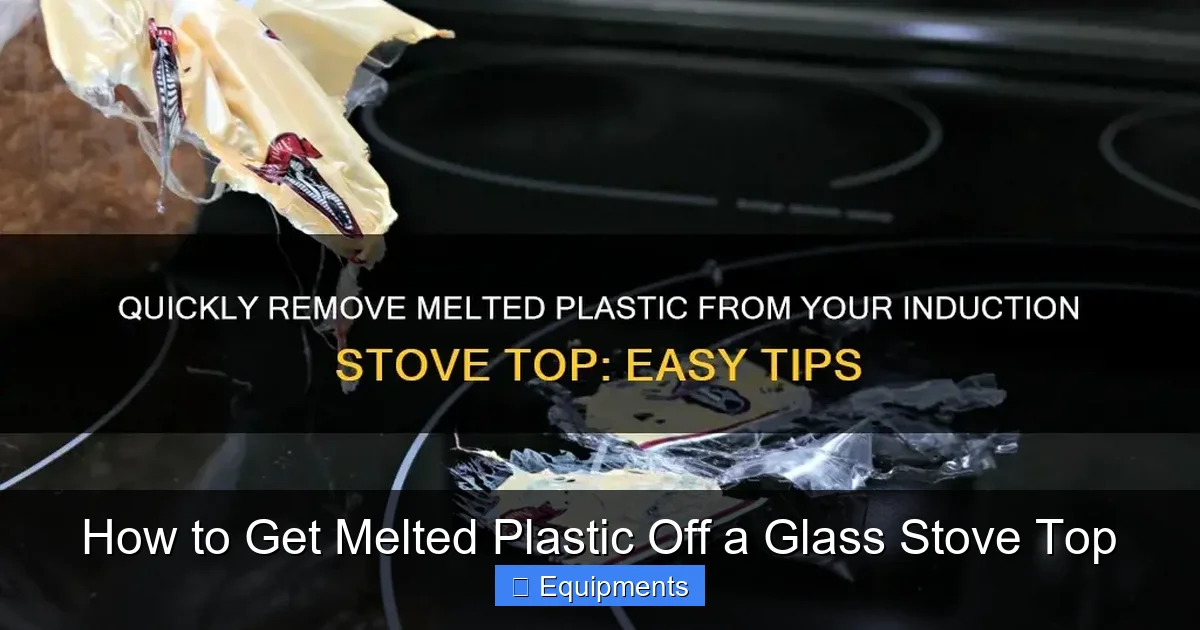
You’re cooking dinner, and in a moment of distraction, a plastic spoon, a grocery bag, or the lid from a plastic container slips and lands on the hot burner. You hear that awful, unmistakable sizzle and smell the acrid, burning plastic fumes. Your heart sinks as you see the melted, bubbly mess now fused to your beautiful, smooth glass stove top. It’s a sinking feeling many of us have experienced. That pristine surface, which took so much effort to keep clean, now looks permanently marred. But here is the most important thing to remember: all is not lost. With the right knowledge, tools, and a calm, patient approach, you can almost always remove that melted plastic without leaving a single scratch. The goal of this guide is to turn your panic into a methodical cleanup process. We will walk you through every safe and effective step, from the immediate “oh no!” moment to a sparkling finish. This isn’t about brute force; it’s about smart chemistry and physics, applied with care.
Understanding Your Enemy: Plastic and Glass Chemistry
Why Does Plastic Melt and Stick?
To defeat the problem, it helps to understand it. Most kitchen plastics—like polyethylene (plastic bags, containers) or polypropylene (food storage lids, spoons)—are thermoplastic polymers. This means they soften when heated and harden when cooled. When a piece of plastic contacts a hot glass cooktop (which can exceed 500°F/260°C), the plastic rapidly softens, bubbles, and flows into the microscopic pores and imperfections of the glass surface. As it cools and hardens again, it forms a mechanical bond, essentially “gluing” itself to the glass. The residue you see isn’t just plastic; it’s often a carbonized, baked-on layer of plastic polymers that have begun to break down.
Visual guide about How to Get Melted Plastic Off a Glass Stove Top
Image source: cleannr.com
Types of Plastic Residue Matter
The removal technique can vary slightly based on the plastic:
- Low-Temperature Plastics (e.g., Polyethylene – Plastic Bags): These melt at lower temperatures (around 230-250°F/110-121°C). They tend to be softer and more pliable when reheated, making them easier to remove.
- High-Temperature Plastics (e.g., Polypropylene – Many Lids/Spoons): These have a higher melting point (around 320-340°F/160-171°C). They may have carbonized more, creating a tougher, darker, and more brittle residue that can be slightly harder to lift.
- Silicone Items: While silicone is heat-resistant, it can still leave a gummy residue if it contacts a burner. This often requires a solvent-based approach.
Identifying the type can guide your patience level, but the core safe methods work for all. The worst-case scenario is a plastic that has burned deeply into the glass, which is rare on modern, durable ceramic-glass cooktops.
Phase One: The Immediate “Do Not Panic” Protocol
The moments after the accident are crucial. Your first instinct might be to grab a spatula and start scraping. Do not do this. Here is your emergency checklist:
Visual guide about How to Get Melted Plastic Off a Glass Stove Top
Image source: shunpoly.com
Step 1: Power Down and Cool
Immediately turn the affected burner to “Off” and remove the pan or item if it’s still there. If you have an electric coil element, it will stay hot for a long time. For gas, turn off the burner and let the pilot light go out if safe. The absolute, non-negotiable rule is: You must let the glass cooktop cool completely to room temperature. This could take 30 minutes to an hour, depending on the burn level. Trying to work on a warm or hot surface is dangerous (risk of burns) and ineffective (the plastic is still soft and will smear).
Step 2: Ventilate
Open windows and turn on your kitchen exhaust fan. Burning plastic releases fumes that are unpleasant and potentially harmful. You want to clear the air while you work.
Step 3: Gather Your Non-Scratch Arsenal
While it cools, collect these tools. Having everything ready prevents you from scrambling for a metal tool later:
- A plastic scraper (often sold for cooktops or paint removal). A old credit card, gift card, or stiff plastic spatula can work in a pinch.
- A wooden spoon or chopstick (the end can be used for prying).
- A hairdryer (with a cool shot button is a bonus).
- Paper towels or a clean, soft cloth.
- A dedicated glass cooktop scraper (often a razor blade in a plastic holder) – use this only as a last resort and with extreme caution.
- Cleaning agents: Baking soda, white vinegar, isopropyl alcohol (rubbing alcohol), or a commercial glass cooktop cleaner (like Cerama Bryte or Weiman).
Method 1: The Cold Pop Technique (For Fresh, Cooled Plastic)
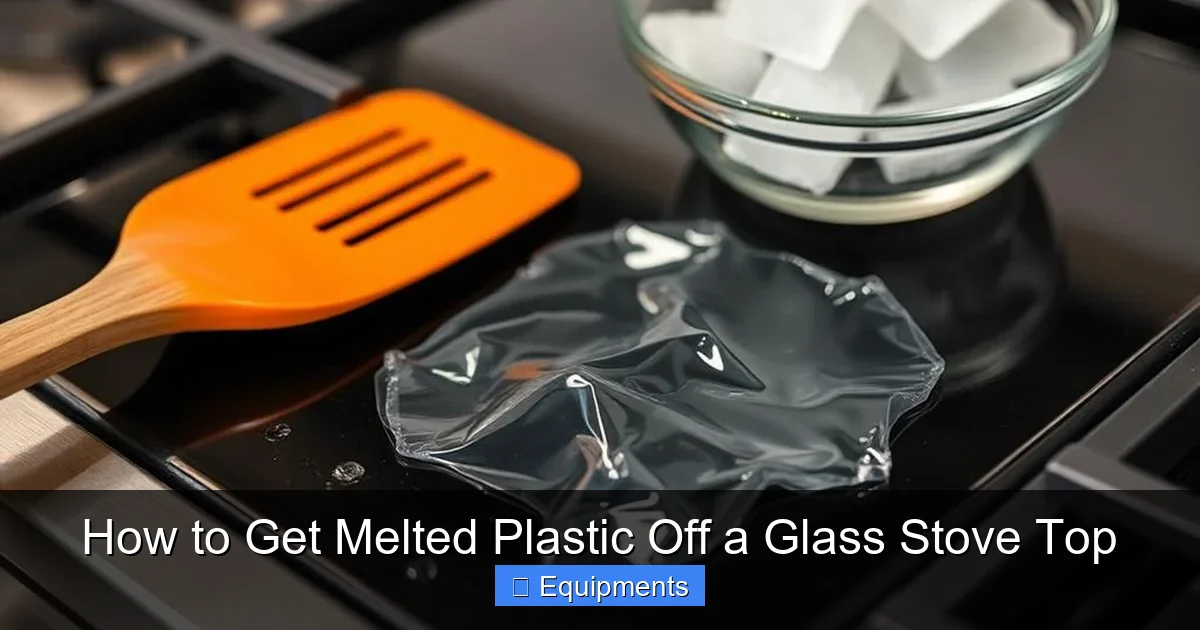
If the plastic was a small piece (like a spoon or bag fragment) and has cooled into a solid, raised blob, this is your best starting point. It often works like magic.
Visual guide about How to Get Melted Plastic Off a Glass Stove Top
Image source: plasticpractical.com
How to Execute the Lift and Pop
Once the stove is completely cold, take your plastic scraper or the edge of a wooden spoon. Find the edge of the plastic blob. You want to get the thin edge of your tool underneath the plastic. Apply gentle, steady pressure to lift. You’re not trying to shave it off; you’re trying to lever it up. Often, you will hear a distinct “pop” or “crack” as the plastic releases from the glass. Once you get one edge up, you can often grab it with your fingers (be careful of sharp edges) and peel the whole piece away. If it breaks, don’t worry. Re-position your tool under a new edge and repeat. The plastic, being a different material from glass, will often separate cleanly if you can get that initial purchase.
Tips for Success
- Work from the outside edge inward. The plastic is usually thinnest and least bonded at the perimeter.
- Be patient. It might take several attempts at different angles to find a weak spot.
- If the plastic is a thin film (like a melted grocery bag), it may crumble as you lift. That’s okay. Collect the pieces.
- Never press the scraper down hard against the glass. Always keep the angle shallow, like you’re sliding a knife under a label.
Method 2: The Gentle Heat Strategy (For Stubborn, Fused Plastic)
If the plastic has fully fused and won’t budge with cold prying, it’s time to reintroduce controlled, gentle heat. The goal is to soften the plastic just enough to become pliable again, without overheating the glass (which could cause thermal shock, though modern glass is resilient) or creating more fumes.
Using a Hairdryer: Your Best Friend
The hairdryer is the safest heat source for this job. It provides focused, low-temperature heat.
- Set the hairdryer to a medium or low heat setting. High heat can be too aggressive and risk scorching the plastic further.
- Hold the hairdryer about 4-6 inches from the plastic residue. Move it constantly in a circular motion to distribute heat evenly. You do not want to concentrate heat on one spot.
- Heat the area for 30-60 seconds. You’ll see the plastic begin to soften, darken slightly, and maybe become a little shiny or sticky.
- Immediately try the Cold Pop Technique from Method 1 with your plastic scraper. The plastic should now yield much more easily.
- Work in small 1-2 inch sections. Heat a section, scrape it, then move to the next. This prevents the plastic from re-hardening as you work.
- If the plastic re-hardens before you can scrape it, simply re-heat that section for a few more seconds.
Important Safety and Glass Care Notes
• Never use a torch or open flame. The risk of cracking the glass or causing a fire is far too high.
• Do not use a hot burner element to reheat the plastic. You have no control over the temperature, and you will likely make the problem worse.
• Avoid extreme temperature changes. Do not take a cold stove and blast it with a hairdryer on high, and never put a cold, wet cloth on a hot stove. The goal is gentle, gradual warming.
Method 3: Solvent and Abrasive-Free Cleaning (For Final Residue)
After the bulk of the plastic is lifted, you might be left with a faint film, a slight discoloration, or a sticky residue. This is the final cleanup phase, where you restore the glass’s original shine. This is not the stage for scraping.
The Baking Soda Paste Power
Baking soda is a mild, non-abrasive alkali that can help break down residual polymers.
- Make a thick paste with baking soda and a few drops of water.
- Apply the paste to the affected area and any surrounding film.
- Using a soft cloth or a non-scratch scrub sponge (like a blue Scotch-Brite™ *non-scratch* variety), rub the paste in small circles with very light pressure.
- Let it sit for 5-10 minutes. The baking soda will draw out oils and help lift the last bits.
- Wipe away with a damp cloth and buff dry with a microfiber towel.
Vinegar and Isopropyl Alcohol for Film
For a greasy or waxy film left behind:
- White Vinegar Solution: Mix equal parts white vinegar and water in a spray bottle. Spray on the residue, let sit for a minute, and wipe with a soft cloth. The acetic acid cuts through grime.
- Rubbing Alcohol (Isopropyl Alcohol): Dampen a cloth with 70% isopropyl alcohol. This is excellent for dissolving sticky, gummy residues. Test on a small inconspicuous area first. Wipe the area and buff clean.
The Commercial Cooktop Cleaner Finish
This is the gold standard for a final, flawless shine. Products like Cerama Bryte, Weiman, or affresh are formulated specifically for glass-ceramic surfaces. They contain a very fine, safe polishing agent and a protective agent. Follow the product directions: typically, you apply a small amount to a damp cloth or directly to the surface, buff in circles, and then buff off with a dry microfiber towel. This step will remove any last trace of haze and leave a protective layer that makes future cleanup easier.
Method 4: The Last Resort – Razor Blades and Extreme Caution
Sometimes, a tiny, hardened speck of carbonized plastic remains, stubbornly bonded. In these rare cases, a single-edge razor blade held perfectly flat against the glass can be used. This is high-risk and should only be attempted if you are extremely comfortable with the tools and have exhausted all other methods.
How to Use a Razor Blade Safely on Glass
- Ensure the surface is wet. Always use the razor blade with plenty of lubricant: either soapy water, a dedicated cooktop cleaner, or glass cleaner sprayed on the area. This allows the blade to glide.
- Hold the blade at a 30-degree angle or less. The goal is to scrape parallel to the surface, not dig into it. Think of it as shaving the very top layer of the residue off the glass.
- Use light, sweeping motions. Let the sharp edge do the work. Do not press down. If you feel resistance, stop. You are likely catching on the glass itself.
- Use a new blade. A dull blade is dangerous and ineffective.
- Work in a well-lit area so you can see exactly what you’re doing.
Warning: A single slip or moment of pressure can and will cause a permanent, deep scratch. If you are not 100% confident, stop and live with a tiny invisible spot rather than risk a large, visible scratch. Often, that last speck is less noticeable than a scratch from a misguided razor.
Prevention: The Only Guaranteed Solution
Now that your stove is clean, let’s talk about making sure this never happens again. An ounce of prevention is worth a pound of cure.
Kitchen Habits to Adopt
- Use Back Burners: Get in the habit of using the back burners for pots that might boil over or simmer for long periods. This creates a natural buffer zone between the front of the stove (where you work) and the hot surface.
- Establish a “No Plastic Zone”: Keep all plastic utensils, bags, containers, and packaging at least 12 inches away from the stove. A designated drawer or counter spot far from the heat is best. Never rest a plastic spoon on the stove, even if it’s off but still warm.
- Check Before You Cook: Do a quick visual scan of your stovetop before turning on a burner. Make sure there’s no stray plastic bag, child’s toy, or recipe card.
- Use Pot Handles Strategically: Turn pot handles inward, away from the edge of the stove, to prevent accidental knocks that could send a plastic utensil flying.
Protective Measures
Consider using stove top guards or covers (silicone or metal) when the stove is not in use. They provide a physical barrier. Some are designed to be left on during cooking for splatter protection, but always check manufacturer guidelines to ensure they are safe for your specific model and won’t trap heat.
Frequently Asked Questions
Can I use a metal spatula to scrape off the plastic if I’m careful?
No. Even with care, a metal spatula is almost guaranteed to scratch the glass surface. The glass on a cooktop is hard but not scratch-proof. Always start with plastic or wood tools. Only consider a razor blade as an absolute last resort, and even then, with extreme caution and proper lubrication.
What if the plastic has burned onto the glass and left a dark stain/char?
If the plastic has carbonized (turned black and crusty), first try the hairdryer heat method to soften it. If a stain remains after removal, use the baking soda paste or a dedicated glass cooktop cleaner, which often contains a very fine polishing agent to lift light stains. For deep carbonization, the stain may be permanent, but the surface will be clean and smooth.
Is it safe to use a razor blade on a glass stove top?
It is possible but high-risk and should be a last resort. You must keep the blade perfectly flat against the surface, use plenty of lubricant (soapy water or cleaner), and use a brand-new, sharp blade with minimal pressure. One wrong angle or moment of distraction will cause a permanent scratch. For 99% of cases, the plastic scraper and hairdryer methods are sufficient and completely safe.
Will vinegar damage my glass stove top?
No. A diluted white vinegar solution (1:1 with water) is perfectly safe for cleaning glass cooktops and is excellent for removing film and water spots. It is acidic but not corrosive to the glass. Always rinse with a water-dampened cloth after using vinegar and buff dry.
My plastic melted during self-cleaning cycle. Is it different?
A self-cleaning cycle reaches extremely high temperatures (often over 800°F/427°C). Plastic residue from this will be thoroughly carbonized and baked on. The standard hairdryer method may not work as the plastic is now fused like ceramic. You will likely need to rely more on the baking soda paste and commercial cooktop cleaner with significant scrubbing. A razor blade might be necessary for the hardest bits. The process is the same, but it requires much more effort and patience.
Can I prevent this by using a silicone mat on the stove?
No. Never place anything directly on a glass cooktop while it is on or hot, including silicone mats, unless the manufacturer explicitly states it is safe for use on your specific model during cooking. Silicone can melt or trap heat, potentially causing thermal shock to the glass or creating a fire hazard. The only safe prevention is behavioral—keeping plastic away.