Unlock restaurant-quality results at home with your GE Profile oven’s probe. This handy tool takes the guesswork out of cooking, ensuring meats, baked goods, and casseroles are cooked to absolute perfection every single time. Simply insert the probe, set your desired internal temperature, and let your oven do the rest, automatically switching to a warm hold when done. It’s the secret weapon for juicy roasts, flawless cheesecakes, and stress-free entertaining.
Key Takeaways
- The probe is your path to precision: It measures the internal temperature of food, allowing you to cook to exact doneness (e.g., 165°F for chicken, 135°F for medium-rare steak) rather than relying on time estimates.
- Setup is simple but crucial: Always plug the probe into the dedicated socket on the oven’s control panel *before* selecting probe functions. Ensure the probe cord is routed correctly to avoid door interference.
- Placement matters: Insert the probe into the thickest part of the food, avoiding bone, fat, or the pan. For thin items like chicken breasts, insert horizontally from the side.
- It works with multiple modes: Use the probe with Bake, Roast, Convection Bake/Roast, and even some broil settings (check your manual). It will not function with Air Fry or Steam modes on most models.
- Safety first: The probe and its cord get very hot. Use oven mitts to handle it. Never leave the probe unattended while the oven is on, and always unplug it after use.
- Clean carefully: The probe tip is dishwasher-safe (top rack), but the cord and plug are not. Hand wash the cord with a damp cloth. Never immerse the plug.
- Troubleshooting is often easy: “PROBE” errors usually mean poor connection, a faulty probe, or the probe is left in while the oven is off. Reseat the plug or replace the probe if needed.
📑 Table of Contents
- Introduction: Say Goodbye to Overcooked Dinners
- What Is the Probe and Why Should You Use It?
- Step-by-Step: Setting Up and Using the Probe
- Mastering the Probe: Temperature Charts & Pro Tips
- Advanced Features: The Perfect Temp Probe & Smart Integration
- Safety, Care, and Troubleshooting
- Conclusion: Your Journey to Perfect Cooking Starts Now
Introduction: Say Goodbye to Overcooked Dinners
There’s a universal moment of panic in home cooking: that second guess right before you pull a beautiful prime rib or a Thanksgiving turkey from the oven. Is it done? Did I cook it too long? What if it’s raw in the middle? We’ve all been there, relying on timers, color, and vague recipes that say “cook until done.” But what if your oven could tell you with scientific certainty when your food is perfectly cooked? That’s exactly what the probe feature on your GE Profile oven does. It transforms guesswork into guaranteed results.
This built-in thermometer is one of the most powerful yet underutilized tools in your kitchen arsenal. Whether you’re a weekend warrior trying to impress with a Sunday roast or a busy parent needing foolproof chicken thighs, understanding how to use the probe is a game-changer. This guide will walk you through every step, from unboxing that shiny metal probe to becoming a confident, precision-cooking maestro. We’ll cover setup, best practices for different foods, advanced tips, and how to avoid common pitfalls. Get ready to elevate your cooking—no culinary degree required.
What Is the Probe and Why Should You Use It?
The Science of Perfect Doneness
At its core, the probe is a simple concept: a thermocouple (a temperature sensor) at the tip of a metal rod connected by a heat-resistant cord to your oven’s computer. When you insert it into food, it provides a continuous, real-time reading of the internal temperature. Unlike an instant-read thermometer that gives a snapshot, the probe monitors the temperature throughout the entire cooking process. Your oven’s computer compares this reading to the target temperature you set. Once the food’s core reaches that target, the oven can automatically switch to a warm hold mode or shut off, preventing overcooking.
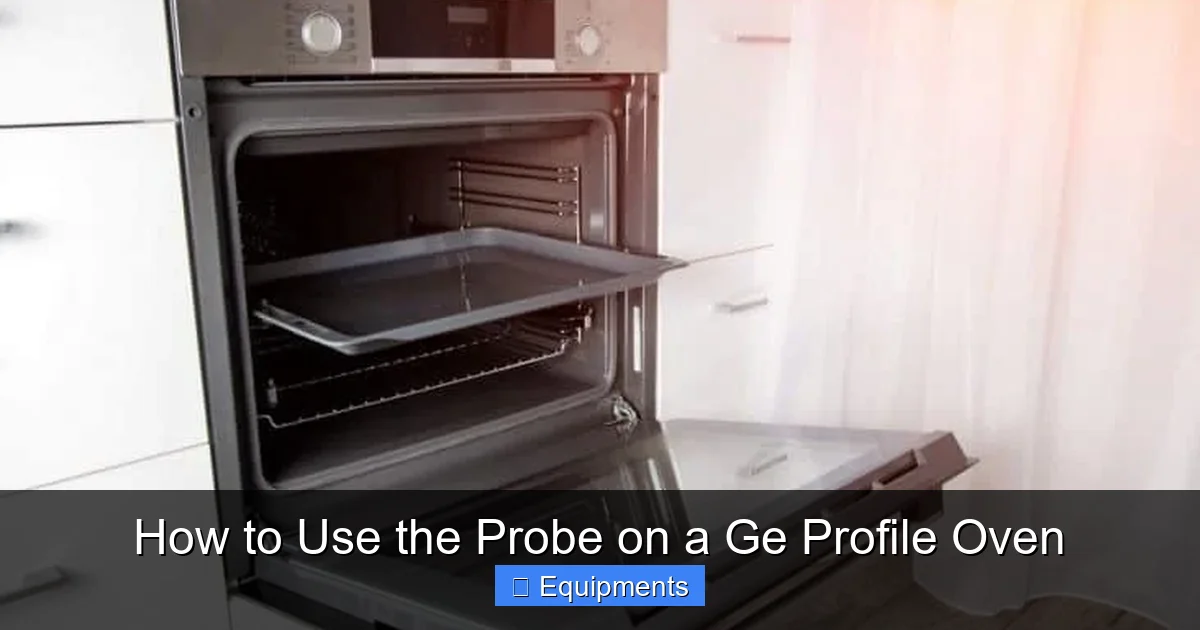
Visual guide about How to Use the Probe on a Ge Profile Oven
Image source: applianceteacher.com
This is critical because internal temperature is the only true indicator of doneness. A steak can look brown on the outside but still be cold in the center. A chicken breast can appear white but be dry from being cooked 10 minutes too long. Time and appearance are unreliable. The probe removes the anxiety. You set the temperature for medium-rare (130°F), and the oven beeps when it hits it. You set it for 200°F for pulled pork, and it holds there until the collagen melts into gelatin. It’s not just for meat; it’s for any dish where core temperature matters: custards, cheesecakes, bread, casseroles, and even reheating large items evenly.
Beyond Meat: Surprising Uses for Your Probe
While many associate the probe with roasting a turkey, its applications are vast:
- Baking: Test for doneness in dense cakes, brownies, or quick breads. A perfect cheesecake should be set around 150°F in the center, not jiggly and not cracked.
- Bread: Achieve the ideal crumb structure. A fully baked loaf will read 190-200°F internally.
- Casseroles & Gratins: Ensure the center is hot and bubbly, especially when topped with cheese that might brown quickly.
- Reheating: Reheat a large ham or a tray of lasagna to a safe, serving temperature (165°F) without drying it out, as the oven will hold at that temp.
- Delicate Sauces & Custards: Monitor temperature to curdle-proof. A crème brûlée is done at about 170°F.
Step-by-Step: Setting Up and Using the Probe
1. Locate and Prepare the Probe
Your GE Profile oven’s probe is typically stored in a small drawer or clip on the side of the oven interior. Carefully pull it out. You’ll notice a metal probe tip, a long stainless steel rod, and a cord ending in a plug. Inspect it for any damage—do not use if the cord is frayed or the tip is bent. The probe is designed to withstand high oven temperatures (usually up to 500°F or more), but it is not broiler-safe in most models. Always check your specific model’s manual for exact limits.
Visual guide about How to Use the Probe on a Ge Profile Oven
Image source: applianceteacher.com
2. The Critical First Step: Plug It In
This is the step most people miss, leading to frustration. You must plug the probe into the dedicated socket on the oven’s control panel or the front of the oven frame BEFORE you select any cooking mode or probe function. On most GE Profile models, you’ll find a small, round, rubber-covered port on the lower right side of the control panel or on the front trim. Lift the cover and firmly insert the plug until it clicks. If you try to select the probe function without it being plugged in, you’ll get an error message.
3. Route the Cord Safely
Gently close the oven door. Watch the probe cord. It must exit the oven cavity through the gap at the top of the door frame. Never let the cord get pinched by the oven door. This can damage the cord and create a safety hazard. If your oven has a cord clip or guide on the interior wall, use it. The cord should lie loosely outside the oven, away from the heating elements.
4. Insert the Probe Correctly
This is where skill meets science. Place your food on a rack in the center of the oven. Insert the probe into the thickest part of the food. For a whole chicken or turkey, this is the inner thigh near the breast, avoiding the bone. For a roast, it’s the geometric center. For a meatloaf or a thick steak, insert from the side so the tip is in the absolute center. The tip of the probe must be fully immersed in the food’s interior, not touching the pan, bone, or a large pocket of fat. Fat heats differently and will give a falsely low reading.
5. Select Your Settings
Now, use your oven’s controls:
- Select your desired cooking mode (Bake, Roast, Convection Roast, etc.).
- Set your oven temperature (e.g., 350°F for a roast).
- Press the PROBE button or navigate to the probe menu on the digital display.
- Use the keypad to set your target internal temperature. This is the most important number. Consult a reliable temperature chart (see below).
- Press START or SET to begin cooking.
The oven display will now show both the set oven temperature and the rising internal food temperature from the probe. When the food reaches your target temp, you’ll hear beeps. On many models, the oven will automatically switch to a Warm Hold setting (usually around 140-170°F) to keep food at a perfect serving temperature without further cooking.
6. Final Steps and Removal
When the oven signals completion, open the door. Use oven mitts to grasp the probe’s handle. The metal probe and cord will be extremely hot. Carefully pull the probe straight out of the food. Place it on a heat-proof surface. Unplug it from the socket. Now you can remove your perfectly cooked food. Let meats rest for 10-15 minutes before carving; the internal temperature will continue to rise slightly (carryover cooking), and the juices will redistribute.
Mastering the Probe: Temperature Charts & Pro Tips
Essential Internal Temperature Guide
Memorizing these key temperatures is the key to probe mastery. Here is a quick reference for common foods. Always reference USDA guidelines for safety, especially with poultry and ground meats.
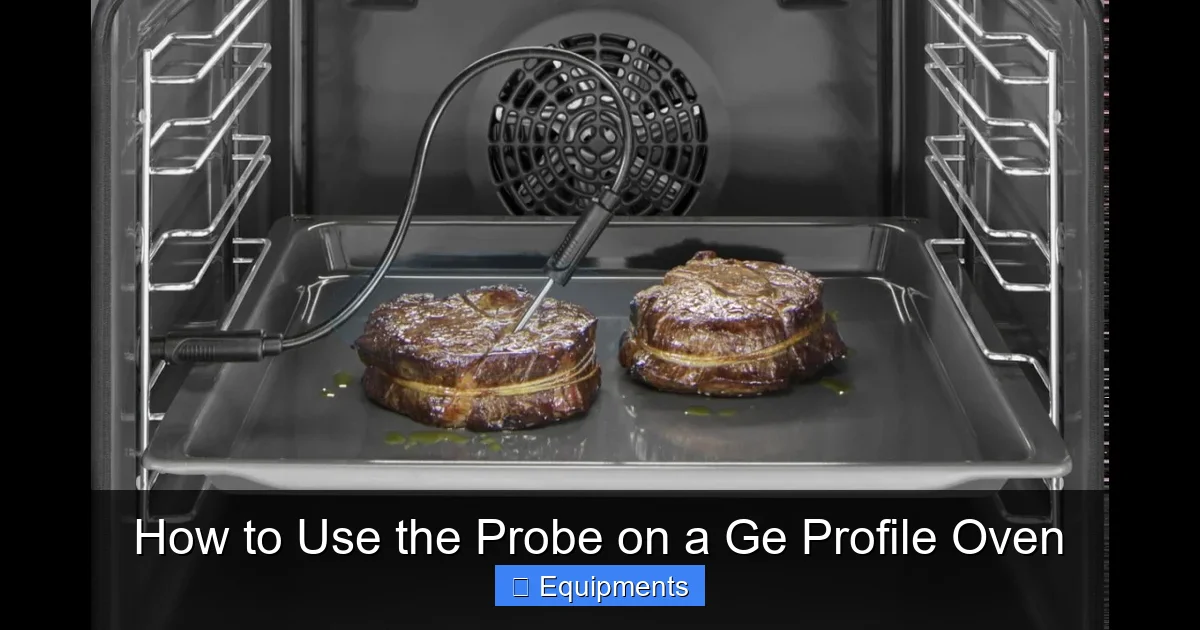
Visual guide about How to Use the Probe on a Ge Profile Oven
Image source: i.ytimg.com
- Poultry (Chicken, Turkey): 165°F (74°C) – USDA safe minimum. For dark meat (thighs, legs), 175-180°F yields more tender, fall-off-the-bone texture.
- Beef, Lamb, Veal (Steaks, Roasts):
- Rare: 120-125°F
- Medium-Rare: 130-135°F (ideal for most prime roasts)
- Medium: 140-145°F
- Medium-Well: 150-155°F
- Well-Done: 160°F+
- Pork: 145°F with a 3-minute rest (for chops, tenderloin, roast). For pulled pork, 195-205°F is the sweet spot for shreddability.
- Ground Meats (Beef, Pork, Turkey): 160°F (beef/pork) or 165°F (turkey) due to increased food safety risk.
- Fish: 125-130°F for rare, 140°F for medium, 145°F for fully cooked/flaky. Be cautious—fish cooks fast!
- Egg Dishes (Casseroles, Quiches): 160°F
- Cheesecake, Custard: 150-155°F (edges may be higher, center should hit this temp).
- Yeast Bread: 190-200°F
Pro Placement Techniques
Getting the probe in the right spot is 80% of the battle. Here’s how for tricky items:
- Thick Chicken Breasts or Pork Chops: Don’t insert from the top. You’ll likely hit the bone or get a shallow reading. Instead, insert the probe horizontally from the side, pushing it into the very center. This ensures the tip is in the thickest, coolest part.
- Meatloaf: Insert into the exact geometric center from the top. A slightly off-center reading can mean an undercooked core.
- Whole Birds: Insert into the inner thigh meat, parallel to the leg bone, until the tip is just touching the thigh bone from the inside. Avoid the breast if you want it juicy; breast meat cooks faster and will hit temp long before the thigh.
- Fish Fillets: For thick fillets (salmon, halibut), insert into the side at the thickest point. For thin fillets, the probe may be too large; an instant-read thermometer is better.
Timing is Everything: When to Insert the Probe
Don’t put the probe in at the very beginning if you’re searing a roast first. For large roasts, many chefs recommend a high-heat sear (500°F for 15-20 mins) to develop a crust, then lowering the oven temp and inserting the probe for the slow cook to target temp. Inserting the probe at the start of a high-heat sear can cause the probe tip to overheat and potentially give a false reading or damage it. Start the probe phase once you’ve reduced to your target cooking temperature (e.g., 325°F for a roast). For items like casseroles or baked goods that start at a moderate temp, you can insert the probe at the beginning.
Advanced Features: The Perfect Temp Probe & Smart Integration
Understanding “Perfect Temp”
Many newer GE Profile models, especially those in the Café series or Profile™ 30″ and 27″ ranges, feature a “Perfect Temp” probe. This is more than just a basic thermometer. It uses a dual-probe system: the standard probe you insert into food, and a second ambient probe that monitors the actual oven cavity temperature. The oven’s computer uses data from both to compensate for heat fluctuations and hot spots, making temperature control even more precise. It’s the difference between a good roast and an exceptional, evenly cooked roast. When using this feature, simply follow the on-screen prompts; the system handles the complexity.
Connecting to Your Smartphone (Wi-Fi Enabled Models)
If your GE Profile oven is Wi-Fi connected and you have the GE Appliances app (or SmartHQ), you can monitor the probe temperature remotely. This is a massive convenience. You can start the roast, leave the house to run errands, and get a notification on your phone when the target temperature is reached. No more hovering by the oven! To use this:
- Ensure your oven is connected to your home Wi-Fi via the app.
- Start your probe cooking cycle on the oven.
- Open the app and navigate to your oven’s controls.
- The live probe temperature and target will be displayed. You can adjust the target temperature from your phone if needed (e.g., if you decide you want your steak a little more done).
Note: Always prioritize physical safety. Even with alerts, be near the oven to remove the food when done, especially for items that can overcook quickly once at temp.
Safety, Care, and Troubleshooting
Safety First: Handling a Hot Probe
The probe is metal and sits in a 400°F+ oven. It will be scalding hot. Always use two hands and oven mitts when removing it. Place it on a trivet or hot pad immediately after unplugging. Never try to wash it while hot. Keep the probe cord away from the oven’s exterior, which can also become very hot during use. Never attempt to use the probe as a tool to move food inside the oven; it is not designed for that and can break.
Cleaning and Maintenance
Proper cleaning ensures longevity and hygiene. Never immerse the probe plug in water. Here’s the routine:
- After unplugging and cooling, wipe the stainless steel probe shaft with a damp cloth and mild dish soap.
- The metal probe tip is usually dishwasher-safe (top rack only), but hand washing is gentler and recommended to preserve its finish. Check your manual to be sure for your model.
- The cord can be wiped down with a damp cloth. Do not submerge.
- The plug should be wiped with a dry or slightly damp cloth. Ensure it is completely dry before storing or reinserting into the oven socket.
- Store the probe loosely coiled in its drawer. Do not kink or sharply bend the cord.
Common Error Messages and Fixes
Your oven’s display is your friend. Here’s what common probe-related messages mean:
- “PROBE” or “PROBE ERROR”: The most common cause is a poor connection. Unplug the probe and firmly re-insert it into the socket. Make sure it’s seated completely. If the error persists, the probe may be faulty.
- “PROBE HIGH” or “PROBE OVER TEMP”: The probe’s internal sensor has exceeded its designed limit (usually 500°F). This can happen if the probe tip is touching a heating element or the oven wall, or if the oven was preheated empty to a very high temperature with the probe inserted. Remove the probe immediately. Let it cool. Ensure it’s placed correctly in the food, away from direct heat sources.
- Probe reading doesn’t change: The probe is likely not inserted into the food properly (touching pan/bone) or the food is frozen solid. Ensure proper placement in the thickest, unfrozen part.
- Won’t activate probe function: Confirm the probe is plugged in before selecting the mode. Also, probe function is typically unavailable with Air Fry, Steam, or certain Sabbath modes. Consult your manual for mode compatibility.
Conclusion: Your Journey to Perfect Cooking Starts Now
Think of the probe on your GE Profile oven not as a complicated gadget, but as your personal cooking assistant. It’s the voice of reason that tells you, “The prime rib is done, take it out now,” when your instincts are screaming, “It’s not brown enough yet!” It’s the tool that lets you host a party without spending the entire evening chained to the kitchen, checking on the ham every five minutes. By mastering the simple steps of plug-in, placement, and temperature setting, you unlock a new level of culinary confidence and consistency.
The beauty of this feature is its universality. It helps the novice avoid disastrously dry chicken breasts and empowers the experienced cook to experiment with low-and-slow barbecue techniques or perfect sous-vide-like results using just their oven. Start simple: use it for your next Sunday roast. Feel the satisfaction of pulling a perfectly pink, juicy center from the oven because the *science* told you it was ready, not because you guessed. Then, branch out. Try a custard. Bake a loaf of sourdough. Reheat a holiday ham without a dry edge in sight. Your GE Profile oven’s probe is more than a feature; it’s your ticket to reliably exceptional food, meal after meal. So, plug it in, set that temp, and get ready to cook with precision and peace of mind.
Frequently Asked Questions
Can I use the probe with the convection fan or air fry mode?
In most GE Profile models, the probe function is compatible with Bake, Roast, Convection Bake, and Convection Roast modes. However, it typically does not work with the Air Fry mode or Steam mode (if your oven has one). Always check your specific model’s use and care manual for the definitive list of compatible modes.
What should I do if my oven says “PROBE ERROR” even though it’s plugged in?
First, unplug the probe from the socket on the oven and firmly re-insert it until it clicks. Ensure the plug is dry and clean. If the error persists, the probe itself may be faulty. Try testing with a known-good replacement probe if available, or contact GE Customer Support for troubleshooting and potential replacement. Never force the plug.
Do I need to preheat the oven before using the probe?
Yes, you should preheat the oven to your desired cooking temperature before inserting the probe into the food and starting the probe cycle (unless you are doing a low-and-slow cook starting from a cold oven, like for some pulled pork). The probe monitors the food’s internal temp as it heats in the preheated environment. Inserting the probe into cold food and then starting a cold oven can give inaccurate initial readings.
Can I leave the probe in the food while it’s resting after cooking?
Yes, and it’s actually a great idea! The internal temperature of large cuts of meat (roasts, turkey) will continue to rise 5-10°F during the resting period due to residual heat (carryover cooking). Leaving the probe in allows you to monitor this final rise and catch it at the absolute perfect moment before it overcooks. Just remember the probe and cord are still very hot during rest.
Is the probe safe to use with all types of cookware?
The probe is designed to be inserted into food, not cookware. It is safe to use with any oven-safe pan or roasting vessel (metal, ceramic, glass). However, ensure the probe tip does not touch the bottom or sides of the pan, as this will give a false temperature reading of the pan, not the food. The probe cord must also be routed so it doesn’t dangle into the pan or touch hot surfaces.
How do I know if my probe needs to be replaced?
Signs of a failing probe include: erratic temperature readings that jump wildly, readings that don’t change as the food cooks, a persistent “PROBE ERROR” message after reseating the plug, or visible damage to the cord (fraying, cuts) or the metal probe shaft (severe bending). If you suspect a fault, you can order a replacement probe specific to your oven model from GE Parts or an authorized dealer. Do not attempt to repair it yourself.