Removing aluminum foil from a Wolf oven bottom requires patience and the right tools to avoid damaging the delicate porcelain enamel surface. The process depends on whether the foil is fresh and soft or baked-on and carbonized. Always let the oven cool completely, start with the gentlest methods (plastic scraper, baking soda paste), and never use metal tools or abrasive cleansers. For severe cases, a commercial oven cleaner may be necessary, applied with extreme care.
Key Takeaways
- Cool Down is Non-Negotiable: Never attempt to remove foil from a hot or warm Wolf oven. The metal expands and bonds more firmly when hot, and you risk severe burns.
- Gentle First, Aggressive Last: Always begin with the least abrasive methods (plastic/nylon scraper, baking soda paste). Escalate to commercial cleaners only if needed, and use them sparingly.
- Protect the Porcelain Enamel: Wolf oven interiors feature a durable but scratch-sensitive porcelain enamel finish. Metal tools, steel wool, and harsh chemicals will permanently mar this surface.
- Heat is Your Friend (Carefully): For baked-on foil, a controlled, low-temperature reheat (e.g., 200°F) can soften the residue, making mechanical removal easier—but never exceed a low setting.
- Prevention is Paramount: The best solution is to never line the oven bottom with foil. Use oven liners designed for your specific Wolf model or place a baking sheet beneath dishes that might drip.
- When in Doubt, Consult the Pros: If you are uncomfortable or the foil is severely fused, contact Wolf Customer Care or a certified technician. Damaging the oven’s interior can be costly to repair.
- Ventilation is Critical: If using commercial oven cleaners, ensure your kitchen is well-ventilated. Wear gloves and avoid inhaling fumes.
[FEATURED_IMAGE_PLACEHOLDER]
📑 Table of Contents
- Introduction: The Dreaded Puddle of Foil
- Understanding the Enemy: Why Foil is a Problem in a Wolf Oven
- Phase One: The Immediate Response (For Fresh, Soft Foil)
- Phase Two: The Stubborn, Baked-On Foil Battle Plan
- Commercial Oven Cleaners: The Nuclear Option (With Extreme Precaution)
- Tools of the Trade: What to Use and What to Avoid
- Prevention: Never Again – The Best Cleaning is No Cleaning
- Conclusion: Patience, Respect, and the Right Tools
Introduction: The Dreaded Puddle of Foil
Let’s face it: you’re not alone. It’s a common, heart-stopping moment for any proud Wolf oven owner. You go to wipe down the interior after a great meal, and there it is—a shiny, melted, and stubbornly adherent patch of aluminum foil fused to the pristine porcelain enamel floor of your premium appliance. How did this happen? Maybe a drip pan liner shifted, or a piece of foil used to catch spills melted into a solid, metallic pancake. Your first instinct might be to grab a spatula or a Brillo pad and get to work, but stop right there. The beautiful, durable finish of a Wolf oven is not invincible, and using the wrong tool or technique can turn a minor annoyance into a permanent, expensive eyesore.
The key to success in this operation is a combination of patience, the correct tools, and a deep respect for the oven’s construction. Wolf ovens are engineered for performance and longevity, and their interiors are designed to withstand high heat and regular cleaning—but not aggressive scraping. This guide will walk you through every step, from the initial assessment to the final polish, ensuring you get that foil off without leaving a single scratch. We’ll cover scenarios for both fresh, soft foil and the nightmare scenario of carbonized, baked-on foil, providing safe, effective methods for each. Remember, the goal isn’t just to remove the foil; it’s to restore your oven’s floor to its original, factory-new condition.
Understanding the Enemy: Why Foil is a Problem in a Wolf Oven
The Science of the Melt
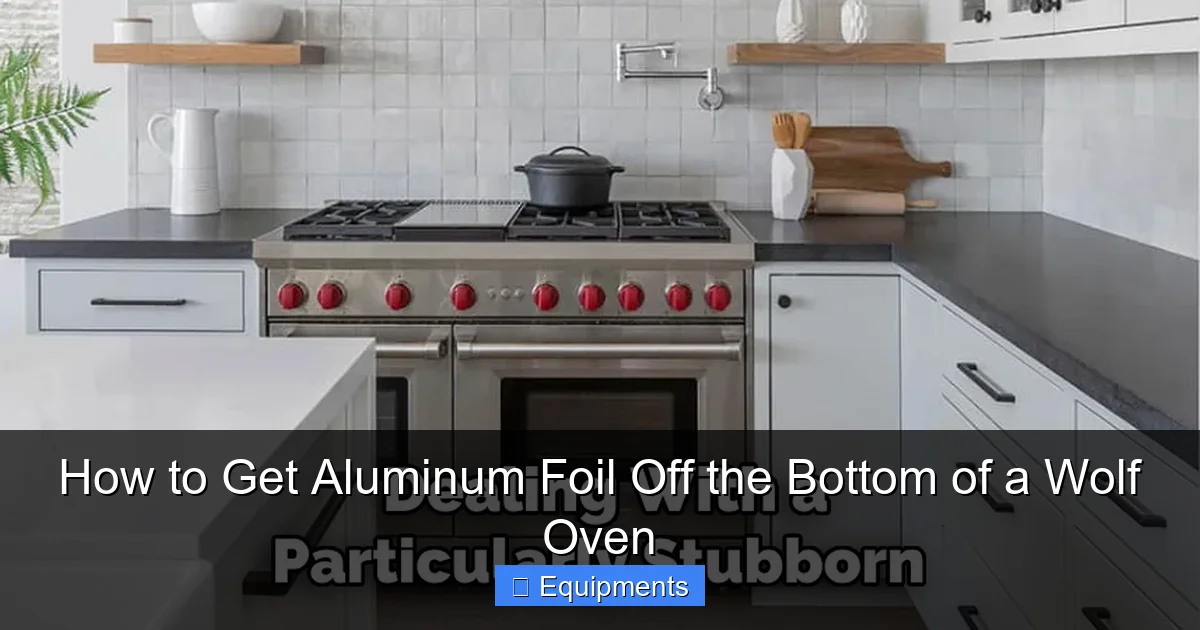
Aluminum foil has a melting point of around 1,220°F (660°C), which is well above the self-cleaning cycle temperature of most ovens (which can reach 900°F+). However, you don’t need to hit the melting point for disaster to strike. During normal cooking, especially with fatty or sugary foods that can reach high temperatures, the foil can soften, warp, and, most critically, bond to the surface beneath it. The bottom of your Wolf oven, typically a dark porcelain enamel, can get extremely hot. When the soft foil makes contact with this hot surface, it doesn’t just sit there—it can partially melt and literally weld itself to the enamel coating. This bond is strengthened by any food residue or grease that gets between the foil and the oven floor, creating a composite layer that is incredibly tough to remove.
Visual guide about How to Get Aluminum Foil Off the Bottom of a Wolf Oven
Image source: thekitchenix.com
The Porcelain Enamel Finish: A Precious Surface
Wolf’s signature oven interior is a porcelain enamel coating applied to a steel base. It’s a fantastic surface: non-porous, easy to wipe clean under normal circumstances, and highly heat-resistant. But it is not scratch-proof. It has a smooth, glass-like surface that is susceptible to damage from anything harder than its own Mohs hardness rating. This means metal scrapers, steel wool, and even some harsh powdered cleansers are absolute enemies. A single scratch not only looks terrible but also creates a tiny groove where food and grime can accumulate in the future, making subsequent cleanings harder. Your mission is to separate the foil from the enamel without introducing any new scars.
Phase One: The Immediate Response (For Fresh, Soft Foil)
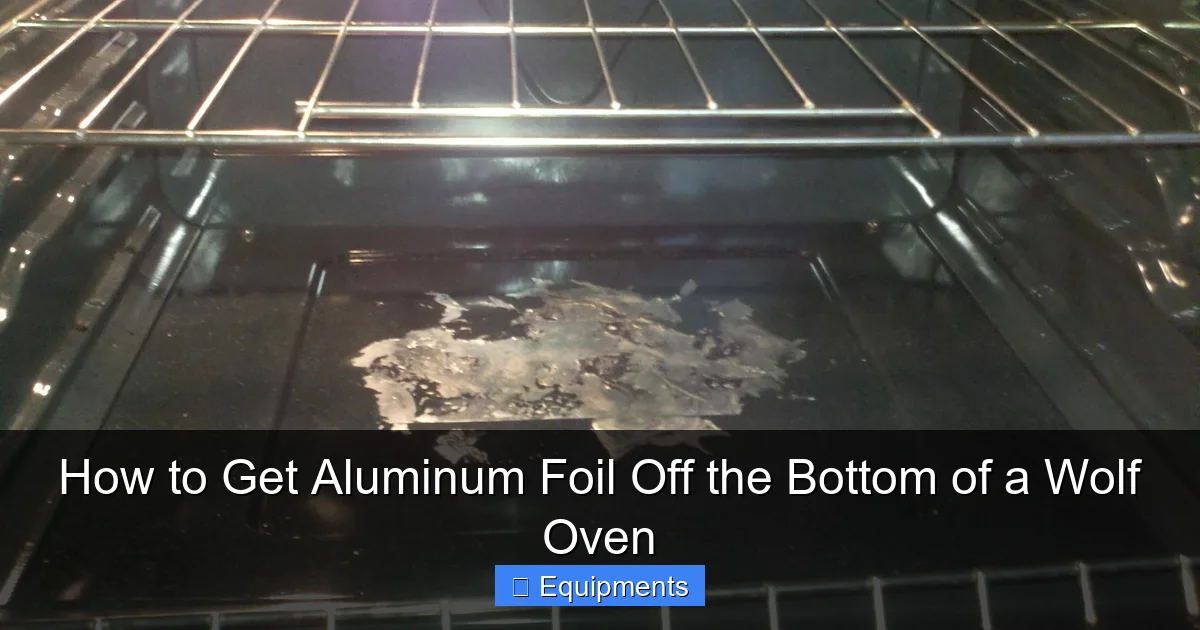
If you catch the foil issue immediately after cooking—meaning the oven is still warm (not hot!) and the foil is soft, pliable, and not yet darkened or carbonized—you have the easiest path forward. Acting quickly is your biggest advantage. The foil has not fully fused or baked on, so it’s more of a stubborn sticker than a welded plate.
Visual guide about How to Get Aluminum Foil Off the Bottom of a Wolf Oven
Image source: 2.bp.blogspot.com
Step 1: The Cool-Down Protocol
Even if the oven just turned off, do not reach in. Turn the oven off, open the door, and let it cool to a safe, warm-but-not-hot temperature. You should be able to comfortably place your hand on the interior wall for a few seconds. This might take 30-60 minutes. Rushing this step risks burns and also means the foil is still too soft and gummy to scrap effectively; it will just smear.
Step 2: Assemble Your Gentle Toolkit
For this stage, you need tools that are effective but have no chance of scratching the enamel. Gather:
- A plastic or nylon spatula or scraper (specifically designed for non-stick surfaces is ideal).
- A soft cloth or microfiber towel.
- Warm, soapy water (a mild dish soap like Dawn is perfect).
- Baking soda (sodium bicarbonate).
- A few ice cubes in a sealed plastic bag (optional, for very soft foil).
Step 3: The Lift and Loosen Technique
Once the oven is cool, dampen a soft cloth in warm, soapy water and lay it over the foil patch. Let it sit for 5-10 minutes. This helps re-hydrate and soften any baked-on food residue holding the foil in place. Now, take your plastic scraper. Hold it at a very low angle, almost parallel to the oven floor. Gently work the thin edge under a corner of the foil. You’re not trying to pry it off in one piece; you’re trying to create a small lift. Once you have a corner up, slowly work the scraper under the foil, applying minimal downward pressure. The goal is to slide the scraper beneath the foil, breaking the adhesive bond. If the foil is being particularly stubborn, place the ice bag on it for 2-3 minutes to contract the metal slightly, which can sometimes break the bond.
Step 4: The Paste Approach
If scraping isn’t fully effective, make a thick paste of baking soda and water. Apply this paste generously over the remaining foil residue and let it sit for 15-20 minutes. Baking soda is a very mild abrasive (Mohs hardness ~2.5, well below porcelain enamel’s ~6-7) and also has slight alkaline properties that can help break down grease. Using your damp cloth or a soft-bristled brush (like a toothbrush), gently rub the paste in a circular motion. The mild abrasion should help lift the last bits. Rinse the area thoroughly with a clean, damp cloth.
Phase Two: The Stubborn, Baked-On Foil Battle Plan
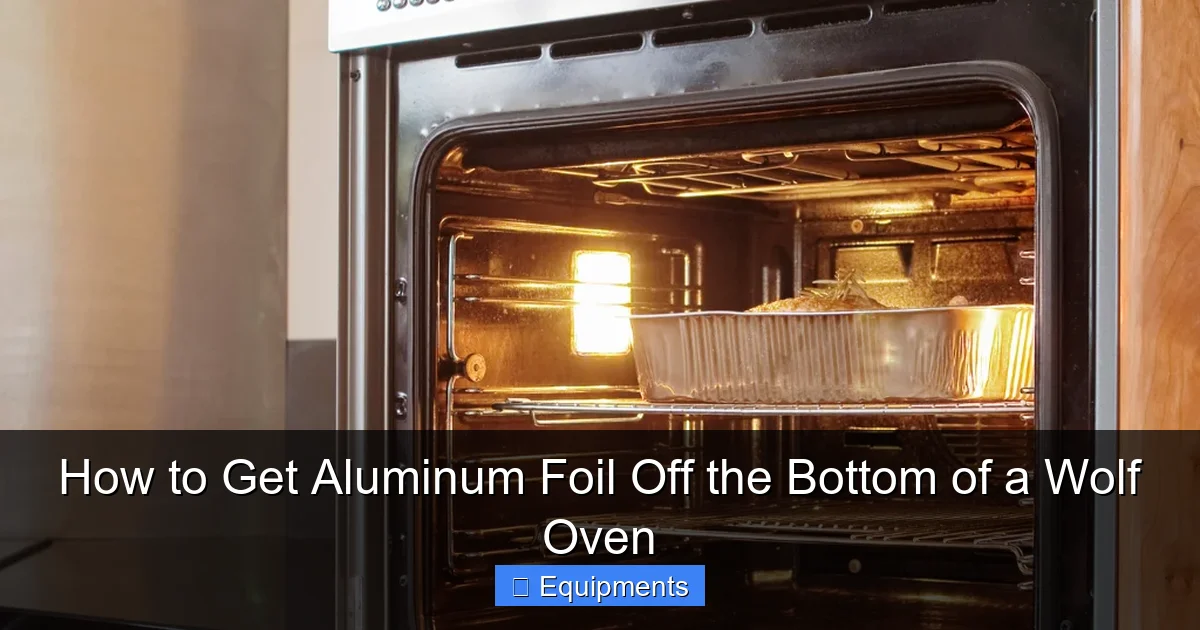
This is the scenario that makes homeowners panic. The foil is dark, hard, possibly carbonized (blackened), and fused solidly to the oven floor. It feels like part of the oven itself. Do not despair, but do prepare for a multi-step process that requires more time and care. Aggression is not the answer; persistence and the right chemistry are.
Visual guide about How to Get Aluminum Foil Off the Bottom of a Wolf Oven
Image source: spicybuffalo.com
Step 1: Confirm Complete Coolness
This is even more critical here. A baked-on foil patch means the oven was likely very hot when the foil failed. Ensure the oven has been completely cold for several hours. Any residual heat will make cleaning products evaporate too quickly and could cause burns.
Step 2: The Heat Reapplication Trick (Use with Extreme Caution)
Paradoxically, a little controlled heat can help. The idea is to reheat the area just enough to slightly soften the carbonized foil residue without getting the oven dangerously hot. Set your Wolf oven to its lowest possible temperature, typically 150°F – 200°F (65°C – 93°C). Let it run for 10-15 minutes. This is not a self-clean cycle. You are just warming the metal. Turn the oven off and let it cool until it is warm to the touch (like a just-washed plate). This slight warmth can make the foil residue slightly more pliable. Test a tiny area with your plastic scraper. If it yields even a little, proceed to the next step while it’s still warm.
Step 3: The Heavy-Duty Paste: Baking Soda and Vinegar
For baked-on messes, we escalate our home remedy. Create a thick paste using baking soda and white distilled vinegar instead of water. The chemical reaction between the alkaline baking soda and the acidic vinegar creates a fizzing action that can help penetrate and lift grime. Apply this paste liberally over the entire foil patch. Cover it with a damp cloth or paper towel to keep it from drying out too quickly. Let it sit for at least 30 minutes, or even up to an hour for really bad cases. The paste will dry and cake on. This is normal. After the time is up, take your plastic scraper or a non-scratch scrub pad (like a blue Scotch-Brite™ Non-Scratch pad) and gently work at the dried paste. The mechanical action of the slightly abrasive, dried baking soda crystals, combined with the chemical action, should start to break down the foil’s bond. Scrub gently. You will likely need to reapply the paste and repeat this process 2-3 times. Patience is key.
Commercial Oven Cleaners: The Nuclear Option (With Extreme Precaution)
When home remedies fail, it’s time to consider a commercial oven cleaner. These products contain powerful chemicals (often sodium hydroxide, or lye, in spray or gel form) designed to dissolve carbonized food and grease. They are effective but also caustic and can damage surfaces if misused. This is your last resort before calling a professional.
Choosing the Right Product
Look for a cleaner specifically labeled as safe for porcelain enamel. Major brands like Easy-Off® have formulas for “Fume Free” or “Oven & Grill Cleaner” that are generally considered safer for enclosed ovens. Avoid any cleaner that comes in a powder form that requires scrubbing; these are often too abrasive. A spray or gel that you apply, let sit, and then wipe is preferable.
The Safe Application Protocol
1. Ventilation: Open windows, turn on your kitchen exhaust fan to its highest setting. Wear rubber gloves and safety glasses.
2. Protect: Lay old towels or newspaper on the floor in front of the oven. Carefully remove any oven racks.
3. Apply: Shake the can well. Hold it 6-8 inches from the oven floor and spray a thick, even coat over the foil patch. Do not spray the heating elements or the oven walls unless the product specifically says it’s safe for all surfaces. For gel formulas, apply with a disposable brush.
4. Wait: Close the oven door and let the cleaner sit for the time specified on the label—usually 10-20 minutes. Do not let it dry out completely. If it starts to dry, mist it lightly with water from a spray bottle.
5. Wipe: Using a stack of paper towels or a cloth you are willing to discard, wipe away the cleaner and the dissolved foil residue. You will see the foil bubble and dissolve. For the final wipe, use a cloth dampened with clean water to remove all chemical traces.
6. Rinse: This is crucial. Take a clean, water-dampened cloth and wipe the entire treated area multiple times. Then, run the oven empty on its lowest setting (200°F) for 15-20 minutes to burn off any lingering chemical odor. Let it cool and wipe again with a damp cloth.
Warning: Never use a commercial cleaner in a self-cleaning oven, and never mix it with other cleaners (especially bleach). The chemical reactions can be dangerous.
Tools of the Trade: What to Use and What to Avoid
Your success hinges on your tool selection. Let’s categorize them clearly.
The “Green Light” Tools (Safe for Porcelain Enamel)
- Plastic/Nylon Scrapers: The workhorse. Look for ones with a razor-thin edge, often sold for cleaning glass cooktops or as “non-scratch” putty knives.
- Silicone Scrapers: Even more flexible than plastic, excellent for getting into slight curves.
- Non-Scratch Scrub Pads: The blue or yellow non-scratch varieties (e.g., Scotch-Brite™ Non-Scratch). Test on an inconspicuous area first.
- Soft-Bristled Brushes: An old toothbrush or a grout brush with nylon bristles is perfect for applying paste and agitating in corners.
- Microfiber Cloths: For wiping, polishing, and applying liquids without lint.
- Baking Soda & Vinegar: Your primary, safest chemical weapons.
The “Red Light” Tools (Absolute No-Nos)
- Any Metal: Razor blades, steel wool (Brillo, SOS pads), metal spatulas, wire brushes. These will scratch instantly.
- Harsh Powdered Cleansers: Comet, Bar Keepers Friend (powder), Ajax. These contain abrasives harder than the enamel finish.
- oven racks in the cleaning process: You can clean racks separately, but don’t use the same aggressive methods on them if they have a non-stick coating. Soak racks in hot, soapy water instead.
- High-Pressure Sprayers: Do not use a pressure washer or a super-concentrated spray that can force cleaner behind the enamel or into seams.
Prevention: Never Again – The Best Cleaning is No Cleaning
Now that you’ve won the battle, let’s win the war. The single best way to deal with foil on the oven bottom is to make it impossible for it to happen.
Embrace the Oven Liner (The Right Way)
Wolf does not recommend placing any covering on the oven bottom that extends beyond the surface, as it can trap heat and cause damage. However, they do approve of using a custom-fit oven liner made of heat-resistant, non-stick material (like a heavy-duty silicone mat or a specific porcelain enamel-safe liner) that sits entirely within the bottom of the oven cavity and does not block any vents. It must be sized precisely for your Wolf oven model. Never use a foil liner or a generic, oversized mat. The liner should be removed for cleaning and never used during self-clean cycles.
Rethink the Foil’s Purpose
Why are you using foil? To catch drips and spills. Instead:
- Place a baking sheet or a shallow roasting pan on the rack below the food you are cooking. This catches drips without ever touching the oven floor.
- For pizzas or breads baked directly on the floor (if your model allows), use a pizza stone or baking steel. These retain heat and are designed for direct oven floor contact.
- If you must line a baking sheet, do it with parchment paper, not foil, and ensure the sheet has a rim to contain any overflow.
Routine Maintenance
Make a habit of wiping the oven floor after it cools following messy bakes or roasts. A quick wipe with a damp cloth and a drop of dish soap prevents buildup. A monthly light cleaning with the baking soda paste method keeps the surface pristine and makes any future messes easier to tackle.
Conclusion: Patience, Respect, and the Right Tools
Getting aluminum foil off the bottom of your Wolf oven is a rite of passage, but it doesn’t have to be a disaster. The process is a lesson in appliance stewardship. It teaches you that your high-performance oven deserves a gentle, thoughtful approach. The core philosophy is simple: cool, gentle, patient. Start with the cool-down, escalate gently from plastic scraper to baking soda paste, and only consider chemical cleaners as a final, carefully managed option. Understand that you are protecting a significant investment. That beautiful, dark, spotless oven floor is a hallmark of the Wolf brand, and preserving it is worth the extra effort. By following these steps, you can transform that melted foil from a source of dread into just another cleaning challenge you’ve mastered. And by adopting the prevention strategies outlined, you can ensure that the next time you open your oven door, you see only culinary success, not a shiny, metallic reminder of a close call. Your Wolf oven is built to last a lifetime; with a little care, you can keep it looking and performing like new for decades to come.
Frequently Asked Questions
Can I use a razor blade scraper on my Wolf oven floor?
No. Razor blades and any metal scrapers will almost certainly scratch the porcelain enamel finish. Even if you get the foil off, you will create permanent, visible scars that can trap grime. Always use plastic or nylon tools.
Will the self-cleaning cycle get rid of the foil?
Do not run the self-clean cycle with aluminum foil on the floor. The extreme heat (800°F-900°F) will not necessarily remove the foil and could cause it to fuse more permanently or even smoke dangerously. The self-clean cycle is designed for organic food residue, not metal. It’s best to remove the foil manually first.
Is it safe to use Easy-Off or other commercial oven cleaners inside my Wolf oven?
Yes, but with extreme caution and only as a last resort. Use only a fume-free or oven-specific formula labeled safe for porcelain enamel. Apply precisely, avoid heating elements, and rinse thoroughly multiple times afterward. Always ventilate the area and wear gloves. Test on a small, inconspicuous area first if possible.
My foil is black and carbonized. Is there any hope?
Yes, but it requires patience. The baked-on, carbonized layer is the toughest. You will likely need to repeat the baking soda/vinegar paste application and gentle scrubbing process several times. The controlled low-heat re-warming trick can also help soften it. If multiple attempts show no progress, it may be time to consult a Wolf technician.
How can I prevent this from happening again?
Never line the oven bottom directly with foil. Instead, place a baking sheet on the rack below your food to catch drips. If you need a liner, invest in a custom-fit, heat-resistant silicone or enamel-safe liner that sits within the oven cavity and does not block vents. Regular light cleaning after messy cooks also prevents buildup.
What should I do if I accidentally scratch the oven floor while trying to remove the foil?
Unfortunately, deep scratches in the porcelain enamel are permanent and cannot be easily repaired. For very light surface scratches, a specialized porcelain enamel polish might reduce their appearance, but results vary. The best course is to stop cleaning immediately if you feel resistance that might cause a scratch and switch to a gentler method. For significant damage, contact Wolf Customer Care to discuss your repair options, which may include panel replacement.
