Loose or falling kitchen tiles are a common but fixable problem. The issue usually stems from moisture damage, poor original installation, or structural shifts. You can often repair the affected tiles yourself with the right tools and careful execution, addressing both the loose tiles and the underlying cause to prevent recurrence. However, extensive damage or suspected structural issues require a professional assessment to ensure a safe, lasting fix.
Key Takeaways
- Identify the Root Cause: Fixing tiles is only a temporary solution if you don’t address the underlying problem, which is most often moisture intrusion or failed adhesive.
- Safety First: Always wear safety glasses and gloves. Remove loose tiles carefully to avoid damaging surrounding ones or causing injury from sharp edges.
- Proper Prep is Non-Negotiable: Thoroughly cleaning and possibly scoring the old substrate is critical for the new adhesive to bond properly and prevent re-failure.
- Match Your Materials: Use a high-quality, polymer-modified thinset mortar suitable for your specific substrate (like cement board or plaster) and tile type.
- Grout is Not the Glue: Understand that grout holds tiles in place laterally but does not adhesive them to the wall. The failure is always in the thinset or substrate.
- Prevent Future Issues: Control kitchen humidity, ensure proper ventilation, and address any water leaks promptly to protect your repaired and surrounding tiles.
- Know When to Call a Pro: If the damage is widespread, the substrate is soft or crumbling, or you suspect a leak behind the wall, hire a qualified tile setter or contractor.
📑 Table of Contents
- Introduction: Your Kitchen Wall is Talking to You
- Understanding the Culprit: Why Do Tiles Detach from the Wall?
- Essential Tools and Materials for the Job
- The Step-by-Step Repair Process: From Loose to Luxurious
- Prevention: Keeping Your Tiles firmly in Place for the Long Haul
- When to Call a Professional Tile Installer
- Conclusion: A Solid Repair is Within Your Reach
Introduction: Your Kitchen Wall is Talking to You
You’re wiping down the countertop, and you hear it—a faint, hollow tap-tap from the backsplash. Or worse, you see it: a tile corner has lifted, or a whole row is developing a noticeable bulge. That sound and sight are your kitchen wall sending a clear distress signal. Tiles coming away from the kitchen wall are more than just an eyesore; they’re a symptom of a failed bond between the tile, the adhesive (thinset mortar), and the wall substrate behind it. Left unchecked, a few loose tiles can lead to water infiltration, damage to the wall cavity, and a cascade of failures that turns a simple repair into a major renovation.
The good news is that in many cases, especially with isolated or moderate damage, you can successfully fix tiles coming away from the kitchen wall yourself. This comprehensive guide will walk you through every step, from diagnosing exactly why your tiles are failing to executing a durable, long-lasting repair. We’ll cover the essential tools, the meticulous preparation that makes or breaks the job, and the application techniques that ensure your tiles stay put for years to come. Let’s get your kitchen back to looking sharp and secure.
Understanding the Culprit: Why Do Tiles Detach from the Wall?
Before you buy a single tube of adhesive, you must play detective. The cause of the failure dictates the correct repair method. Applying new thinset over a compromised substrate is like putting a bandage on a broken bone—it won’t hold. Here are the most common reasons tiles come loose from a kitchen wall.
Visual guide about How to Fix Tiles Coming Away from Kitchen Wall
Image source: thekitchenix.com
The Primary Offender: Moisture and Water Damage
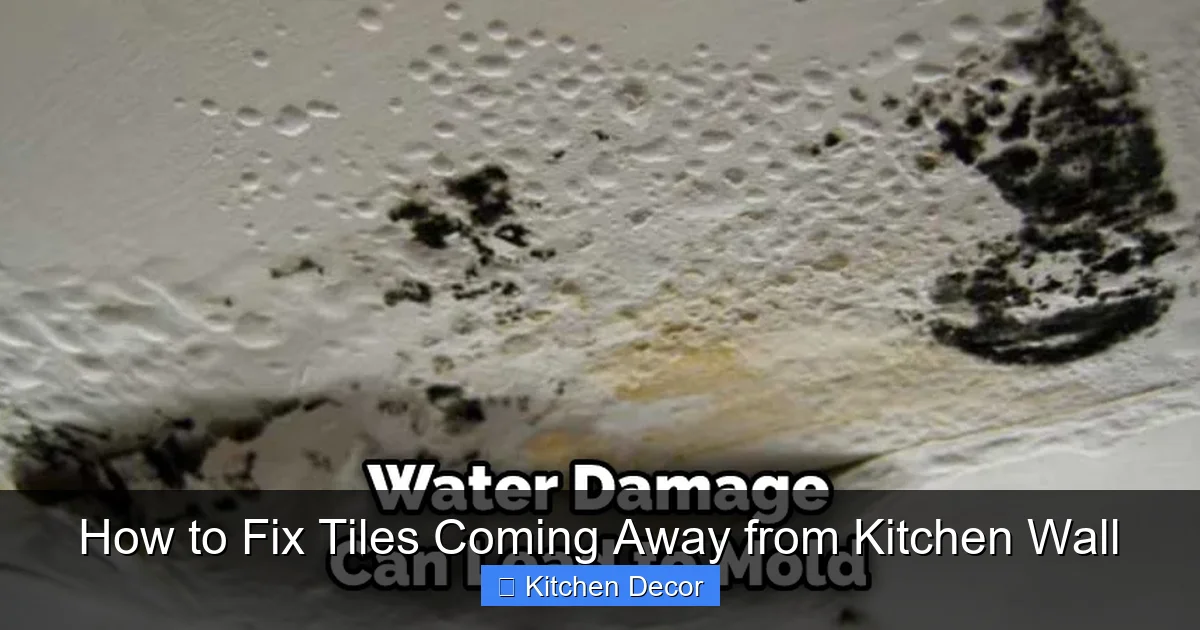
Kitchens are humid environments. Steam from the sink and dishwasher, splashes from cooking, and condensation can all find their way behind the tile if the installation wasn’t perfectly sealed or if grout lines are cracked. Once water penetrates, it can saturate the substrate (the wall material behind the tile).
- On Plaster or Drywall: These materials are not water-resistant. They absorb moisture, soften, and lose their structural integrity. The thinset bond fails as the substrate turns to mush.
- On Cement Board: While cement board is water-resistant, prolonged, direct water exposure can still cause issues, especially at seams or if the board was improperly installed with gaps that channel water behind it.
Poor Original Installation: The “It Wasn’t Me” Defense
Sometimes, the problem is with the initial job. This is common in older homes or with DIY installations. Look for these red flags:
- Insufficient Adhesive: Tiles set with spot-bonding or insufficient “coverage” (less than 95% for floors, 100% for wet areas like backsplashes) have less surface area to grip. The unsupported tile can flex and pop.
- Wrong Adhesive: Using a pre-mixed “mastic” adhesive in a wet area (like behind a sink) is a classic mistake. Mastic can re-emulsify (turn back into a paste) when exposed to water, completely losing its bond. Only a polymer-modified thinset mortar should be used in kitchens.
- Unprepared Substrate: A dusty, oily, or glossy surface prevents proper adhesion. Substrates must be clean, sound, and sometimes “scratch-coated” with a thin layer of thinset to create a mechanical key.
Structural Movement and Vibration
Your house isn’t a static object; it breathes and settles. Significant movement can crack tile and grout and shear the bond. Causes include:
- Foundation Settlement: More common with whole-house issues, but can manifest in one wall.
- Thermal Expansion: Inadequate expansion joints (especially at corners and changes in plane) don’t allow for normal expansion/contraction of the tile assembly, leading to stress and failure.
- Impact or Vibration: Heavy objects striking the wall (like a cabinet door) or persistent vibration from nearby appliances can work tiles loose over time.
Essential Tools and Materials for the Job
Gathering your supplies before you start is crucial for a smooth, efficient repair. Rushing to the hardware mid-job leads to poor decisions and mistakes. Here’s your checklist.
Visual guide about How to Fix Tiles Coming Away from Kitchen Wall
Image source: thekitchenix.com
Tools of the Trade
- Safety Gear: Safety glasses, heavy-duty gloves (leather or cut-resistant), and a dust mask. Tile shards and dust are hazardous.
- Removal Tools: A flat, sturdy putty knife (a 1-inch width is versatile). For stubborn tiles, a tile nipper or rotary tool with a diamond wheel can carefully cut through grout lines. A hammer and chisel (cold chisel) can be used cautiously for larger sections but risk damaging adjacent tiles.
- Application Tools: A notched trowel (size depends on tile size; 1/4″ x 1/4″ or 3/8″ x 1/4″ square notch is common for walls). A rubber grout float. A margin trowel for mixing and applying in tight spots. A grout sponge and a large bucket for water.
- Cleaning Supplies: A shop vacuum with a brush attachment, rags, trisodium phosphate (TSP) substitute or a heavy-duty degreaser/cleaner, and a wire brush for stubborn residue.
- Mixing Tool: A powerful drill with a mixing paddle is essential for getting a lump-free, consistent thinset mix. A mixing bucket (5-gallon size is handy).
Materials You’ll Need
- Polymer-Modified Thinset Mortar: This is your adhesive. Buy a reputable brand (like MAPEI, Custom Building Products, Laticrete). For kitchen walls, a “Type N” or unmodified thinset is often acceptable on cement board, but a “Type S” (polymer-modified) offers superior bond strength and flexibility, making it the safer choice for most repairs, especially over plaster or where moisture is a concern. Follow the manufacturer’s instructions for mixing.
- Grout: Sanded grout for joints 1/8″ or wider; unsanded (epoxy or cement-based) for narrower joints. Match the color as closely as possible to existing grout, or consider re-grouting the entire affected area for uniformity.
- Tile: If you have spare tiles from the original installation, use them. If not, you’ll need to find an exact match. This can be challenging. Take a sample to a tile supplier. Be prepared that your replacement tile might not be an exact color match due to manufacturing variances or dye lot differences.
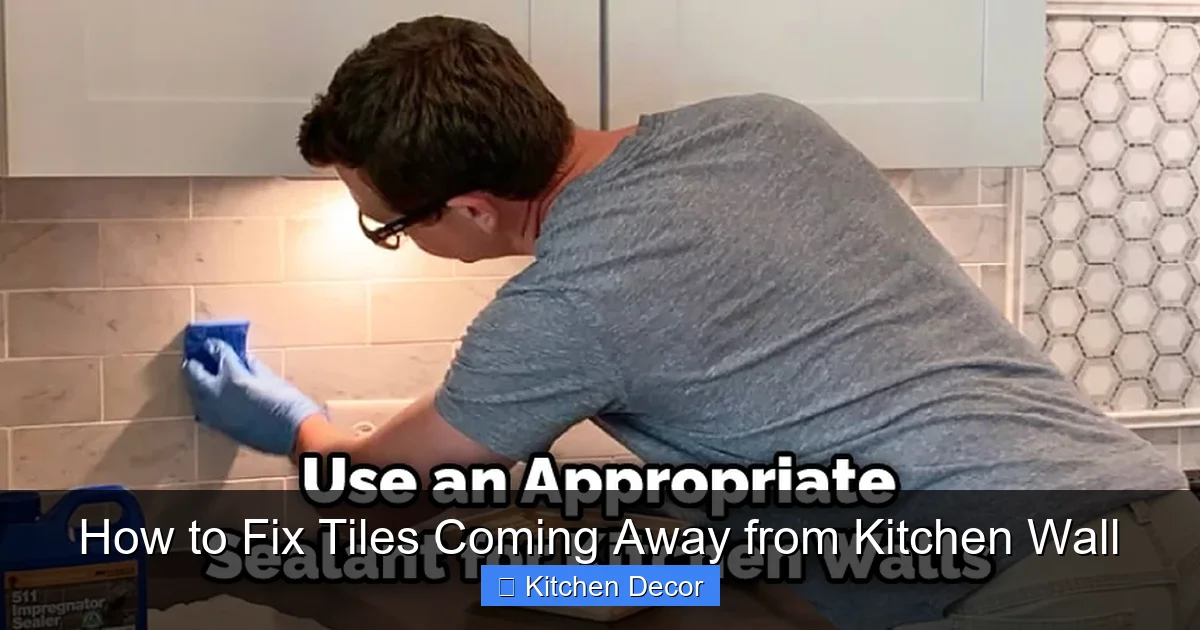
- Sealant: 100% silicone caulk in a color that matches your grout or tile. This is for the top edge where the backsplash meets the countertop and at inside corners. This is a flexible, waterproof joint that prevents future moisture ingress.
The Step-by-Step Repair Process: From Loose to Luxurious
Patience and precision are your best allies here. Rushing the preparation or adhesive application is the number one cause of repair failure. Follow these steps methodically.
Visual guide about How to Fix Tiles Coming Away from Kitchen Wall
Image source: thekitchenix.com
Step 1: Assessment and Safe Removal of Loose Tiles
First, confirm which tiles are truly loose. Tap each tile in the suspect area with the handle of your putty knife. A clear, hollow sound indicates a failed bond. A solid, high-pitched sound means it’s still well-adhered.
To remove a loose tile, work slowly. Insert your putty knife behind the tile at a low angle. Gently tap the handle with a hammer to pry the tile away from the wall. The goal is to remove the tile whole if possible, but it will often break. This is okay. Wear your gloves and goggles. If a tile is stubborn, you may need to score the grout lines around it with a rotary tool to break the bond to its neighbors. Do not use excessive force that could dislodge adjacent, sound tiles. Remove all loose tile and any remaining thin, flaking adhesive from the wall substrate.
Step 2: Substrate Preparation – The Most Critical Step
This step determines the success or failure of your entire repair. The substrate (the wall behind the tile) must be perfectly sound, clean, and ready to accept new adhesive.
- Remove All Old Thinset: Scrape and chisel away every bit of the old, failed mortar from the wall. It should feel solid and uniform. Any crumbly or soft spots indicate damaged substrate.
- Assess and Repair the Substrate:
- If it’s Cement Board: Scrub the area with a wire brush to remove dust and loose particles. Vacuum thoroughly. If the board is damaged (soft, crumbling), you must cut out the damaged section and replace it with a new piece of cement board, screwed securely to the studs. This is a bigger job but non-negotiable for a lasting fix.
- If it’s Plaster or Drywall: This is trickier. Any soft, water-damaged plaster or drywall must be cut out and replaced. feather the edges of the new patch with setting-type joint compound for a smooth transition. For minor, sound areas, a “scratch coat” is essential.
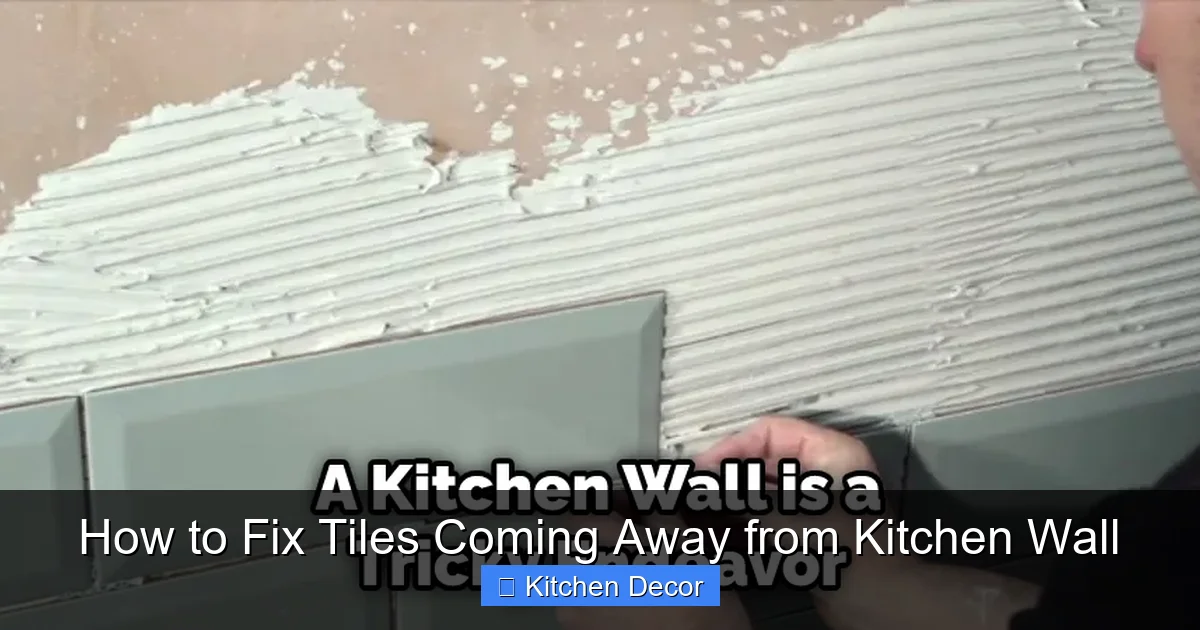
- Apply a Scratch Coat (for plaster/drywall or smooth surfaces): Mix a small batch of your thinset to a creamy, peanut butter consistency. Using the flat side of your trowel, apply a thin (1/16″-1/8″) layer to the prepared substrate. Then, while it’s still wet, drag the notched side of your trowel through it to create grooves. This creates a mechanical key for the next layer of thinset to lock into. Let this scratch coat cure until it’s firm but not fully dry (usually 1-2 hours, follow product directions). It should be damp to the touch.
Step 3: Mixing and Applying the Thinset
Follow the manufacturer’s instructions on your thinset bag exactly. Use cool water and a drill with a mixing paddle for a uniform, lump-free mix. Let the mixed thinset “slake” (rest) for the time specified, usually 5-10 minutes, then remix briefly. It should have the consistency of smooth, creamy peanut butter—not too stiff, not too runny.
Using your notched trowel, scoop up a generous amount of thinset. Apply it to the wall (not the tile) in the repaired area. Spread it and then comb it with the notches to create uniform ridges. The size of the notch determines the thickness of the adhesive bed; a 1/4″ x 1/4″ notch is standard for wall tile up to 8″x8″.
Key Technique: After combing the thinset with the notches, smooth the surface flat with the flat edge of the trowel. This is called “back-buttering” the wall. Then, press your replacement tile firmly into the thinset. Give it a slight twist (about 1/8 turn) and press firmly to collapse the ridges and ensure full contact. The tile should sit firmly without wobbling. Use plastic spacers between tiles to maintain even grout joints.
Step 4: Grouting and Finishing
Allow the thinset to cure fully. This is critical. Check the bag—typically 24-72 hours for full strength, but it can often take light traffic after 24 hours. Do not grout prematurely.
Mix your grout according to instructions. Using a rubber float, press the grout firmly into the joints at a 45-degree angle, holding the float at a 90-degree angle to the tiles. Scrape off excess grout from the tile faces with the float held flat. After the grout has begun to set (20-30 minutes, it will look hazy), wipe the tiles with a damp grout sponge, rinsing frequently. Use a clean, dry microfiber cloth to polish the tiles after the grout haze sets. Cure the grout per manufacturer instructions, keeping it from drying too quickly (spray with a light mist if in a hot, dry room).
Finally, apply a continuous bead of 100% silicone caulk where the backsplash meets the countertop and at any inside corners (where two walls meet). Tool the bead smooth with a wetted finger or caulk tool. This flexible joint is vital for movement and water prevention.
Prevention: Keeping Your Tiles firmly in Place for the Long Haul
You’ve just fixed the problem. Now, protect your investment. The best repair is the one you never have to do again.
Control Kitchen Humidity and Moisture
Use your range hood vent fan every time you cook, and for 10-15 minutes after. This removes steam at its source. Ensure the vent actually exhausts outside, not into the attic. Wipe up splashes and condensation from the backsplash immediately, especially behind the sink. Check under the sink regularly for leaks in the plumbing.
Maintain Your Grout and Caulk
Grout is porous and can crack over time, allowing water behind the tile. Inspect grout lines annually. Re-seal sanded cement grout with a penetrating grout sealer every 1-2 years. Caulk will shrink and crack; remove and replace it every 3-5 years or at the first sign of failure. This is your first line of defense against water getting behind the tile.
Ensure Proper Ventilation
If your kitchen doesn’t have an effective exhaust fan, consider installing one. This is one of the most effective long-term strategies for preventing moisture-related tile failures throughout the entire kitchen environment.
When to Call a Professional Tile Installer
While many repairs are DIY-friendly, some situations demand the expertise of a professional tile setter or contractor. Recognize these signs to avoid a costly, damaging mistake.
Signs of Substrate Failure or Structural Issues
If, during your removal, you discover that the substrate itself is soft, spongy, crumbling, or has large sections that move when pushed, the problem is far beyond the tile. This indicates significant water damage or structural failure. A pro will need to cut out the damaged section, address any hidden leaks, and rebuild the wall with proper cement board or masonry. Attempting to tile over a failing substrate is a guaranteed repeat failure.
Widespread or Complex Damage
If a large section of your backsplash (more than 25-30%) is loose, or if the failure pattern suggests a systemic installation error (like entire rows popping off), a piecemeal repair will look mismatched and be structurally weak. A professional can assess whether a full re-tiling is more cost-effective and will ensure a uniform, solid installation. Similarly, if the tiles are very small (mosaic), very large, or are a delicate material like natural stone, professional handling and specialized adhesives are often required for a good result.
You Suspect a Leak Behind the Wall
Is there a musty smell? Are the walls near the backsplash, especially on the other side of the wall (in an adjoining room or cabinet), showing water stains, peeling paint, or swelling? This is a red flag for a hidden plumbing leak or a failed seal behind the tile. A professional can use moisture meters and thermal imaging to locate the source and fix it before you repair the tile. Fixing the tile without fixing the leak is pouring water (and money) down the drain.
Conclusion: A Solid Repair is Within Your Reach
Fixing tiles that are coming away from your kitchen wall is a project that rewards careful, methodical work. The core principle is simple but profound: success depends 90% on preparation. By taking the time to correctly diagnose the cause, meticulously remove all failed materials, and properly prepare the substrate, you create a foundation for a repair that will last as long as the original installation. Remember to use the right materials—a quality polymer-modified thinset and proper caulk—and respect the curing times. A few hours of focused effort can restore the beauty and integrity of your kitchen’s most hardworking surface. And by adopting the prevention habits we’ve discussed, you’ll ensure that the next time you hear that hollow tap, it’s because you’re installing a new tile, not rescuing an old one.
Frequently Asked Questions
Can I just regrout the loose tiles without removing them?
No. Regrouting only addresses the grout joints, which are not the adhesive holding the tile to the wall. If a tile is loose, the bond between the tile and the thinset mortar has already failed. You must remove the tile, scrape off the old adhesive, and reinstall it with fresh thinset. Regouting over a loose tile is a temporary cosmetic fix that will fail quickly.
How long does a tile repair like this typically take?
For a small area (a few tiles), the active work—removal, substrate prep, setting tiles—can be done in a half-day to a full day. However, you must account for curing times: thinset typically needs 24 hours before grouting, and grout needs another 24-72 hours before full exposure to water and cleaning products. So, from start to a fully functional backsplash, plan on 2-3 days.
Is it okay to use the old tile that I removed?
Often, yes, if it wasn’t damaged during removal. Clean off all old thinset from the back of the tile thoroughly. Inspect it for cracks or chips. A tile with a clean, sound back and no visible damage can be reused. However, matching it perfectly to existing tiles can be difficult due to manufacturing variances, so be prepared for a slight color or texture difference.
What’s the difference between mastic and thinset, and why does it matter?
Mastic is a pre-mixed, organic adhesive that is easy to use but water-sensitive. It can lose its bond when exposed to steam and water, making it unsuitable for kitchen backsplashes (a “wet area”). Thinset is a powder you mix with water or a latex additive. It’s a cement-based mortar that is water-resistant and provides a much stronger, more durable bond, especially in humid environments. For any tile repair in a kitchen, always use a polymer-modified thinset.
How much will this repair cost if I do it myself versus hiring a pro?
DIY costs are primarily for materials: thinset ($20-$40/bag), grout ($10-$25), maybe a new tile ($2-$15 each), and sealant. For a small repair, this can be under $100. Hiring a professional typically charges by the hour or by the project, with rates from $50-$100+ per hour. A professional repair for a small section might cost $200-$500+, depending on location and complexity, but includes expertise, warranty on workmanship, and often a better aesthetic match.
My entire backsplash feels loose. Can I fix this without removing every tile?
p>If the entire installation feels hollow and detached from the wall, this indicates a widespread failure of the original adhesive bond, likely due to moisture or poor installation. Unfortunately, there is no effective “injection” method to re-adhere tiles in place. The only reliable solution is to remove all the tiles, completely strip the old thinset, repair or replace the substrate if damaged, and then reinstall the entire backsplash. This is a major project best handled by a professional if you are not experienced.