Dehydrating vegetables in your oven is a simple, cost-effective way to preserve seasonal produce and create healthy snacks. By using low heat and proper airflow, you can transform fresh veggies into shelf-stable chips, powders, and ingredients for soups. This guide walks you through every step, from selecting the best vegetables to perfect storage, ensuring delicious results every time.
Key Takeaways
- Oven dehydration is accessible: You don’t need a specialty dehydrator; your conventional oven can do the job perfectly with the right technique.
- Uniform slicing is critical: Cutting vegetables to consistent thickness (usually 1/4-inch) ensures even drying and prevents some pieces from burning while others remain moist.
- Low and slow is the rule: Temperatures between 125°F and 200°F (with 135°F-150°F being ideal) slowly remove moisture without cooking the vegetables.
- Airflow cannot be compromised: Keeping the oven door slightly ajar (or using a wooden spoon to prop it) is essential to let moist air escape and prevent steaming.
- Conditioning is a non-negotiable step: After drying, letting vegetables sit in a jar for a week allows any remaining moisture to equalize, preventing spoilage in storage.
- Not all veggies are equal: Water-rich vegetables like cucumbers and zucchini dehydrate beautifully, while high-starch veggies like potatoes require blanching first for best results.
- Storage determines shelf life: Properly dried and conditioned vegetables stored in airtight containers in a cool, dark place can last 6-12 months.
📑 Table of Contents
- Why Dehydrate Vegetables? The Delicious and Practical Benefits
- Choosing the Best Vegetables for Oven Dehydration
- Essential Preparation: Washing, Slicing, and Pretreating
- Setting Up Your Oven for Dehydration: Temperature and Airflow
- The Dehydrating Process: Step-by-Step from Tray to Storage
- Conditioning and Storage: The Final Steps for Long-Term Success
- Common Pitfalls and Pro Tips for Flawless Results
- Conclusion: Your Oven is a Powerful Preservation Tool
Why Dehydrate Vegetables? The Delicious and Practical Benefits
Have you ever wondered what to do with that bumper crop of zucchini from your garden or the amazing sale on bell peppers at the farmer’s market? Dehydrating is one of the oldest and most efficient methods of food preservation, and it’s something you can easily master with your own oven. When you dehydrate vegetables in the oven, you’re essentially removing the water that bacteria and molds need to grow, locking in flavor, color, and nutrients in a lightweight, compact form. This process transforms fresh, perishable produce into versatile ingredients that can last for months, even up to a year, without any electricity for storage.
The benefits are huge. You create incredibly healthy snacks—think crispy kale chips or savory zucchini chips—that are far cheaper and free of preservatives compared to store-bought versions. Dehydrated veggies are perfect for backpacking meals, adding a nutrient boost to soups and stews, or making your own spice blends and vegetable powders. It reduces food waste dramatically, allowing you to enjoy your summer harvest all winter long. Plus, the process is wonderfully forgiving and connects you to your food in a tangible way. There’s a deep satisfaction in taking a simple, fresh carrot and turning it into a shelf-stable, delicious ingredient you grew or bought yourself.
The Science Behind Successful Dehydration
At its core, dehydration is about moisture removal. Fresh vegetables can be up to 95% water. Our goal is to reduce their moisture content to between 10-20%, a level where microbial growth is impossible. The oven provides a controlled, low-heat environment that evaporates this water slowly. Using too high a heat will cook the exterior, creating a hard “case” that traps moisture inside, leading to spoilage. That’s why the mantra is always low and slow. The gentle heat draws moisture to the surface where it evaporates, and proper airflow (from an open oven door) carries that moist air away. This continuous cycle is what yields a crisp, dry, and perfectly preserved final product.
Choosing the Best Vegetables for Oven Dehydration
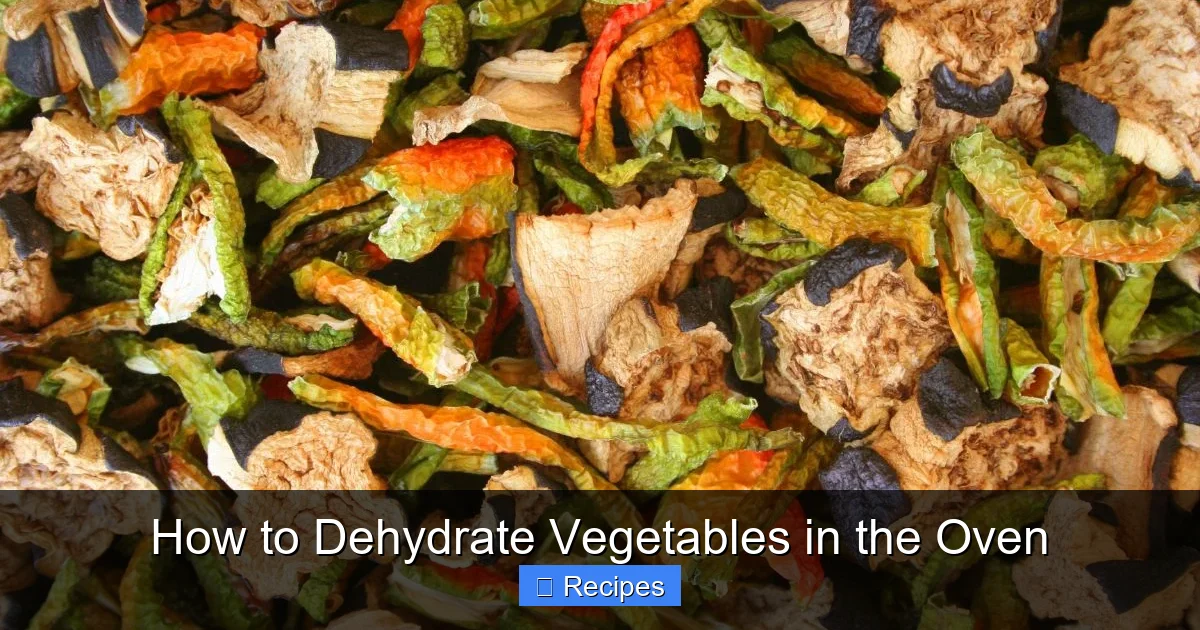
Not all vegetables are created equal when it comes to drying. Some are practically made for it, while others need a little extra prep. The best candidates are those with lower starch and sugar content and a good texture. Water-rich vegetables like cucumbers, zucchini, mushrooms, and tomatoes dehydrate exceptionally well and become wonderfully crisp or leathery. Root vegetables like carrots, beets, and sweet potatoes are excellent, but they almost always require blanching first to soften cell walls and speed up drying. Leafy greens like kale and spinach are dehydration superstars, turning into crispy chips in just a few hours.

Visual guide about How to Dehydrate Vegetables in the Oven
Image source: dehydratedcookbook.com
Here’s a practical cheat sheet for your first attempts:
- Beginner-Friendly (Easy & Reliable): Zucchini, yellow squash, mushrooms, bell peppers (all colors), onions, green beans, cherry tomatoes, kale, spinach.
- Intermediate (Require Blanching): Carrots, broccoli, cauliflower, asparagus, peas, corn, sweet potatoes, regular potatoes.
- More Challenging (High Water or Sugar): Cucumbers (can become brittle), eggplant (needs careful slicing), pumpkin (very thick, requires long time).
- Avoid for Now: Avocados (too fatty), lettuce (too watery and fibrous).
Always choose vegetables that are at their peak freshness—firm, unbruised, and ripe. You are concentrating their flavor, so starting with the best quality is paramount. If you have a surplus from your garden or a great deal at the market, that’s your perfect time to dehydrate.
Understanding Vegetable Water Content and Drying Time
The water content directly impacts how long a vegetable will take to dry. A general rule: the higher the water content, the longer the drying time, but also the more dramatic the texture change. A slice of zucchini, which is over 95% water, will shrink dramatically and become crisp. A carrot slice, with about 88% water, will shrink less and become more leathery or brittle. A thick slice of potato might only shrink by 30% but requires hours of drying to become brittle throughout. This is why uniform slicing is so important—it ensures all pieces lose moisture at a similar rate.
Essential Preparation: Washing, Slicing, and Pretreating
This is the most important step for success. Rushed preparation leads to uneven drying and poor storage life. The goal is to get every piece of vegetable to the same thickness so they finish drying at the same time. Invest in a good mandoline slicer or a sharp chef’s knife. For most vegetables, a slice between 1/8-inch and 1/4-inch thick is ideal. Thinner slices dry faster but can burn more easily; thicker slices take much longer and risk having a moist center.
Visual guide about How to Dehydrate Vegetables in the Oven
Image source: dehydratedcookbook.com
Washing and Trimming: Thoroughly wash all produce. Trim away any bruises, blemishes, or tough stems. For vegetables like broccoli or cauliflower, cut into uniform florets. For root vegetables, peel them if the skin is tough or waxy (like store-bought potatoes or carrots). For items like green beans, trim the ends.
The Critical Step: Blanching (When Needed) For many vegetables, especially those from the root and cruciferous families, blanching is essential. Blanching—briefly boiling or steaming followed by an ice bath—serves two purposes: it destroys enzymes that can cause loss of color and flavor during storage, and it softens the cell walls, allowing moisture to escape more easily during drying. Without blanching, these veggies can dry into a tough, leathery state that never gets fully crisp and may rehydrate poorly. A quick guide: boil or steam for 2-5 minutes depending on thickness, then plunge into ice water to stop the cooking. Pat completely dry with towels before arranging on trays.
Pretreating for Color Retention: To prevent apples, pears, or even potatoes from browning, you can give them a quick dip in a solution of 1 tablespoon of lemon juice or ascorbic acid (Vitamin C powder) per cup of water for 3-5 minutes. Drain and pat dry. This isn’t strictly necessary for most vegetables but can be a nice touch for aesthetic appeal.
Tips for Perfect Slicing
Use a mandoline for perfect, uniform slices of zucchini, carrots, or potatoes. If slicing by hand, try to make each piece as similar in size and shape as possible. For irregular vegetables like broccoli, aim for florets of the same size. For mushrooms, slice them to the same thickness. Consistency is king.
Setting Up Your Oven for Dehydration: Temperature and Airflow
This is where the magic—and the main difference from a dedicated dehydrator—happens. Your oven’s lowest temperature setting is often still too hot. Most conventional ovens have a minimum of 170°F or 200°F. You need to get your oven to a steady temperature between 125°F and 150°F (52°C to 65°C). Many modern ovens have a “Warm” setting (often 150°F-200°F) or a “Dehydrate” setting—use that if you have it. If not, you’ll need to use a little trick.

Visual guide about How to Dehydrate Vegetables in the Oven
Image source: runningtothekitchen.com
Temperature Control: The best method is to use an oven thermometer. Place it on a rack to get an accurate reading. Set your oven to its lowest possible temperature, often 170°F or 200°F. Once preheated, you may need to turn it off and on briefly to maintain a temperature in the 135°F-150°F range. This requires some babysitting at first. A convection or fan-assisted oven is a huge advantage here, as the circulating air mimics a dehydrator’s function and allows for a slightly higher temperature (up to 150°F) without risk of “cooking.”
Airflow is Non-Negotiable: Moisture must escape. You must prop your oven door open at least 2-4 inches. You can use a wooden spoon, a rolled towel, or a specialized oven door prop. This allows the humid air to vent out and be replaced by drier air. Without this, your vegetables will steam, not dehydrate, and will spoil quickly. The open door also means your oven will take longer to heat and will lose heat when you open it to rotate trays, so be patient.
Tray Setup: Use rimless baking sheets (like cookie sheets) for best airflow. Line them with parchment paper or reusable silicone baking mats. Do not use foil, as it can react with acidic vegetables. Arrange your vegetable slices in a single layer with no touching or overlapping. If pieces touch, they will steam together and won’t dry properly. Leave space between slices for air to circulate. You will likely need to work in batches unless you have a large oven and multiple racks.
Oven vs. Dehydrator: The Honest Comparison
An electric dehydrator is purpose-built: it has a precise, low temperature range (usually 95°F-165°F) and a powerful fan that circulates air evenly. It’s hands-off and energy-efficient for long runs. Your oven is a multi-tool. It can achieve the same result but requires more monitoring of temperature (you may need to turn it on/off) and mandatory door propping. It also uses more energy to heat a large cavity. However, if you don’t have a dehydrator and want to try the process, the oven is a perfectly viable and effective starting point. The results, with careful attention, are just as good.
The Dehydrating Process: Step-by-Step from Tray to Storage
Now for the hands-on part. With your vegetables washed, sliced, blanched (if needed), and patted dry, and your oven preheating to the target range with the door propped, you’re ready.
- Load the Trays: Arrange your vegetable slices on the prepared baking sheets in a single, non-overlapping layer. Place the sheets on the oven racks, leaving at least 2 inches of space between racks for air circulation.
- Insert and Monitor: Place the racks in the oven. Set a timer for the minimum expected time (see chart below). Your oven temperature will fluctuate. Use your thermometer to check it periodically and adjust the oven dial as needed to keep it in the 125°F-150°F range. Do not rely on the oven’s digital display alone.
- Rotate Trays: Every 1-2 hours, rotate the baking sheets. Swap the position of the top and bottom racks, and also turn each sheet front-to-back. This compensates for hot spots in your oven and ensures even drying.
- Check for Doneness: Drying times vary wildly based on vegetable type, slice thickness, humidity, and your oven. The best test is the “bend test”. Remove a piece, let it cool for a minute (it will crisp up slightly as it cools), and try to bend it. Properly dried vegetables should be:
- Crisp/Chip-like (e.g., kale, zucchini, mushrooms): Snap cleanly. No flexibility.
- Leathery/Tough (e.g., carrots, green beans, peas): Can be bent but will snap rather than bend smoothly. Should not be pliable like a raisin.
- Powdery (for herbs or future grinding): Should crumble easily between your fingers.
There should be no visible moisture pockets when you break a piece in half. The center should feel dry, not cool or damp.
- Cool Completely: Once a batch seems done, remove the trays from the oven and let the vegetables cool completely on the trays for 30-60 minutes. They will crisp up further as they cool. Do not skip this step.
Estimated Drying Times at 135°F-150°F
These are estimates. Your results will vary. Always use the bend test as your final guide.
- Leafy Greens (kale, spinach): 2-4 hours
- Cucumber, Zucchini (1/4″ slices): 6-10 hours
- Mushrooms (sliced): 6-10 hours
- Bell Peppers (strips): 8-12 hours
- Onions (rings or slices): 6-10 hours
- Green Beans (cut): 8-14 hours
- Cherry Tomatoes (halved): 10-16 hours
- Carrots (sliced or shredded): 8-14 hours (blanched first)
- Potatoes/Sweet Potatoes (sliced): 10-18 hours (blanched first)
Conditioning and Storage: The Final Steps for Long-Term Success
You’ve dried your vegetables perfectly. Don’t ruin it now! The conditioning step is a simple but vital insurance policy against spoilage. Even the most carefully dried batch can have microscopic variations in moisture content between pieces.
Conditioning: Place your completely cooled dried vegetables into a clean, dry glass jar. Fill it about 2/3 full. Seal the lid tightly. Leave the jar at room temperature, out of direct sunlight, for 7-10 days. Each day, shake the jar vigorously. This process allows any residual moisture from slightly less-dry pieces to distribute evenly throughout the batch. If you see any condensation on the inside of the jar after a day or two, the batch was not dry enough. Return the vegetables to the oven for another 1-2 hours of drying, then re-condition.
Storage: After successful conditioning, your vegetables are ready for long-term storage. Use airtight containers—glass jars with sealable lids, high-quality plastic food storage containers, or vacuum-seal bags are best. Store them in a cool, dark, and dry place. A pantry shelf away from the stove and dishwasher is ideal. Properly conditioned and stored dried vegetables will keep for 6-12 months. For maximum longevity (up to 2 years), store in the freezer.
Label Everything: Always label your containers with the contents and the date you dehydrated them. It’s easy to forget what’s what after a few months.
Rehydrating and Using Your Dried Vegetables
Dried vegetables are incredibly versatile. To rehydrate for soups, stews, or casseroles, simply add them directly to the liquid early in the cooking process—they will absorb water as they cook. For a quicker method, soak them in hot water for 20-30 minutes before adding to your dish. The soaking liquid is flavorful and can be used as part of your recipe’s liquid. Crispy dehydrated vegetables like kale chips or zucchini chips are meant to be eaten as-is as snacks. Dried herbs and vegetable powders can be used straight from the jar to boost flavor. Get creative! Add dried mushrooms to pasta sauce, sprinkle powdered onion on roasted potatoes, or toss dried bell pepper strips into a grain salad.
Common Pitfalls and Pro Tips for Flawless Results
Even with the best instructions, a few common mistakes can trip you up. Here’s how to avoid them and ensure success every time you dehydrate vegetables in the oven.
- Problem: Vegetables are chewy or pliable after cooling. Solution: They weren’t dry enough. Return them to the oven for another 1-2 hours. Remember, they crisp up slightly as they cool, but they should not be flexible.
- Problem: The edges are burnt but the center is moist. Solution: Your slices are uneven. Use a mandoline. Also, your oven temperature might be too high. Use an oven thermometer and aim for the lower end of the range (125°F-135°F), especially for thin slices.
- Problem: Vegetables steam and turn soggy in the oven. Solution: Your oven door isn’t open wide enough. You must have significant airflow. Also, you may have overcrowded the trays. Pieces must not touch.
- Problem: Dried veggies taste bland or “off” after a few months. Solution: Improper conditioning led to moisture migration and spoilage. Always condition. Also, ensure your storage containers are truly airtight and stored in a cool, dark place. Heat and light degrade quality.
- Problem: The process takes forever. Solution: Patience is key. Thinner slices and a convection setting (if you have one) will speed things up. Also, drying in smaller batches with more rack space allows for better airflow, which can actually reduce overall time compared to overcrowding.
Pro Tip: For vegetables you plan to powder (like tomatoes, mushrooms, or herbs), dry them until they are very brittle and snap easily. This makes grinding in a spice grinder or blender much easier and yields a finer powder.
Pro Tip: Save the tomato skins and pepper cores you trim off! Dry them separately and add them to your compost or grind them into a flavorful powder to boost soups and sauces.
Pro Tip: If your oven runs hot, you can create a “drying box” effect. Place a large cardboard box in your oven (remove the shelves), cut a hole in the top for airflow, and place your trays inside the box. The box acts as an insulator, helping to maintain a more stable, lower temperature inside.
Conclusion: Your Oven is a Powerful Preservation Tool
Learning how to dehydrate vegetables in the oven opens a world of culinary possibility and self-reliance. It’s a foundational skill that connects you to the seasons, saves money, reduces waste, and provides you with a pantry full of instant flavor. The process is wonderfully simple: select fresh produce, slice uniformly, dry low and slow with plenty of airflow, condition, and store airtight. While it requires a bit of patience and oven-watching, the rewards are immense. You’ll create snacks that are healthier than anything from a bag, ingredients that elevate your cooking, and a sense of accomplishment that comes from preserving your own food. Start small with a tray of kale or zucchini chips. Experience the magic of turning a perishable vegetable into a crisp, shelf-stable treasure. Before you know it, you’ll be looking at every vegetable with a new eye, thinking, “How would that taste dehydrated?” Your oven is ready. Your vegetables are waiting. It’s time to start drying.
Frequently Asked Questions
Can I dehydrate vegetables in a gas oven?
Yes, you can. The process is the same, but gas ovens can have more temperature fluctuation. Use an oven thermometer to ensure the temperature stays in the safe 125°F-150°F range. You may need to adjust the flame or setting more frequently. Prop the door open as with an electric oven.
What is the ideal oven temperature for dehydrating vegetables?
The ideal temperature range is between 125°F and 150°F (52°C to 65°C). Temperatures above 160°F risk cooking the vegetables rather than drying them, which seals in moisture. Use an oven thermometer to verify your oven’s actual temperature, as many oven dials are inaccurate.
How do I know when my vegetables are fully dehydrated?
Use the “bend test.” Remove a piece, let it cool for a minute, and try to bend it. Crispy items (like kale) should snap. Leathery items (like carrots) should be brittle and snap, not bend pliably. There should be no visible moisture when you break it in half. When in doubt, dry it longer.
Do I really have to blanch vegetables before drying?
For many vegetables, especially roots (carrots, potatoes), cruciferous veggies (broccoli, cauliflower), and corn, blanching is highly recommended. It softens cell walls for faster, more even drying and preserves color and flavor. For low-starch, high-water veggies like zucchini, mushrooms, and bell peppers, blanching is optional but can still improve texture.
Can I dehydrate frozen vegetables?
Yes, but with caution. Thaw them completely and pat them very dry. They will have a softer texture to start with, which can lead to a less crisp final product. They are best used in cooked dishes (like soups) rather than as crispy snacks. Ensure they are not packed with ice crystals, which adds extra water.
My dehydrated vegetables got soft during storage. What happened?
This almost always means they were not dried enough initially or the conditioning step was skipped. Trapped moisture causes them to absorb ambient humidity and become pliable. Unfortunately, if they are soft, they are not shelf-stable and should be used immediately (in a cooked dish) or re-dehydrated. Always do the 7-day conditioning step to catch this before long-term storage.
