Your kitchen island is the heart of holiday hosting, and decorating it for Christmas can spark joy without sacrificing function. By balancing beautiful elements like garlands, lights, and themed centerpieces with practical considerations for safety and workspace, you can create a stunning festive display. This guide provides step-by-step inspiration, from choosing a cohesive theme to layering textures and lighting, ensuring your island remains a usable and magical centerpiece all season long.
Let’s face it: during the holiday season, the kitchen isn’t just for cooking—it’s the command center. It’s where cookie dough gets rolled, where hot cocoa is perpetually on standby, and where family and friends inevitably gather, leaning against the counter with a snack. And right in the middle of it all? Your kitchen island. This hardworking surface has the potential to be so much more than a prep station. When you learn how to decorate your kitchen island for Christmas, you transform it from a functional piece of furniture into the joyful, festive heart of your home. It’s the first thing guests see when they walk in, and it sets the tone for the entire holiday vibe.
But here’s the thing: decorating an island isn’t just about plopping a few random Santa figurines on it. It’s about creating a balanced, beautiful, and *safe* arrangement that coexists with your holiday baking chaos. It’s about weaving in texture, light, and scent to make the space feel magical. Whether your style is classic red and green, rustic farmhouse, or modern metallic, your island can be a stunning canvas. This guide will walk you through every step, from initial planning to final touches, ensuring your kitchen island becomes a showstopping centerpiece that you’ll love all season long. Get ready to roll up your sleeves and sprinkle some of that Christmas magic right onto your countertop.
Key Takeaways
- Plan with purpose: Decide on a theme, color palette, and measure your island space before buying decor to ensure cohesion and proper fit.
- Prioritize safety first: Always keep heat sources, outlets, and major workspace clear. Use flameless candles and ensure electrical cords are safely tucked away.
- Create visual layers: Combine height ( tiers, candlesticks), texture (knit, wood, metal), and varying shapes (round, linear) for a dynamic, professional-looking arrangement.
- Incorporate natural elements: Fresh pine, eucalyptus, berries, and cinnamon sticks add authentic scent, texture, and timeless holiday charm.
- Lighting is key: Use warm white string lights, lanterns, or LED candles to create a cozy, inviting glow that enhances your decor after dark.
- Maintain functionality: Design your decor in zones, leaving ample clear prep space. Use decorative bowls for frequent items like fruit or utensils.
- Refresh and adapt: Choose versatile pieces that can be restyled or swapped out to carry your decor from Thanksgiving through New Year’s.
📑 Table of Contents
- 1. The Foundation: Planning Your Christmas Island Theme and Layout
- 2. Building the Base: Garlands, Runners, and Textural Foundations
- 3. The Star Attraction: Centerpieces and Tiered Displays
- 4. Lighting the Way: Creating a Warm, Glowing Ambiance
- 5. Functional Festivity: Decor That Works With Your Workflow
- 6. Theme Inspirations: From Traditional to Unexpected
- Conclusion: Your Festive Heart is Ready
1. The Foundation: Planning Your Christmas Island Theme and Layout
Before you even dig into the storage boxes, the most crucial step in how to decorate your kitchen island for Christmas is planning. A little forethought prevents a cluttered, chaotic look and ensures your decor enhances the space rather than competes with it. Think of your island as a stage; you need a set design before the actors (your decorations) make their entrance.
Define Your Holiday Aesthetic
First, decide on a overarching theme or color palette. This doesn’t mean everything has to match perfectly, but it should feel connected. Are you dreaming of a Traditional Christmas with classic reds, greens, golds, and nutcrackers? Perhaps a Rustic/Farmhouse feel with natural woods, burlap, pinecones, and muted creams? Or maybe a Modern Elegant look with silver, white, blue, and sleek metallics? Having this guiding principle makes decision-making easier. For example, a rustic theme might incorporate a wooden dough trough, while a modern theme might use mirrored trays and geometric shapes. Look at your existing kitchen decor—does your island have a marble top, a butcher-block surface, or painted cabinets? Let that inform your choices for a seamless look.
Measure Twice, Decorate Once
Grab a tape measure. You need to know the exact dimensions of your island’s surface area—length, width, and height if it’s a raised bar. This is non-negotiable. A massive, sprawling centerpiece will make eating at the island impossible. A tiny cluster will get lost on a large surface. The goal is to proportion your decor to the space. A good rule of thumb is to leave at least 2/3 of the surface clear for practical use. Your decor should live in the remaining 1/3, or be arranged in a long, narrow runner down the center. Sketch a quick layout on paper. Where will a garland runner go? Will you use a tiered tray to add height? This simple step saves countless hours of rearranging later.
Zoning for Function and Flair
Your island likely serves multiple purposes: food prep, casual dining, homework station, and landing pad for mail. Acknowledge these functions and zone your decor accordingly. Imagine dividing the island into three imaginary sections: the front (facing the room), the back (against the wall or facing the sink), and the sides. The front is your “show” zone—this is where the main centerpiece or garland goes. The back can hold taller items that won’t block your view or workspace when you’re standing at the island. The sides are perfect for asymmetrical arrangements or single statement pieces like a tall vase or candlestick. This zoning strategy automatically creates balance and preserves precious workspace.
2. Building the Base: Garlands, Runners, and Textural Foundations
The base layer of your Christmas island decor is what grounds the entire look and adds immediate festive texture. This is your foundation, and nailing this step makes everything else come together effortlessly.
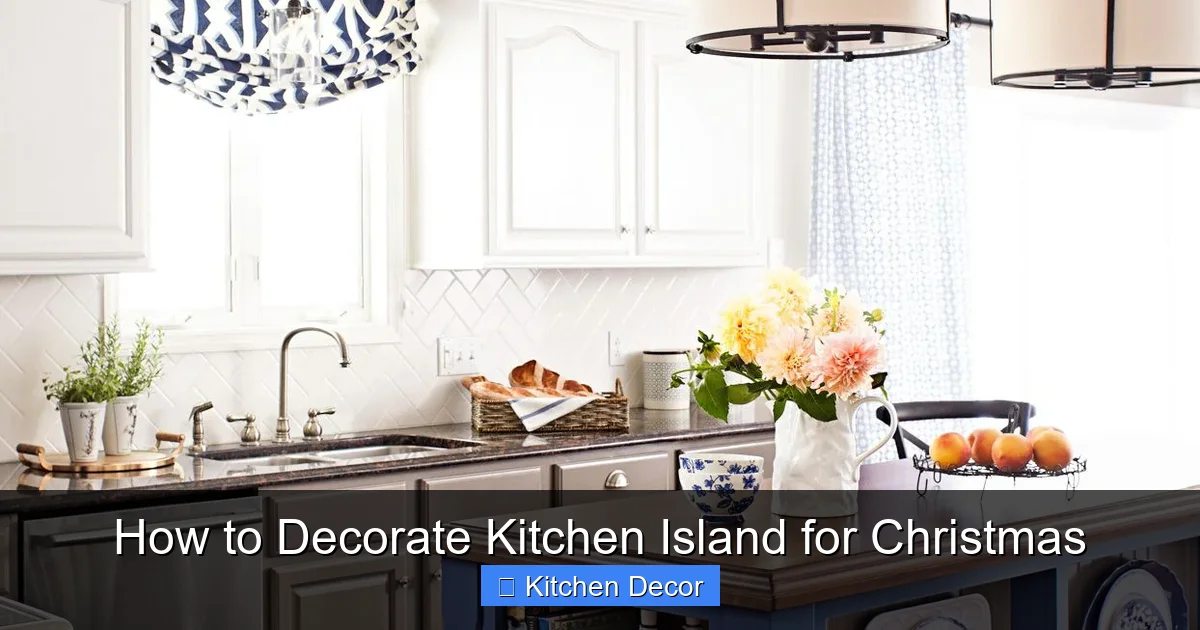
Visual guide about How to Decorate Kitchen Island for Christmas
Image source: bhg.com
The Classic Garland Runner
A garland draped along the center or back edge of your island is a timeless choice. But don’t just use any old plastic string! For a lush, professional look, opt for a high-quality faux pine garland with a realistic needle count. Look for ones with integrated lights for instant ambiance. To make it your own, “fluff” it thoroughly by separating the branches. Then, weave in natural elements: tuck in sprigs of red berries (like hypericum), clusters of pinecones (vary the sizes!), and swags of eucalyptus or magnolia leaves for a soft, elegant drape. The key is to make it look abundant and organic, not like a uniform wire snake. Secure heavier additions with thin floral wire hidden in the branches.
Beyond the Garland: Fabric and Natural Runners
If garlands feel too bulky, consider a fabric or natural runner. A thick, chunky knit table runner in cream or red adds cozy texture. A burlap runner with a satin ribbon tie gives a rustic-chic feel. For an ultra-simple, natural look, use a long, flat tray or a piece of reclaimed wood as your “runner” and place decor directly on it. This defines the space beautifully and protects your countertop. You can even layer a smaller, contrasting runner or placemat on top of a larger one for added dimension. Remember, the runner doesn’t have to span the entire length—a centered, shorter length can be more elegant.
Texture Trio: Wood, Metal, and Fiber
To avoid a one-note look, intentionally mix three core textures in your base layer. Wood brings warmth—think a small wooden dough bowl, a slice of wood as a base, or wooden beads. Metal adds shine and structure—consider a hammered metal tray, silver candlesticks, or iron candle holders. Fiber provides softness and organic feel—think linen napkins, a jute braid, or wool felt stars. When you combine these, even with a simple color palette, your island will feel rich, collected, and deeply intentional.
3. The Star Attraction: Centerpieces and Tiered Displays
Now for the focal point! This is where you create height, drama, and that “wow” factor. The secret weapon for a stunning kitchen island? Verticality. Flat arrangements can look sad and sparse. You need to draw the eye upward.
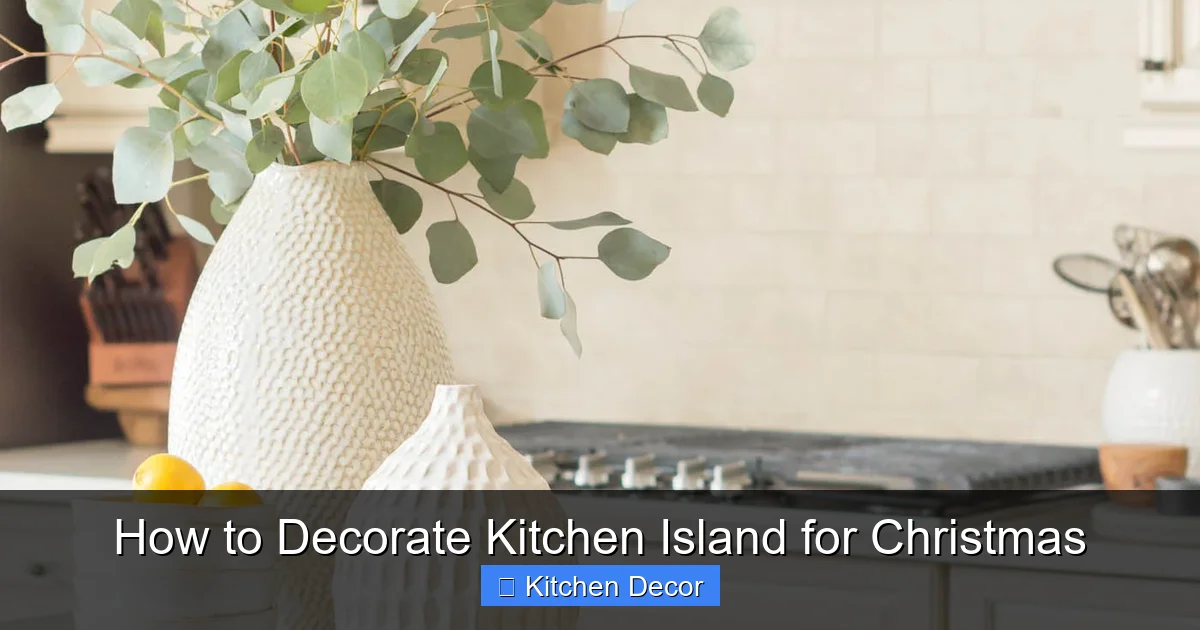
Visual guide about How to Decorate Kitchen Island for Christmas
Image source: kelleynan.com
Mastering the Tiered Tray
A tiered tray (cake stand, stand with multiple levels) is arguably the single best tool for decorating a kitchen island. It uses minimal footprint while maximizing visual impact through height. Start with the largest, heaviest item on the bottom tier—this could be a small potted rosemary plant, a cluster of large pillar candles, or a decorative wooden box. The middle tier is for medium interest: a small gingerbread house, a grouping of ornaments in a vintage tin, or a stack of holiday books tied with ribbon. The top tier is for delicate, small items: a single porcelain angel, a tiny pinecone tree, or a sprig of mistletoe. Pro Tip: Use the “rule of three” or “rule of five” when grouping items on each tier—odd numbers are more visually pleasing.
Building a Statement Centerpiece
If you prefer a single, low-slung centerpiece (great if you have a raised bar behind the island where you’ll place taller items), think in terms of a “landscape”. Use a long, low tray or a wooden plank as your base. Create a scene: a bed of faux snow or white moss, then place small evergreen cuttings, a few shiny red ornaments, and some tiny birch logs or cinnamon sticks. Add a few battery-operated fairy lights tucked in for sparkle. The key is to keep it under 6-8 inches in height so it doesn’t obstruct the view or conversation across the island. This style is perfect for a modern, minimalist aesthetic.
Asymmetrical & Organic Arrangements
Don’t feel everything has to be perfectly centered! An asymmetrical arrangement can feel more dynamic and artistic. Place a large, low basket filled with ornaments on one side of the island, and balance it on the opposite side with a tall, slender candlestick or a vase of bare branches. The eye will travel across the surface, creating movement. Use a large, beautiful cutting board or a vintage tray as your “canvas” and build your arrangement on it. This makes the whole display portable—you can lift it off in one piece when you need the full island for cooking.
4. Lighting the Way: Creating a Warm, Glowing Ambiance
Christmas magic literally shines through light. Lighting is the element that transitions your island from a lovely daytime display to an enchanting evening focal point. It’s non-negotiable for a truly festive feel.
Visual guide about How to Decorate Kitchen Island for Christmas
Image source: tohavetohost.com
String Lights: The Unsung Hero
Warm white string lights are your best friend. Drape them through your garland, wind them around your tiered tray’s base, or place a jar filled with battery-operated lights in the center of your centerpiece. For a more structured look, use a lighted garland that has the lights permanently woven in—it’s hassle-free and provides even illumination. If you want to be more creative, place a string of fairy lights inside a large glass vase or hurricane lamp filled with ornaments or pinecones for a glowing, diffused effect. Always use LED lights for safety and energy efficiency, and ensure any cords are neatly tucked behind the island or under a runner to prevent tripping hazards.
Candles: Real vs. Faux
Candles create unparalleled ambiance, but on a kitchen island, safety is paramount. Never leave real candles unattended, and keep them far from any heat source, open flame (stove!), or flammable decor. For a worry-free option, invest in high-quality flameless LED candles. Modern ones are incredibly realistic, with flickering flames and even a wax-like exterior. Use a variety of heights: pillar candles in hurricane glasses, taper candles in candlesticks, and tealights in small lanterns. Group them in clusters of 3 or 5 for a dramatic effect. If you do use real candles, place them in sturdy, enclosed holders (like lanterns or glass cloches) and never burn them down to the nub.
Task Lighting with a Festive Twist
Don’t forget your island’s own pendant lights! If you have pendants above the island, consider swapping out the standard bulbs for edison-style bulbs for a warm, vintage glow, or clear or amber-toned bulbs that complement your decor. You can even find decorative pendant cords in rustic rope or twisted wire to add to the festive aesthetic. This overhead lighting will make your entire setup look intentional and well-lit, perfect for those late-night cookie-decorating sessions.
5. Functional Festivity: Decor That Works With Your Workflow
This is the golden rule of how to decorate a kitchen island for Christmas: it must still function as a kitchen island. The goal is to decorate around the workflow, not against it. A beautiful but unusable island will lead to frustration.
Preserve the Prime Prep Zone
Identify your primary “work triangle” area. This is typically the center front of the island, closest to the sink and stove. This 24-30 inch strip should remain completely clear. No decor, no bowls, nothing. You need this space for rolling out dough, chopping vegetables, and setting down hot pans. Your decor should live on the outer edges, the back ledge, or on the sides. If your island has a raised bar/breakfast area on one side, that’s a perfect spot for taller, more decorative items that won’t interfere with standing prep work on the main surface.
Incorporate Smart Storage
Use your decor to hide clutter! A large, beautiful ceramic bowl or a rustic wooden crate on the island can hold frequently used items like cookie cutters, mixing spoons, or a stack of holiday towels. A tiered basket on the bottom shelf of your island (if it has one) can hold onions, potatoes, or fruit—suddenly, storage becomes part of the display. Look for decorative containers that fit your theme: a galvanized metal bucket for a farmhouse look, a woven seagrass basket for coastal, or a glass cloche to showcase a special collection.
Easy-Access Holiday Essentials
Designate spots for the items you reach for daily during the holidays. A small tray by the coffee maker can hold your favorite mugs, a jar of hot chocolate mix, and a stack of festive stir sticks. A small decorative caddy can hold oven mitts and a thermometer. By giving these utilitarian items a designated, decorated home on the island, you keep the surface tidy and ensure everything you need is within arm’s reach. It’s functional decor at its finest.
6. Theme Inspirations: From Traditional to Unexpected
Now that you have the principles down, let’s get inspired. Here are three complete, achievable theme ideas to decorate your kitchen island for Christmas, each with specific items and layouts.
Theme 1: Timeless Traditional Red & Green
This is the classic Christmas we all know and love. Palette: Crimson red, forest green, gold, and cream. Base: A lush, full faux pine garland with red berries and pinecones draped down the center. Weave in a few sprigs of holly. Centerpiece: A tiered tray with a red velvet tablecloth as a skirt. Bottom tier: a collection of red ceramic mugs filled with candy canes. Middle tier: a classic Santa figurine and a nutcracker. Top tier: a small, decorated rosemary bush shaped like a Christmas tree. Lights: Warm white string lights woven through the garland and a single gold mercury glass pillar candle in a glass hurricane. Extras: Red and green gingham napkins in a small basket, a few shiny red ornaments scattered casually, and a bowl of winterberries.
Theme 2: Cozy Rustic Farmhouse
All about warmth, nature, and simplicity. Palette: Natural wood tones, cream, beige, sage green, and pops of burgundy. Base: A simple, loose burlap runner down the center. Drape a more natural-looking garland (like a grapevine or cedar) on top, but keep it sparse. Add bundles of cinnamon sticks tied with twine and small bundles of dried orange slices. Centerpiece: A large, shallow wooden dough bowl or a vintage enamelware tray. Fill it with a mix of large and small pinecones, a few whole walnuts, some moss, and a few unshelled chestnuts. Place 2-3 tall, white pillar candles (real or LED) in rustic wooden holders at either end. Lights: A string of soft white lights wrapped around the base of the centerpiece bowl. Extras: A small pot of rosemary or a tiny Norfolk Island pine in a galvanized bucket, a stack of linen napkins, and a jar of honey with a wooden dipper.
Theme 3: Modern Glam Metallic
Sophisticated, sparkly, and cool. Perfect for those who love a touch of luxury. Palette: Silver, white, charcoal, and accents of pale blue or blush. Base: A sleek, long, low mirrored tray or a shiny silver runner. Centerpiece: A tall, clear glass vase filled with silver-dusted pine branches, white berries (like snowberries), and a few long, thin metallic ornaments. Flank it with two identical matte black candlesticks holding tall white tapers. Lights: A delicate string of cool white fairy lights placed inside the vase with the branches for an ethereal glow. Extras: A few geometric metal shapes (like stars or trees), a small ceramic bud vase with a single white amaryllis, and a stack of books with white or metallic spines. Keep everything clean-lined and avoid anything too busy or rustic.
Conclusion: Your Festive Heart is Ready
Decorating your kitchen island for Christmas is one of the most rewarding holiday tasks. It’s where you take a hardworking piece of furniture and infuse it with the spirit of the season—the warmth, the joy, the nostalgia. By starting with a solid plan, focusing on texture and height, prioritizing safety and function, and then letting your chosen theme shine through, you create more than just a pretty display. You create a destination. It’s where your family will naturally congregate, where kids will leave out cookies, and where you’ll sip your morning coffee surrounded by the gentle glow of the season.
Remember, the most beautiful decor tells a story—your story. Don’t be afraid to mix heirlooms with new purchases, or to use a favorite holiday mug as part of the display. The goal isn’t perfection; it’s a space that feels joyful and uniquely yours. So this year, before you tackle the tree or the mantel, turn your attention to the bustling heart of your home. With these tips and ideas, you can decorate your kitchen island for Christmas in a way that’s both breathtakingly beautiful and wonderfully practical. Now, go light those (flameless) candles and let the festivities begin.
Frequently Asked Questions
How do I decorate a kitchen island for Christmas without blocking workspace?
Focus your decor on the outer edges and back of the island, leaving the center front 24-30 inches completely clear for prep work. Use a long, narrow runner or garland down the center, and place taller items against the back wall or on the side ledges. A tiered tray uses minimal footprint while adding height.
What are the safest Christmas lights to use on a kitchen island?
Always use UL-listed LED string lights. Keep all cords away from sinks, stoves, and any potential water sources. Use battery-operated lights for ultimate safety, especially if you have young children or pets. Never use real candles unattended near the island.
My kitchen island has a raised breakfast bar on one side. How should I decorate it?
This is a perfect opportunity for asymmetry! Place your main, lower display (like a garland runner or low centerpiece) on the main countertop side. Use the taller, raised bar side for taller, more decorative items like a collection of holiday figurines, a tall vase of branches, or a stack of decorative books. This creates visual interest while keeping the main work surface clear.
What are some budget-friendly ways to decorate a kitchen island for Christmas?
Shop your home! Use existing vases, trays, and books. Gather natural elements like pinecones, evergreen branches, and interesting twigs from your yard. Make a simple garland by threading popcorn and cranberries. Use a roll of brown kraft paper as a runner and decor children can draw on. A few inexpensive string lights and a few strategically placed ornaments can make a huge impact.
How can I make my island decor smell like Christmas too?
Incorporate natural, fragrant elements! Tie small bundles of cinnamon sticks with twine and tuck them into your garland. Add whole cloves to orange slices for a simmering pot scent (keep the pot off the island!). Use a small diffuser with a seasonal essential oil blend (like pine, orange, clove). A few fresh sprigs of rosemary or pine will also add a wonderful natural aroma.
What if my kitchen island is very small or very large? How does that change the decor?
For a small island, less is more. Use a single, long, low runner or a small, symmetrical centerpiece like a single low basket with a few ornaments and a candle. Avoid bulky garlands. For a large island, you have room for zones. Use a long garland runner down the center, a tiered tray at one end, and a small decorative bowl or lantern at the other. Create multiple focal points to fill the space without clutter.