Decorate floating shelves in your kitchen by balancing function and flair. Start with a clean, cohesive foundation, then layer in personal items using the “rule of three” for visual rhythm. Incorporate texture, varied heights, and a touch of greenery to avoid clutter. Choose materials that complement your kitchen’s style, and remember that negative space is a powerful design tool. Regularly edit your shelves to keep the look intentional and fresh, ensuring your kitchen remains both beautiful and highly functional.
So, you’ve installed those gorgeous floating shelves in your kitchen. Maybe they’re a sleek, modern stain, or a rustic, reclaimed wood. They’re up, they’re sturdy, and they’re… empty. Or perhaps they’re currently holding every single cookbook, mug, and random appliance you own, looking more like a utility closet than a design feature. Sound familiar? You’ve got the canvas; now it’s time to paint a picture. Learning how to decorate floating shelves in kitchen spaces is where the real magic happens. It’s the final brushstroke that transforms your kitchen from a mere workspace into the heart of your home—a place that tells your story, showcases your style, and makes you smile every time you pour a cup of coffee.
Let’s be real: kitchen shelves can be a design conundrum. They need to be functional—holding things you actually use—but they also can’t look cluttered or haphazard. They’re exposed 24/7, so there’s nowhere to hide a messy arrangement. The goal is to achieve that coveted “effortlessly collected” look, where everything seems to have a purpose and a place, even if it was arranged with a bit of intentional thought. This isn’t about strict rules; it’s about principles. Think of it as a visual recipe. We’re going to mix the right ingredients—function, form, texture, and personality—in the perfect proportions to create a display that’s uniquely yours.
In this complete guide, we’re going beyond just “put pretty things on shelves.” We’ll dive deep into the foundational thinking before you place a single object. We’ll break down styling secrets that professional designers use, explore ideas for every kitchen style from farmhouse to ultra-modern, and tackle the nitty-gritty of materials, proportions, and common pitfalls. By the end, you’ll look at your blank (or busy) shelves not with dread, but with excitement, ready to craft a display that is both deeply personal and perfectly polished. Let’s get into it.
Key Takeaways
- Balance is Key: Blend everyday essentials (dishes, oils) with decorative pieces (art, ceramics) to create shelves that are both useful and beautiful.
- Embrace the Rule of Three: Group items in sets of three or odd numbers for a more dynamic, aesthetically pleasing arrangement.
- Texture & Material Matter: Mix wood, metal, ceramic, and greenery to add depth and tactile interest to your kitchen shelves.
- Negative Space is Design: Don’t fear empty spots. Leaving areas open prevents a cluttered look and lets special items breathe.
- Function First in Prime Zones: In high-traffic areas near the stove or sink, prioritize frequently used items like spices and cooking oils for easy access.
- Height & Scale Create Drama: Use tall items (vases, canisters) alongside shorter objects to create visual layers and guide the eye along the shelf.
- Edit Ruthlessly: Your shelves are a curated display, not a storage closet. Regularly remove items that don’t serve a purpose or spark joy.
📑 Table of Contents
- Laying the Foundation: Function, Form, and Placement
- Styling Principles: The Designer’s Toolkit
- Room-by-Room Inspiration: Styling for Your Kitchen’s Personality
- Material World: Choosing the Right “Containers” and Objects
- Pitfalls to Avoid: Common Floating Shelf Faux Pas
- Maintenance and Evolution: Keeping Your Shelves Fresh
- Conclusion: Your Kitchen, Your Canvas
Laying the Foundation: Function, Form, and Placement
Before you even think about *what* to put on your shelves, you must answer *why* and *where*. The most beautiful shelves in the world will frustrate you if they’re in the wrong spot or don’t support your kitchen’s workflow. Decorating floating shelves in kitchen environments starts with this crucial, often overlooked, planning phase.
Function First: What’s the Shelf’s Job?
Every shelf has a primary purpose, even if it’s just “looking pretty.” Be honest with yourself. Is this shelf above your coffee maker? That’s your morning command center. It needs mugs, a small canister of sugar, your favorite coffee beans, and maybe a small plant. Is it beside your stove? This is your cooking zone. Think oils, vinegar, frequently used spices in cute jars, and a pair of tongs. Is it in a breakfast nook or a wide-open wall far from the action? This is your “display zone,” perfect for art, collections, and decorative items you love but don’t need daily. Assigning a primary function to each shelf set gives you a starting point and prevents the “junk drawer effect” where everything gets tossed up there with no rhyme or reason.
The Golden Rule of Placement and Proportion
Floating shelves come in all sizes, but not all sizes work equally everywhere. A common mistake is choosing shelves that are too short or too long for the wall space. As a general guideline, your shelf(s) should occupy about 60-80% of the available wall width to feel substantial but not overwhelming. For a single long shelf, consider breaking it into two or three shorter shelves spaced evenly. This creates more visual interest and offers more “staging areas.” Also, pay attention to height. Shelves should be mounted at a practical height: above a counter, leave at least 18-24 inches for workspace; above a sink, ensure they don’t block the window or create a splatter hazard; in a high-traffic area, keep them at or above eye level to avoid head bumps.
Sizing Up Your “Vessels”
Your shelves are like a stage, and the objects on them are the actors. You need a mix of “leading roles” (tall, statement pieces) and “supporting cast” (shorter, filler items). Before you buy anything, do a “dry run” on your counter or table. Gather potential items—a tall vase, a stack of plates, a short canister, a framed photo. Play with arrangements. Do you have enough variation in height? A good rule is to have at least one item that’s significantly taller than the others (by 6-12 inches) to create vertical interest. Also, consider the shelf’s depth. Standard depths are 10-12 inches, which is great for most items. If your shelves are deeper (like 16+ inches), you can create a “layered” look by placing items both at the back and the front, but be careful not to make the front row look like a barricade.
Styling Principles: The Designer’s Toolkit
Now for the fun part. With your functional zones and proportions mapped out, we can apply universal design principles that make any arrangement look intentional, balanced, and magazine-worthy. These are the tricks of the trade that you can use over and over again.
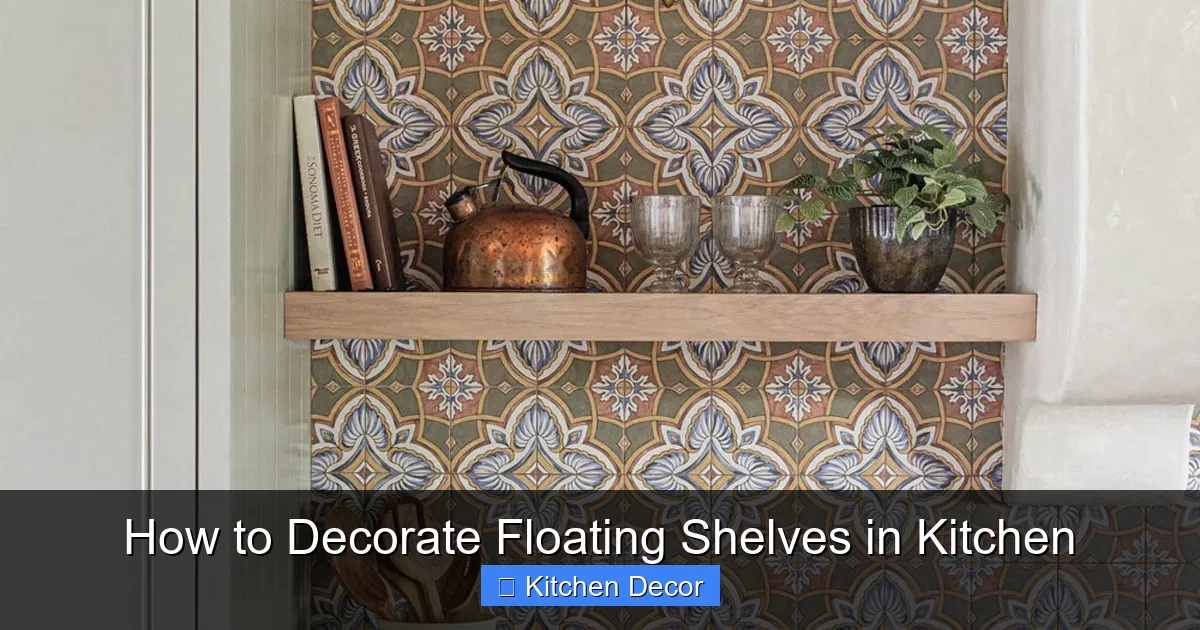
Visual guide about How to Decorate Floating Shelves in Kitchen
Image source: jennasuedesign.com
The Rule of Three (and Odd Numbers)
This is the cornerstone of good shelf styling. Our brains are wired to find odd-numbered groupings more interesting, dynamic, and harmonious than even-numbered ones. A trio of objects feels complete but not static. So, instead of two matching vases, try three different-sized ones. Instead of four mugs, display three or five. This rule applies to groupings *within* your shelf arrangement too. You might have a main trio on the left, a solo plant on the right, and a stack of books in the center—all odd numbers creating their own little stories.
Creating a Visual Arc: The “Layered Triangle”
Look at a beautifully styled shelf from a distance. You’ll often notice that the tallest items aren’t all clustered together. They’re strategically placed to create a gentle, upward-trending line or a soft “S” curve across the shelves. Imagine an invisible triangle or a flowing line connecting the highest points on each shelf or across a set of shelves. This creates movement and guides the eye. If all your tall items are on the left, the composition feels lopsided. Spread the height. Place a tall object on Shelf 1 (left), a medium on Shelf 2 (center-right), and another tall on Shelf 3 (far right). This creates rhythm.
The Power of Texture, Material, and Color
This is where personality explodes. A shelf of all white ceramic is clean but boring. A shelf of all dark wood is warm but flat. The magic is in the mix. Combine:
- Textures: Smooth (ceramic, glass) vs. Rough (woven basket, unglazed pottery, a piece of coral) vs. Soft (a linen napkin, a small sheepskin).
- Materials: Warm wood, cool metal (brass, black iron), natural fiber (seagrass, rattan), glossy ceramic, matte stoneware.
- Color Palette: Stick to a cohesive but not matchy-matchy palette. For a neutral kitchen, add pops of color through art, a vibrant bowl, or a colored canister. For a colorful kitchen, use shelves to introduce metallic accents (gold, copper) or natural tones (greenery, wood) to ground the space.
For example: a rough-hewn wooden bowl (texture) holding a smooth, glazed lemon (color/texture) next to a shiny brass candlestick (material) and a sprig of rosemary (organic texture). Instant depth.
Negative Space: The Art of “Less”
This might be the hardest concept to embrace, but it’s critical. Not every inch of shelf needs to be filled. Negative space—the empty areas—gives your eyes a place to rest. It makes the items you *do* have look more special and considered. If your shelves feel crowded, step back. Remove one item. Does the arrangement still work? Often, it looks better. Aim for about 30-40% “empty” space on a shelf. This also makes cleaning infinitely easier. A shelf with one beautiful vase and a small plant is powerful. A shelf crammed with 15 small tchotchkes looks like a flea market.
Incorporating “Life”: Greenery and Organic Elements
Kitchens can feel sterile with all the appliances and hard surfaces. The single best antidote is living things. A small potted herb (like mint or thyme) is functional *and* beautiful. A trailing ivy or a sturdy succulent adds organic shape and a breath of fresh air. A simple branch from your garden in a vase brings height and a soft, natural line. Even a dried lemon slice or a bundle of cinnamon sticks adds an organic, textural element. Aim to have at least one “living” or “once-living” element on each shelf or within a set of shelves. It softens the hard edges and makes the space feel alive.
Room-by-Room Inspiration: Styling for Your Kitchen’s Personality
Now let’s get specific. How do these principles apply to different kitchen styles? The core rules remain the same, but the “props” change. Here’s how to decorate floating shelves in kitchen styles ranging from cozy to cutting-edge.
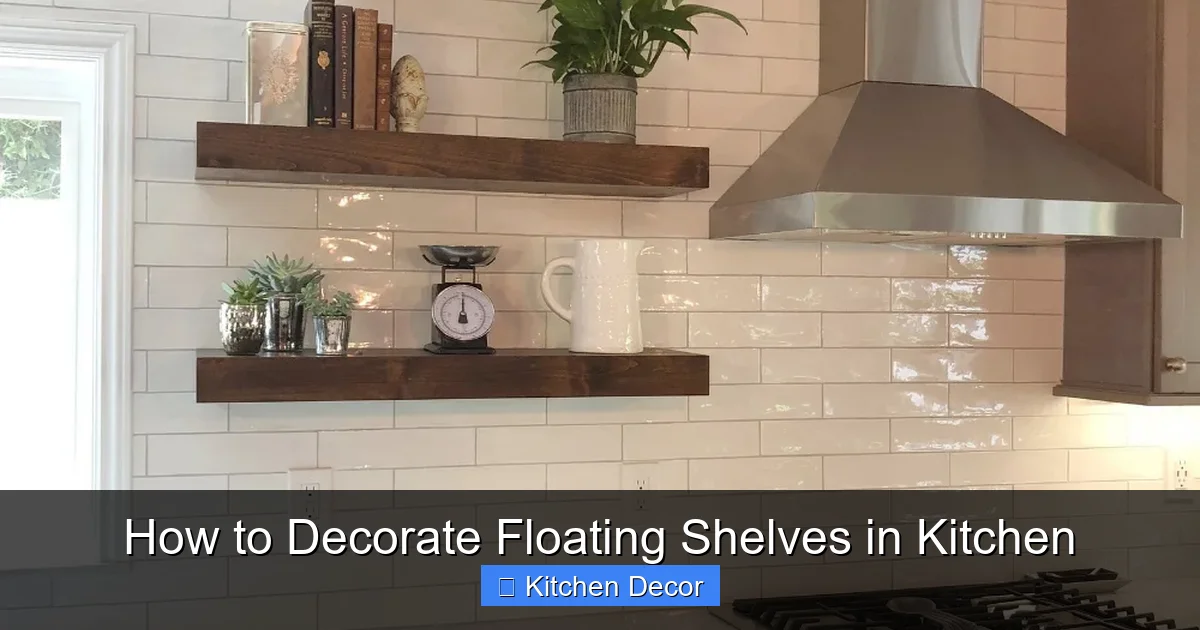
Visual guide about How to Decorate Floating Shelves in Kitchen
Image source: i.pinimg.com
The Modern & Minimalist Kitchen
Think clean lines, handle-less cabinets, and a monochromatic or neutral palette. Your shelves should feel like a curated gallery.
- What to Use: Sleek, geometric vases (white, black, concrete), simple matte black or brass canisters, a single striking piece of abstract art or a black-and-white photograph in a thin frame, a single sculptural object (a smooth stone, a metal geometric shape), one healthy, architectural plant (a snake plant, a fiddle-leaf fig).
- Avoid: Clutter, patterned ceramics, too many different metals. Stick to one metal tone (all brass or all black).
- Arrangement Tip: Go for extreme negative space. A single object centered on a long shelf can be stunning. Or, a perfectly symmetrical arrangement of three identical items.
The Farmhouse & Rustic Kitchen
Warm, inviting, and lived-in. Think wood, apron sinks, and vintage touches.
- What to Use: Galvanized metal buckets or containers, enamelware (blue or cream), wooden cutting boards (leaned against the back), Mason jars (for utensils or blooms), vintage books, simple earthenware, a small collection of white ironstone, dried herbs or onion sets in a vase.
- Avoid: Anything too shiny or modern (polished chrome). Keep metals warm (black iron, aged brass).
- Arrangement Tip: Embrace asymmetry and a “collected” feel. A stack of old cookbooks tied with twine, a chipped enamel mug holding wooden spoons, and a sprig of lavender in a repurposed bottle. It should feel useful and casual.
The Traditional & Classic Kitchen
Elegant, symmetrical, and timeless. Think Shaker cabinets, subway tile, and brass hardware.
- What to Use: Fine china or porcelain (a single displayed plate or cup), crystal or cut-glass decanters, silver trays (to corral smaller items), gilded frames, classic blue-and-white ceramics, stacked leather-bound books.
- Avoid: Rustic, rough textures unless balanced with something elegant (e.g., a rough wood bowl holding smooth pearls or lemons).
- Arrangement Tip: Symmetry works beautifully here. A matching pair of lamps or vases on either end of a shelf with a centered art piece. Use understated, cohesive color schemes like cream, gold, navy, and green.
The Eclectic & Bohemian Kitchen
This is where you can go wild! Mix patterns, colors, and eras with confidence.
- What to Use: A vibrant, patterned ceramic from your travels, a macramé hanging, a vintage sign, mismatched but color-coordinate mugs, a collection of small baskets, bold art, a beaded lampshade turned on its side.
- Avoid: Chaos. Even in eclecticism, there needs to be a unifying thread—a color palette (e.g., all warm tones), a dominant material (lots of wood), or a theme (all travel souvenirs).
- Arrangement Tip: Let your personality shine. This style loves “more,” but still group like items. Have a shelf dedicated to your pottery collection, another to your cookbook hoard, and a third to your art prints. Within each group, vary heights and textures.
Material World: Choosing the Right “Containers” and Objects
The objects you choose are half the battle. Let’s talk about the most common and effective items for decorating floating shelves in kitchen areas, broken down by category.
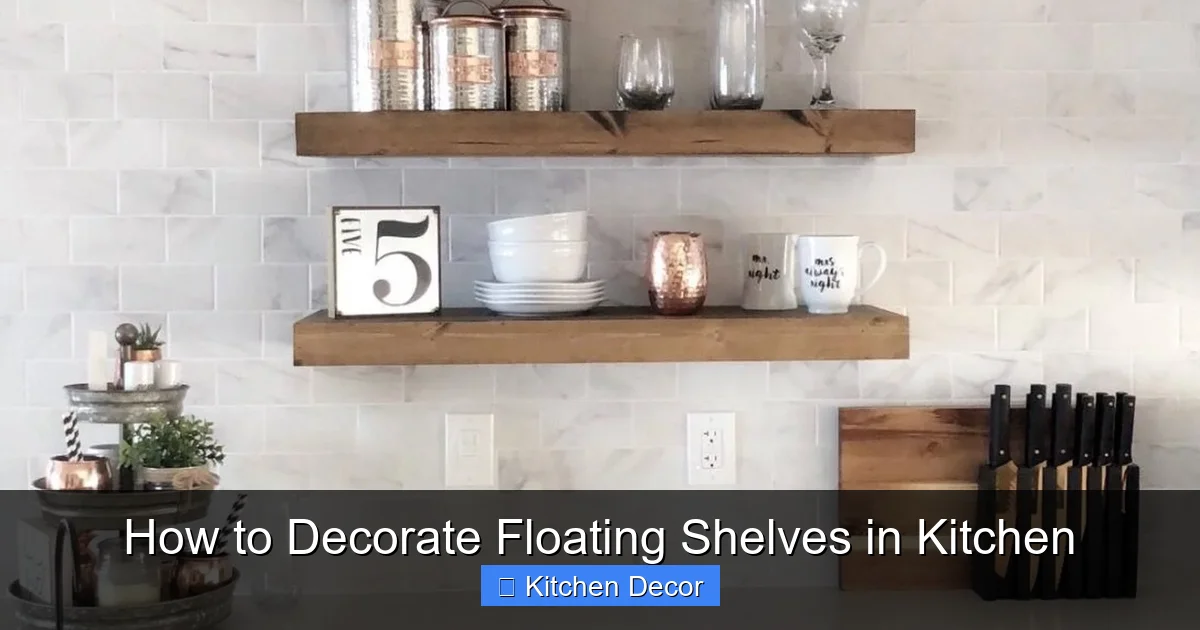
Visual guide about How to Decorate Floating Shelves in Kitchen
Image source: i.pinimg.com
Ceramics & Glass: The Workhorses of Style
Canisters, jars, vases, bowls, and mugs are your best friends. They come in every shape, size, color, and finish.
- Canisters & Jars: Use them for actual storage (coffee, tea, pasta, spices) or empty as decoration. Mix shapes: a tall, slender jar next to a short, wide canister. Label them with nice chalkboard tags or printed labels for a uniform look.
- Vases: Don’t save them for flowers only. A single, beautiful vase can be a sculptural object. Or, use a small vase to hold a single stem, a bundle of herbs, or even wooden spoons.
- Bowls: Perfect for corralling small items like citrus, a cluster of small apples, or a collection of tea bags. A beautiful handmade bowl on its own is art.
- Mugs & Cups: Display a small, curated collection (3-5) of your favorite mugs. Hang a few from small hooks under the shelf for extra dimension. Avoid displaying every mug you own.
Baskets & Natural Fibers: Adding Warmth and Storage
Woven seagrass, rattan, or cane baskets are kitchen shelf superstars. They hide clutter (tea bags, snack packets, napkins) while adding incredible texture and a natural, organic feel. Use them as “boxes” on your shelf. Place a basket on its side or upright to create different levels. A small basket can hold a potted herb. They are the ultimate tool for marrying function and form.
Art, Books, & Personal Objects: Tell Your Story
This is where your shelves become *yours*.
- Art: Lean small framed prints, photos, or canvas art against the back of the shelf. This creates depth. Mix portrait and landscape orientations. Use consistent frames for a clean look, or mix wildly for an eclectic feel.
- Books: Cookbooks are an obvious choice. Stack them horizontally (2-3 high) or stand a few upright. Use bookends (a nice stone, a heavy ceramic object) to keep them tidy. Don’t just cram them all; select your most beautiful or used ones.
- Personal Objects: A vintage measuring cup from your grandmother, a souvenir mug from a favorite vacation, a small piece of pottery you made. These items add soul. Just be selective—choose a few meaningful ones, not everything.
Lighting: The Final Layer
Don’t forget light! If your shelves are near a window, great. But consider adding a small, plug-in puck light or a tiny LED strip hidden under the front edge of the shelf. This creates a beautiful, ambient glow at night that makes your displayed items pop and adds a touch of luxury. A small, elegant table lamp can also work, especially on a lower shelf in a nook.
Pitfalls to Avoid: Common Floating Shelf Faux Pas
Even with the best intentions, it’s easy to slip up. Here are the most common mistakes when learning how to decorate floating shelves in kitchen spaces and how to fix them.
Clutter Creep: The “Everything But the Kitchen Sink” Syndrome
This is the #1 offense. The shelf becomes a dumping ground for everything with no home. The fix? **Edit.** Take everything off. Only put back items that are either beautiful or truly used daily. If it’s just “okay” or you keep it “just in case,” find it a home in a cabinet. Remember the 30-40% negative space rule.
Ignoring the Sightline: The “Wall of Stuff” Effect
When shelves are placed directly above a busy countertop full of appliances, they can create a visually overwhelming “wall” that makes the kitchen feel smaller. The fix? **Create separation.** Keep the counter surface as clear as possible. On the shelves, use lighter colors and negative space to create visual “breathing room.” If possible, stagger the shelves (one higher, one lower) to break up the horizontal line.
Forgetting the “Kitchen” in Kitchen Shelves
While you want style, completely ignoring function can lead to frustration. A beautiful vase placed directly above your stove will get greasy. Your favorite serving platter on a high shelf is useless. The fix? **Zoning is everything.** Near cooking areas: function. Near eating areas: a mix. On a distant wall: pure display. Let the shelf’s location dictate its content 70% of the time.
Poor Weight Distribution and Safety
Floating shelves are anchored into studs, but they have limits. Putting a heavy collection of cast iron pans on a single, narrow shelf is a risk. The fix? **Distribute weight.** Place heavier items (canisters full of rice, stoneware) on the ends or directly over a stud if you know where it is. Keep very heavy, frequently used items on lower, more substantial shelves or in cabinets. When in doubt, check your shelf’s weight rating.
Inconsistent Styling Across a Set
If you have three identical shelves side-by-side, making each one look exactly the same can feel stiff and boring. The fix? **Create a theme with variation.** Use the same color palette and material mix on all shelves, but vary the specific items and their arrangement. Shelf 1 might have books and a plant; Shelf 2 has ceramics and art; Shelf 3 has baskets and utensils. They feel connected but not duplicated.
Maintenance and Evolution: Keeping Your Shelves Fresh
Your kitchen is a living, working space, and your shelves should reflect that. They’re not a static museum exhibit.
The Seasonal Swap
One of the easiest ways to keep your kitchen feeling fresh is to swap out a few items with the seasons. In spring, add a vase of tulips or a woven basket with lemons and lavender. In fall, bring in small gourds, a cinnamon bundle, or a cozy linen napkin. In winter, add a few pinecones, a red ribbon, or a small evergreen cutting. You don’t need to redo everything—just change 1-3 elements per shelf to signal the shift.
The Quarterly Edit
Set a reminder every three months to do a full shelf edit. Take everything off. Clean the shelves thoroughly (dust bunnies love to hide back there). Then, look at each item with fresh eyes. Does it still fit the function of this zone? Does it spark joy or feel like clutter? Has it become chipped or worn in an unlovely way? Be ruthless. Let go of items that no longer serve the purpose. This prevents clutter from slowly creeping back in.
Adapting to Life Changes
Got a new baby? You might need to move the breakable vases to a higher shelf and add a cute stuffed animal. Started a new hobby like bread baking? Now’s the time to add a beautiful proofing basket or a collection of artisan flours in glass jars. Your shelves should grow and change with you. Don’t feel locked into an arrangement forever. The beauty of floating shelves is their flexibility. Rearrange, replace, and re-imagine as your life evolves.
Conclusion: Your Kitchen, Your Canvas
Decorating floating shelves in kitchen areas is less about achieving a perfect, Pinterest-perfect look and more about creating a space that feels authentically you—a space that is both a joy to cook in and a pleasure to look at. It’s the thoughtful balance of the mug you drink from every morning and the piece of pottery you bought on a memorable trip. It’s the practical canister of salt sitting next to the smooth, painted stone you just like to hold.
Start with a plan. Understand the function of each shelf. Gather your favorite things—the useful, the beautiful, the meaningful. Then, play. Use the rule of three, vary your heights, mix your textures, and don’t be afraid of a little empty space. Step back often. Look at it from different angles. Live with it for a few days. The goal is a collection that feels intentional, layered, and personal.
Your kitchen is the hub of your home. With these principles in your toolkit, your floating shelves can become one of its most charming and expressive features. So go ahead, grab that vase, arrange that stack of books, and add that little plant. You’re not just decorating; you’re curating a piece of your daily life. And that is always in style.
Frequently Asked Questions
How much weight can floating shelves in the kitchen hold?
This depends entirely on the shelf’s construction, material (solid wood holds more than MDF), and how it’s anchored. Shelves mounted into wall studs with proper hardware can hold 50+ pounds. Always check the manufacturer’s weight rating and mount into studs for heavy items like stacks of plates or canisters full of goods. When in doubt, distribute weight and keep very heavy items on lower shelves or in cabinets.
How far apart should floating shelves be in the kitchen?
For standard 10-12 inch deep shelves, a spacing of 16-24 inches between shelves is common. This allows room for average-height items (like canisters, vases, books) without feeling cramped. If you have taller items (like a vase or a plant), you may need more vertical space. Consider your specific items and leave at least 2-3 inches of clearance above anything you want to easily grab.
What if my floating shelves are very small? How do I decorate them?
Small shelves (12-18 inches wide) are perfect for a single, focused vignette. Embrace minimalism. Choose one statement piece: a small potted succulent, a single beautiful mug, a narrow framed photo, or a tiny stack of two special books. You can also use a very small basket to hold a tea light or a sprig of herbs. The principle of negative space is even more critical here—let that one item shine.
Can I mix different metals (brass, black, chrome) on my kitchen shelves?
Yes, you can mix metals, but it’s a advanced styling technique. To do it successfully, establish a dominant metal (e.g., 70% of your metal items are brass) and use others as accents (a single black handle on a jar, a tiny chrome spoon rest). Also, tie them together with a common element, like a warm wood tone or a consistent color palette. For a foolproof look, stick to one metal family (all warm brass/gold, or all cool nickel/chrome/black).
How often should I change the items on my kitchen floating shelves?
There’s no rule, but a good practice is to do a light “refresh” seasonally (swapping out a few decorative elements) and a full edit quarterly (taking everything off, cleaning, and reassessing what stays). Also, edit immediately when you acquire a new item that doesn’t fit—either find a place for it by removing something else, or don’t put it up. This keeps your shelves from becoming cluttered and ensures they always reflect your current taste and needs.
Are floating shelves practical in a busy kitchen, or are they just for show?
They are absolutely practical if styled with intention. The key is zoning. Use shelves in high-use areas (near the stove, coffee station, sink) primarily for daily-use items stored in attractive, uniform containers. Use shelves in less busy areas for more delicate or purely decorative items. Choose easy-to-clean materials (glazed ceramic, metal, sealed wood) for zones prone to grease and splashes. With smart organization, they add valuable storage and display space without sacrificing function.